
 Hi Friends!
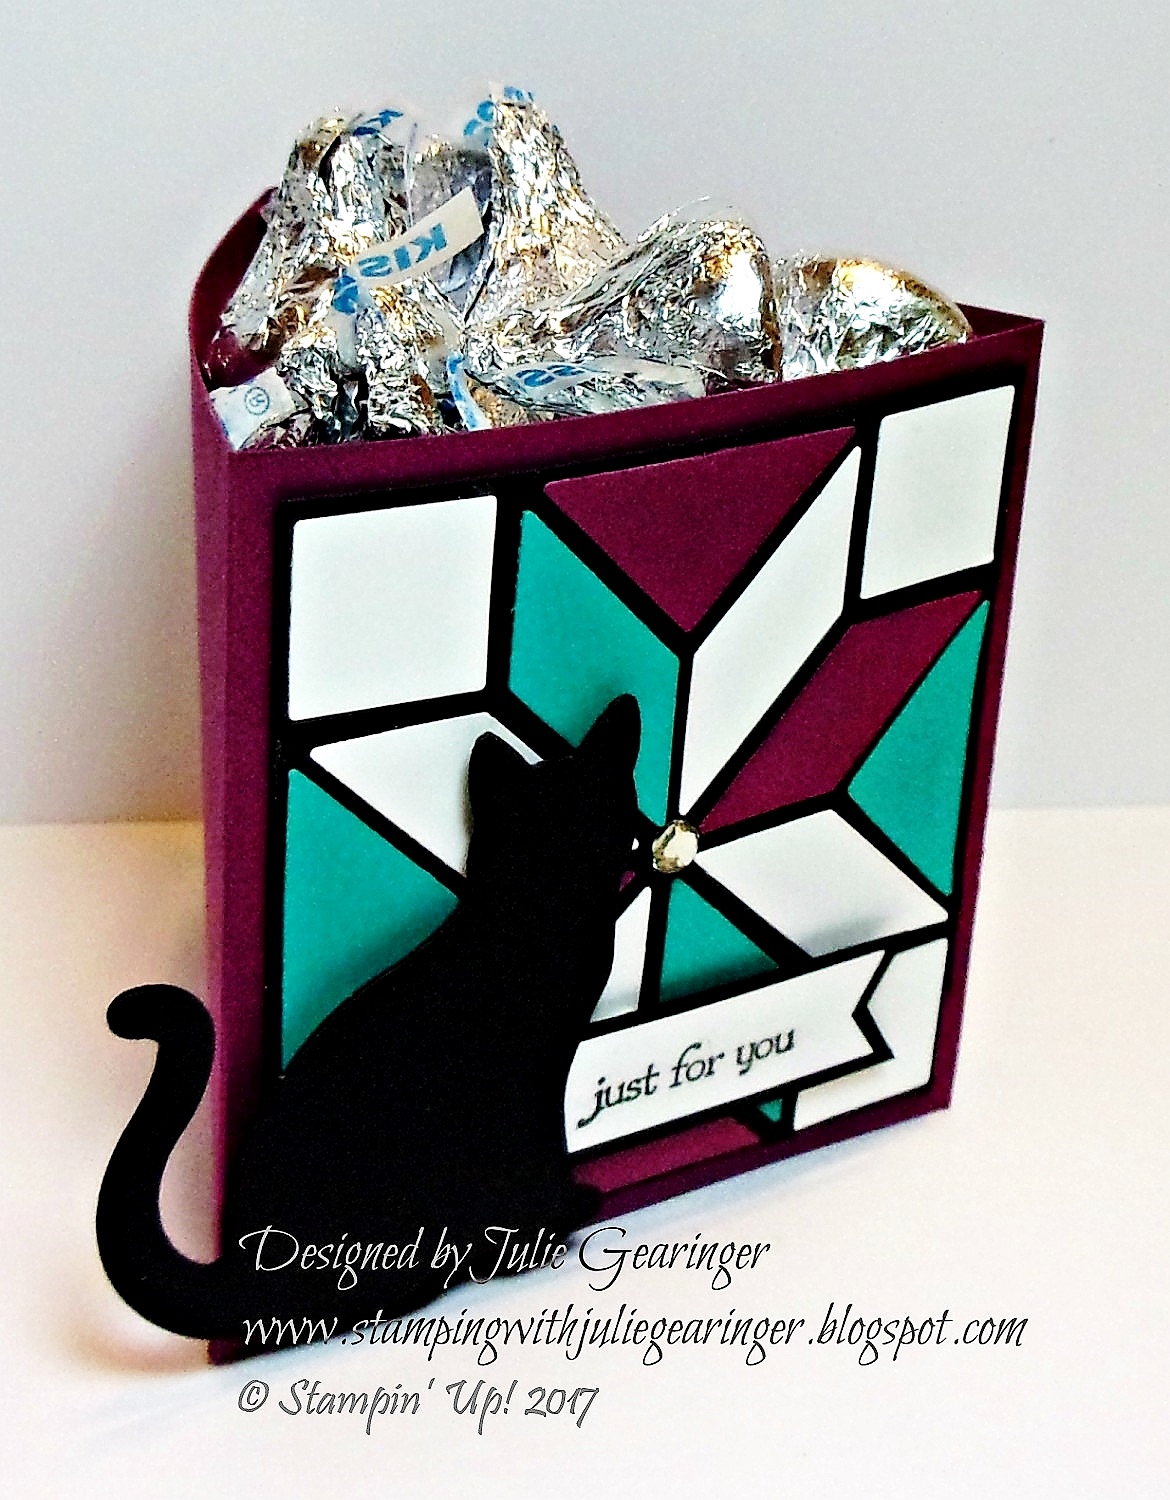
Since I do not own any current Stampin’ Up! sets that feature
coffee, cupcakes, candy, tea or other "sweet treats" , I decided to create a Triangular Treat Box using this
tutorial from Splitcoaststampers (see written tutorial here and tutorial video here).
I wanted to incorporate two of my favorite items from the
Holiday Mini Catalog- the Cat Punch and the Quilt Builder Framelits™ Dies. I had die-cut the "quilts" from pieces of
background paper that I used in other cards (fyi- I tend to die cut shapes from
cardstock layers that are “hidden” by other layers to reduce the postage costs as
well as re-purposing cardstock that would otherwise be wasted:-)).

I am also linking to the Just Us Girls #416 Color Week Challenge
(Bermuda Bay is a shade of green, right?) and the International Art & Soul #19 “Not Square or Rectangles” Challenge.
If you have not had a chance to stop by the SU-Only Challenge site to check out the rest of the Design Team’s samples or the other challenge
sites yet, I encourage you to do so- fabulous wonderful inspiration from all!
To create this project:
1). Using the Big Shot™ with the Quilt Builder Framelits™ and
die cut four separate quilt images – one
each from Whisper White, Basic Black, Rich
Razzleberry and Bermuda Bay cardstock (I use a piece of Glad® Press ‘n Seal® (PNS) to hold all of the quilt
die pieces together). Arrange the pieces
onto the Basic Black backing square, just peel off each piece of the PNS and
adhere to the quilt (I used the Two Way Glue Pen).
 2). Using the tutorial linked above for the Triangular Treat
Box, score a piece of 3” x 11” Rich Razzleberry cardstock at the 3”, 6” and 9”
mark. Continue with the tutorial to
create the bottom from a scrap piece of Rich Razzleberry cardstock and assemble the
box.
2). Using the tutorial linked above for the Triangular Treat
Box, score a piece of 3” x 11” Rich Razzleberry cardstock at the 3”, 6” and 9”
mark. Continue with the tutorial to
create the bottom from a scrap piece of Rich Razzleberry cardstock and assemble the
box.
3). Use the Cat Punch to punch out three cats from Basic Black
cardstock, layer the three together to create the cat embellishment.
4). Trim the quilt (my frame around the quilt was a bit “off”
so I trimmed it to even up the sides- if you are able to die-cut it perfect,
then you may not need to trim- lol!).
Add the assembled quilt to the front of the box.
5). Stamp the sentiment from Teeny Tiny Wishes using Stampin’
Archival™ Basic Black Ink onto a scrap piece of Whisper White cardstock, trim
and create the banner by hand (I used the retired Hexagon Punch). Mount onto a piece of Basic Black cardstock
and trim around the edges. Add to the
back of the Cat Punch image and mount onto the front of the box with Stampin’
Dimensionals®.
6). Add a Rhinestone to the center of the quilt to finish off
the box. Fill with “Sweet Treats” and
enjoy! A quick and easy treat box for
any occasion!
Stamp Sets: Teeny Tiny Wishes
Ink/Mediums: Stampin’ Archival™ Basic Black
Paper: Whisper White,
Basic Black, Bermuda Bay, Rich Razzleberry
Accessories/Tools: Big
Shot™, Quilt Builder Thinlits™ Dies, Rhinestones, retired Hexagon Punch, Glad® Press ‘n Seal®
Thanks again for taking
the time to stop by and I hope that you will create your own Stampin’ Up! Only
project and join us for our “Treats of All Kinds” challenge!

3 comments:
WHat a lovely treat box. Like your take on our theme. Thank you for joining us at International Art & Soul! Best, CG
Simply stunning Julie. Love that die and the colours look fabulous. How cool to make this into a treat box. Thanks so much for sharing with us at Just Us Girls. Lovely to see you again.
So fabulous! Love the geometric shapes with the colors and your black cat rocks! Thanks for joining in at JUGS~
Post a Comment