Pages

Wednesday, July 31, 2013

2013 Dare To Get Dirty- Card #2


Hi Stampers!

Here is the second card created for one of the Splitcoaststampers Dare To Get Dirty Challenge  :-)   Are you a Fan Club Member ofSplitcoaststampers yet?  If so, come join in on the fun and if not, it is not too late to join (did I mention in addition to the forum discussions and fun creating the cards,  that the Member Companies will have prizes??))  


To create this card:

Using the Embossing Buddy®, de-static a piece of Island Indigo cardstock and stamp the ornament image using Versamark™ ink.  Apply Stampin’ Emboss® Silver Embossing Powder and heat with the Heat Tool.   

Cut the ornament out using the Big Shot™ with the corresponding Holiday Ornaments Framelit™. 

Emboss a piece of Whisper White cardstock using the Big Shot™ with the Fancy Fan Textured Impressions™ Embossing Folder inserting only part of the paper into the embossing folder.  Stamp the sentiment along the bottom of the cardstock using Basic Gray Classic Ink.

Adhere the Winter Frost Designer Series Paper (DSP) to a piece of Island Indigo, add the embossed Whisper White cardstock.  Add a piece of Basic Gray Satin Ribon along with a piece of White Satin Ribbon to cover the seam.

Adhere the ornament using the Stampin’ Dimensionsals® and add the Silver Cord along with the Large Rhinestone.   Add the additional Rhinestones to finish off the card.


Stamp Sets: Ornament Keepsakes,  More Merry Messages  

Ink: Versamark™, Basic Gray

Paper/Cardstock:  Whisper White, Island Indigo, Winter Frost DSP

Accessories:  Big Shot™, Holiday Ornaments Framelits™, Fancy Fan Textured Impressions™ Embossing Folder, Embossing Buddy®, Stampin’ Write® Silver Embossing Powder, Heat Tool, Rhinestones, Silver Cord (retired), Satin Ribbon (from my stash)

Thanks again for visiting- I hope all of you have a wonderful Thursday!!

PP156 Heaven Knows You Are Special

Hi Stampers! 

I wanted to create a card using The Paper Players PP156 Sketch and decided to incorporate a few images that I had already watercolored, fussy cut and had on hand. 

If you have a chance, check out the Design Team samples as well as the other entries- a great job by all!

To create this card:

Stamp the images from By The Tide using Early Espresso Classic Ink onto Whisper White cardstock and carefully watercolor using the AquaPainter™ with Crisp Cantaloupe Classic Ink from the ink pad.

Ink the label stamp from Everything Eleanor using Crisp Cantaloupe Classic Ink and stamp onto Whisper White.  Ink the script stamp from By The Tide using Early Espresso Classic Ink and repeatedly stamp over the label image.  Carefully cut this image out by hand and cut in half vertically.

Stamp the label from Notable Notions twice using Early Espresso Classic Ink onto Whisper White cardstock and carefully cut by hand.  Cut the bottom off one of the images and layer to create a longer tag.

Stamp the coral image using Early Espresso Classic Ink onto the elongated tag and watercolor Crisp Cantaloupe Classic Ink over the coral.  Use the Early Espresso Stampin’ Write marker to add a bit of distressing and the Satin Ribbon to cover up the seam in the tag.

Use the Big Shot™ to emboss a piece of Crumb Cake cardstock using the Woodgrain Textured Impressions™ Embossing Folder and layer onto the Early Espresso cardstock.

Add all of the elements per the sketch, embellish with Pearls to finish off the card.

Stamp Sets:  By The Tide, Everything Eleanor, Blessings from Heaven, Notable Notions  

Ink: Early Espresso, Crisp Cantaloupe

Paper: Whisper White, Crumb Cake, Early Espresso

Accessories:  Big Shot™, Woodgrain Textured Impressions™ Embossing Folder, Chalk Talk Framelits™, AquaPainter™, Color Spritzer Tool, Sponge Dauber, Pearls


Thanks again for stopping by- I hope all of you have a great Wednesday!!

Tuesday, July 30, 2013

SUO76 Z is for Zebra, Zinnia- Thank you!

Hi Stampers! 

The Stampin’ Up! Only Challenges theme for the SUO76 Challengeis Back To School.  For some reason when I thought of this challenge, the first thing that came to my mind were the alphabet flash cards :-))  

I truly hope that you will have a chance to stop by to visit SUO-Only Challenges to check out all of the other Design Team creations and play along with us :-))

To create this card:

Ink the new background stamp, Dictionary, with Whisper White Craft Ink and stamp onto a piece of Basic Black cardstock.

Use the Big Shot™ with the Alphabet Press Textured Impressions™ Embossing Folder to emboss a piece of Whisper White cardstock.  Trim for the horizontal panel and adhere to Basic Black cardstock.  Add the Basic Black cardstock strip to the center of the panel and adhere to the Dictionary background panel.

Use the Big Shot™ with the Chalk Talk Framelits™ to cut the large tag and narrow tag from Basic Black cardstock.  De-static using the Embossing Buddy® and stamp the sentiment on the long narrow tag along with the zebra and “Z” image on the larger tag with Versamark™ ink.  Apply Stampin’ Emboss® White Embossing Powder and heat with the Heat Tool.  Once cooled, apply a bit of Whisper White Craft Ink with a Sponge Dauber to finish off the chalkboard effect.

If desired, add the Whisper White and Basic Black cardstock strip along with the top edge of the tag (FYI- I added this to hide my original handwritten “Z” that I decided did not look right- so now you know another secret about me:-))).
 
De-static another piece of Basic Black cardstock using the Embossing Buddy® and stamp the zinnia flower along with the sentiment for the lower portion of the card with Versamark™ ink.  Apply Stampin’ Emboss® White Embossing Powder and heat with the Heat Tool.  Once cooled, again apply a bit of Whisper White Craft Ink with a Sponge Dauber to finish off the chalkboard effect. 

Adhere the large Chalk Talk tag and the narrow sentiment tag to a Whisper White layer and mount to the card using Stampin’ Dimensionals®.   “Fussy-cut” the three zinnias and adhere to the top of the tag.   Punch out the lower sentiment using the XL Oval Punch and then cut the oval to square with the bottom of the card.

Create the paper bow using two large oval punches from Whisper White (rolled in half and adhered with a Mini Glue Dot), add a small strip of Whisper White cardstock on the bottom, adhere the two folded ovals and the two strips for tails.  Add the Antique Brad to the center and adhere to the card.

Stamp Sets:  Zoo Review, Best of Flowers, One in A Million, Dictionary, Occasions Alphabet

Ink: Versamark™

Paper/Cardstock: Whisper White, Basic Black

Accessories:  Big Shot™, Alphabet Press Textured Impression ™ Embossing Folders, Chalk Talk Framelits™, Embossing Buddy®, Heat Tool, Stampin’ Emboss® White Embossing Powder, XL and Large Oval Punch, 1” Square Punch, Antique Brad

Thanks again for stopping by- I know this card may not be what you would traditionally think of with a “Back to School” challenge but that is what I love about challenges- so many interpretations!! 


Again, I hope you can come join us for our Backto School Challenge at SUO Challenges!! Have a great Tuesday!!!

Harvest of Thanks- A GateFold for the Pals Paper Arts!


Hi Again Stampers! 
 
I wanted to create one more card this evening and even though I am too late for the deadline, I just loved the Pals Paper Arts PPA165 Sketch  and decided to create a GateFold card :-)    I hope that you will find the time to visit their site- they now have two different Design Teams and they rotate each week for a new challenge, so again, tons of inspiration!!

This sketch seemed perfect for a Gate Fold card- so to create this card:

GateFold- Open 
Ink up the large label stamp from Harvest of Thanks using Stampin’ Write markers in Chocolate Chip, Crushed Curry, Tangerine Tango and Wild Wasabi and stamp onto Whisper White cardstock.  

Use the Distressing Tool to distress the edges and a Sponge Dauber with Crumb Cake to antique the paper. 

Use the Big Shot™ with the Apothecary Accents Framelits™ to cut out the image and also cut a piece from Chocolate Chip.   Cut the Chocolate Chip layer in half horizontally to layer behind the focal image.

Use the Big Shot™ with the Circle Framelits™ to cut a circle from the Sweater Weather Designer Series Paper and also a circle the same size using Chocolate Chip cardstock.  Cut the Chocolate Chip circle in half and layer behind the DSP circle and adhere the focal image label.

Use the Simpy Score™ Tool to create the GateFold from Whisper White cardstock and layer Chocolate Chip cardstock on the two gate folds in the front  (on second thought, I should have created the card base using Chocolate Chip cardstock- hindsight is 20/20 :-)))… Adhere a piece of embossed Sweater Weather DSP on both sides (Soft Sky Polka Dot pieces using the Square Lattice Textured Impressions™ Embossing Folder) .

Card in Closed Position 
Use the Dotted Scallop Ribbon Border Punch to punch out a piece from Chocolate Chip cardstock and attach to the bottom of a piece of Crushed Curry DSP (again from Sweater Weather), distress with the Distressing Tool and add to the right hand panel per the sketch.

Add the Chocolate Chip DSP panel in the center of the card as well as a piece along the lower right hand panel (distress as well) along with the Antique Brad and Gratitude sentiment (stamped in Chocolate Chip onto Whisper White and cut with the Big Shot™ and  the Bitty Banners Framelits™ to finish off the card.

Stamp Sets: Harvest of Thanks

Ink: Chocolate Chip, Stampin’ Write Markers- Chocolate Chip, Crushed Curry, Tangerine Tango, Wild Wasabi

Paper/Cardstock:  Whisper White, Chocolate Chip, Sweater Weather DSP

Accessories: Big Shot™, Apothecary Accents Framelits™, Circle Framelits™, Bitty Banner Framelits™, Dotted Scallop Ribbon Border Punch, Distressing Tool, Sponge Dauber, Antique Brad


Thanks again for visiting and I hope you have a terrific Tuesday!!

Monday, July 29, 2013

A Floral Sympathy for the ColourQ

Hi Stampers! 
 
I hope all of you had a great weekend!!  I wanted to create a card using this week’s CQC199 ColourQ Challenge and it seems as though lately, I never have enough sympathy cards on hand…

Again, if you have not already visited the ColourQ site yet, I urge you to take the time to do so- a wonderful weekly challenge that provides unending inspiration!!

To create this card:

Ink the floral image using Crisp Cantaloupe (a substitute for Groovy Guava) and stamo repeatedly onto a piece of Crumb Cake cardstock. 

Distress the edges of the Crumb Cake layer using the Distressing Tool and sew onto a piece of Cajun Craze (sub for Dusty Durango) cardstock.    Distress the edges of the Cajun Craze , add the Tea Lace Paper Doily along with the Satin Ribbon. 

Layer onto a piece of Old Olive cardstock and distress those edges as well.  Mount the entire background onto a Whisper White card base.

Create the rolled flowers- Using the 1 ¼” Scallop Circle Punch, punch out four circles from Cajun Craze and 3 circles from Crisp Cantaloupe cardstock.  Carefully cut a spiral from the outside of the circle towards the center and roll each up by hand (starting from the outside towards the center).  Splitcoaststampers has a great tutorial here using just a rounded square-  I prefer the scallop circle to give a bit more realism to the petals :-)

Punch out the leaves using the Bird Builder Punch (I used Old Olive as a substitute for the Kiwi Kiss) and adhere using Mini Glue Dots.  Add the rolled flowers and Pearl Centers along with Pearls in the upper and lower corner of the card.

Stamp the sentiment using Cajun Craze Classic Ink onto Whisper White, punch out using the Artisan Punch and add a Cajun Craze layer behind the sentiment (split the Cajun Craze layer in half horizontally and layer behind the Whisper White).   

Stamp Sets: Stippled Blossoms, Petite Pairs

Ink: Crisp Cantaloupe, Cajun Craze , Crumb Cake

Paper/Cardstock:  Whisper White, Cajun Craze, Crisp Cantaloupe, Crumb Cake, Old Olive

Accessories: Distressing Tool, Sponge Dauber, Sewing Machine, Punches- 1 ¼” Scallop Circle, Bird Builder, Artisan; Tea Lace Paper Doily, Pearls, Satin Ribbon (from my stash)


Thanks again for stopping by!!!  Have a great evening and if you have the chance to visit again tomorrow, I will my card for the new SUO Challenge card :-) 

Sunday, July 28, 2013

CAS Thank You- A Sketch for a Sketchy Bird


Hi Again Stampers!!

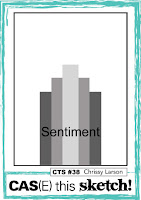
For some reason I seem to feel more creative in the wee hours of the morning, so I decided to stay up and create a card for the CAS(E) This Sketch #38 (again, if you have a chance check out their site- so many interpretations of this sketch- it is amazing)!!


To create this card:

Stamp the bird image from Simply Sketched using Early Espresso ink and add a bit more grass by hand with the Stampin’ Write Early Espresso marker.

Color the bird using the AquaPainter™ using Crushed Curry Classic Ink and the grass with the Gumball Green Stampin’ Write marker.

Use the Big Shot™ along with the Window Frame Collections Framelits™ to cut out the bird image along with another piece from Early Espresso cardstock.  Add the Early Espresso layer behind the bird image (cut the Early Espresso layer in half horizontally and allow just a bit to show behind the focal image). 

Mount onto the Whisper White card base using Stampin’ Dimensionals® and add the sentiment to finish off the card.

Stamp Sets:  Simply Sketched, Short & Sweet

Ink: Early Espresso, Crushed Curry, Stampin’ Write Gumball Green marker

Paper: Whisper White, Early Espresso

Accessories: Big Shot™, Window Frame Collections Framelits™,  1 ¼” Circle Punch (to round off the edges of the sentiment)


This was another quick, easy card!  Thanks again for stopping by and I hope you have a great Sunday!!

Saturday, July 27, 2013

Gold for Christmas- A Simple, Peaceful Card

Hi Stampers!

I wanted to create another quick Christmas card and decided to create a CAS card for the CASology #54 Gold Challenge  (if you have a chance, check out the super projects at their site!).

To create this card:

Using the Embossing Buddy®, de-static a piece of Whisper White cardstock and stamp the dove image using Versamark™ ink.  Apply Stampin’ Emboss® Gold Embossing Powder and heat with the Heat Tool.   

Once cooled, trim the piece close to the edges of the image, adhere to a piece of More Mustard cardstock and add the gold triple ribbon bow (from my stash). 

Repeat the embossing steps above to emboss the sentiment on another piece of Whisper White cardstock- trim to a bit larger in width than the focal image. 

 Add the focal image using Stampin’ Dimensionals® and add the entire panel to the Whisper White card base using Stampin’ Diimensionals® as well.

Stamp Sets: Calm Christmas, More Merry Messages

Ink: Versamark™

Paper/Cardstock:  Whisper White, More Mustard (retired)

Accessories:  Embossing Buddy®, Stampin’ Write® Gold Embossing Powder, Heat Tool, Gold Ribbon (from my stash)


Thanks again for visiting- I hope all of you have a great weekend!!

Dare To Get Dirty- Card #1

Hi Again Stampers! 

Here is my first card created for one of the Splitcoaststampers Dare To Get Dirty Challenge  :-)   Are you a Fan Club Member ofSplitcoaststampers yet?  If so, come join in on the fun and if not, it is not too late to join (did I mention in addition to the forum discussions and fun creating the cards,  that the Member Companies will have prizes??))  

And no, I do not get commission for you to join or any compensation :-)   I know that I visit the Splitcoaststampers site daily- I do not know of a better bargain for seven cents a day ($25.00 a year) than being a Fan Club Member!! :-)

Since this card was created for the Fan Club Dare To Get Dirty Gallery, I am not allowed to share any of the details of the specific challenge but I can share the techniques and products used….

Create the mask for the moon and sand using sticky notes, hold the masks over the Whisper White cardstock as you apply the ink for the sky using the AquaPainter™, remove the mask and re-mask the sky portion to color in the ocean, remove the masks, re-mask and color in the sand. 

Once dried, stamp the Wetlands bird image using Early Espresso Classic Ink and cut the image out with the Big Shot™ along with the Ovals Collection Framelits™.   Mount a frame of Early Espresso cardstock using the same size oval and cut in half vertically (adhere behind the focal image allowing just part of the frame to show). 

Add the Woodgrain background (sponge with Soft Suede and Baked Brown Sugar) and add texture with the Color Spritzer Tool and an Early Espresso Stampin' Write marker.

Create the seashell by stamping with Early Espresso Classic Ink, watercoloring with Soft Suede and fussy cutting each shell.  

Add the White Gel Pen accents to the shells and the waves, adhere the seashells along the edge of the focal frame, add the sentiment along with the Hemp Twine accents to finish off the card. 

Stamp Sets: Wetlands, By The Seashore

Ink: Early Espresso, Crisp Cantaloupe, Strawberry Slush, Island Indigo, Soft Suede, Crumb Cake

Paper/Cardstock:  Whisper White, Early Espresso, Soho Subway DSP


Accessories: Big Shot™, Woograin Textured Impressions™ Embossing Folder, Oval Framelits™, Color Spritzer Tool, Sponge Daubers, Hemp Twine (retired), White Gel Pen

Thanks again for visiting- I hope you will have time to join in on the fun!!  Have a great Saturday!!

Friday, July 26, 2013

Celebrating with the Stampin' Celebration Inspiration Challenge!

Hi Stampers!!

I hope all of you are having a great week so far :-)  I wanted to create a card for the Stampin’Celebration Inspiration Challenge #68 for July- I love their inspirational photos and the Design Team is fantastic!   Again, if you have not visited these sites yet- stop by and check it out!!

The inspiration photo seemed to showcase chevrons and since I had not ordered the new background set and/or Designer Series Paper from the color families yet, I decided to improvise with the recently retired set, Beyond Plaid…

To create this quick CAS card:

Use the Big Shot™ with the Chevron Textured Impressions™ Embossing Folder to emboss a piece of Whisper White cardstock.  

Trim and mount onto a piece of Elegant Eggplant and then again onto a piece of Whisper White.  Add to the Whisper White card base using Stampin’ Dimensionals®.

Using Strawberry Slush and Pumpkin Pie Classic Ink, stamp the chevron background stamp onto Whisper White cardstock.  Punch out the butterflies from the chevron background using the Elegant Butterfly Punch. 

Adhere the butterflies and the banner sentiment to the main panel using Mini Glue Dots, add the Rhinestones to finish off the card.

Stamp Sets:  Beyond Plaid, Fabulous Phrases

Ink: Strawberry Slush, Pumpkin Pie, Elegant Eggplant

Paper: Whisper White, Elegant Eggplant

Accessories: Big Shot™, Chevron Textured Impressions™ Embossing Folder ,  Punches- Elegant Butterfly, 1” Square, Rhinestones

Thanks again for stopping by and I hope you have a wonderful weekend!!

Tuesday, July 23, 2013

Thinking of You- A Sketch and Color Challenge

Hi Again Stampers!!

I am having a great time in my stamping room today so I think this may be a record for posts in one day for me..

While my hubby watches his baseball games, I decided to create a card using the HSSSC164Sketch at Hand Stamped Sentiments (I flipped the sketch over) and the DD62 Challenge Colors from The Dynamic Duos.  

Again, if you have not visited these sites yet- stop by and check out all of the inspiration!!

To create this quick CAS card:

Using the hexagon punch, punch out various pieces from the Modern Medley Designer Series Paper (DSP).  Adhere the hexagons per the sketch onto Basic Black cardstock and carefully trim around the outer edge by hand.

Adhere this panel onto a piece of Calypso Coral DSP from Epic Day This and That.  Add the 5/8” Basic Black Satin Ribbon bow along with the banner sentiment. 

Mount the entire panel onto Basic Black cardstock and add the butterflies and pearls to finish off the card.

Stamp Sets:  Papillon Potpourri, Wetlands

Ink: Basic Black

Paper: Very Vanilla, Basic Black, Epic Day This and That DSP, Modern Medley DSP

Accessories:  Punches- Elegant Butterfly, Hexagon, 1” Square, Pearls, 5/8” Basic Black Satin Ribbon (retired)

I think I will have to make this card again in a different color combo- it was definitely quick and easy!!  


Thanks again for stopping by and I hope you have a wonderful Wednesday!!

Two Different Cards- One Sketch from The Paper Players

Hi Stampers!!

I hope all of you are having a fabulous week so far!!  I wanted to take a moment to stamp a few cards and decided to use the PP155 Sketch atThe Paper Players (love sketch challenges and definitely love The Paper Players! :-))

If you have not dropped by their site yet, I would encourage you to do so- they have a terrific Design Team and many other entries that showcase the versatility of the sketch!

One thing I love about stamping is that there are no mistakes per se- I usually keep previously stamped images and embossed pieces in case I can utilize them in the future and I was able to incorporate some of those pieces into the second card:-)  Love it when that happens!!   

To create the first card:

Ink the chevron wood stamp from Truly Grateful (sneak peek of the new set from the upcoming Holiday Mini)  using Crumb Cake Classic Ink and stamp onto two pieces of Whisper White cardstock.  Ink the wheat image from the same set using Early Espresso Classic Ink and stamp over the wood grain image on one of the pieces and also stamp the acorn image- color using an AquaPainter™ with ink from Crushed Curry and Pumpkin Pie Classic Ink pads and use the Marina Mist Stampin’ Write marker to color the tie around the center.

Punch out the wheat image using the 2 ½” XL Circle Punch and layer onto additional 2 ½” Circles of Soft Suede, Whisper White and Early Espresso cardstock (each circle is cut in half horizontally and spread apart a bit before adhering to allow the edges to show behind the focal image).  

Use a Decorative Label Punch to punch a piece of Early Espresso cardstock- cut in half vertically, adhere to the sides and add the Antique Brads to finish off the focal image.

Punch out the acorn image using the 1 ¼” Circle Punch and layer with two circles punched from Early Espresso cardstock using the same punch.

Ink the sentiment using Early Espresso Classic Ink and stamp over the second piece of stamped background created in the first step above.  Trim the piece and punch the banner points using a 1” Square Punch- layer onto a piece of Early Espresso cardstock.

Use the Big Shot™ to emboss a piece of Whisper White using the Woodgrain Textured Impressions™ Embossing Folder, trim and adhere to a piece of Early Espresso cardstock.

Add the focal image along with the banner sentiment and acorn using Stampin’ Dimensionals® to finish off the card.

Stamp Sets:  Truly Grateful

Ink: Early Espresso, Crushed Curry, Pumpkin Pie, Stampin’ Write Marker- Marina Mist

Paper: Whisper White, Early Espresso, Soft Suede

Accessories:  Big Shot™, Woodgrain Textured Impressions™ Embossing Folders, Punches- 1” Square, 1 ¼” Circle, 2 ½” XL Circle, Decorative Label, Antique Brads

To create the second card:

Use the Big Shot™ to emboss a piece of Crumb Cake using the Woodgrain Textured Impressions™ Embossing Folder, sponge a bit of Early Espresso Classic Ink over the outside edges, trim and mount onto a piece of Early Espresso cardstock.

Stamp the tractor image from Harvest Blessings using Early Espresso Classic Ink onto Whisper White cardstock and color using the AquaPainter™ with ink from the Cantaloupe Crisp, Calypso Coral and Gumball Green Classic Ink Pads.  

Stamp the sentiment from Thoughts & Prayers onto Whisper White cardstock using Early Espresso Classic Ink and cut into a banner (use the 1” Square Punch to create banner points).   Add slight distressing using the Color Spritzer Tool with an Early Espresso Stampin’ Write marker to the tractor image as well as the sentiment.

Cut the tractor image out using the Big Shot™ along with the Ovals Collection Framelits™ and also cut another oval from Early Espresso cardstock using the same size framelit™, cut the Early Espresso Oval in half horizontally to frame behind the tractor image oval and add to the card using Stampin’ Dimensionals®. 

Add the banner sentiment along with the Designer Brushed Bronze button tied with Hemp Twine to finish off the card. 

Stamp Sets:  Harvest Blessings, Thoughts & Prayers

Ink: Early Espresso, Cantaloupe Crisp, Calypso Coral, Gumball Green, Stampin’ Write Marker- Early Espresso

Paper: Whisper White, Early Espresso, Crumb Cake

Accessories:  Big Shot™, Woodgrain Textured Impressions™ Embossing Folders, Ovals Collections Framelits™,  Punches- 1” Square, Color Spritzer Tool, Brushed Bronze Designer Button (retired), Hemp Twine (retired)


Thanks again for taking the time to stop by- I hope all of you have a wonderful week!!

Ladies Card Ministry- Card #3- Nautical Thinking of You

Hi Again Stampers! 

This is the final card that we created this past weekend at our Ladies Ministry Class (again, the other two cards are in previous posts- card # 1 and card #2)

We had a great time but if we are able to fellowship and stamp again, we most likely will only stamp two cards versus three due to the time

To create the Nautical Thinking of You card:

Start off with two pieces of Whisper White cardstock- one piece 4 ¼” x 5 ½” and the second piece would be 2 ½” x 3 ½”.   

Ink up a brayer with Pool Party Classic Ink apply onto the two pieces of Whisper White cardstock using a light touch and a random pattern.  Ink another brayer with Marina Mist (or clean off the first one by rolling off the excess ink onto scrap paper before inking with the darker ink) and apply, again with a very light touch over the Pool Party background in the opposite direction leaving some white spaces.

Ink the script stamp from By The Tide using Midnight Muse Classic Ink and stamp off onto a piece of scrap paper and then repeatedly stamp onto the smaller piece of brayered background paper.   Ink the coral image using Midnight Muse Classic Ink and stamp directly to the background in the lower left hand corner, re-ink the stamp and stamp again in the lower right hand corner.

Ink the fish, shell (two images) and Nantucket stamp using Midnight Muse Classic Ink and stamp directly onto the larger piece of brayered background paper.  Ink up the sentiment from Wetlands using Midnight Muse Classic Ink and stamp onto this panel as well.

Punch out the sentiment using the Large Oval Punch and the Nantucket image using the ¾” Circle Punch and carefully cut out the other images by hand (fussy cut).

Lightly sponge Midnight Muse Classic Ink over the edges of the images and mount the Nantucket image onto two circles of Midnight Muse cardstock layered together but spread apart to leave a bit of an edge.  Sponge the edges of the smaller background panel using Midnight Muse Classic Ink and layer this panel onto a piece of Midnight Muse cardstock.

Use the Big Shot™ with the Woodgrain Textured Impressions™ Embossing Folder to emboss a piece of Whisper White cardstock and a strip of Midnight Muse cardstock.

Layer the Whisper White onto another piece of Midnight Muse cardstock and add the horizontal strip of Midnight Muse cardstock. 

Add the knotted twine to the corners of the background panel (fray the edges after knotting) and adhere the panel to the background using Stampin’ Dimensionals®. 

Add the fish, shells, Nantucket image and sentiment using Stampin’ Dimensionals® to finish off the card. 

Stamp Sets: By The Tide, Wetlands

Ink: Pool Party, Marina Mist, Midnight Muse

Paper/Cardstock:  Whisper White, Midnight Muse

Accessories: Big Shot™,  Woodgrain Textured Impressions™ Embossing Folder, Punches- Large Oval, ¾” Circle, Brayer, Hemp Twine (retired)


Thanks again for stopping by!!  We had a great time creating these cards!!