Pages

Saturday, June 26, 2021

One Nation Under God


Hi Friends!

Today I am sharing a Mixed Media Patriotic card designed with the new Red, White & Blue Bundle along with the Old Glory Bundle and other dies/supplies (from Stamp Simply)!


I fell in love with the Old Glory Bundle when it was released last spring and absolutely love the new coordinating Red, White & Blue Bundle, don’t you?  

The flag image, block sentiment stamp plus all of the other sentiments are perfect for so many summer cards!

This week we are celebrating the new Red, White & Blue Bundle release by sharing patriotic cards on the Stamp Simply blog!  I hope you have had a chance to check out the fabulous inspiration from the rest of our Design Team!

I decided to create an easel card since I wanted to use the patriotic map of the USA as well as the flag images. 

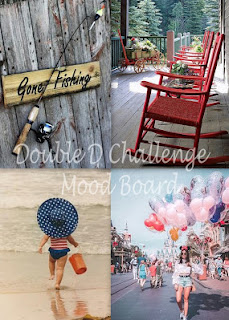
As many of you know, I love to participate with online challenges and will be linking this card to the Double D “Signs of Summer” Challenge (I was inspired by the red, white and blue stripes in the little girl's bathing suit as well as the celebratory theme of the parade in the inspiration photo).  

I am also participating in the  Simon Says Wednesday “Red, White and/or Blue” Challenge  and the Word Art Wednesday #497-#498 “Anything Goes” Challenge.  

If you have not had a chance to visit the Stamp Simply blog or the other challenge sites yet, I encourage you to do so- wonderful inspiration from all!

To create this card:


Ink the block image from the Red, White & Blue stamp set with Tim Holtz™ Chipped Sapphire Distress Ink and stamp at the top and the bottom of a 3 ¾” x 5” piece of white cardstock and onto another piece of white cardstock approx. 3 ¾” x 2 ½”.

Once the ink has dried, apply Tim Holtz™ Picket Fence Distress Stain over the entire panel to tone down the color a bit.  Allow to dry and distress the edges of the panels with a distressing tool.

Use a blending brush with Tim Holtz™ Pumice Stone Distress Ink to “age” the panels, mount each onto white cardstock, trim, and mount again onto red cardstock, trim and finally mount onto navy cardstock.

Ink the block image from the Red, White & Blue stamp set with Versafine Onyx Black Ink and stamp onto another piece of 4 ¼” x 5 ½” white cardstock (stamp near the bottom of the panel).

Ink the US map image from the Old Glory stamp set with Versafine Onyx Black Ink and stamp onto the top of the same panel as the flag image (this way you can die-cut both from the same piece of cardstock).

Die cut both images using the coordinating dies and watercolor the images with watercolor pencils (I use Derwent™ and a few Stampin’ Up! – see in the list below).

Create the banner flags from the Echo Park America 6x6 Paper Pad using the smallest banner die from the Fishtail Sentiment Banners and once die cut, split the banner in half (FYI- I used the little strips that you normally cut off the top of the 6x6 paper when you remove it from the pad.  There is a hole in the center, and you can get two of the smallest dies cut into banners, resulting in four when you split them in half).


Gently apply Tim Holtz™ Pumice Stone Distress Ink to “age” the banners with a blending brush. 

Use a glue gun to adhere the banners to a string of knotted patriotic twine and mount on an angle to the large background panel (FYI- I used a glue gun to add a drop of glue to each end of the twine as well as a small amount under the twine in the center to adhere to the panel).

Using Versafine Onyx Black Ink, stamp the “One Nation Under God” and “Always Remember Freedom Isn’t Free” onto white cardstock, apply clear embossing powder and heat set with a heat tool.


Once the embossing has cooled, carefully color the “Nation” in red (I used a sharp red watercolor pencil).  Die cut the “One Nation Under God” sentiment with a medium banner die from the Fishtail Sentiment Banners, distress the paper with the pumice stone distress ink, distress the edges with a distressing tool (or the edge of scissors) and trim off the left-hand side to mount along the main background panel (under the banner).

Cut the “Always Remember Freedom Isn’t Free” sentiment in half, distress the edges and set aside.

Create the easel base from a piece of 4 ¼” x 11” piece of heavy white.  Score at 5 ½” and on one side at 2 ¾”.  Fold along the 5 ½” score line for a tent fold, the fold the 2 ¾” upward to create the base for the main panel. 

Once you have the easel base folded, I tend to trim a bit off the edges (approx. ⅛”).  This way when you mount your front panel and smaller piece at the bottom, the white cardstock will not show.   Please refer to this tutorial at Splitcoaststampers for more details and info on how to create an easel card base.

Adhere the main front panel to the small fold at the top of the easel (I use strong adhesive to adhere this panel).

Add the layered smaller panel at the bottom of the easel with dimensional foam (or chipboard).

Adhere the die cut US map image to the card front with dimensional foam and/or chipboard as well as the flag image at the bottom of the easel.


Adhere the “Always Remember Freedom Isn’t Free” sentiment layers with dimensional foam and/or chipboard onto the lower panel and finish off the card with a few silver rhinestones in the upper right-hand and lower left-hand corners of the flag panel.


Stamp Sets:   Red, White & Blue Bundle, Old Glory Bundle (Stamp Simply)

Ink/Mediums: Versafine Onyx Black Ink, Watercolor Pencils- Derwent® #19- Madder Carmine, #28= Delft Blue; Stampin’ Up! – Daffodil Delight, Early Espresso, Basic Black, Night of Navy; Tim Holtz™ Distress Ink- Chipped Sapphire, Pumice Stone, Picket Fence Distress Stain

Cardstock/Paper: White, Red, Navy; Echo Park America 6x6 Paper Pad


Accessories/Tools: Gemini, Jr., Stamp Simply Steel Dies- The Red, White & Blue Flag, Patriotic Stars & Stripes (Old Glory), Fishtail Sentiment Banners, May Arts Patriotic Twine, Distressing Tool, Blending Brush, Scoring Tool, Embossing Powder Tool, Clear Embossing Powder, Heat Tool, Silver Rhinestones


Also, don't forget that Stamp Simply still has the following special for June (also, a free shipping offer) :


Thanks again for taking the time to stop by and visit! I hope you are having a great summer so far and, for my US friends, as we approach Independence Day, I hope you are thankful for those in our armed forces (and their families) serving currently and in the past.  We know that “Freedom Isn’t Free”. May we always remain “One Nation Under God”.  

Hugs and God Bless, sweet friends!


Wednesday, June 23, 2021

Happy 70th Birthday with Tool Shed


Hi Friends!

Today I am sharing a card that I designed for a dear friend of ours who turned 70 last year in April.  I had mailed him a different card originally, but he never received it (maybe one day it will show up).  I am sure that the Post Office was overwhelmed during the height of the COVID-19 pandemic.

This was the original card mailed:  


The original card (above) was quite a bit darker and was designed with the retired background stamp, Tool Shed (from Stampin’ Up!) along with a sentiment from a current set, A Godly Man from Stamp Simply.  

Below was the replacement card that I created (just delivered by hand to him recently) and it uses the same background stamp and the same verse, but this stamp is from the retired Verve Stamp set, Scripture Medley 3.


As I mentioned in my previous posts, I am working on creating a card for each of the Splitcoaststampers’ (SCS) Sketch Challenges and the original card uses the SC# 
Sketch for the design (I will link this later once I find my original note, lol!).  

FYI- The original card was created in the same way as the newer version, with just a bit more distressing and gold metallic added to the chipboard numbers.

I am participating with the As You See It #252 “Apply the Y” Challenge (masculine card) and the WordArt Wednesday #497-#498 “Anything Goes” Challenge.

If you have not taken the time to visit the challenge blogs, I hope you will do so- gorgeous inspiration from all.

To create both cards:

Ink the background Tool Shed stamp with Versafine™ Onyx Black ink, stamp onto white cardstock (for the replacement card) and on kraft paper for the first card, apply clear embossing powder and heat set with a heat tool.

For the replacement card, use various distress inks- Tea Dye, Vintage Photo, and Walnut Stain to “antique” the paper.  For the original card, darker distressing was created by applying more ink, etc.  Use a small splatter stamp from Timeless Textures (retired SU!) to add additional distressing with black soot distress ink onto the background panel.

Distress the edges and adhere to a piece of black cardstock.

For the newer version, add a strip of 1” black satin ribbon at the top of the card. 

Create holes for the grommet type eyelets with a Crop-A-Dile™ and set the eyelets.

Add a scrap strip of black cardstock behind the panel where the openings of the grommets are located before mounting the panel onto a white card base.


Stamp the sentiment in the same manner as above, distress and mount onto black cardstock.  Adhere to the card front with dimensional foam (or chipboard).

Paint the chipboard numbers with black acrylic paint and adhere to the card front.

Stamp Sets: Tool Shed background, Timeless Textures (retired Stampin’ Up!), Scripture Medley 3 (retired Verve Stamps), A Godly Man (Stamp Simply)

Ink/Mediums: Versafine™ Onyx Black, Tim Holtz™ Distress Inks- Tea Dye, Vintage Photo, Walnut Stain; Black Acrylic Paint, Gold Metallic Acrylic Paint

Cardstock/Paper:  Whisper White, Basic Black, Kraft

Accessories: Embossing Buddy®, Clear Embossing Powder, Heat Tool, Distressing Tool, 1” Black Satin Ribbon, Pewter Grommets/Eyelets, Crop-A-Dile™, Chipboard Numbers (from my stash)

Thanks again for taking the time to stop by- I hope all of you are having a great week so far!

TCC158 Cast Your Cares


Hi Friends!

Welcome to The Card Concept #158 {Long Summer Days} Challenge!


For those of you who are not familiar with
The Card Concept Challenge, we are a bi-weekly challenge that uses an inspiration photo for you to create a card. 

You can choose one card-making style or a combination of styles, the choice is yours!  Plus, our Design Team of ten ladies create a card to help give you even more inspiration!

 I love this photo, don't you? The beach theme, the colors as well as the textures inspired me to create a Mixed Media card using a few retired Stampin’ Up! stamps as well as a retired Verve stamp set for the sentiment.

Also, FYI- this will be our last challenge for the summer (but we will return in the fall). 

Normally our challenge would end in two weeks, but we have decided to keep the challenge open all summer to allow you to participate as you have time. 

We will resume with The Card Concept Challenges on Sept. 1st with our DT announcement and our first challenge on Sept. 8th.

Also, as those of you who follow me know, I have a personal goal to create a card for each of the Splitcoaststampers Sketch Challenges and incorporated the #SC594 Sketch Challenge into the design. 

I am also joining the More Mixed Media Challenge June "Anything Goes Optional Purple" along with the Double Trouble #87 "It's Hip to Be Square" Challenge (for Thing #1, I used a circle and Thing #3- I heat embossed the sentiment). 

If you have not had a chance to visit The Card Concept, or the other challenge sites yet, I encourage you to do so- gorgeous inspiration from all! 

To create this card:

Trim a piece of kraft cardstock to 4” x 5 ¼”.  Repeatedly stamp the script image (retired Notable Notions) with ground espresso distress ink over the background.


De-static the lower right-hand area, stamp the verse sentiment (retired Verve stamps) with Versafine™ Onyx Black ink, apply clear embossing powder and heat set with a heat tool.

Apply pearl texture paste using a scallop stencil onto the background area.  Allow the paste to dry for approx. one hour.

Ink the Seaside Sketches (retired Stampin’ Up!) image with Versafine™ Onyx Black ink and stamp onto a piece of white cardstock.

Watercolor the image with watercolor pencils, distress ink and distress oxide inks and once satisfied with the coloring, die cut with a stitched circle die. 

Mount onto another larger circle die cut from light blue cardstock.

Stamp the seashells from Stippled Shells and By the Seashore with Versafine™ Onyx Black ink onto white cardstock, heat set with a heat tool.

Watercolor with Stampin’ Write markers, distress ink and fussy cut the images.  Use a black marker to edge the shell images.

Mount the stenciled background onto white cardstock, trim close to the edge.

Add the blue checked layered panel of designer paper, the cream burlap ribbon, and the light blue grosgrain ribbon (wrapping the ends of the blue ribbon behind the background panel).          

Mount the panel onto light blue cardstock and adhere to a white card base.

Mount the die cut focal image with dimensional foam (or chipboard), add the seashells around the edges (again, with dimensional foam/chipboard).

Use a clear glitter pen to add shimmer to the seashells as well as the water.

Finish off the card with rhinestones on the upper left and lower right-hand corners.

Stamp Sets: Seaside Sketches, Stipple Shells, By the Seashore, Notable Notions (all retired Stampin’ Up!), Faith Medley (retired Verve Stamps)

Ink/Mediums: Versafine™ Onyx Black Ink, Watercolor Pencils- Derwent, Stampin’ Up!, etc. –Blues, Browns, Beige, Tim Holtz™ Distress Ink- Ground Espresso, Faded Jeans, Pumice Stone, Distress Oxide- Tumbled Glass; Spectrum Noir™ Clear Glitter Marker, Pitt Penn Black Marker, Dreamweaver Pearlescent Embossing Paste

Paper/Cardstock: Whisper White, Bashful Blue, Crumb Cake, retired blue check designer paper (all current and retired Stampin’ Up!)

Tools/Accessories: Gemini, Jr., Stitched Circle STAX Dies (My Favorite Things), Matting Circle Dies (Divinity Designs LLC), Scallop Stencil (Memory Box), Palette Knife, Heat Tool, Embossing Buddy™, Clear Embossing Powder, 1” Light Blue Grosgrain Ribbon, Cream Burlap Ribbon, Rhinestones

Thanks again for stopping by!  We hope you will have the time to create a card based on our inspiration photo and join us at The Card Concept! The challenge is open until August 25th  at noon EDT.

Saturday, June 19, 2021

Welcome Baby- Perfect Gift From Above


Hi Friends!

Today I am sharing a card designed with the new Welcome Baby Bundle along with the Echo Park Cupid & Co 6x6 Paper Pad  plus additional dies/other supplies (from Stamp Simply)!

I love the new Welcome Baby stamp set as well as the sweet Welcome Baby Basics die set- both included in the Welcome Baby Bundle


The Welcome Baby Bundle bundle coordinates with the previously released Baptism and More stamp set and is available as a trio set as well-  Welcome Baby and Beyond Bundle!


This week we are celebrating the new release by sharing cards created this new bundle- I hope you have a chance to check out the Stamp Simply blog!  Such cute cards and inspiration from the rest of our
Design Team!

I thought the colors and patterns in the Echo Park Cupid & Co 6x6 Paper Pad  would be perfect for a pink floral card for a new little girl in your life! Plus, I had to add lace, ribbon, and a pearl- a girl must have her frills and jewelry, right?


I will be participating with the Wednesday Watercooler Challenge WWC318 Kath's All About Occasions  and the Word Art Wednesday #495-#496 "Anything Goes" Challenge.   

 If you have not had a chance to visit the Stamp Simply blog or the other challenge sites yet, I encourage you to do so- gorgeous inspiration from all!


To create this card:

Using the Darice Wire Fence embossing folder, emboss a piece of light pink cardstock.  Trim to 4” x 5 ¼” and mount onto a 4 ¼” x 5 ½” piece of white cardstock.

Add a piece of white lace across the panel along with a strip of moss seam binding (wrapping the ends of the seam binding behind the panel). 

Mount the panel onto a white card base.

Die cut the medium oval from the Hemstitch Oval Dies, stamp the sentiment from the new Welcome Baby stamp set with Versafine Onyx Black ink and heat set with a heat tool.


Adhere the oval die cut to the card front (overlapping the ribbon and lace).   

Die cut the “onsie” die from the Welcome Baby Basics from a floral piece and the little heart from a solid red piece of paper from the Echo Park Cupid & Co 6x6 Paper Pad.

Die cut the bib from white cardstock and layer all together (I also die cut an additional “onsie” from white cardstock to mount behind the entire image to give it additional strength).

Mount the layered die cut onto the card front with dimensional foam (or chipboard).

Add the moss green seam binding bow and pearl to the center of the heart to finish off the card.

Stamp Sets: Welcome Baby Bundle (Stamp Simply)

Ink/Mediums: Versafine Onyx Black

Cardstock/Paper:  White, Light Pink; Echo Park Cupid & Co 6x6 Paper Pad

Accessories/Tools: Gemini, Jr., Darice Embossing Folder- Wire Fence, Stamp Simply Steel Dies- Welcome Baby Basics, Spellbinders Amazing Paper Grace- Hemstitch Ovals, Kaisercraft Self Adhesive Round Pearls- Pearl, May Arts Moss Green ½” Seam Binding, 1 ½” White Lace

I am so thankful that you took the time to visit- I hope I have inspired you to be creative this week, sweet friends!

Also, don’t forget- there is still time to save 15% off at Stamp Simply!