Friday, June 19, 2015

JUN15VSNB Two Hands- A Color, Sketch and Virtual Stamp Night Challenge :-)

Hi Again Stampers! 

I wanted to share another card that I created for the Splitcoaststampers’ “Happy” Virtual Stamp Night (keep in mind that one of the rules is that you can only spend one hour creating the card – needless to say, very difficult at times for me).

This card was created for the JUN15VSNB “Clap Along If You Feel Like Stampin” Challenge (see details here and gallery here) along with the SC543 Sketch Challenge (see details here and gallery here) and the Paper Players PP249 Color Challenge. 

This was a tough challenge for me since I discovered that I do not have any stamps showing just hands…then I remembered the retired Handmade with Love II set from 2002  (I knew there is a reason I hold on to my retired stamps-  LOL!).

If you have not had a chance to do so, I hope you will find the time to visit the above challenge sites to check out the Design Team samples as well as their galleries-wonderful inspiration from all!

To create this card:

Using a small acrylic block, press the block into the Pool Party Classic Ink pad and stamp onto a piece of Whisper White cardstock.  Repeat this step leaving ample room around each “block” for using a punch.

Ink the “hand crafted” stamp from the retired Handmade with Love II set using Real Red and stamp over two of the Pool Party “blocks” and repeat the steps with Island Indigo Classic Ink.

Use the 1” Square Punch to punch out the “blocks” and trim off the top and bottom portions of the stamped image (just leaving the hands).

Mount onto 1” squares of Pool Party cardstock and mount those squares onto a MFT Stitched Square  die cut from Whisper White cardstock (approx. 2 ½” square).

Mount the entire “hand” panel onto a piece of Real Red cardstock and add the retired Real Red button with Island Indigo Baker’s Twine to the center.

Ink the sentiment from Trust God using Real Red Classic Ink and stamp onto a piece of Whisper White cardstock.

Adhere the retired Island Indigo Sycamore Street ribbon strips along with the retired Real Red ¼” Grosgrain Ribbon on a diagonal and mount the panel onto a piece of Island Indigo cardstock, trim and mount onto a piece of Real Red cardstock, trim and mount onto the Whisper White card base.

Mount the focal image panel using Stampin’ Dimensionals® to finish off the card.

Stamps: Trust God, retired Handmade with Love II (2002)

Ink: Island Indigo, Pool Party, Real Red

Paper: Whisper White, Island Indigo, Pool Party, Real Red

Accessories: Big Shot™, MFT Stitched Square Die, 1” Square Punch, retired ribbon- Island Indigo Scyamore Street Stitched Satin, ¼” Real Red Grosgrain  , retired Real Red button, retired Island Indigo Baker’s Twine

Thanks again for stopping by- I hope all of you have a fabulous Friday and weekend!  If you have the time, drop by again soon ( I will be sharing more cards this evening and tomorrow)- hugs to all of you and God Bless!

JUN15VSNA Happy Anniversary- Time To Celebrate and Dance :-)

Hi Stampers! 

I have been busy this week designing cards for the Splitcoaststampers’ “Happy” Virtual Stamp Night and one of the rules is that you can only spend one hour creating the card (very difficult at times for me :-)).

This card was created for the JUN15VSNA “Happy Dance” Challenge (see details here and gallery here) along with the SC544 Sketch Challenge (see details here and gallery here). 
 
If you have not had a chance to do so, I hope you will find the time to visit the above challenge sites to check out the Design Team samples as well as their galleries- gorgeous inspiration from all!

This card was fairly easy to create since I used Graphic 45’s Time To Celebrate paper along with the Time to Flourish  stamp set#2… a few layers, add  a die cut along with a punch and you are done!

Stamps: Time To Flourish Cling Stamp 2 (Graphic 45)

Ink: Early Espresso

Paper: Whisper White, Crisp Cantaloupe, Cucumber Crush, Early Espresso; Time To Celebrate (Graphic 45)

Accessories: Big Shot™, MFT Dizzy Border Die, Hexagon Punch, Pearls


Thanks again for visiting- I will be posting more of the challenge cards this evening and tomorrow :-)  Hope all of you have a great weekend!

Wednesday, June 17, 2015

Casting All Your Cares- A Throwback to the 50's


Hi Again Stampers! 

I love the colors and theme for this week’s FM213 Friday Mash Up Challenge and decided to incorporate the Hand Stamped Sentiments HSSSC214 Sketch Challenge along  with the Splitcoaststampers’ JUN15VSND "Happy Days"  Challenge (see details here and gallery here). 

If you have not had a chance to do so, I hope you will find the time to visit the above challenge sites to check out the Design Team samples as well as their galleries- gorgeous inspiration from all!

This card was fairly easy to create- I used My Digital Studio (MDS) to print out the car image from the Countryside Stamp Brush Set, colored with an AquaPainter™ along with Stampin’ Write Markers , added a few die cuts and you are done


Stamps: Countryside (MDS version), digital verse from Word Art Wednesday

Ink: Printer Ink- Black,  Classic Ink- Cajun Craze, Island Indigo, Garden Green; Stampin’ Write Markers- Cajun Craze, Island Indigo, Garden Green, Sahara Sand, Smoky Slate

Paper: Whisper White, Cajun Craze, Island Indigo, Garden Green , retired Island Indigo DSP, Garden Green DSP, SU! Green Background Papers (from years ago- maybe 2000 or so :-))

Accessories: Big Shot™, Stylish StripesTextured Impressions™ Embossing Folder, MFT Stitched Circle and Rectangle Dies, AquaPainter™, Hexagon Punch, retired  Garden Green button, Natural Linen Thread


Thanks again for stopping by- I plan on sharing more later this evening but wanted to post this card  before the Friday Mash Up deadline:-)

Of The Earth- Bluebird of Happiness :-)

Hi Stampers!!

I have been having fun the last few evenings creating cards for the Splitcoaststampers’ “Happy” Virtual Stamp Night and decided to incorporate the CC534 Color Challenge (see details here and gallery here) along with the CAS Colours & Sketches #128 Sketch Challenge  with the JUN15VSNG “Bluebird of Happiness” Challenge.

Again, if you have not already done so, I hope you will find the time to visit the above challenge sites to check out the wonderful Design Team samples as well as the inspiration from their galleries!

To create this card:

Ink the bird image from the retired set, Of the Earth, with Blackberry Classic Ink and stamp two images onto Pool Party cardstock and one image onto Wisteria Wonder cardstock.

Punch out the images with the 1 ¼” Square Punch and mount onto Whisper  White cardstock squares that have been die cut with the MFT Stitched Stax Square Die.

Emboss a  piece of  Whisper White cardstock using the Big Shot™ with the Honeycomb Textured Impressions Embossing Folder™ , trim and mount onto a piece of Blackberry Bliss cardstock.

Add a piece of 3/8” Wisteria Wonder Seam Binding and mount the panel onto the Whisper White card base.

Mount the bird image squares using Stampin’ Dimensionals® and add the digital sentiment to finish off the card.

Stamp Sets:  Of The Earth, Digital Sentiment from Word Art Wednesday

Ink:  Blackberry Bliss, Printer Ink-Black

Paper: Whisper White, Blackberry Bliss, Pool Party, Wisteria Wonder

Accessories: Big Shot™, Honeycomb Textured Impressions™ Embossing Folder, MFT Stitched Square STAX Die, 3/8” Wisteria Wonder Seam Binding


Thanks again for visiting- I will be sharing more cards throughout the evening and tomorrow :-)

Tuesday, June 16, 2015

You've Got This- Encouragement for a Friend


Hi Stampers! 

I love the colors for this week’s Pals Paper Arts PPA255 Color Challenge and originally did not think I would have enough time to create a card (since I wanted to create something a bit non-traditional) but this morning, I woke up with an idea for a non-tradional floral card :-)

One of our elders in our church went to be with the Lord a year ago and this week would have been their 36th Wedding Anniversary.  His wife along with his three children have been a great testimony to the Lord's faithfulness during this difficult time and I thought that the sentiment on this card would reflect what her husband would say to her, "Honey, with the Lord, You've Got This" :-)  

I decided to incorporate the wonderful  Connie and Mary CCMC359 Sketch Challenge as well- I just love their sketches!

If you have not had a chance to do so, I hope you will find the time to visit the above challenge sites to check out all of the Design Team samples as well as their galleries- gorgeous inspiration from all!

To create this card:

Ink the floral image from You’ve Got This with Stāz-On® Jet Black Ink and stamp onto Whisper White cardstock.

Color the petals with the Stampin’ Write Sahara Sand marker (three layers of color for the shadowing on the petals) and use the Early Espresso marker for the center.

Use an AquaPainter™ with Marina Mist Classic Ink to watercolor the background.

Once dry, trim the image and mount onto Early Espresso cardstock.

Use the Big Shot™ with the Woodgrain Textured Impressions™ Embossing Folder to emboss a piece of Sahara Sand cardstock, trim into two panels (saving the excess for another project) and mount onto Early Espresso cardstock.

Trim a piece of Whisper White cardstock and adhere to the Early Espresso card base.

Adhere the two woodgrain panels per the sketch and mount the focal image using Stampin’ Dimensionals®.

De-static a piece of  Early Espresso cardstock with the Embossing Buddy®, stamp the sentiment using Versamark™ ink, apply Stampin’ Emboss® White Embossing Powder and heat with the Heat Tool.

Once the embossing has cooled, trim the panel and create the banner points using the Banner Triple Punch.

Mount the sentiment using Stampin’ Dimensionals® and add a few  highlights to the center of the flower with the White Gel Pen to finish off the card.

Stamps: You’ve Got This

Ink: Stāz-On® Jet Black, Versamark™, Marina Mist; Stampin’ Write Markers- Sahara Sand, Early Espresso; White Gel Pen

Paper: Whisper White, Early Espresso, Sahara Sand
Accessories: Big Shot™, Woodgrain Textured Impressions™ Embossing Folder, Embossing Buddy®, Stampin’ Emboss® White Embossing Powder, Heat Tool, AquaPainter


Thanks again for stopping by- I hope all of you have a fantastic day and remember, "You've Got This" :-) !!

Happy Anniversary- A Sunflower for June Anniversaries :-)


Hi Stampers! 

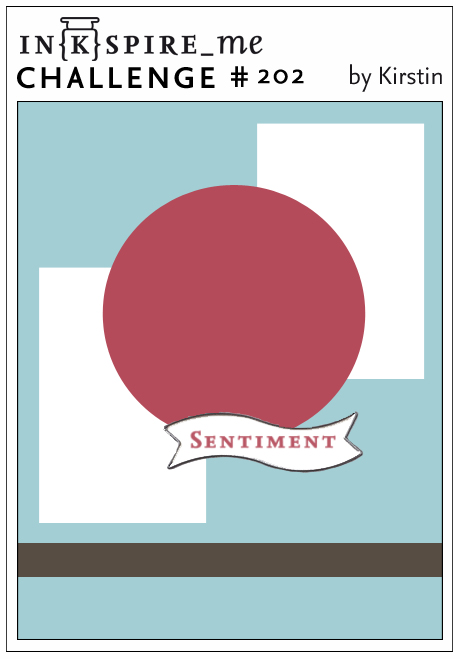
I had a chance to create a card this evening and decided to use the ColourQ CQC294Challenge along with the IN(K)SPIRE_Me #202 Sketch Challenge (this is  a new challenge site for me)  and the SC106 Stampin’ Celebration PhotoInspiration Challenge.

Again, if you have not had a chance to do so, I hope you will find the time to visit the above challenge sites to check out the Design Team samples as well as their galleries- fabulous inspiration from all!

FYI- I am just “under the wire” for the ColourQ Challenge, so I will not be describing the step by step process at this time, but if you have any questions, please let know.  

This card was very simple to create- stamping, a bit of coloring to define the petals with the Hello Honey Stampin’ Write Marker, die cutting and the Hexagon Punch (for the banner points). 

Stamps: Express Yourself (retired SU! hostess set), Splendid Sunflower (MFT)

Ink: Soft Suede, So Saffron; Hello Honey Stampin’ Write Marker

Paper: Whisper White, So Saffron, Soft Suede, retired Epic Day This and That Designer Series Paper

Accessories: Big Shot™, MFT Die-Namics™ Splendid Sunflower Die, MFT Dizzy Border Die, Hexagon Punch, retired Gold Cord


Thanks again for visiting- I hope you have a terrific Tuesday, my friends!!

Saturday, June 13, 2015

Home of the Free Because of the Brave- An Easy Waterfall Mini Album


Hi Stampers!   


This week’s Stampin’ Royalty Challenge SR281 is “Anything ButA Card” and I decided to create a mini photo album using the CMCC75 Colour Me "Colour Me Striking" Challenge.

In the past few weeks Graphic 45 has been highlighting their retiring 2014 Design Team members with "Fond Farewell" posts and I fell in love with all of the designer projects but especially Ginger Ropp's Easy Instagram Mini Waterfall Album (I have created at least ten of these this week- they are so addictive!!) :-)  

Here is a link to the Graphic45 post for Ginger Ropp's favorite projects  and I have linked the YouTube video for this project below :-)


If you have not visited either challenge site yet, I encourage you to do so- marvelous inspiration from all!


Using the instructions from the video, score a 12x12 piece of Night of Navy cardstock (I used a retired textured piece from my stash)- score at 3”, 6” and 9”, turn and score at 4” and 8”.

Using the Stampin’ Up! Paper Trimmer, trim on the 3” and 6” score  lines to the 4” score line.

Turn the paper and trim along the uncut side of the paper along the 4” score line to the 9” score (again, using Ginger Ropp’s video instruction).

Fold the 3” and 6” trimmed score panels as directed on the video and complete the photo folio per the video instructions – I found that it was a bit easier to also add an additional score line of approx. 1/8” or so, to the left of the first 3” score line to allow for the bulk.

Decorate the panels as you desire…  fyi- I did a few strips of designer paper on some of the panels and adhered on the two sides only to allow a photo or other panel to be inserted under the strip...  this is what I love about this mini book- it can be decorated in any way you choose :-)

To decorate the panels:

Cover: Add the piece of lace onto the front cover and mount the red grosgrain ribbon (I used ribbon from my stash and wrapped the ribbon around the album adhering with Scor Tape®). 

Adhere the 2 ¾” x 3 ¾” piece of striped paper from the Authentique® Pride Collection over the ribbon and lace.
Add the scrap piece of textured Night of Navy cardstock  (approx. ¼” x 3 ¾”) over the edge of the lace.

Add the two scrap pieces of red starred patterned paper to the sides.
Stamp the flag image from the Our Daily Bread Designs (ODBD) Old Flag Background using Stāz-On® Jet Black Ink and color with an AquaPainter™ using Night of Navy and retired Poppy Parade Classic Ink (I used Poppy Parade versus Real Red to match the paper).

Trim a portion of the background (save the rest for another project) and stamp the Gorgeous Grunge large splatter stamp using Ranger® Tim Holtz® Tea Dye Distress Ink.

Sponge Ranger® Tim Holtz® Old Paper Distress Ink over the entire image to antique the paper.

Mount onto a piece of Night of Navy cardstock, trim again and mount onto a piece of Poppy Parade cardstock. 

Stamp the sentiment from Land of the Free (ODBD) using Stāz-On® Jet Black Ink and color with Stampin’ Write  Markers- Night of Navy and retired Poppy Parade (I used Poppy Parade versus Real Red to match the paper).

Trim the sentiment, distress with the same inks as the Old Flag background panel, mount onto a piece of Night of Navy cardstock, trim again and mount onto a piece of Poppy Parade cardstock. 

Add the scrap pieces of the star pattern paper and insert the pewter brads.
Mount the sentiment to the focal image panel and adhere the entire panel to the front cover.

Behind the front cover:  Mount the 2 ¾” x 3 ¾” red music panel from the Authentique® Pride Collection to the back of the front cover.

Stamp the image from Not Forgotten (ODBD) using using Stāz-On® Jet Black Ink onto a piece of Whisper White cardstock and color with the AquaPainter™ with Night of Navy and Poppy Parade Classic Ink adding shadows using the Sahara Sand Stampin’ Write Marker.

Trim and mount onto Night of Navy cardstock, trim and mount onto Poppy Parade cardstock and distress the panel by sponging Ranger® Tim Holtz® Old Paper Distress Ink over the edges and image.

Mount the focal image to the panel.

Balance of pages:  Mount the 2 ¾” x 3 ¾” pieces of the Authentique® Pride Collection to the “pages” or panels.

Using scrap strips of the papers, adhere to the edges only to create the straps to hold photos or business size cards (I plan to use some of these albums for Bible Verse memorization by printing the verses on business size cardstock).

I did add one sentiment on the opposite “page” from the Not Forgotten image using the verse from the same stamp set (colored with Stampin’ Write markers and “antiqued” with Ranger® Tim Holtz® Old Paper Distress Ink, cut out with the Big Shot™ and the Chalk Talk Collection Framelits™ and mounted onto an additional Chalk Talk frame from Night of Navy and Poppy Parade cardstock).

The entire album takes a few hours to create, but again, fair warning, they are very addictive!
Stamp Sets: Old Flag Background, Land of the Free, Not Forgotten (all Our Daily Bread Designs), Gorgeous Grunge (Stampin’ Up!)
Ink:  Stāz-On® Jet Black Ink, Night of Navy and retired Poppy Parade Classic Ink, Stampin’ Write Markers- Night of Navy, Sahara Sand and retired Poppy Parade; Ranger© Tim Holtz® Tea Dye and Old Paper Distress Ink
Paper/Cardstock:  Whisper White, Night of Navy Textured (12x12), Night of Navy Smooth, retired Poppy Parade, Authentique® Pride Collection
Accessories:  Big Shot™, Chalk Talk Framelits™, Sponge Dauber, Pewter Brads, lace and grosgrain ribbon from my stash

Thanks again for stopping by- I hope all of you have a wonderful weekend!

Friday, June 12, 2015

Masculine Praying for You- Prayers for a Dear Friend


Hi Stampers!!

This week’s PP248 Paper Players Theme is "Masculine", so I wanted to share a card that I created for a dear friend that is experiencing pain with some undiagnosed health issues.

I also incorporated the Splitcoaststampers’ CC526 Color Challenge (see details here and gallery here) and SC534 Sketch Challenge (see details here and gallery here).

We are praying that the doctors will be able to identify the source of the pain and be  able to give him some relief.

Again, if you have not already done so, I hope you will find the time to visit the above sites to check out the wonderful Design Team samples as well as the galleries!

To create this card:

Stamp the Geese and Trees (Impression  Obsession®) focal image using Stāz-On® Jet Black Ink onto Whisper White cardstock.

 Using an AquaPainter™, apply Tempting Turquiose, Rose Red and Island Indigo Classic Ink to the sky area (brushing some across the moon to resemble clouds).

Use a Faber-Castell® Pitt Pen Black Marker to darken the branches (and fill in the “snow” that is on the branches from the original image- the pointellism in the background is part of the stamp :-)).  

Apply a bit of gray to the geese with a Stampin’ Up! retired watercolor pencil.

Trim the image and mount onto a piece of Basic Black cardstock.

Use the Crimper Tool to crimp a piece of retired Designer Series Paper (DSP)  and distress the edges with the Distressing Tool.

Tear the bottom and roll up by hand- distressing with your fingernail, adhere the distressed panel onto a piece of Basic Black cardstock, trim the panel again and mount onto the Whisper White card base.

Add the focal image panel using Stampin’ Dimensionals®.

Stamp the sentiment from My Favorite Things® Sympathy using Stāz-On® Jet Black Ink onto Whisper White cardstock, create the banner points with the Hexagon Punch and mount onto a piece of Basic Black cardstock (creating matching banner points with the Hexagon Punch as well).

Ink the large splatter stamp from Gorgeous Grunge using Stāz-On® Jet Black Ink, stamp off onto a scrap piece of paper and stamp onto the sentiment.

Use the AquaPainter™ to apply diluted Tempting Turquoise over the sentiment and mount the sentiment using Stampin’ Dimensionals® to finish off the card.

Stamp Sets: Gorgeous Grunge, Geese and Trees (I/O), Sympathy (MFT)

Ink: Stāz-On® Jet Black, Classic Ink- Tempting Turquoise, Rose Red, Island Indigo; Faber-Castell® Black Pitt Pen Marker, Stampin’ Up! Gray Watercolor Pencil

Paper: Whisper White, Basic Black, retired World Spectacular DSP
Accessories: Crimper Tool, Distressing Tool, AquaPainter™, Hexagon Punch  


Thanks again for visiting- have a wonderful weekend, my friends!
Related Posts Plugin for WordPress, Blogger...