Wednesday, March 23, 2016

John 3:16 For God So Loved the World


Hi Friends!

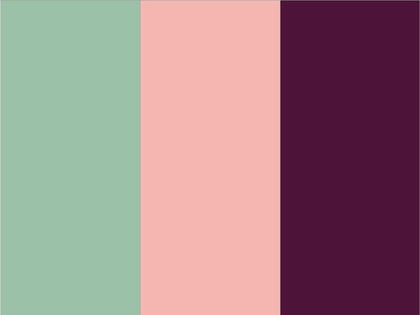
I had a chance to spend some time stamping this evening and decided to create a card using Friday Mashup! FM245 Easter or Sketch Theme Challenge (sadly this will be their final challenge) along with the Splitcoaststampers CC575 Color Challenge and the Word Art Wednesday #222/223 “Anything Goes” Challenge.

I love this verse- the Gospel Message in one verse and perfect for Easter :-)
If you have not had a chance to visit the above galleries yet, I hope you will find the time to do so- wonderful Design Team samples and inspiration from all!

To create this card:

Ink the Our Daily Bread Designs (ODBD) Chalkboard John’s stamp with Blackberry Bliss Classic Ink and stamp onto a piece of Whisper White cardstock.

Trim the image, mount onto Blushing Bride cardstock, trim and mount onto Mint Macaron cardstock, trim and mount onto Blackberry Bliss cardstock.

It is difficult to photograph Blackberry Bliss- the card looks better in real life :-)
Use the Big Shot™ along with the retired Lacy Brocade Textured Impressions™ Embossing Folder to emboss a piece of retired Blushing Bride Designer Series Paper (DSP).

Lightly sand the embossed DSP, trim and mount onto a piece of Mint Macaron cardstock, trim again and mount onto a piece of Blackberry Bliss cardstock.

Emboss a scrap piece of Mint Macaron cardstock with the Lacy Brocade Textured Impressions™ Embossing Folder, adhere to the card front, add the strips of 3/8” Blackberry Bliss Stitched Satin Ribbon (retired) and the strips of Pearls.

Mount the entire panel onto the 5 ½” square Whisper White card base.

Ink the Boho Cross (ODBD) image using Stāz-On® Jet Black Ink and stamp onto a piece of Whisper White cardstock.

Color the Boho Cross using Stampin’ Write Markers- Blushing Bride, Blackberry Bliss and Mint Macaron, fussy-cut the cross and use a Basic Black marker to darken the edges.

Use a paint brush to apply Ranger® Tim Holtz® Crazing Distress Medium to the cross.

Mount the focal image panel to the card front using dimensional foam, add the 3/8” Blackberry Bliss triple Stitched Satin Ribbon bow and add Pearls to the corners of the card.

Mount the cross with dimensional foam and add the Pearl to the center to finish off the card.

Stamp Sets: Chalkboard John’s, Boho Cross (both Our Daily Bread Designs)

Ink: Stāz-On® Jet Black, Blackberry Bliss, Stampin’ Write Markers- Blackberry Bliss, Blushing Bride, Mint Macaron

Paper: Whisper White, Blackberry Bliss, Blushing Bride, Mint Macaron, retired Blushing Bride DSP

Accessories: Big Shot™, retired Lacy Brocade Textured Impressions™ Embossing Folder, 3/8” Blackberry Bliss Stitched Satin Ribbon, Pearls, Ranger® Tim Holtz® Crazing Distress Medium, Sanding Block

Thanks again for taking the time to visit- I hope you have a wonderful Easter Week and Resurrection Sunday!!


Tuesday, March 22, 2016

Trust God- A Monochromatic Color, Sketch and Tic-Tac-Toe Challenge


Hi Friends!

I had a chance to spend some time stamping this morning and decided to create a card using the Pals Paper Arts PPA292 Sketch Challenge along with the Papercraft Crew PCCC186 Tic-Tac-Toe Challenge (Flowers, Feminine and Embossing Folder) and the monochromatic Watercooler WWC59 Color Challenge (although I am too late to link to the challenge).

If you have not had a chance to visit the above galleries yet, I hope you will find the time to do so- wonderful Design Team samples and inspiration from all!

To create this card:

To create the central upper background panel, ink the Timeless Texture stamps using Mint Macaron, Mossy Meadow and Cucumber Crush Classic Ink.

Ink the Watercolor Wash background stamp using Wild Wasabi Classic Ink, brayer the ink over the background stamp and transfer the ink from the brayer to the background panel.

Trim the panel, use the retired Distressing Tool to distress the edges, mount onto a piece of Mint Macaron cardstock, trim and mount onto Mossy Meadow cardstock and distress the edges again using the Distressing Tool.

Mount a piece of Whisper White cardstock (approx.4” x 3”) onto a piece of Mint Macaron cardstock and add a distressed/ embossed piece of retired Wild Wasabi Designer Series Paper (DSP) to the lower part of the Mint Macaron card front (embossed with the Boho Chic Textured Impressions™ Embossing Folder).

Add a ½ White Lace Paper Doily and a strip of Mint Macaron mounted onto Mossy Meadow cardstock (embossed with the Woodgrain Textured Impressions™ Embossing Folder).

Cut a strip from the Timeless Textures stamped panel (created in the first step) and create the banner using the Hexagon Punch.

Ink the sentiment from Trust God, flowers from Petite Petals and butterflies from Papillon Potpourri using Stāz-On® Jet Black Ink and stamp onto Whisper White cardstock.

Use the Elegant Butterfly Punch to punch out the butterflies, fussy-cut the flowers and use the Tags and Labels Framelits™ to cut out the sentiment (also cut a label from Mossy Meadow cardstock).

Cut the Mossy Meadow label in half and mount behind the sentiment.
Watercolor the center of the flowers with Wild Wasabi Classic Ink and apply a Mint Macaron wash to the flower petals and butterflies.

Add the sentiment to the card front, adhere the flowers and butterflies (along with leaves created from the Bird Builder Punch and Cucumber Crush cardstock).

Add Pearls to the center of the butterflies and the upper left and lower right hand corners to finish off the card.

Stamp Sets: Trust God, Papillon Potpourri, Petite Petals, Timeless Textures, Watercolor Wash

Ink: Stāz-On® Jet Black, Cucumber Crush, Mossy Meadow, Mint Macaron, Wild Wasabi

Paper: Whisper White, Cucumber Crush, Mint Macaron, Mossy Meadow

Accessories: Big Shot™, Woodgrain Textured Impressions™ Embossing Folder, Tag and Labels Framelits™, Punches- Hexagon, Bird Builder; AquaPainter™, White Tea Lace Paper Doily, Pearls, Brayer, retired Distressing Tool


Thanks again for taking the time to visit- I hope you have a fabulous Easter Week!!

Monday, March 21, 2016

Bear Hugs- Wishing You A Lake Full of Fish

Hi Again Friends!

Here is another card that I created this past weekend using a brand new stamp set from the Stampin’ Up! Occasions Mini, Bear Hugs along with the coordinating Bear Hugs Framelits™ and a few of my favorite online stamping challenges.


If you have not had a chance to visit the above galleries yet, I hope you will find the time to do so- wonderful Design Team samples and inspiration from all!

This card was fun and easy to create:

Ink the sentiment, large bear and three of the fish images from Bear Hugs using Stāz-On® Jet Black Ink and stamp onto Whisper White cardstock. 

Using an AquaPainter™ with Soft Suede Classic Ink, color the bear and lightly color the fish, add Mossy Meadow along with Watermelon Wonder to the three fish.

Trim the sentiment and create the banner points with the Hexagon Punch, mount onto Mossy Meadow cardstock and punch the ends with the Hexagon Punch as well.

Use the Big Shot™ with coordinating Bear Hugs Framelits™ to cut out the bear and the three fish.

Create a rope from Natural Linen Thread and adhere the three fish to the “line”.

Emboss a piece of Whisper White cardstock with the Arrows Textured Impressions™ Embossing Folder, a scrap piece of Watermelon Wonder and Soft Suede with the Woodgrain Textured Impressions™ Embossing Folder and a small rectangle piece of Whisper White cardstock with the Zig Zag Textured Impressions™ Embossing Folder.

Trim and mount the rectangular piece of embossed Whisper White cardstock to a piece of Mossy Meadow cardstock, wrap a few strands of Natural Linen Thread around the panel and set aside.

Add the strips of Woodgrain embossed Watermelon Wonder and Soft Suede cardstock with a stapler to the embossed Arrows Whisper White panel, trim and mount onto a piece of Mossy Meadow cardstock and adhere the entire background panel onto the Watermelon Wonder card base.

Add the Zig Zag embossed rectangle along with the sentiment using Stampin’ Dimensionals®, add the line of fish to the bear and mount the bear to the card front with Stampin’ Dimensionals® to finish off the card.

Stamp Sets: Bear Hugs

Ink: Stāz-On® Jet Black, Soft Suede, Mossy Meadow, Watermelon Wonder

Paper: Whisper White, , Soft Suede, Mossy Meadow, Watermelon Wonder

Accessories: Big Shot™, Arrow, Woodgrain and Zig Zag Textured Impressions™ Embossing Folders, Bear Hugs Framelits™, Stapler, Natural Linen Thread, Hexagon Punch


Thanks again for taking the time to visit- I hope you have a wonderful Easter Week!!

CAS Spring Bunny Retreat


Hi Friends!

I hope all of you are having a marvelous Monday!  I had a chance to create a few cards this weekend and will be sharing over the next few days.


If you have not had a chance to visit the above galleries yet, I hope you will find the time to do so- fabulous inspiration from all!

This card was very easy to create:

Ink the Bunny Retreat image from Inkadinkado® using Stāz-On® Jet Black Ink onto Whisper White cardstock and color the images using an AquaPainter™ with Crumb Cake, Sahara Sand and Crisp Cantaloupe (retired) Classic Ink along with colored pencils to define some of the shadows and fur.

Stamp the verse from the Our Daily Bread Designs (ODBD) Scripture Collection 2 with Stāz-On® Jet Black Ink below the rabbit image and use a Sponge Dauber with Crisp Cantaloupe Classic Ink (retired) with the Mini Punchenella stencil by Balzar Designs® to stencil the dots.

Use the Big Shot™ with the My Favorite Things™ (MFT) Blueprints 20 Die to cut the panel into a rectangle, layer the cut panel onto a piece of Basic Black cardstock and trim the edges.

Emboss a piece of Crumb Cake cardstock with the Woodgrain Textured Impressions™ Embossing Folder, trim and mount onto a piece of Basic Black cardstock.
Original version without the stenciling 

Add a piece of 1” Black Satin Ribbon across the embossed background, add the ¼” Peach Satin Ribbon and mount the background panel onto the Whisper White card base.

Mount the bunny image panel onto the card front using dimensional foam to finish off the card.

Stamp Sets: Bunny Retreat (Inkadinkado®), Scripture Collection 2 (ODBD)

Ink: Stāz-On® Jet Black, Crumb Cake, Sahara Sand, Crisp Cantaloupe (retired)

Paper: Whisper White, Basic Black, Crumb Cake

Accessories: Big Shot™, MFT Blueprints 20 Dies, Woodgrain Textured Impressions™ Embossing Folder, Sponge Dauber, 1” Black Satin Ribbon and ¼” Peach Satin Ribbon (from my stash), Colored Pencils- various manufacturers


Thanks again for taking the time to visit- hugs and have a wonderful week, my friends!

Saturday, March 19, 2016

Friendship Never Melts Away

Hi Friends!

Today I am sharing my Mixed Media card on the  Artistic Outpost blog and decided to highlight the gorgeous Skating Emporium stamp set.


I hope you will take the time to visit the Artistic Outpost Blog as well as the galleries for the challenge sites linked above.

To create this card:

Using the Memory Box™ Winter Flurry Frame, apply Crackle Texture Paste with a palette knife onto a piece of Very Vanilla cardstock.

Once the embossing paste has dried (I carefully used a Heat Tool to speed up the process), apply Ranger® Tim Holtz® Old Paper and Tea Dye Distress Stain to the background (again, drying with the Heat Tool).

Spritz Champagne Mist Shimmer Paint (Champagne Mist Shimmer Paint mixed in a spritzer bottle with rubbing alcohol) over the entire panel.

Stamp the three images from Skating Emporium (the skaters on the lake along with the two Central Park advertisements) using Stāz-On® Jet Black Ink onto a piece of OurDaily Bread Designs Vintage Ephemera 6x6 Paper.

Trim the images and apply Ranger® Tim Holtz® Tea Dye Distress Ink to the images, position the two advertisement panels onto the background and adhere using Ranger® Tim Holtz® Crazing Distress Medium.

Use a zigzag stitch to attach the background panel onto a piece of Basic Black cardstock.

Adhere the skaters on the lake image onto a piece of Basic Black cardstock and apply Ranger® Tim Holtz® Crazing Distress Medium over the panel.

De-static  a piece of Basic Black cardstock with the Embossing Buddy®, stamp the sentiment with Versamark™ Ink, apply Stampin’ Emboss® Winter White Embossing Powder heat with the Heat Tool and apply the embossing to dry.

Cut the sentiment apart by hand and mount the skaters on the lake image along with the sentiment onto the card front using dimensional foam.

Add the snowflake charm with Gold Thread and add a Pearl to the center of the charm.

Mount the entire panel onto the card base, using a Sponge Dauber with Ranger® Tim Holtz® Tea Dye Distress Ink to the edges.

Stamp the skate image onto Very Vanilla cardstock using Stāz-On® Jet Black Ink, fussy cut the image, apply Ranger® Tim Holtz® Tea Dye Distress Ink with a Sponge Dauber and add Ranger® Tim Holtz® Crazing Distress Medium over the image.

Add the skates to the card front to finish off the card.

Stamp Sets: SkatingEmporium (Artistic Outpost)

Ink: Versamark™, Stāz-On® Jet Black; Ranger® Tim Holtz® Old Paper and Tea Dye Distress Stains, Tea Dye Distress Ink, Champagne Mist Shimmer Paint Spray

Paper: Very Vanilla, Basic Black; Vintage Ephemera 6x6 Paper Collection (ODBD)

Accessories: MB Winter Flurry Frame Stencil, Ranger® Tim Holtz® Crazing Distress Medium , Embossing Buddy®, Heat Tool, retired Stampin’ Emboss® Winter White Embossing Powder, Pearls, Snowflake Charm, Gold Thread


Thanks again for stopping by- hugs and I hope all of you have a fabulous weekend!

Thursday, March 17, 2016

Choose Faith- Count It All Joy


Happy St. Patrick’s Day, Friends!

I wanted to create a card using green for St. Patrick’s Day (after all. I do have Irish in my blood :-)) and decided to give myself a real challenge and create a one layer card.  

That’s right- just fold a piece of cardstock in half and stamp onto the card front for a one layer card.   I know that this should sound easy enough to do but for a gal that loves vintage, shabby, layers, textures and embellishments, it is easier said than done :-)

Shhh...here's a secret- this card also has a sneak peek with the sentiments from the upcoming Creative Worship Choose Faith clear stamp set (Sweet ‘n Sassy Stamps) :-)  I combined the sentiments from Choose Faith to create the hope, faith, joy along the stems as well as the main sentiment "count it all JOY".  

This is from James 1:2 "My brethren, count it all joy when you fall into various trials"...and it continues in verse 3 "knowing that the testing of your faith produces patience"...

Joy in all things is something that I have to continually remind myself as well as remember that the trials are for testing of my faith and helping to produce patience... something that I know I need to work on in my life- how about you?

I am looking forward to the release of the Choose Faith stamp set- I know you will love all of the sentiments and fonts!  It is perfect for Bible Art Journaling as well as card making and I paired it with two other clear stamp sets from Sweet ‘n Sassy Stamps (SNSS)- Precious Poppies and Grunge Elements.

I found that this month’s One LayerSimplicity “Let Green March In” Challenge to be very inspiring for my one layer card and am also participating in the Splitcoaststampers’ CAS366 “GlitterySentiments” Challenge (hard to see in the photo but the large JOY has Clear Wink of Stella® over the letters) as well as the Two Paper Diva’s March Tic-Tac-Toe Monthly Challenge (Green, Stamps, Flowers).

I hope you will have a chance to check out the galleries at the above challenge sites- tremendous inspiration from all!

To create this card:

See- it really is only one layer :-)
Using a MISTI® tool, position the poppy image from Precious Poppies (I cut this image apart from the largest group of poppies in the set) along with the sentiments and words from Choose Faith, ink with the Basic Black Archival Stampin’ Pad™ and stamp onto retired Naturals White cardstock (I scored the card panel and stamped directly onto the folded card).

Create a mask for the poppy flowers using scrap paper (or sticky note/masking paper) and position over the petals and stems.
Using Sponge Daubers, ink Pear Pizzazz, Wild Wasabi and retired Gumball Green Classic Ink over the Heartwood Stencil by Memory Box®. 

Remove the stencil and the masks, color the stems with the Wild Wasabi Stampin’ Write Marker, add dots between the hope, faith and joy sentiment along the stems using a Faber-Castell® Black Bold Pitt Pen marker and color the petals with the Smoky Slate Stampin’ Write marker.

Hard to see but the sentiment is glittery :-)
Use an AquaPainter™ to soften the coloring on the petals and add Clear Wink of Stella® to the petals as well as the large “JOY” in the sentiment.

Ink one of the inkblot images from Grunge Elements with Pear Pizzazz Classic Ink and stamp a few times onto the card front to finish off the card.

Quick and easy...I will count it all joy :-) !

Stamp Sets:  Choose Faith, Precious Poppies, Grunge Elements (Sweet ‘n Sassy Stamps)

Ink: Basic Black Archival Stampin’  Pad™, Pear Pizzazz, Wild Wasabi, retired Gumball Green, Stampin’ Write Markers- Wild Wasabi, Smoky Slate; Faber-Castell® Black Pitt Pen Marker, Clear Wink of Stella®

Paper: Naturals White (retired)

Accessories:  Sponge Daubers, Memory Box® Heartwood Stencil, MISTI®


Thanks again for taking the time to stop by- hugs and have a blessed week, my friends!

Wednesday, March 16, 2016

TCC51 Mixed Media- His Grace Is Sufficient For You


Hi Friends!!

It’s time for new The Card Concept #TCC51 "Naturally Pink" Inspiration Challenge!  I took inspiration from the colors of the eggs as well as the texture of the wood and nest for my Mixed Media card.

Just a reminder that The Card Concept is a bi-weekly challenge that has an inspiration photo along with a number of design styles that you can choose from to create your card- Clean and Simple, Clean and Graphic, Clean and Layered, Shabby Chic, Freestyle Collage, Classy and Elegant and Mixed Media.  


 I hope you have a chance to visit us at The Card Concept and check out the rest of our Design Team samples as well as the other challenge sites- wonderful inspiration from all!!

To create this card:

Use the Big Shot™ with the Woodgrain Textured Impressions™ Embossing Folder to emboss a piece of Whisper White cardstock, trim the panel and mount onto the Early Espresso card base.

Using a Sponge Dauber with the Balzar Designs® Mini Punchenella Stencil and sponge Melon Mambo along with Blushing Bride Classic Ink onto a piece of retired Designer Series Paper (DSP).

De-static the DSP Panel with the Embossing Buddy®, ink the retired Favorite Frame stamp with Versamark™ Ink and stamp onto the stenciled panel, apply Stampin’ Emboss® White Embossing Powder and heat set with the Heat Tool.

Close-up of Crackled Texture Paste & Stenciling
Use the Balzar Designs® Mini Punchenella Stencil and apply Studio 490 Wendy Vecchi® Crackled Texture Paste with a palette knife, allow the paste to dry, distress the edges, hand tear the opposite corners of the panel and mount the panel to the card front.

Ink the Butterfly with Bird Nest stamp from Inkadinkado® with Stāz-On® Jet Black Ink and stamp onto Whisper White cardstock.
Color the image with Stampin’ Write Markers and use an AquaPainter™ to soften the edges.

Fussy-cut out the image, add Clear Wink of Stella® to the butterfly wings and eggs mand mount the image to the card front with dimensional foam.

Stamp the sentiment from the Our Daily Bread Designs retired set, Grow in Grace with Stāz-On® Jet Black Ink and stamp onto Whisper White cardstock, create the banner with the Hexagon Punch, add the Silver Thread to the card front and mount the sentiment over the thread with dimensional foam.

Add a few Pearls to the flower centers to finish off the card.

Stamp Sets: Favorite Frame (retired Stampin’ Up!), Butterfly with Bird Nest (Inkadinkado™), Grow In Grace (retired Our Daily Bread Designs)

Ink: Stāz-On® Jet Black; Stampin Write Marker- Blushing Bride, Crumb Cake, Crushed Curry, Daffodil Delight, Early Espresso, Pink Pirouette, Sahara Sand, Soft Sky, Wild Wasabi

Paper: Whisper White, Early Espresso, retired  Stampin’ Up! DSP

Accessories: Big Shot™, Woodgrain Textured Impressions™ Embossing Folder, Embossing Buddy®, Stampin’ Emboss® White Embossing Powder, Heat Tool, Distressing Tool, Mini Punchenella Stencil, Crackled Texture Paste, AquaPainter™, Silver Thread,  Pearls


Thanks again for taking the time to visit- I hope you can gather your supplies and pick a style to create your own card for our gallery at The Card Concept!

Tuesday, March 15, 2016

SUO144 Blooms for Spring


Hi Friends!   

It’s time for the SUO144 “Welcome Spring” Challenge and I decided to combine a few stamp sets to create my floral card (definite sign of spring for me are spring flowers).


I hope you will have a chance to check out my sister DesignTeam member samples at the SU-Only Challenge site as well as the fantastic Design Team samples and gallery at the other galleries- wonderful inspiration from all!


To create this card:

Ink the blossom image from Birthday Blooms using Stāz-On® Jet Black Ink and stamp onto Whisper White cardstock.

Original version
Color the flower using Wisteria Wonder and Wild Wasabi Stampin’ Write Markers softening the edges with the AquaPainter™, fussy cut the bloom and set aside.

Ink the Timeless Textures scroll image using Wisteria Wonder Classic Ink , stamp off onto a piece of Whisper White cardstock and stamp the large splatter stamp from Gorgeous Grunge using Pool Party Classic Ink.

Ink the sentiment from Trust God with Stāz-On® Jet Black Ink  and stamp onto the upper left hand corner of the panel.

Ink the grid stamp from Timeless Textures stamp set using Pool Party Classic Ink and repeatedly stamp onto a piece of Pool Party cardstock, ink the small splatter stamp from Timeless Textures using Wisteria Wonder Classic Ink, repeatedly stamp over the panel, cut the panel on an angle and add to the Whisper White stamped panel.
Stepped up version

Trim the panel, mount onto a piece of Wisteria Wonder cardstock and add the ½ White Tea Lace Paper Doily along with a strip of Wisteria Wonder cardstock and ¼” Pool Party Stitched Satin Ribbon over the seam.

Add the entire panel to the Basic Black card base, adhere the strips of Pearls over the ribbon and add the Pearls to the corners to finish off the card.

Stamp Sets:  Birthday Blooms, Timeless Textures, Trust God, Gorgeous Grunge

Ink:  Stāz-On® Jet Black, Pool Party, Wisteria Wonder; Stampin’ Write Markers- Wisteria Wonder, Wild Wasabi
Paper/Cardstock: Whisper White, Pool Party, Wisteria Wonder, Basic Black
Accessories: White Tea Lace Paper Doily, Pearls

Thanks again for stopping by and we hope to see your Stampin’ Up! Only project in our “Welcome Spring” Challenge gallery!
Related Posts Plugin for WordPress, Blogger...