Tuesday, June 11, 2024

Admired, Respected, Loved


Hi Friends!

I am having fun this week creating cards using some of my older retired stamp sets, paper and ribbons.

With Father's Day approaching, I wanted to create a few masculine cards and decided to combine two retired stamp sets from Stampin’ Up!- the moose image from the Walk in the Wild set and the sentiment is from The Wilderness Awaits.

I enjoy playing along with online challenges and will be linking this card to The Male Room #187 “Ribbon or Twine” Challenge,  the C.R.A.F.T. #722 “Masculine” Challenge and the Simon Says Wednesday “Masculine” Challenge.  

 If you have not had a chance to visit the above challenge sites yet,  I hope you will find time to do so- fabulous inspiration from all!


To create this card:

Heat emboss the moose image as well as the sentiment using Versafine Onyx Black ink and clear embossing powder.

Once the embossing for the moose image has cooled, watercolor the moose image using distress oxide inks and die cut with a stitched square die.

Mount the die cut square onto a piece of black cardstock and trim close to the die cut.

Die cut the sentiment with a fishtail banner die (die cut two additional fishtail banners from black cardstock and layer behind the embossed sentiment).

Emboss a piece of woodgrain designer paper (approx.4” x 3 ½”) with a woodgrain embossing folder and distress the edges.


Adhere the embossed panel onto a piece of black cardstock.

Trim a piece of designer paper to approx. 4” x 2 ¾” and adhere to the lower portion of the panel.

Add a strip of 1” black grosgrain ribbon to the card panel, wrap the ends behind the panel before adhering to a white card base.

Add a few pieces of looped green satin ribbon to the right hand side of the layered moose image.

Adhere the moose and sentiment to the card front using dimensional foam to finish off the card.

Stamp Sets: The Wilderness Awaits, Walk in the Wild (both retired Stampin; Up!)

Ink/Mediums: Versafine Onyx Black. Tim Holtz Distress Oxide- Broken China, Brushed Corduroy, Ground Espresso, Mowed Lawn

Cardstock/Paper: White, Black, misc. Woodgrain and Green Designer Paper (not sure of the manufacturer)

Accessories/Tools: Gemini, Jr, MFT Stitched Square Dies, Fishtail Sentiment Banners Dies (Stamp Simply), Woodgrain Embossing Folder (retired SU!). Embossing Powder Tool, Clear Embossing Powder, Heat Tool, Distressing Tool, 3/8” Green Satin and 1” Black Grosgrain Ribbon (from my stash)

Thanks again for taking the time to visit- I hope all of you have a blessed week!

Saturday, June 8, 2024

Stamp Simply May 2024 Release- Mackinac Bridge Troubling Waters


Hi Friends!

Today, I am sharing a card designed using the brand new release stamp set, the Mackinac Bridge Bundle which is part of the Masculine/Nautical Great Lakes Series Release from Stamp Simply


There were two stamp bundles in this new release and both of the new stamp bundles, the Great Lakes Freighter- The Edmund Fitzgerald Bundle and the Mackinac Bridge Bundle- are perfect for all occasions!


To create this card:

De-static a piece of white cardstock with an embossing powder tool, ink bridge image from the Mackinac Bridge Bundle- using Versafine Onyx Black ink, stamp onto the prepared panel, apply clear embossing powder and heat set with a heat tool.


Color the bridge image with water-based markers.

Use the coordinating die from the Mackinac Bridge Bundle to die cut the bridge image and die cut an additional bridge from white cardstock to layer behind the stamped/colored image.

Trim a piece of white cardstock to approx. 2 ½” to 5” and using Tumbled Glass Distress Oxide ink and a stencil brush, apply ink over the “sky” area.


Using the cloud dies from the Mackinac Bridge Bundle,  die cut a few clouds.

Layer the cloud pieces onto the sky area and mount the panel onto a 4 ⅛: x 5 ⅛” piece of white cardstock.

Dry emboss a piece of approx 2 ½” x 5” piece of white cardstock with the Mechanics 3D Embossing Folder, attach to the white cardstock from the step above.

De-static a piece of white cardstock with an embossing powder tool, ink the verse sentiment from the Mackinac Bridge Bundle with Versafine Onyx Black ink, apply clear embossing powder and once cooled, trim to size before mounting onto blue cardstock.

Mount onto the card front and layer a piece of blue seam binding over the rough cut edges (wrapping the ends behind the panel) and mount the panel onto a piece of blue cardstock. 

Trim and mount onto a white card base.

Add the die cut Mackinac Bridge image onto the card front using dimensional foam to finish off the card.

If you have not had a chance to check out the rest of my Sister Design Team cards on the Stamp Simply blog, I hope you take the time to do so- fabulous inspiration from all!!

Stamp Sets: Mackinac Bridge Bundle (Stamp Simply)

Ink/Mediums: Versafine Black Onyx,Stampin’ Up!- Granny Apple Green,  Pool Party, Brilliant Blue; Tim Holtz Distress Oxide- Tumbled Glass

Cardstock/Paper: White, Blue

Accessories/Tools:  Gemini, Jr., Mackinac Bridge BundleSizzix 3D Texture Fades A6 Embossing Folder- MechanicsEmbossing Powder Tool, Heat Tool, Clear Embossing Powder, Seam Binding Sampler- Blues Purples

Don’t forget to stop by and check out the current specials at Stamp Simply!

Thanks again for visiting and I hope you have a wonderful week! 


Saturday, June 1, 2024

Stamp Simply May 2024 New Release- Edmund Fitzgerald


Hi Friends!

Today, I am sharing a card designed using the brand new release stamp set, The Great Lakes Freighter- Edmund Fitzgerald Bundle which is part of the Masculine/Nautical Great Lakes Series Release from Stamp Simply


I love both of the new stamp bundles in this release, the Great Lakes Freighter- The Edmund Fitzgerald Bundle and the Mackinac Bridge Bundle- love the fonts used as well as the sentiments are perfect for all occasions!


To create this card:

De-static a piece of the Ocean Ink Drops 6x6 paper (approx 4” x 3 ½ ”) with an embossing powder tool, ink the sentiment from The Great Lakes Freighter- The Edmund Fitzgerald using Versamark ink, apply white embossing powder and heat set with a heat tool.


Using Tumbled Glass Distress Oxide ink and a stencil brush, apply ink over a 3” x 4” piece of white cardstock (to resemble clouds- this is hard to see in the photo).  Heat set the ink with a heat tool.

Layer the cloud piece onto a 4 ¼” x 5 ½” piece of black cardstock and add the embossed Ocean layer onto the bottom.

Adhere the white scalloped trim over the raw edges of the layers and add the blue seam binding (wrapping the ends of the seam binding to the back of the panel).


Mount the entire panel onto a white card base.

Add a strip of the Ocean designer paper to the inside of the card.

De-static a piece of white cardstock with an embossing powder tool, ink the ship image from The Great Lakes Freighter-The Edmund Fitzgerald with Versafine Onyx Black ink, stamp onto the prepared panel, apply clear embossing powder and heat set with a heat tool.

Water color the image with water-based markers and die cut with the coordinating die (also die-cutting an additional ship from white cardstock to layer behind the colored image).

Mount the ship image to the card front with dimensional foam to finish off the card.

I enjoy playing along with online challenges and will be linking this card to the Word Art Wednesday #649-#650 "Anything Goes" Challenge (link here).

If you have not had a chance to check out the rest of my Sister Design Team cards on the Stamp Simply blog, I hope you take the time to do so- gorgeous inspiration from all!!

Stamp Sets: The Great Lakes Freighter- Edmund Fitzgerald Bundle (Stamp Simply)

Ink/Mediums: Versafine Black Onyx, Versamark Watermark Stamp Pad, Stampin’ Up!-Early Espresso, Soft Suede, Smoky Slate, Pool Party, Brilliant Blue; Tim Holtz Distress Oxide- Tumbled Glass

Cardstock/Paper: White, Black; Craft Consortium Ink Drops- Ocean 6x6 

Accessories/Tools:  Gemini, Jr., The Great Lakes Freighter- Edmund Fitzgerald Bundle, Embossing Powder Tool, Heat Tool, White and Clear Embossing Powder, May Arts Coffee & Tea Ribbon Sampler- 10 yards, Seam Binding Sampler- Blues Purples


Don’t forget to stop by and check out the current specials at Stamp Simply!


Thanks again for visiting and I hope you have a wonderful week! 


Saturday, May 25, 2024

Stamp Simply May 2024 New Release- Eucalyptus Silhouettes


Hi Friends!

Today, I am sharing a very card designed using the brand new release stamp set, Eucalyptus Silhouettes from Stamp Simply (this set also has a coordinating die set and comes as a bundle). 


Sometimes you need to a quick sympathy card and this one was very easy to create:


Using Tumbled Glass Distress Oxide ink and a stencil brush, apply ink over a 4 ¼” x 5 ½” piece of white cardstock (to resemble clouds- this is hard to see in the photo).  Heat set the ink with a heat tool.

Ink the Eucalyptus Silhouette images using a variety of green inks and stamp onto a piece of white cardstock around the edges.

De-static an area in the upper right hand part of the panel with an embossing powder tool, ink the sympathy sentiment with Versafine Onyx Black ink, stamp onto the prepared panel, apply clear embossing powder and heat set with a heat tool.

Trim the panel to approx. 3 ¾” x 5”, mount onto light green cardstock, trim and mount onto pale blue cardstock, trim and mount onto a white card base.


Add a strip of the white scallop braid trim to the card front and a strip of blue gingham designerpaper along the inside left hand side of the card base to finish off the card.

If you have not had a chance to check out the rest of my Sister Design Team cards on the Stamp Simply blog, I hope you take the time to do so- spectacular inspiration from all!!

Stamp Sets: Eucalyptus Silhouettes (Stamp Simply)

Ink/Mediums: Versafine Black Onyx, Stampin’ Up!- Pear Pizzazz, Garden Green, Wild Wasabi; Tim Holtz Distress Oxide- Tumbled Glass

Cardstock/Paper: White, Pear Pizzazz, Pool Party; Echo Park Farmers Market 6x6 Paper Pad

Accessories/Tools:  Gemini, Jr., Embossing Powder Tool, Heat Tool, Clear Embossing Powder, 3/8” Mini Scroll Braid Trim- 3 yds- White

Don’t forget to stop by and check out the current specials at Stamp Simply!


Thanks again for visiting and I hope you have a great week! 

Saturday, May 18, 2024

Stamp Simply May 2024 New Release- Daisy Pitcher Sending Cheer


Hi Friends!

Today, I am sharing a card designed using one of the brand new release stamp sets, Daisy Pitcher Bundle from Stamp Simply


I love the Daisy Pitcher Bundle- it is so bright and cheery!  There are several different sentiments that will work for cards year round.


To create this card:

Using the Interwine 3D embossing folder, emboss a piece of white cardstock, trim to approx. 3 ¾” x 5”, adhere to a piece of green cardstock.


Add a piece of the eyelet lace, and layer a 2” x 4” piece of the yellow gingham patterned paper over the top of the lace.

Adhere a piece of sage twill ribbon over the panel and wrap the ends of the ribbon behind the panel before mounting it onto light blue cardstock.

Mount the entire card front panel to a white card base.


Add a strip of the yellow gingham patterned paper to the inside of the card base.

De-static a piece of white cardstock with an embossing powder tool, ink the daffodil pitcher image along with the sentiment from the Daffodil Pitcher Bundle with Versafine Onyx Black ink, apply clear embossing powder and heat set with a heat tool.

Die cut the sentiment with the Fishtail Sentiment Banners die and mount onto the upper left hand part of the card front with dimensional foam.

Water-color the daisy pitcher image with water-based markers and die cut with the coordinating die.

Mount the floral image to the card front with dimensional foam to finish off the card.

If you have not had a chance to check out the rest of my Sister Design Team cards on the Stamp Simply blog, I hope you take the time to do so- gorgeous inspiration from all!!

As many of you know, I enjoy participating with online challenges and will be playing along with the Word Art Wednesday #647-648 “Anything Goes” Challenge.


Stamp Sets: Daffodil Pitcher Bundle (Stamp Simply)

Ink/Mediums: Versafine Black Onyx, Stampin’ Write Markers- Crushed Curry, Pool Party, Island Indigo, Pear Pizzazz

Cardstock/Paper:  White, Pear Pizzazz, Pool Party; Echo Park Farmers Market 6x6 Paper Pad

Accessories/Tools:  Gemini, Jr., Stamp Simply Steel Dies- Fishtail Sentiment Banners, Daffodil Pitcher Bundle; Sizziz 3D Texture Fades A6 Embossing Folder- Intertwine, Embossing Powder Tool, Heat Tool, Clear Embossing Powder, May Arts 5/8” Twill- 30 yd spool- Sage, May Arts Coffee & Tea Ribbon Sampler- 10 yards

Don’t forget to stop by and check out the current specials at Stamp Simply!

Thanks again for visiting and I hope you have a fabulous week! 

Wednesday, May 15, 2024

TCC207 Red, White and Blue


Hi Friends!

Welcome to our #207 {Red, White and Blue} Challenge at the The Card Concept!

We are looking forward to seeing what inspires your card from our inspiration photo! Will it be the overall theme, the flowers, water pitcher, lantern, the colors, textures or something else?

I truly love all things patriotic so this photo inspired me to create a Clean and Layered Mixed Media card using stamps, dies and lace from Stamp Simply.

I hope you will take a moment to visit our challenge blog and see how the rest of the Design Team were inspired- Christmas, a kid’s card, floral and more!

To create this card:

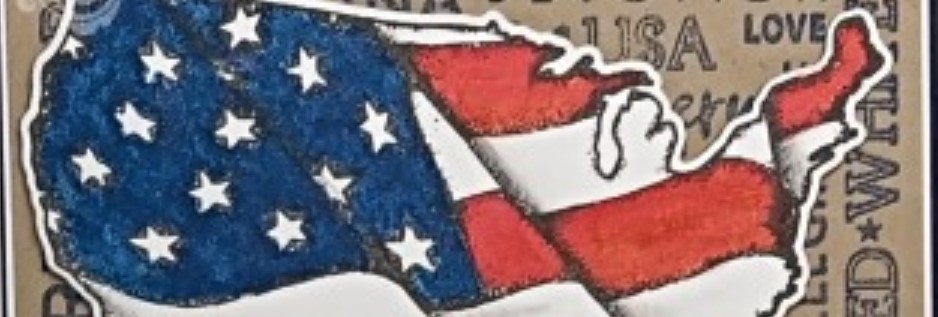
On a piece of white cardstock, de-static with an embossing powder tool, ink the USA flag map image from the Old Glory Bundle with Versafine Black Onyx ink, stamp onto the prepared panel, apply clear embossing powder and heat set with a heat tool.

Watercolor the image with water color pencils and water-based markers.


Die cut with the coordinating die from the Old Glory Bundle (also die cut another flag image from white cardstock to layer behind the colored image).

Trim a piece of kraft cardstock to approx. 4” x 5 ¼”, ink the background image from The Red, White and Blue with blue ink, stamp repeatedly onto the panel.

Mount the stamped panel onto a piece of white cardstock, trim and mount onto navy cardstock.

Add the strip of lace and satin ribbon (wrapping the ends of the ribbon around to the back of the panel).

Mount the panel onto a white card base and add the scrap strip of designer paper to the inside panel.

Mount the die cut USA Flag map image onto the card front with dimensional foam and the card is done!


Stamp Sets: Old Glory Bundle, The Red, White & Blue (Stamp Simply)

Inks/Mediums: Versafine Onyx Black,  Tim Holtz™ Chipped Sapphire Distress Oxide Ink, Derwent™ Watercolor Pencils- Red, Navy, Black; Stampin’ Write Markers- Poppy Parade, Night of Navy

Cardstock/Paper: Kraft, White, Night of Navy, Echo Park Let Freedom Ring 6x6 Paper Pad


Accessories/Tools: Gemini, Jr.,  Old Glory Bundle, Embossing Powder Tool, Clear Embossing Powder, Heat Tool, AquaPainter™, Venise Lace Lucia .75”- 1 yard- White, Red Satin Ribbon (from my stash)

Thanks again for taking the time to stop by! I hope you are inspired to create a card and join us for our #207 {Red, White and Blue} Challenge at The Card Concept!  The deadline to play along is Monday, June 10th at noon EST. 

Also, I hope you have a chance to check out the specials at Stamp Simply!


Related Posts Plugin for WordPress, Blogger...