Saturday, October 22, 2016

Espresso My Thanks


Hi Again Friends!

I am having fun designing cards this weekend and decided to play around with the Pick Me Up Clear Stamp Set (with the coordinating Pick Me Up Dies available as a bundle) along with the Grunge Elements 2 Clear Stamp Set from Sweet ‘n Sassy Stamps.



I hope you will find the time to visit us at the Sweet ‘n Sassy Blog as well as visit the other challenge blogs- fabulous inspiration from all!

To create this card:

On your craft mat, apply distress inks (I used Vintage Photo, Tea Dye and Rusty Hinge), spritzed lightly with water to blend a bit and pressed a piece of white cardstock into the ink at the top of the panel.

Dry the panel with the heat tool and stamp the SNSS Grunge Elements 2 Clear Stamp Set images with distress ink to mimic the coffee stains and splatter.

Ink the sentiment from SNSS Pick MeUp Clear Stamp Set with espresso distress ink and stamp onto the panel.

Trim the background panel, adhere to espresso cardstock before mounting onto the white card base.

Ink the coffee mug and steam images from SNSS Pick Me Up Clear Stamp Set with espresso distress ink and stamp onto white cardstock.

Die cut the images with the coordinating SNSS Pick Me Up Dies, also die cutting the SNSS Pick Me Up heart die from rose cardstock.

Layer the heart and steam dies onto the coffee mug, use a clear glitter pen to add shimmer to the heart and steam and mount the coffee mug onto the card front with dimensional foam to finish off the card.

Quick and easy!  Note to self- this would be a fun card to create multiples to give as a gift...Christmas is only a few months away!!


Thanks for taking the time to stop by- you are all such an encouragement to me.  Hugs and have a blessed week, my friends!

Peace of God


Hi Friends!

I am sharing this card on the Sweet ‘n Sassy Blog today and wanted to share with you here as well.

This card was designed using the Peace of God Clear Stamp Set by Sweet 'n Sassy Stamps (SNSS) and it always brings a smile to my face when I design with the bird image- my husband and I love to watch birds at our feeders and the Tufted Titmouse (“Tufty”) is one of our favorites!!

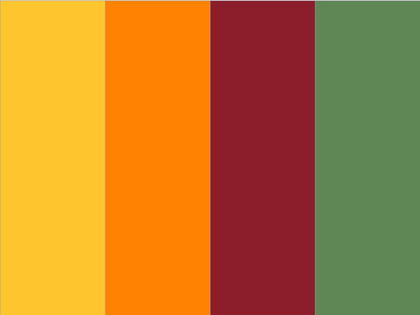
I also incorporated the FMS259 Sketch Challenge at Freshly Made Sketches along with the Just Us Girls #366 Photo Inspiration (I used the colors in the photo) into the design- I love both of these weekly challenge sites!

I hope you will find the time to visit us at the Sweet ‘n Sassy Blog as well as visit the other challenge blogs- fabulous inspiration from all!

To create this card:

Ink the Tufted Titmouse image from SNSS Peace of God Clear Stamp Set with archival black ink and stamp onto white cardstock.

Use a water brush with ink from a craft mat or palette to color the bird image and color directly onto the image for the leaves, berries and branch with water based markers.

Die cut the image using a stitched circle die and also cut two circles from cherry cardstock to layer behind the focal image and create a thin frame.

Stamp the sentiment from SNSS Peace of God Clear Stamp Set with archival black ink onto a panel of white cardstock, score lines for the layers per the sketch, trim and mount onto the cherry card base.

Add the focal image circle with dimensional foam to finish off the card.


Thanks again for taking the time to stop by- hugs and have a blessed week, sweet friends!

The Golf Club- Live, Laugh, Play


Hi Friends! 

Today I am sharing a fun card on the Artistic Outpost Blog using the Artistic Outpost stamp sets, The Golf Club and Grunge Elements along with the ODBD Pierced Rectangles Dies (all available at Our Daily Bread Designs) and I wanted to share it with you as well.


If you have not had a chance to visit The Artistic Outpost Blog or the other challenge sites yet, I encourage you to do so- great inspiration from my sister Design Team at the AO Blog as well as from the other challenge DT and galleries!

To create this card:

Ink the background collage image from AO The Golf Club with black soot distress ink and repeatedly stamp onto taupe cardstock, spritz the panel lightly with water and use a heat tool to dry.

Ink the corner splatter stamp from AO Grunge Elements with taupe ink, stamp over the edges of the background panel, use a distressing tool to distress the edges of the panel, add the two strips of 5/8” black satin ribbon, mount the distressed panel onto black cardstock and distress the edges of the black cardstock layer with the distressing tool before mounting onto the white card base.

For the focal image panel, stamp the background collage stamp from AO The Golf Club with archival black ink onto white cardstock, watercolor  with taupe, tangerine and emerald ink, add additional distressing with the corner splatter stamp from AO Grunge Elements using taupe ink before trimming and mounting onto black cardstock.

Stamp the golfer images from AO The Golf Club with archival black ink into white cardstock, fussy-cut the images, mount each onto black cardstock and fussy-cut again before adhering to the focal image panel.

Stamp the sentiment from AO The Golf Club with archival black ink into white cardstock, die cut with the ODBD Pierced Rectangles Dies, layer onto black cardstock, trim close to the edge before mounting onto the focal image panel with dimensional foam.

To finish off the card, mount the entire focal image panel to the card front with dimensional foam.


I am so thankful that you visited me today and hope I have inspired you to create something this weekend- hugs and have a blessed week, my friends!


Friday, October 21, 2016

CAS Mixed Media- French Foliage Leaves

Hi Stampers!!

I am sharing another quick Clean and Simple (CAS) card using a few retired Stampin’ Up! stamp sets that needed some “love”.


Again, if you have not already done so, I hope you will find the time to visit the above challenge sites to check out their fabulous Design Team samples and challenge entries- wonderful inspiration from all!

To create this card:

Ink the retired French Foliage oak leaf with Stāz-On® Jet Black Ink and onto a piece of Whisper White cardstock as well as a sticky note to create a mask.

Mask the oak leaf and repeat the same steps as above with the other two leaf images.

Keeping the mask on all three leaves, stamp the script and postage seal images with Stāz-On® Jet Black Ink.

Watercolor the images using an AquaPainter™ and ink from Stampin’ Write Markers- Cherry Cobble, Crushed Curry, Garden Green and Pumpkin Pie (I scribble the ink onto my craft mat and use a palette but a clear block would work or ink from the ink pads).

Add a few shadows and the splatter from the French Foliage stamp set with Pumice Stone Distress Ink and once the leaves are dry, apply shimmer with a Clear Glitter Pen (hard to see in the photo).

Stamp the sentiment from the retired Trust God stamp set and watercolor with Crushed Curry and Pumpkin Pie- add the splatter stamp image using Pumice Stone Distress Ink.

Die cut the images with MFT Stitched Rectangle and Stitched Circle STAX, mount onto Basic Black cardstock and adhere to the Whisper White background.

Trim the background and mount onto the Basic Black card base to finish off the card.

Stamp Sets: French Foliage, Trust God (retired Stampin’ Up!)

Ink/Mediums: Stāz-On® Jet Black; Stampin’ Write Markers- Crushed Curry, Cherry Cobbler, Garden Green, Pumpkin Pie; Pumice Stone Distress Ink; Clear Glitter Pen

Paper: Whisper White, Basic Black

Accessories: AquaPainter™, Sticky Note Paper, Big Shot™, MFT Stitched Rectangles STAX, MFT Stitched Circle STAX


Thanks again for taking the time to visit- I hope you have a wonderful weekend, my friends!  

Our Daily Bread Designs- Christmas Card Collection 2016


Hi Friends! 

Today at the Our Daily Bread Designs (ODBD) Blog, we are sharing inspiration from the ODBD October 2016 Release! I have designed two more cards using the ODBD Christmas Card Collection 2016 6x6 Paper Pad along with the ODBD Peace Border Die.

I did incorporate a few other ODBD Dies from previous releases into the designs but this time, I did not use any stamps- just the ODBD Christmas Card Collection 2016 6x6Paper Pad images :-) 

If you have not had a chance to stop by the Our Daily Bread Designs Blog yet, I encourage you to do so- fabulous inspiration from my Design Team “Sisters” (affectionately known as the “Breadbasket” or “Breadsticks”).

To create the Merry Christmas Mailbox card:

Die cut and emboss the following from white cardstock using:
1). A 4 ¼” x 5 ½” piece using the ODBD Vintage Pattern Flourish Dies
2). The 2nd largest die from the ODBD Vintage Borders Dies

From Dark Purple Cardstock using:
1).   ODBD Vintage Labels Dies- size to fit within the ODBD Vintage Borders Dies frame cut from white cardstock in the step #2 above
3). ODBD Ornate Ovals Dies- 2nd to the smallest die

1). The mailbox image with the ODBD Stitched Oval Dies.
2). The Merry Christmas sentiment with the ODBD Ovals Dies (to fit the Ornate Ovals frame cut from dark purple cardstock cut in stap #3 above).

Layer the pieces together onto the dark purple card base and finish off the card with the rhinestone embellishment in the middle of the bow.

To create the Peace Card:

Trim the Holy Night image from the ODBD Christmas Card 2016 Collection 6x6 Paper Pad, mount onto a rectangle of white cardstock (die cut and embossed with the ODBD Pierced Rectangles Dies), mount onto a piece of black cardstock trimmed close to the die cut and mount the entire panel onto the white card base.

Die cut and emboss the ODBD Peace Border Die from white cardstock and adhere to the top of the card.

Die cut and emboss the ODBD Shining Star Die from silver foil paper, mount onto the card front with dimensional foam and add the rhinestones to the star centers.

Use a clear glitter pen to add glitter to the light from the stars to finish off the card.

Thanks again for taking the time to stop by and I hope I have inspired you to start on your Christmas cards for either this year (or if you are already finished for this year, get a head start on next year).

Hugs and have a blessed weekend, my friends!


Wednesday, October 19, 2016

TCC60 All That We Behold is Full of Blessing


Hi Friends!!

Woohoo!  It’s time for the #60- Chevron Pumpkin Challenge at The Card Concept!  Our inspiration photo is gorgeous and can be interpreted in so many ways- the colors, the chevron, the pumpkin, the sunfowers, the wood , the glass, the leaves, etc.  

In fact, there is no right or wrong way when it comes to photo interpretation and we would love to see your card in our gallery!!

I was inspired by the sunflowers as well as the chevron and the colors- they remind me of fall and Thanksgiving!  I decided to pull out a few retired Stampin’ Up! stamp sets- Sunflower Serenade, Full of Blessings and Positively Chevron (background stamp) along with the current Timeless Textures to design this shabby chic card.


I hope you have a chance to visit us at The Card Concept and check out the rest of our Design Team samples as well as the other challenge sites- wonderful inspiration from all!!

To create this card:

Ink and stamp the Positively Chevron background onto retired Color Me Autumn Designer Series Paper (DSP) with Cajun Craze Classic Ink, trim and distress with the retired Distressing Tool and mount onto Early Espresso cardstock (distressing the edges of the Early Espresso cardstock layer as well).

Distress the edges of a strip of retired Orchard Harvest DSP, layer onto Early Espresso cardstock, mount onto the layered chevron background and add the 5/8” Rust Satin Triple Ribbon bow (wrapping the ends of the ribbon behind the back of the layers) before adhering the entire panel onto the Cajun Craze card base.

Stamp the retired Sunflower Serenade image and the sentiment from the retired Full of Blessings stamp set with Stāz-On® Jet Black Ink onto Very Vanilla cardstock, color with an AquaPainter™ using Derwent® Watercolor Pencils, Stampin’ Write Markers, Tumbled Glass Distress Ink followed by a layer of Picket Fence Distress Ink (to tone down the brightness of the Tumbled Glass background).

Using the Big Shot™ with the MFT Stitched Oval STAX Dies, die cut the sunflower image along with an oval from the same size die from Early Espresso cardstock.

Split the Early Espresso oval die cut in half and layer behind the sunflower image.

Trim the sentiment and layer onto a piece of Early Espresso cardstock.

Use a Sponge Dauber to apply Vintage Photo Distress Ink over the edges of the sunflower and sentiment layer.

Ink the small splatter stamp from Timeless Textures with Vintage Photo Distress Ink, stamp off before stamping onto the sentiment and sunflower layers.

Finish off the card by adhering the sunflower and sentiment with dimensional foam and adding a bit of shimmer with a clear glitter pen to the centers of the sunflowers.

Stamp Sets: Sunflower Serenade, Positively Chevron, Full of Blessings, Timeless Textures

Ink: Stāz-On® Jet Black, Cajun Craze Stampin’ Write Marker, Derwent® Watercolor Pencils, Distress Inks- Tumbled Glass, Vintage Photo, Picket Fence; Clear Glitter Pen

Paper: Very Vanilla, Early Espresso, Cajun Craze; Retired Color Me Autumn DSP, retired Orchard Harvest DSP

Accessories: Big Shot™, MFT™ Stitched Oval STAX Dies, AquaPainter™, Distressing Tool, 5/8” Rust Satin Ribbon

 Thanks again for taking the time to stop by!  I hope all of you have a fabulous week and hope you can join us for the #60 Chevron Pumpkin Challenge at The Card Concept!

Tuesday, October 18, 2016

ODBDSLC279 Home for the Holidays

Hi Friends! 


Today I am sharing another card designed for the Our Daily Bread Designs “Shining the Light” ODBDSLC279 “Color Challenge” Challenge with a reminder that is not too late to join in on the fun!

You have until November 6th to join us for a chance to be spotlighted for the Shining the Light award or to win a $15 ODBD gift certificate (one random participant will be chosen).  To be spotlighted for the Shining the Light Award, you must use ODBD stamps (or stamps from our sister companies: North Coast Creations or Artistic Outpost). 

If you have not already had a chance to visit my Design Team Sisters’ sites yet, I hope you will find the time to do so!  Fabulous inspiration for sure!
Chris  ∙  Robin


To create this card:

Ink the lamp post image from the ODBD Home for the Holidays stamp set with archival black ink, stamp onto a piece of white cardstock and onto a piece of scrap paper to create a mask.

Fussy cut the mask and position over the stamped image on the white cardstock.

Create another mask for the moon with the ODBD Circle Dies and masks for the snow banks from sticky note paper.

Mask the snow banks and moon, sponge light and dark blue ink for the sky.

Remove the mask for the moon and re-position the snow bank masks to apply a bit of light blue ink to create additional snow in the foreground.

Remove the mask from the lamp post and color the lamp post using a water brush with water color pencils, markers, add white highlights as snow with an extra fine white paint pen and use a clear glitter pen to add shimmer to the lamp post.

Ink the Merry Christmas sentiment from ODBD Home for the Holidays stamp set with archival black ink and stamp within the sign on the lamp post.

Die cut the entire panel with the ODBD Pierced Rectangles Dies and mount onto a piece of white cardstock, trim close to the die cut edge and mount onto the dark navy card base.

Ink the sentiment from ODBD Home for the Holidays stamp set with archival black ink and stamp onto a piece of white cardstock, die cut and emboss with the ODBD Ovals Dies.

Die cut and emboss a piece of dark navy cardstock with the ODBD Layered Lacey Ovals Dies, layer with the die cut oval sentiment and mount onto the card front with dimensional foam to finish off the card.

I hope that I have inspired you to create something with the colors from the ODBDSLC279 Color Challenge and we are looking forward to seeing your artwork in the ODBD Shining the Light Challenge gallery!


Related Posts Plugin for WordPress, Blogger...