Hi Friends!
Today I am sharing another fairly quick card using stamps,
dies and other supplies all from Stamp Simply!
I am so far behind on my Christmas cards and need to start mailing them! This card does not have too many layers but will still probably need a “hand-cancelled” stamp. Last year, most of my cards required the “hand-cancelled” stamp along with additional postage for weight. I am trying to conserve funds this year (as we all are), but a few of my cards arrived last year with just the envelope and no card. Not sure what happened to the cards, but those were a few that I tried to mail with just a regular postage stamp vs. the “hand-canceled”. I will not do that again, lol!
This card is also for The Card Concept #185 Christmas Blessings Challenge. I am a bit late posting my DT card and my apologies. I am still trying to maintain all of my husband's outside duties along with my own- he was such a great husband and I miss him so!
I was inspired by the greenery and the colors for my Clean and Layered card. Our challenge is open for the entire month of December and we hope you will have time to join us.
I am also linking this card to the Word Art Wednesday #573-#574 “Anything Goes” Challenge.
If
you have not already had a chance to do so, I hope you visit the Stamp Simply blog to
see all the gorgeous inspiration from the rest of the SS Design Team as well as
the above challenge sites- gorgeous projects from all!
To create this card:
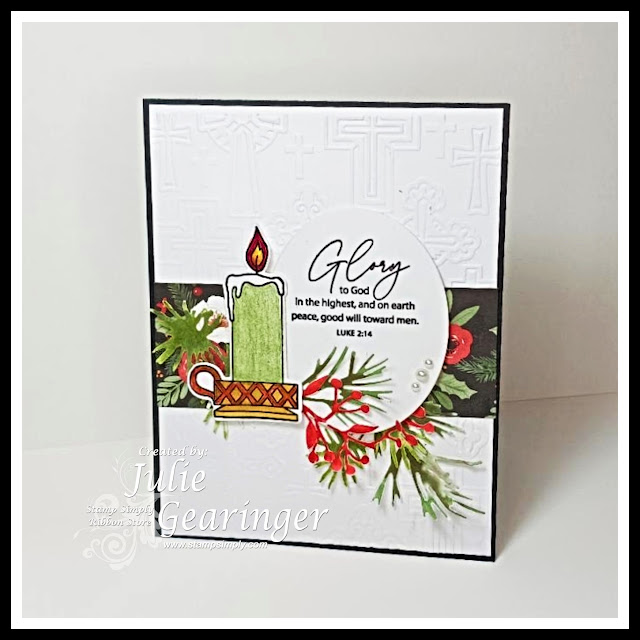
Emboss a piece of white cardstock using the Darice CrossesEmbossing Folder, trim the embossed panel and mount onto
a piece of black cardstock.
Add a piece of the designer paper from the Carta
Bella Happy Christmas 6x6 Paper Pad.
Die cut the greenery from white cardstock using the Sizzix
Thinlits Dies by Tim Holtz- Mini Holiday Greens . Color the die cut pieces with water-based
markers.
Once the embossing has cooled, die cut the candle
with the coordinating die from the Christmas
Peace bundle and the sentiment with an oval die (die cut an additional oval
and candle from blank white cardstock to layer behind the stamped/heat embossed
images).
Color the candle using water-based markers and
colored pencils.
Mount the die cut holiday greens under the oval sentiment
and mount the sentiment onto the card front using dimensional foam.
Add the candle using dimensional foam on the portion
that is not adhered to the oval.
Adhere the panel to a white card base.
Apply shimmer to the candle with a clear glitter marker and add a few pearls to finish off the card.
Stamp Sets: Christmas
Peace Bundle (Stamp Simply)
Ink/Mediums:
Versafine Onyx Black, Water-based Markers,
Zig Wink of Stella Brush-
Clear Glitter Marker
Cardstock/Paper: White, Black, Happy
Christmas by Carta Bella 6x6 Paper Pad
Accessories/Tools: Gemini, Jr. , Stamp
Simply Dies- Christmas Peace Bundle, Sizzix
Thinlits Dies by Tim Holtz- Holiday Greens Mini, Darice Embossing
Folder- Crosses, Embossing
Powder Tool, Heat Tool, Clear Embossing Powder, Kaisercraft
Self-Adhesive Pearls- Pearl
Also, today is the last day for 20% off Stamp Simply stamps and dies!
 |


1 comment:
Julie, your card is stunning. That embossed background is amazing and I love how you placed the image/sentiment, allowing the background to show, too!
Post a Comment