Saturday, July 29, 2017

Psalm 34:8- O Taste and See That The Lord Is Good

Hi Friends!

I 
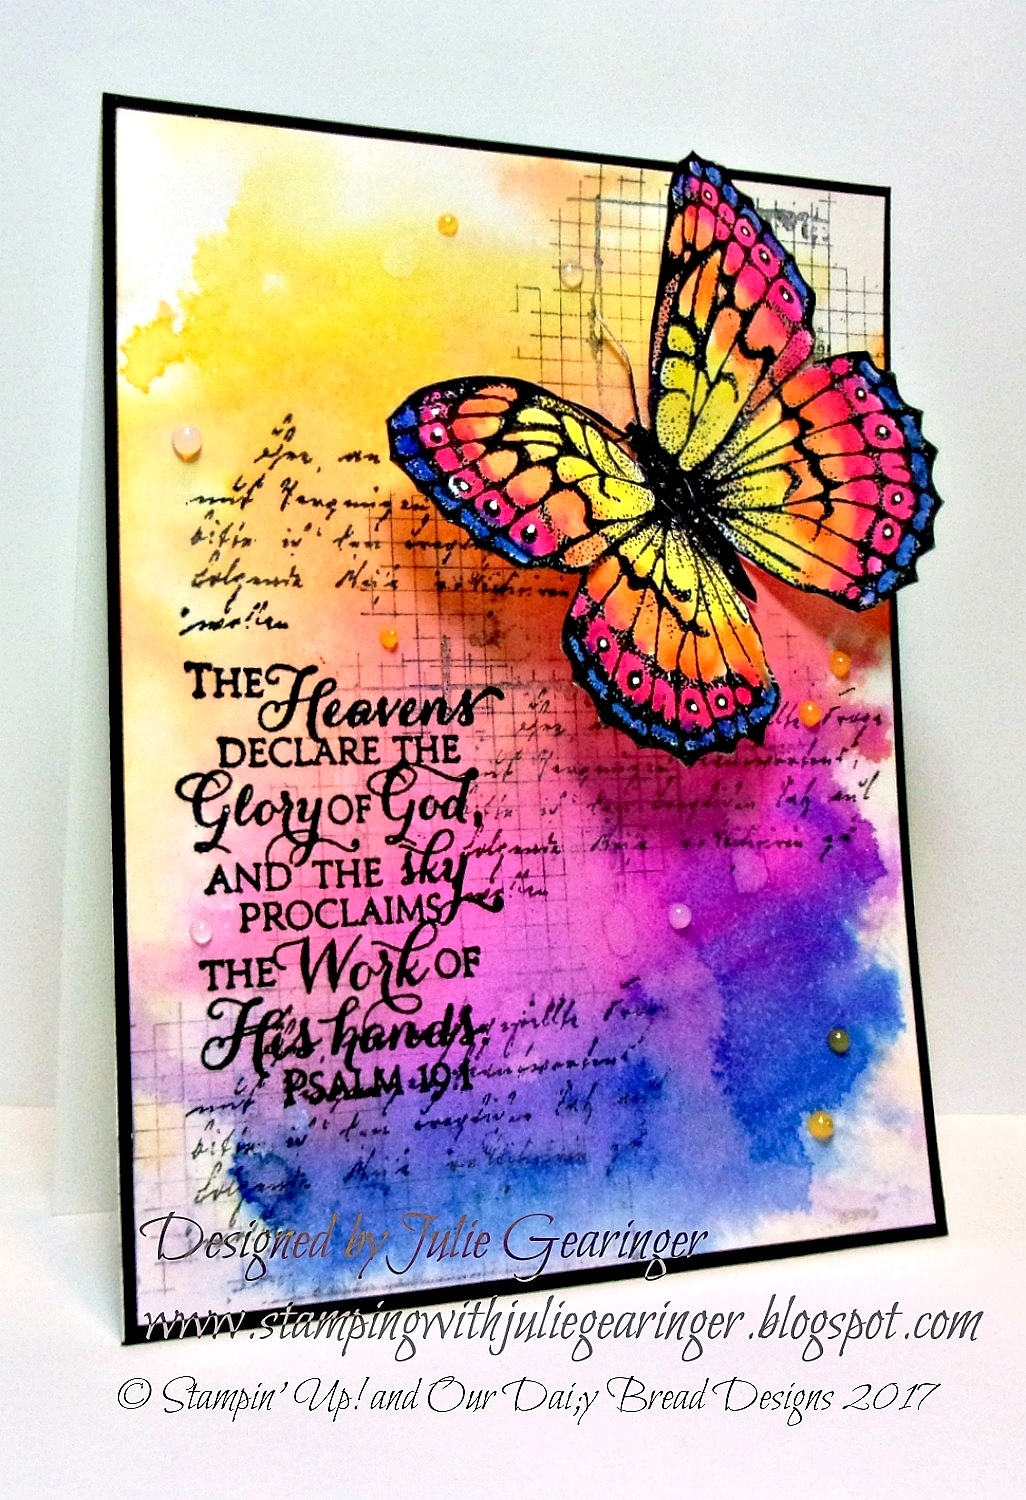
had a chance to create a card this weekend using a digital stamp from Power Poppy along with a brand new verse sentiment from Verve Stamps.  

I had printed out and watercolored the digi image a while back but had not completed a card, so when I noticed that the As You See It Challenge #155 Challenge is “When I lose my craft mojo, I ____”, I thought this would be a good time to finish this project.  

If I am struggling with figuring out a design (or as we call it in the crafty world "mojo"), I generally find that if I focus on only one or two stamp sets and use a sketch/or color challenge, it helps with my “mojo”.  I have so many stamps, designer papers, inks, mediums, etc. that it can get a bit overwhelming since I want to use them all!   I am also a bit of a perfectionist with an "Attention Deficit Disorder" (all of those supplies keep grabbing my attention:-)) so limiting my choices helps me immensely.


Since I wanted to get my "mojo" back, I incorporated the Tuesday Morning Sketches #413 Sketch Challenge and the Just Us Girls #404 Wild Card Week “Use Something Old/and or New” Challenge (I have owned the Power Poppy digi stamp for a while, the DSP, Embossing Folder and Banner Punch were retired years ago, the gingham ribbon is several years old and the Verve Stamps image is " brand new to me").

If you have not had a chance to check out the above challenges yet, I hope you will find the time to do so- great inspiration from all!

To create this card:

1). Using a digital software program or Word, re-size and print out the Power Poppy Apples In Season image onto white cardstock.  Using watercolor pencils along with an AquaPainter™ (very little water so the paper will not pill), water color the image.  Once you are satisfied with the colors, die cut the image with the MFT Stitched Ovals STAX Dies.  Die cut a piece of black cardstock using the same size oval die (split the die in half) and set aside.

2). De-static the colored oval image with an Embossing Buddy® powder tool, stamp the Verve Stamps Scripture Medley 4 image with Versafine™ Onyx Black ink and heat emboss with clear embossing powder.  Once the powder has cooled, use a clear glitter pen to add shimmer to the apples and blossoms and an extra fine white paint pen to add highlights.

3). Layer the die cut oval image onto the split black die cut (allowing just the black die to show a bit) and set aside.

4). Use the Big Shot™ with the retired Lacy Brocade Texture Impressions™ Embossing Folder to emboss a piece of retired designer series paper (Stampin’ Up!), mount onto a piece of black cardstock and distress lightly with a sanding block.  Mount onto the red card front and adhere to the white card base.

5). Add the horizontal strip of retired dsp onto a smaller piece of black cardstock (per the sketch) and adhere a piece of black and white gingham.  Adhere to the card front and mount the focal image using dimensional foam.

6). The small flag banners were in my stash (punched from black cardstock using the retired Banner Punch (SU!) – punch two smaller banners using the red dsp for the middle area.  Using a copper spiral clip, add the banners to the corner.

7). Finish off the card with the double black and white gingham bow.

Stamp Sets: Apples In Season (digi- Power Poppy), Scripture Medley 4 (Verve Stamps)

Ink/Mediums: Printer Ink- Black; Versafine™, Derwent™ Watercolor Pencils, Spectrum Noir™ Clear Glitter Pen, Extra Fine White Sharpie® Paint Pen

Paper: Whisper White, Basic Black, Riding Hood Red, retired DSP- SU!

Accessories/Tools: Big Shot™, MFT Stitched Ovals STAX Dies, retired Lacy Brocade Textured Impressions™ Embossing Folder, retired Banner Punch, Copper Spiral Clip, 1” Black and White Gingham Ribbon, Sanding Block, Embossing Buddy®, Clear EP, Heat Tool


Thanks again for taking the time to stop by- hugs and I hope all of you have a great weekend !

Thursday, July 27, 2017

His Wings- Sending Prayers Your Way


Hi Friends!

Wow! This week has been a hectic one but I finally had a chance to relax and create a card using the Creative Worship stamp set, His Wings (designed by Korin Sutherland) along with Floral Greetings (designed by Graciellie Design) both available from Sweet ‘n Sassy Stamps.


If you have not had a chance to visit the above challenge sites or SNSS Blog/FB Page yet, I encourage you to do so- gorgeous inspiration from all!

To create this card:

1). On a piece of white cardstock, scribble yellow, green and blue color with a Zig® Clean Color Brush Marker, spritz with water and heat set with a heat tool.  Once the panel has  thoroughly dried, de-static with an embossing powder tool, stamp the feathers from the His Wings stamp set with Versafine™ Onyx Black ink and heat emboss with clear embossing powder. Add a bit more color as needed (I also added additional blue with a Stampin’ Write Pacific Point Marker).

2). Once the embossing has cooled, fussy- cut the feathers (cutting into the design a bit) and set aside.

3). De-static a scrap piece of white cardstock with an embossing powder tool, ink the bird image from His Wings with Versafine™ Onyx Black ink, heat emboss with clear embossing powder and once cooled, fussy-cut the image. 

4). On a piece of Strathmore® Bristol Smooth paper, apply the same three colors using the Zig® Clean Color Brush Markers, spritz with water and heat set with a heat tool.  Drop additional water onto the panel, press a paper towel to soak up the water and some of the ink, heat with the heat tool to dry. 

5). Once you are satisfied with the background, de-static the panel near the bottom with an embossing powder tool, stamp the sentiment from Floral Greetings usingVersafine™ Onyx Black ink and heat emboss with clear embossing powder. Trim the panel, mount onto black cardstock, trim again and mount onto the white card base.

6). Add the feathers directly to the card front and mount the bird with dimensional foam.

7). Finish off the card with Nuvo™ Jewel Crystal Drops and use an Extra Fine Sharpie® White Paint Pen to add a few dots to the top feather.

 Stamp Sets:  His Wings, Floral Greetings (Sweet‘n Sassy Stamps)

Ink/Mediums: Versafine™ Onyx Black, Stampin’ Write Pacific Point Marker, Zig® Clean Color Real Brush Markers- Yellow, Light Green, Cobalt Blue; Extra Fine Sharpie® White Paint Pen; Nuvo® Jewel Drops- Sea Breeze, Limoncello, Key Lime

Paper/Cardstock: Whisper White, Basic Black; Bristol Smooth

Accessories/Tools: Embossing Buddy®, Clear Embossing Powder, Heat Tool

Thanks again for taking the time to stop by- hugs and I hope all of you have a great weekend!  

Monday, July 24, 2017

Christmas In July- Another Tissue Watercolor Background

Hi Friends!!

Today I am sharing a Clean and Simple (CAS) Christmas card using the scrap leftover piece of a tissue paper technique background I had created for another CAS card (see previous post here).

Since I already had the background panel, I searched through my stash of "scraps" and found the snowflakes plus the sentiment already die cut/printed and ready to go making this card fairly quick and easy to assemble :-)  


If you have not already had a chance to visit the above challenge sites, I hope you will do so- so much inspiration from their Design Teams as well as in their galleries!

To create this card:

1). Using Tranquil Tide and Soft Sky Classic Ink, tap the pads onto a silicone craft mat, spritz with water, use a plastic spoon (or palette knife) to mix the ink a bit and lay a piece of tissue paper into the ink (smooshing very gently with your fingers to moisten all of the tissue).  Carefully lift up the tissue paper and set onto a paper towel to dry.  My first layer was a bit light so I added additional ink until I was satisfied with the color.

2). Using a craft glue, spread the glue over an entire piece of white cardstock, squishing the tissue a bit to create more ridges and allow the panel to dry (I did use a heat tool to speed up the process- I am so impatient!).  De-static the panel with an Embossing Buddy®, gently rub the Versamark™ ink pad over the ridges, apply Silver Embossing Powder and heat set with the Heat Tool.

3). Use the Big Shot™ with the MFT Stitched Rectangle STAX Dies to cut the panel, mount onto Basic Black cardstock and trim close to the die cut edge.

4). Print the sentiment from Merry & Type using My Digital Studio™ (retired Stampin’ Up!) onto Whisper White cardstock, die cut with the Big Shot™ with a smaller frame die from the MFT Rectangle STAX , mount onto black cardstock and trim close to the edge.   Adhere the sentiment panel to the tissue paper background panel.

5). Die cut the various snowflakes from Silver Foil, mount a few behind the tissue paper background and sentiment.  Trim another Whisper White panel and mount onto the Basic Black card base.  Add the layered snowflake background panel to the car front with dimensional foam.

6). Finish off the card by adding the large snowflake, rhinestones and a few accents with  Nuvo™ Silver Lining Crystal Drops.

Stamp Sets: Merry & Type (retired Stampin’ Up!- digital version)

Ink/Mediums: Printer Ink- Black, Versamark™, Classic SU! Ink- Tranquil Tide, Pool Party; Nuvo™ Silver Lining Crystal Drops

Paper: Whisper White, Extra Thick Whisper White, Basic Black; Silver Foil, Tissue Paper

Accessories/Tools:  Big Shot™, MFT Stitched Rectangle STAX Dies, Memory Box™ Lindeman Snowflake Die, Impression  Obsession™ Snowflake Die Set, Embossing Buddy®, Stampin’ Emboss® Silver Embossing Powder, Heat Tool, Rhinestones


Thanks again for visiting- hugs and I hope all of you have a great week!

Saturday, July 22, 2017

Dragonfly Dreams- Tissue Paper Watercolor


Hi Friends!!

Wow, this week has been so busy!  I have been wanting to try the Tissue Watercolor Technique for the CASMix-Up July Challenge and finally had a chance this evening!  

 I used Loll’s tips from her wonderful video (here) and decided to try her technique with the addition of heat embossing as well.

I also incorporated the CAS(E) This Sketch #231 Challenge, the Splitcoaststampers CC642 Color Challenge and the Addicted to Stamps and More #251 “Anything Goes” Challenge into the design.

If you have not already had a chance to visit the above challenge sites, I hope you will do so- so much inspiration from their Design Teams as well as in their galleries!

To create this card:

1). Using Tranquil Tide and Soft Sky Classic Ink, tap the pads onto a silicone craft mat, spritz with water, use a plastic spoon (or palette knife) to mix the ink a bit and lay a piece of tissue paper into the ink (smooshing very gently with your fingers to moisten all of the tissue).  Carefully lift up the tissue paper and set onto a paper towel to dry.  My first layer was a bit light so I added additional ink until I was satisfied with the color.

2). Using a craft glue, spread the glue over an entire piece of white cardstock, squishing the tissue a bit to create more ridges and allow the panel to dry (I did use a heat tool to speed up the process- I am so impatient!).  De-static the panel with an Embossing Buddy®, gently rub the Versamark™ ink pad over the ridges, apply Silver Embossing Powder and heat set with the Heat Tool.

3). De-static a piece of Whisper White cardstock with the Embossing Buddy®, ink the splatter image from Dragonfly Dreams and the sentiment from Rose Wonder with Versamark™ ink and stamp onto the panel.  Apply Silver Embossing Powder and heat set with the Heat Tool.  Trim the panel and mount onto the Extra Thick Whisper White card base.

4). Create the banner from Silver Foil using the Big Shot™ with the MFT Blueprints 16 Dies, cut in half and adhere to the card front.

5). Die cut the tissue panel with a medium frame from the retired MFT Fancy Ticket STAX dies and mount onto the card front with dimensional foam.

Close uo of the tissue background 
6). Stamp the dragonfly image from Dragonfly Dreams using archival black ink onto white cardstock, heat set the ink and watercolor with Tranquil Tide and Pool Party Classic Ink.  Die cut with the Detailed Dragonfly Thinlits™, mount onto the card front and use dimensional foam below the wings.

7). To finish off the card, apply shimmer to the wings using a Spectrum Noir™ Clear Glitter Pen and add a few drops around the sentiment and on the tissue panel with Nuvo™ Gray Mist Jewel Drops.
I wish the shimmer showed better in the photo- this card definitely shines IRL :-)

Also, I have to say that I absolutely love this tissue paper technique- thanks Loll for the fabulous instructions!   I am so thrilled that I decided to try this (I have a few scraps from this panel for another card) plus I am looking forward to playing around with different colors and inks in the future!  Loll, you have definitely converted me- lol!

Stamp Sets: Dragonfly Dreams, Rose Wonder (both current Stampin’ Up!)

Ink/Mediums: Versafine™ Onyx Black Ink, Versamark™ Ink, Classic SU! Ink- Tranquil Tide, Pool Party; Nuvo™ Grey Mist Jewel Drops, Spectrum Noir™ Clear Glitter Pen

Paper: Whisper White, Extra Thick Whisper White, Silver Foil, Tissue Paper

Accessories:  Big Shot™, Detailed Dragonfly Thinlits™, MFT Blueprints 16 Dies, retired MFT Fancy Ticket STAX Dies, Embossing Buddy®, Stampin’ Emboss® Silver Embossing Powder, Heat Tool


Thanks again for visiting- hugs and I hope all of you have a wonderful weekend!

Tuesday, July 18, 2017

The Heavens Declare The Glory of God


Hi Friends!!

I am so excited to announce that I am the Guest Designer for the Retro RubberChallenge Blog #67 “Over the Rainbow” Challenge!  

A few weeks ago, my card was chosen as their winner and one of the perks of winning is that you are invited to be a Guest Designer on a future challenge- what a wonderful honor!

I decided to create a colorful simple Mixed Media card using a verse sentiment from the current Our Daily Bread Designs Scripture 9 stamp set along with retired Stampin’ Up! sets- Off the Grid, Stipple Butterfly and Notable Notions.  All of these stamps are several years old and I absolutely loved having a chance to play around with them again!


If you have not already had a chance to visit the above challenge sites, I hope you will do so- they all have wonderful Design Teams as well as gorgeous inspiration in their galleries.

To create this card:

1). Ink the Stipple Butterfly image with Versafine™ Onyx Black ink, stamp onto a piece of white cardstock paper, apply clear embossing powder and heat set with the Heat Tool.

2). Using Zig® Clean Real Color Markers along with an AquaPainter™, watercolor the butterfly image and fussy-cut the image.  Add a few white highlights to the wings with the Sharpie® Extra Fine White Paint Pen.

3). On a piece of Strathmore™ Bristol Smooth Paper, use the same Zig® Clean Real Color Markers, add a bit of color, spritz with water and dry with the Heat Tool. Splash a bit of water onto the panel, let the water absorb before lifting with a paper towel and heat with the Heat Tool. 

4). Trim the panel, ink the retired Off the Grid background stamp with Hickory Smoke Distress Ink over the background as well as the retired Notable Notions script image.

5). Stamp the sentiment from Scripture Collection 9 with archival black ink and heat set with the Heat Tool.

6). Trim the panel and mount onto a piece of black cardstock, trim once more and mount onto the white card base.

7). Mount the fussy cut butterfly to the corner and add a few drops of Nuvo™ Rosewater and Orange Marmalade Jewel Drops to finish off the card.

 Stamp Sets: Scripture Collection 9 (Our Daily Bread Designs); Stipple Butterfly, Off the Grid, Notable Notions (all retired Stampin’ Up!)

Ink/Mediums: Versafine™ Onyx Black Ink, Zig® Clean Color Real Brush Markers- Yellow, Orange, Blue, Pink;  Nuvo™ Jewel Drops- Rosewater, Orange Marmalade; Sharpie® Extra Fine White Paint Pen

Paper: Bristol Smooth, Basic Black, Whisper White

Accessories:  AquaPainter™, Heat Tool

Thanks again for visiting- I hope you will find some time to pull out some of your older stamps and join us at Retro Rubber Challenge Blog! Hugs and please stop by again soon!

Ribbon of Courage


Hi Friends!   

It’s time for the #179 “New Fun from Stampin' Up!” Challenge at SU-Only Challenges!  We would love to see your projects using a “New to You” Stampin’ Up! set and I decided to use the Ribbon of Courage stamp set for my Clean and Simple card.

As soon as I saw this set in the new catalog, I knew that it would have to be one of my first purchases. Cancer has taken it's toll on my immediate family as well as my husband's, not to mention many friends as well.  I think that this ribbon image as well as the sentiments and matching framelits are perfect for sending a note of encouragement to those who are experiencing the trials of chemo, radiation and other tests, don't you?

I am also linking to the Word Art Wednesday #290-#291 “AnythingGoes” ChallengeIf you have not had a chance to stop by the SU-Only Challenge site to check out the rest of the Design Team projects or the Word Art Wednesday Challenge site yet, I encourage you to do so- wonderful inspiration from all! 

To create this card:

1). Ink the Ribbon of Courage image using Stampin’ Archival™ Basic Black Ink, stamp onto Whisper White cardstock and heat set with the Heat Tool.  Use the Big Shot™ along with the coordinating Support Ribbon Framelits™ to cut out the image.

2). Color the image with Pink Pirouette, Rich Razzleberry, Sweet Sugarplum and Flirty Flamingo Stampin’ Write Markers, using an AquaPainter™ to blend the color.

3). De-static a piece of Basic Black cardstock with the Embossing Buddy®, stamp the sentiment from Ribbon of Courage with Versamark™ Ink, apply Stampin’ Emboss® White Embossing Powder and heat set with the Heat Tool.

4). Trim the panel, mount onto a piece of Whisper White cardstock, trim again and mount onto a piece of Basic Black cardstock before adhering to the Extra Thick Whisper White card base.

5). Mount the colored Ribbon of Courage image with Stampin’ Dimensionals®. 
6). Add a few Rhinestones to finish off the card.

Stamp Sets: Ribbon of Courage

Ink/Mediums: Stampin’ Archival™ Basic Black; Stampin’ Write Markers- Pink Pirouette, Rich Razzleberry, Sweet Sugarplum, Flirty Flamingo
Paper: Whisper White, Extra Thick Whisper White, Basic Black
Accessories/Tools: Big Shot™, Support Ribbon Framelits™, AquaPainter™, Heat Tool, Rhinestones, Embossing Buddy®, Stampin’ Emboss® White Embossing Powder

Thanks again for taking the time to visit and I hope that you will create your own Stampin’ Up! Only project and play along with our “New Fun from Stampin' Up!” challenge!

Saturday, July 15, 2017

Peaceful Peonies


Hi Friends!

I love participating in online challenges and finally had a chance to create a card for The Flower Challenge #10 “Embossing Heat/Dry” using the colors from the Addicted to Stamps and More #250 Photo Inspiration Challenge and the WordArt Wednesday #290-#291 “Anything Goes” Challenge.


I pulled out the Peaceful Peonies Clear Stamp Set from Sweet ‘n Sassy Stamps (designed by NinaB Designs) and used heat embossing (along with watercolor) to create my own background paper for this Mixed Media card.

If you have not had a chance to visit the above challenge sites or SNSS Blog/FB Page yet, I encourage you to do so- fabulous inspiration from all!

To create this card:

1). Use a de-static tool to prep a 4” x 5 ¼” piece of white cardstock for heat embossing.  

Ink the large peony image from Peaceful Peonies with embossing ink, stamp onto the white cardstock, apply white embossing powder and heat set with the heat tool.  Repeat the steps to ink and stamp three more images around the perimeter of the panel.

2). Using distress markers add a bit of color and blend with a water brush.  Continue to color until you are satisfied with the results.  Wipe off any excess ink from the embossing with a dry paper towel.

3). Add a piece of green satin ribbon, wrapping the ends behind the panel and mount onto the white card base.

4). Ink the sentiment from Peaceful Peonies using archival black ink, stamp onto white cardstock and die cut with a pierced oval die.

5). Adhere a bit of looped metallic silver thread and mount the sentiment using dimensional foam.

6). Finish off the card by applying shimmer to the petals with a clear glitter pen.

 
Stamp Sets:  Peaceful Peonies (Sweet ‘n Sassy Stamps)

Ink/Mediums: Versafine™ Onyx Black, Versamark™, TH Distress Markers- Shaded Lilac, Picked Raspberry, Mowed Lawn; Spectrum Noir™ Clear Glitter Pen

Paper/Cardstock: Whisper White

Accessories/Tools: Embossing Buddy®, White Embossing Powder, Heat Tool, Water Brush, 1” Light Green Satin Ribbon, Big Shot™, ODBD Pierced Ovals Dies, Silver Metallic Thread


Thanks again for taking the time to visit!  Hugs and I hope all of you have a great weekend!  
Related Posts Plugin for WordPress, Blogger...