Friday, November 18, 2022

Merry Christmas- Poinsettia Coffee Card


Hi Friends!

This week at Stamp Simply, we are celebrating Coffee in honor of the 2022 Fall/Winter Coffee Lovers Blog Hop and today is the last day to receive 15% off items in the Coffee Category items at Stamp Simply.  


Today is also the final day of the 2022 Fall/Winter Coffee Lovers Blog Hop and I decided to create a Clean and Layered/ Mixed Media Christmas card.  


I am also linking this card to the Word Art Wednesday #569-#570 Anything Goes Challenge.

If you have not already had a chance to do so, I hope you visit the Stamp Simply blog to see all the fabulous inspiration from the rest of the SS Design Team as well as the above challenge sites- gorgeous projects from all!

To create this card:

Trim a piece of the green plaid paper from the Craft Consortium Tartan Plaid 6x6 Paper to approx. 1 ½” x 4”.


Layer a piece of black cardstock behind the plaid paper and add the lace die cut (die cut from white cardstock with the Tim Holtz Crochet Die).

Emboss a piece of white cardstock with the Sizzix 3D Texture Fades A2 Embossing Folder - Lace, trim to approx. 4” x 3 ½”.  Mount onto the top half of a piece of 4 1/4" x 5 1/2" black cardstock. 

On another piece of white cardstock, de-static the lower portion of the panel with an embossing powder tool, stamp the sentiment from the Seasonal Wreath, Fall/Winter stamp set with Versafine Onyx Black ink, apply clear embossing powder and heat set with a heat tool.

Adhere the sentiment panel onto the black cardstock panel.

Mount the layered plaid lace panel to cover the cut edges of the embossed panels.

Adhere the entire panel onto a white card base.


Ink the cup images from Have A Cup On Us Bundle with Versafine Onyx Black ink, apply clear embossing powder and heat set with a heat tool.

Die cut with the coordinating dies from the Have A Cup On Us Bundle and place the die cut cup images back inside the openings on the panel.  

Ink the poinsettia image from the Seasonal Wreath,Fall/Winter with Versafine Onyx Black ink and stamp onto one of the die cut cup images. 


Repeat the process for the other cup and heat set the ink with a heat tool.

Color the poinsettia images with water-based markers.  Add shimmer with a clear glitter marker and white highlights with a white gel pen.

Die cut two additional dies from each coffee cup images and layer behind the stamped images (this helps give the images a bit more stability).

Layer the die cut coffee cup images onto the card front with dimensional foam.

Finish off the card with red rhinestones.


Stamp Sets: Have A Cup On Us Bundle, Seasonal Wreaths, Fall/Winter  (Stamp Simply)

Cardstock/Paper: White, Black,  Craft Consortium Tartan Plaid 6x6 Paper

Inks/Mediums: Versafine Black Onyx, Zig Wink of Stella Brush- Clear Glitter Marker

Accessories/Tools: Gemini, Jr., Sizzix 3D Texture Fades A2 Embossing Folder - Lace, Have A Cup On Us Bundle,  Sizzix Thinlits Dies  by Tim Holtz- Crochet, Kaisercraft Self-Adhesive Round Rhinestones- Red

Thanks again for taking the time to stop by- I hope you have a chance to check out the new releases at Stamp Simply as well as shop our Coffee Themed Sale!


Wednesday, November 16, 2022

The Card Concept #184b Merry Christmas


Hi Friends!

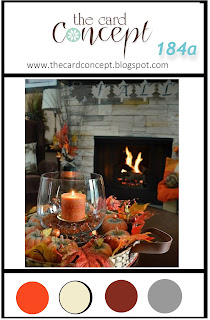
Welcome to the #184 {Happy Thanksgiving} or {Merry Christmas} Challenge at The Card Concept! 

I love both of our inspiration photos!  That warm cozy fireplace along with the beautiful fall colors and neutrals- perfect for Thanksgiving!

I also love the elegance of the Christmas photo and since I am so far behind on my Christmas cards,  I decided to create a Clean and Layered/ Classy and Elegant card inspired by our #184 challenge!  

I wanted to keep my card fairly simple (since I have not had as much time to create this past fall).  

I have been busy trying to keep up with my yard work (my hubby did such a fabulous job on our yard and with my bone on bone knees, it has been slow going for sure, lol!).  I am thankful for all the he did while he was here on earth and am so glad he is with the Lord now and can finally rest :-) I miss him in so many ways!

In addition to the overall elegance of the photo, I was also inspired by the gold and white colors for my Christmas card!  

This was a quick card using a few basic items- gold embossing powder, metallic cardstock, one stamp/die bundle, a banner die, one woodgrain embossing folder and a few pearls (all from Stamp Simply)!  

Quick and easy and relatively flat for mailing.

I also enjoy playing along with other online challenges and will be linking this card to the Tic-Tac-Toe #187 Featured Designer Stef Challenge (diagonal – Scoring/Embossing- Free- Wood).  I used a wood embossing folder (it is a bit difficult to see in the photo, but it is there, lol!).  I am also linking to the Word Art Wednesday #569-#570 Anything Goes Challenge.

I also enjoy playing along with other online challenges and will be linking this card to the Tic-Tac-Toe #187 Featured Designer Stef Challenge (diagonal – Scoring/Embossing- Free- Wood).  I used a wood embossing folder (it is a bit difficult to see in the photo, but it is there, lol!).  I am also linking to the Word Art Wednesday #569-#570 Anything Goes Challenge.

If you have not had a chance to visit our Design Team/gallery at The Card Concept Challenge, or the other challenge sites yet,  I hope you will find time to do so- gorgeous inspiration from all!

To create this card:

De-static two pieces of white cardstock with an embossing powder tool, ink the tree image from O Christmas Tree with Versamark ink, stamp onto one of the prepared panels and repeat the process with the “Merry Christmas” and “Love-Joy-Peace” sentiments on the other panel.  Apply gold embossing powder and heat set with a heat tool.


Once the embossing powder has cooled, die cut the tree image with the coordinating tree die and the sentiments with the Fishtail SentimentBanners Dies

Die cut two additional trees from white cardstock and layer the gold embossed tree onto the two blank tree die cuts (I like doing this step to give the embossed main image more stability).

Trim another piece of white cardstock to 5 ¼” x 4”, emboss with the Sizzix 3D Lumber Texture Fades Embossing Folder, trim and mount onto a 5 ½” x 4 ¼” piece of Gold LuxuryPearlescent Metallic Cardstock.

Mount the entire panel onto a white card base.

Add the die cut sentiments directly to the card front and mount the embossed/die cut tree image with dimensional foam.

Finish off the card with a few pearls.

Stamp Sets:  O Christmas Tree Bundle (Stamp Simply)

Ink/Mediums: Versamark

Cardstock/Paper: White, Luxury Pearlescent Metallic 105# Cardstock- Gold

Accessories/Tools: Gemini, Jr., Sizzix 3D Texture Fades Lumber Embossing Folder, O Christmas Tree Bundle Dies, Stamp Simply Steel Dies- Fishtail Sentiment Banners,   Embossing Powder Tool, Gold Embossing Powder, Heat Tool, Kaisercraft Self-Adhesive Pearls-Pearl

I hope you have a chance to create a card and join us for our #184 {Happy Thanksgiving} or {Merry Christmas} Challenge at The Card Concept! 

Thanks again for taking the time to visit- I hope all of you have a blessed week and Thanksgiving!

Saturday, November 12, 2022

Thankful for You


Hi Friends!

This week at Stamp Simply, we are celebrating a Season of Thanks and I decided to create a simple “Thankful for You” card using stamps, paper, embossing folder, ribbon and other supplies from Stamp Simply!

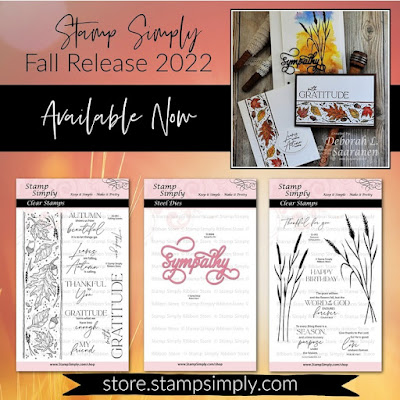
The Autumn Silhouettes stamp set is so versatile and I used the “Thankful for You” sentiment on this card along with the Prima Fruit Paradise 6x6 Paper Pad.


The Prima Fruit Paradise 6x6 paper pad has 30 sheets of beautiful fruit, butterflies and patterns plus you get 5 sheets of 6 different designs.  Perfect for making multiple cards, scrapbook pages and projects!

I enjoy playing along with online challenges and will be linking this card to the Word Art Wednesday #569-#570 Anything Goes Challenge along with the Double D “Thankful-Grateful-Blessings” Challenge.

If you have not already had a chance to do so, I hope you visit the Stamp Simply blog to see all the gorgeous inspiration from the rest of the SS Design Team as well as the above challenge sites- fabulous projects from all!

To create this card:


Trim a piece of the patterned paper from the Prima Fruit Paradise 6x6 paper pad.

Stamp the sentiment from Autumn Silhouettes with Versafine Onyx Black ink onto the patterned paper,  apply clear embossing powder and heat set with a heat tool.

Use a clear glitter marker to add shimmer to the images on the designer paper panel. 

Mount the patterned paper onto a piece of gold Luxury Pearlescent Metallic 105# Cardstock  and trim close to the edge.

Emboss a piece of white cardstock (approx. 4” x 5 ¼”) with the Darice Wire Fence Embossing Folder, mount onto a piece of gold Luxury Pearlescent Metallic 105# Cardstock.


Add a strip of sage green twill ribbon wrapping the ends behind the panel.

Add the panel to a white card base and mount the sentiment panel onto the card front with dimensional foam.

Stamp Sets: Autumn Silhouettes (Stamp Simply)

Cardstock/Paper: White,  Luxury Pearlescent Metallic 105# Cardstock - Gold 15 ct, Prima Fruit Paradise 6x6 Paper Pad

Inks/Mediums: Versafine Black Onyx, Zig Wink of Stella Brush- Clear Glitter Marker

Accessories/Tools: Gemini, Jr., Darice Embossing Folder- Wire Fence,  May Arts 5/8” Twill- 30 yd spool- Sage

Thanks again for taking the time to stop by- I hope you have a chance to check out the new releases at Stamp Simply as well as shop our Coffee Themed Sale!


Saturday, November 5, 2022

Easel Card Note Holder with Matching Journaling Tag


Hi Friends!

This week at Stamp Simply, we are celebrating a Week of Gifting with gift tags, packaging, gift ideas, etc.  

I decided to combine the gift packaging with part of the gift by designing an easel card note holder, homemade gift bag and a matching gift journal tag using stamps, dies, paper and other supplies from Stamp Simply!

Gift in Envelope with Journaling Tag

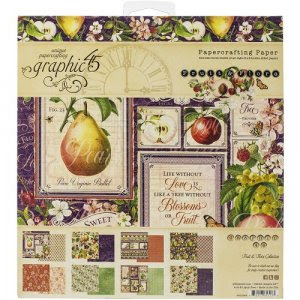
I absolutely love Graphic 45 papers and this beautiful collection, Fruit & Flora is perfect for cards, tags and projects all year round.

I saw this idea from the Graphic 45 Easel Note Card Holder video  and used the Splitcoaststamper easel card tutorial and modified it a bit for my project. 

I created the envelope from 8 ½” x 11” Kraft cardstock (60 lb weight) by measuring the finished folded easel card with the note pad included, added a gusset on each side and bottom, and finished off the front with a piece of the Graphic 45 Fruit & Flora paper.

The folded easel card fits into the handmade envelope (gently to not crease the lace).


The matching journal tag was created with the
Tim Holtz Tag Collection dies , is blank on the back for journaling and helps to close the envelope with the purple seam binding.


I absolutely love the laces at Stamp Simply and used the gorgeous 1.75” Gabriella lace on the easel card along with the ¾” Lucia lace at the bottom of the journaling tag.

The sage green twill ribbon on the easel portion of the card was a perfect match to that beautiful Fruit & Flora Graphic 45 paper as well covering the edge of the lace.

Easel Note Card Holder- open


Both of the verse sentiments are from the new stamp set, Autumn Silhouettes and were heat embossed onto vanilla cardstock before die cutting with the Farmhouse Sentiment Banner Dies.

The easel card was finished off with a few pearls on the easel portion as well as the cover of the sticky note portion.

Easel Note Card Holder- closed

I enjoy participating with online challenges and will be linking this project to the Word Art Wednesday #567-#568 Anything Goes Challenge.

Stamp Sets: Autumn Silhouettes (Stamp Simply)

Cardstock/Paper: Very Vanilla, Elegant Eggplant (Stampin’ Up!), Graphic 45 Fruit & Flora 8x8 Paper Pad

Inks/Mediums: Versafine Black Onyx

Accessories/Tools: Gemini, Jr., Stamp Simply Steel Dies- Farmhouse Sentiments Banner Dies, Sizzix Thinlit Dies by Tim Holtz- Tag Collection, .75” Venise Lace Lucia- Ivory 1 yardVenise Lace Gabriella 1.75”- Ivory 1 yard, Seam Binding Sampler- Blues Purples 30 yds, May Arts 5/8” Twill- 30 yd spool- Sage, Kaisercraft Self-Adhesive Round Pearls- Pearl

Thanks again for taking the time to stop by- I hope you have enjoyed our Week of Gifting at Stamp Simply!  


Wednesday, November 2, 2022

TCC183 Give Thanks Pumpkin Kitty


Hi Friends!

Welcome to the #183 Pumpkin Party Challenge at The Card Concept

I thought that this fun photo had so much inspiration- I love the patterns on the pumpkins as well as the colors and decided to pull out several older stamp sets in my stash to create a Mixed Media card (and, of course, it had to have a black kitty, lol!).

Those of you who follow my blog know that I have a goal to use some of my older stamps and I was able to pull out four older stamp sets to create this card, woohoo!

I also enjoy playing along with other online challenges and will be linking this card to the Tic-Tac-Toe #185 Featured Designer Claire’s Challenge (bottom row across- Die Cuts, Orange, and Enamel Dots- I did not have any enamel dots so I used black rhinestones) along with  the Word Art Wednesday #567-#568 Anything Goes Challenge.


If you have not had a chance to visit our Design Team/gallery at The Card Concept Challenge, or the other challenge sites yet,  I hope you will find time to do so- wonderful inspiration from all!

To create this card:

De-static a piece of black cardstock with an embossing powder tool, ink the Chalkboard Vine background stamp with Versamark ink, stamp onto the prepared panel (omitting stamping some areas), apply white embossing powder and heat set with a heat tool.


Trim the panel to approx. 3 ⅞” x 5”, mount onto a piece of white cardstock, trim to approx. 4 ⅛” x 5 ⅛” and mount onto a 4 ¼” x 5 ½” piece of black cardstock.

Adhere the entire panel onto a white card base.

Die cut the tag from white and black cardstock using the medium tag from the Tim Holtz Tag Collection dies.

Ink the medallion image from the Paisley Bouquet stamp set (Joy Clair Stamps) using Hickory Smoke Distress Oxide ink and stamp onto the white tag die cut.

Heat set the ink with a heat tool, de-static the upper area with an embossing powder tool, ink the sentiment from Autumn Blessings (Verve Stamps) with Versafine Onyx Black ink, stamp onto the tag, apply clear embossing powder and heat set with a heat tool.

Use an orange colored pencil to lightly add orange to the paisley image on the tag, layer the tag onto the black tag and mount onto the card front with dimensional foam.

Stamp the pumpkin from Autumn Harvest (Concord & 9th) with Versafine ink onto white cardstock, apply clear embossing powder and heat set with a heat tool.


Once the embossing has cooled, watercolor the pumpkin with water-based markers and add texture with an orange-colored pencil.

Die cut the pumpkin with the coordinating masking die and mount onto the lower part of the tag (using dimensional foam on the left-hand side where the pumpkin hangs off the tag).

Use a clear glitter pen to add shimmer to the pumpkin.

Using the cat punch (Stampin’ Up!), punch out three cats from black cardstock and glue all three together.

De-static the top of the layered cat with an embossing powder tool, ink the paisley bouquet image with Versamark ink, stamp onto the cat, apply clear embossing powder and heat set with a heat tool (the embossing is hard to see in the photo).

Adhere the cat onto the tag.

Add the black and white checked bow and black rhinestones (my substitute for enamel dots) to finish off the card.

Stamp Sets: Chalkboard Vine Background (Divinity Designs LLC), Autumn Harvest (Concord & 9th), Autumn Blessings (Verve Stamps), Paisely Bouquet (Joy Clair Stamps)

Ink/Mediums: Versamark, Versafine Black Onyx, Stampin’ Write Markers- Pumpkin Pie, Tangerine Tango, Old Olive, Soft Suede; Spectrum Noir Clear Glitter Pen

Cardstock/Paper: White, Black

Accessories/Tools: Gemini, Jr., Sizzix by Tim Holtz- Tag Collection, Embossing Powder Tool, Clear and White Embossing Powder, Heat Tool, Black Rhinestones, ⅝” Black and White Checked Ribbon

I hope you have a chance to create a card and join us for our #183 Pumpkin Party at The Card Concept

Thanks again for taking the time to visit- have a blessed week, sweet friends! 

Related Posts Plugin for WordPress, Blogger...