Saturday, October 29, 2022

With Gratitude


Hi Friends!

Today I am sharing a quick and easy card using the new stamp set, Falling Leaves Border Strip for the sentiment, the new Craft Consortium Monochrome Ink Drops 6x6 paper along with other dies and supplies from Stamp Simply.

As many of you who follow my blog, I have a personal goal to create a card using each of the over 900+ sketches from Splitcoaststampers.  For this card, I used the SC655 sketch for the layout.


I am also playing along with the Simon Says Wednesday “Anything Goes” Challenge.

If you have not already had a chance to do so, I hope you visit the Stamp Simply blog to see all the gorgeous inspiration from the rest of the SS Design Team as well as the Simon Says Wednesday Challenge site- fabulous projects from all!

To create this card:


De-static a piece of gray cardstock with an embossing powder tool, ink the sentiment from the Falling Leaves Border Strip set with Versamark™ ink, apply copper embossing powder and heat set with a heat tool.

Trim the panel, mount onto white cardstock, trim and mount onto copper cardstock.

Trim a piece of the Monochrome Ink Drops paper to approx. 2 ¾” x 5 ½”.  Mount onto white cardstock, trim and mount onto copper cardstock.

Emboss a piece of gray cardstock with the 3D Texture Fades Leaves embossing folder.

Apply copper shimmer paint over the embossed panel, trim and mount onto white cardstock, trim again and mount onto a piece of 4 ¼” x 5 ½” copper cardstock.


Adhere the entire panel onto a white card base.

Add the monochrome ink drop panel allowing part of the panel to overlap the top of the card.

Die cut the large leaf from the Tim Holtz Skeletal Leaves Die from copper cardstock. Mount the leaf die cut onto the monochrome panel (trimming off part of the stem).

Adhere the sentiment panel with dimensional foam to finish off the card.

Stamp Sets: Falling Leaves Border Strip (Stamp Simply)

Ink/Mediums: Versamark™, Copper Shimmer Paint

Cardstock/Paper: White, Gray, Craft Consortium Ink Drops- Monochrome 6x6 Paper Pad, Luxury Pearlescent Metallic 105# Cardstock - Copper 15 ct

Accessories/Tools: Gemini, Jr.™, Sizzix Thinlits Dies by Tim Holtz- Skeleton Leaves, Sizzix 3D Texture Fades A6 Embossing Folder- Leaves


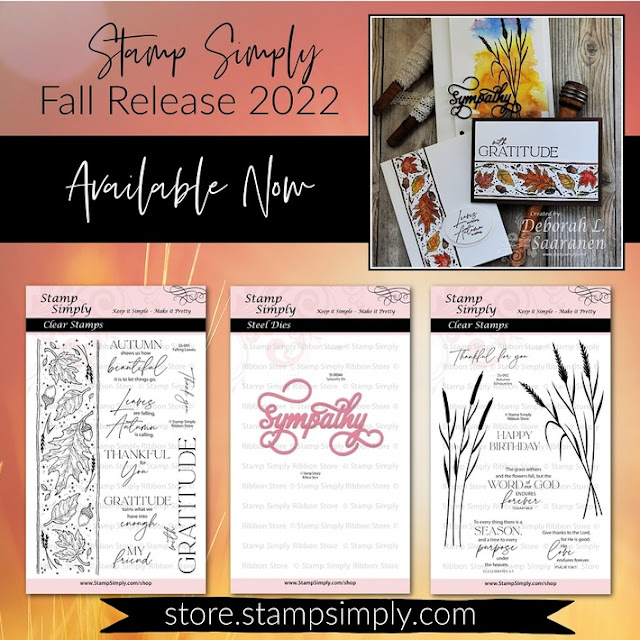
Don’t forget to check out the new Fall and Winter release at Stamp Simply

Thanks again for stopping by- I hope all of you have a wonderful weekend!  

Wednesday, October 19, 2022

TCC182b May the Spirit of Christmas


Hi Friends!

Welcome to the #182a {Harvest Bounty} or #182b {Christmas Joy} Challenge!

This is our mid-month dual inspiration challenge- don’t you just love all both of our inspiration photos?  I am behind in designing my Christmas cards this year and was inspired by the colors, theme and the poinsettias on the hearth of the Christmas Joy photo to create an Elegant and Classy Mixed Media card.

I am also participating with the Word Art Wednesday #565-#566 “Anything Goes” Challenge.

If you have not had a chance to visit our Design Team/gallery at The Card Concept Challenge, or the Word Art Wednesday challenge site yet,  I hope you will find time to do so- gorgeous inspiration from all!

This was a fairly easy card to create:

De-static a piece of white cardstock with an embossing powder tool, ink the poinsettia image from the Floral Cluster- Winter Poinsettia stamp set with Versafine Onyx Black ink, apply clear embossing powder and heat set with a heat tool.

Once cooled, watercolor the image with water-based markers.  Add white highlights with a white paint pen and die cut with the Floral Cluster and Sprigs Die.


Repeat the embossing steps above on another piece of white cardstock with the sentiment from Christmas Peace.  Once the embossing has cooled, die cut with the Spellbinders Elegant Ovals Die.

Die cut a second oval from white cardstock and layer the two to create a thicker sentiment layer.

Trim a piece of the dark floral patterned designer paper from the Carta Bella Happy Christmas 6 x 6 paper pad to approx. 4’ x 4” (cut in half) and layer onto a piece of white cardstock.

Layer a piece of the red checked designer paper from the Carta Bella Happy Christmas 6x6 paper pad onto black cardstock.  Adhere to the background panel covering the cut edges of the dark floral layers.

Trim the white around the background panel, mount onto black cardstock, trim again and mount onto a white card base.

Adhere the sentiment panel directly to the card front and add the winter poinsettia image with dimensional foam.

Finish off the card using a clear glitter pen on the petals (hard to see in the photo) and white pearls to the floral center and the lower right area of the sentiment oval.

Stamp Sets:  Floral Cluster-Winter Poinsettia, Christmas Peace (Stamp Simply)

Ink/Mediums:  Versafine™ Onyx Black, Stampin’ Write Markers- Poppy Parade, Cherry Cobbler, Pear Pizzazz, Mossy Meadow; Zig Wink of Stella Brush- Clear Glitter Marker

Cardstock/Paper: White, Black, Carta Bella Happy Christmas 6x6 Paper Pad

Accessories/Tools: Gemini, Jr., Stamp Simply Steel Dies- Floral Cluster and Sprigs,  Spellbinders Elegant Ovals Dies, Embossing Powder Tool, Clear Embossing Powder, Heat Tool, Kaisercraft Self-Adhesive Round Pearls- Pearl

Thanks so much for stopping by-I hope you have been inspired to join us with our #182a {Harvest Bounty} or #182b {Christmas Joy} Challenge

Saturday, October 15, 2022

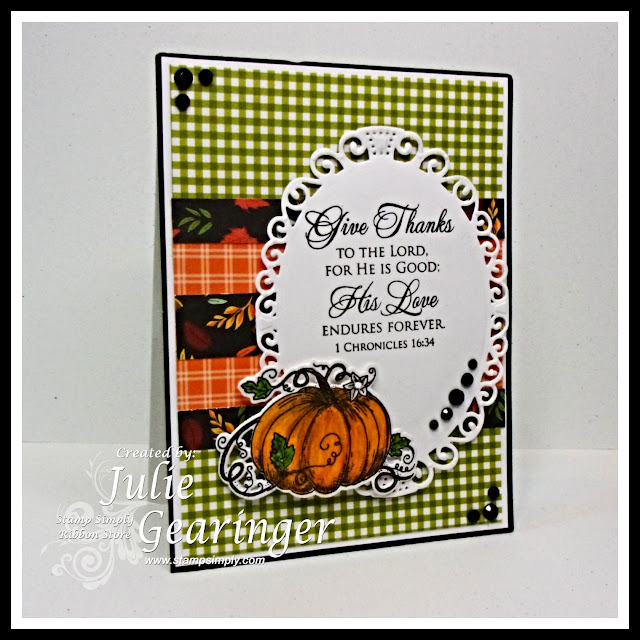
His Love Endures Forever


Hi Friends!

Today I am sharing a quick fall card designed with stamps, dies and other supplies from Stamp Simply.

I love the colors of Autumn as well as the leaves, pumpkins and other elements that remind us of the cozy days ahead and the future winter months to come.

I enjoy participating with online challenges and will be playing along with the SimonMonday Fabulous Fall Mood Board Challenge, the Simon Wednesday Fall Color Challenge and the Double Trouble Challenge #122 Fall Colors- Leafin’ Up to You Challenge.

If you have not already had a chance to do so, I hope you visit the Stamp Simply blog to see all the beautiful inspiration from the rest of the SS Design Team as well as the above challenge sites- wonderful projects from all!

To create this card:


Trim the gingham piece of designer paper from the Carta Bella Welcome Autumn 6x6 Paper Pack to 4” x 5 ¼”. 

Add the horizontal strips of the Carta Bella Welcome Autumn designer paper (I used scraps from another project), trim the ends and mount the panel onto a piece of white cardstock.

Trim and mount onto a piece of black cardstock before adhering to the white card base.

De-static a piece of white cardstock with an embossing powder tool, ink the verse sentiment from the Give Thanks clear stamp set using Versafine Black Onyx ink, apply clear embossing powder and heat set with a heat tool.


Once the embossing has cooled, die cut the sentiment with the Spellbinders Elegant Ovals Dies.

Ink the pumpkin image from the Welcome Fall bundle with Versafine Black Onyx ink, heat set the ink with a heat tool.

Using watercolor pencils, watercolor the pumpkin image (heat setting the color with a heat tool).

Use the coordinating die from the Welcome Fall bundle to die cut the pumpkin (also die cutting another pumpkin from plain white cardstock).  Layer the colored image onto the blank die cut creating a thicker die cut.


Mount the sentiment oval onto the card front with dimensional foam and add the die cut pumpkin.

Finish off the card with black rhinestones.

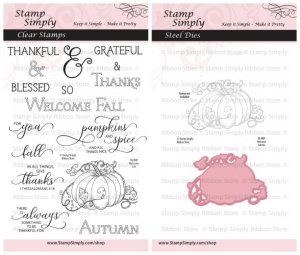
Stamp Sets: Give Thanks, Welcome Fall Bundle (Stamp Simply)

Ink/Mediums:  Versafine™ Onyx Black, Derwent Watercolor Pencils- Orange, Green, Brown and Black

Cardstock/Paper: White, Black, Carta Bella Welcome Autumn 6x6 Paper Pack

Accessories/Tools: Gemini, Jr., Welcome Fall Bundle, Embossing Powder Tool, Clear Embossing Powder, Heat Tool, Kaisercraft Self-Adhesive Round Rhinestones – Black


Check out the Flash Sale on Graphic 45 Paper this weekend!


plus don’t forget to check out all the 

new items including the 2022 Winter/Fall Release  at Stamp Simply!


Thanks again for stopping by-I hope all of you have a fabulous weekend!


Saturday, October 8, 2022

Trio of Tags- Autumn Silhouettes


Hi Friends!

This week on the Stamp Simply blog, the Design Team are focusing on tags.  

While I had the inks out from my last post, I decided to pull out two Stamp Simply stamp sets (including the new Autumn Silhouettes) along with a Tim Holtz stencil to create my mixed media tag trio.

As many of you who follow my blog know that I enjoy participating with online challenges and I am linking this card to the Word Art Wednesday #563-#564 Anything Goes Challenge.

If you have not already had a chance to do so, I hope you visit the Stamp Simply blog to see all of the tag inspiration from the rest of the SS Design Team as well as the above challenge sites- gorgeous cards/tags from all!


To create this set of tags:

Die cut three tags from white cardstock using the medium tag die from the Sizzix Thinlits by Tim Holtz Tag Collection (I used a white cardstock with a bit of a coating that I have in my stash- sorry, not sure of the manufacturer, I used to work for a printing company and it was some of their overstock).  

Using a stencil brush, apply Fossilized Amber Distress Oxide Ink to the majority of the tags.


De-static the tags with an embossing powder tool, ink the wheat image from the Autumn Silhouettes using Versamark™ ink, apply clear embossing powder and heat set with a heat tool.

Once the embossing has cooled, use a stencil brush to Candied Apple and Crazed Pumpkin Distress Oxide ink and gently heat set the ink with a heat tool.

Using a stencil brush, apply Seedless Preserves Distress Oxide ink over the wheat images.  Use a dry paper towel to wipe off the excess ink from the stamped images.

Use a purple water-based markers to add additional shadows around the wheat images,

Ink the Scripty Background Minis 2 image with Versafine Onyx Black ink. Stamp = sporadically over the tag (not stamping the entire image) and wipe off the excess ink over the stamped images.

Heat the script images slightly to set the ink.

Using a stencil brush, with the Tim Holtz Layering Stencil- Flourish, apply Seedless Preserves Distress Oxide Ink around the tag (re-positioning the stencil to create texture).

Lightly spritz the tag with water to create a splatter effect on the background, allow the water to set for a few seconds, then dab with a dry paper towel before lightly heating each tag with a heat tool to dry the ink.


De-static the lower left portion of the tag with an embossing powder tool, ink the verse sentiments from the Autumn Silhouettes using Versafine™ Onyx Black ink, apply clear embossing powder and heat set with a heat tool.

Finish off the tag with a looped piece of black seam binding.

Stamp Sets:  Autumn Silhouettes, Scripty Background Minis 2 (Stamp Simply)

Ink/Mediums:  Versafine™ Onyx Black, Versamark™, Tim Holtz® Distress Oxide- Fossilized Amber, Candied Apple, Carved Pumpkin, Seedless Preserves; Stampin’ Write Elegant Eggplant Marker

Cardstock/Paper: Coated White (not sure of manufacturer, in my stash)


Accessories/Tools: Gemini, Jr., Sizzix Thinlits by Tim Holtz- Tag Collection, Tim Holtz Layering Stencil- Flourish, Embossing Powder Tool, Clear Embossing Powder, Heat Tool, Stencil Brushes, ½” Black Seam Binding


Don’t forget to check out all the new items including the 2022 Winter/Fall Release  at Stamp Simply!


Thanks again for stopping by-I hope you inspired you to create something this weekend!


Wednesday, October 5, 2022

TCC181 Colors of Fall


Hi Friends!

Welcome to the #181 Colors of Fall Challenge

Don’t you just love all of the vibrant colors in our inspiration photo?  I was inspired by the colors, the leaves and nature to create a Mixed Media card. 

I pulled out a few retired Stampin’ Up! sets for this card and used a heat emboss resist technique.

As many of you know that follow my blog, I enjoy playing along with online challenges and will be linking this card to the Featured Designer Jeanne #181 Tic-Tac-Toe Challenge (far right column down Autumn Colors-Enamel Dots/Gems- Ink Blending).  I used Nuvo™ Jewel Drops (hopefully they qualify as enamel dots).  

I am also linking to the Use Your Stuff #468 "Autumn or Fall" Challenge (I chose Fall and used stamps that are many years old (French Foliage is from approx. 2010), the Shopping Our Stash #480 "Leaf Me Alone" Challenge , the Stamping Sensation October "All Things Autumn" Challenge , the We Love Stamping "Autumn" Challenge and the Make My Monday #184 "Autumn Flora or Fauna" Challenge (I love the leaves in the fall).

If you have not had a chance to visit our Design Team/gallery at The Card Concept Challenge, or the other challenge sites,  I hope you will find time to do so- wonderful inspiration from all!


This was a fairly easy Mixed Media card to create:

Using a stencil brush, apply Fossilized Amber Distress Oxide Ink to the majority of a 4 ¼” x 5 ½” coated white cardstock panel.

Repeat the above with Candied Apple, Crazed Pumpkin, applying less ink than the Amber and heat set the ink with a heat tool.

De-static the panel with an embossing powder tool, ink the leaf images from the retired Stampin’ Up! French Foliage using Versamark™ ink, stamp a few leaves onto the panel (not overlapping at this point), apply clear embossing powder and heat set with a heat tool.

Create a mask for each leaf, apply a bit more distress oxide ink onto the panel, mask the leaves that have already been stamped and embossed, ink the stamps again with Versamark™ ink, stamp over the masked leaves and repeat the above embossing steps.

Once you have embossed the leaves to your satisfaction, apply Seedless Preserves Distress Oxide ink over the embossed images.  Wipe the ink off the embossed images.

Using a purple water-based marker, deepen the shadows around some of the leaves and blend into the background,


Ink the script stamp with Versafine™ Onyx Black and repeatedly stamp over the background (sporadic and not pressing too hard), stamping off to lighten the ink as well.

Repeat the above with the canceled postage image and stamp the Gorgeous Grunge splatter image with Seedless Preserves. Wipe off the ink from the embossed images and heat set the background carefully (being careful not to melt the previously embossed leaves).

Trim the panel, mount onto light yellow cardstock, trim again and mount onto black cardstock. Adhere the panel to a white card base.

De-static a scrap piece of black cardstock, ink the sentiment from Moon Lake with Versamark™ ink, apply white embossing powder and heat set with a heat tool.

Cut the pieces of the sentiment apart and mount onto the card front with dimensional foam.

To finish off the card, add a few Nuvo™ Morning Dew Jewel Drops and allow them to dry naturally. 

Stamp Sets:  French Foliage, Gorgeous Grunge, Moon Lake (all retired Stampin’ Up!)

Ink/Mediums:  Versafine™ Onyx Black, Versamark™, Tim Holtz® Distress Oxide- Fossilized Amber, Candied Apple, Carved Pumpkin, Seedless Preserves; Stampin’ Write Elegant Eggplant Marker, Nuvo™ Morning Dew Jewel Drops

Cardstock/Paper: Coated White (not sure of manufacturer, in my stash), Barely Banana, Basic Black

Accessories/Tools: Embossing Powder Tool, Clear and Extra Fine White Embossing Powder, Heat Tool, Stencil Brushes

Thanks so much for stopping by-I hope you have been inspired to join us with our #181 Colors of Fall Challenge!

Saturday, October 1, 2022

Have a Cup On Us


Hi Friends!

In celebration of International Coffee Day, World Card Making Day and the National Coffee Day Blog Hop, there are several blog hops and prizes! 

Come hop along for a chance to win prizes!


Come hop along and leave a comment for a chance to win!


The National Coffee Day Blog Hop and the Stamp Simply National Blog Hop post are still active as well!  Come hop along and leave a comment for a chance to win!  It’s easy to enter to win!  Just leave a comment on this Stamp Simply Blog Post telling us what your favorite HOT beverage is. This post is open for comments thru Tuesday, 10/04/22. The winner will be announced on Thursday, 10/06/22 in the evening.


Plus, Stamp Simply is one of the sponsors of the National Coffee Day Blog Hop and to celebrate, all items in the Stamp Simply Coffee Category (stamps, dies, paper, ribbon, embellishments) are 15% OFF with code Coffee2022.

FYI- The sale code is Case Sensitive and runs through 10/02/22.  Also note: Select stamps/dies that were marked at 35% OFF previously, are still on sale and you still get another 15% OFF those!!!   Shop the Coffee Category here.


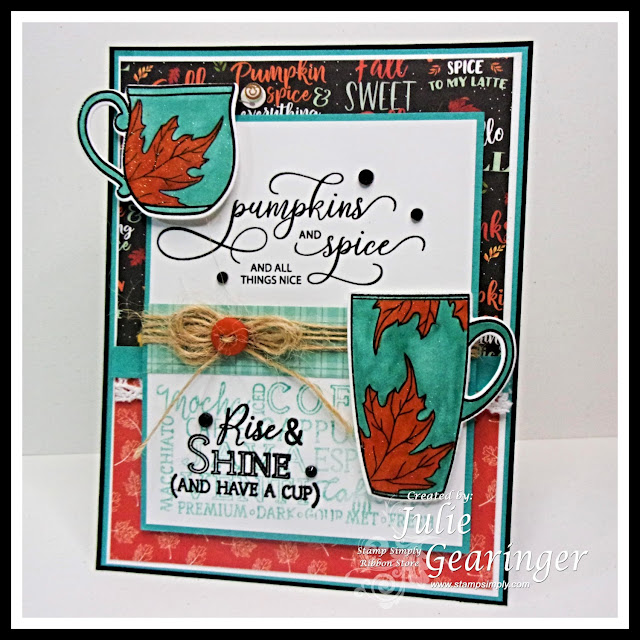
To celebrate, I am sharing a fall coffee card designed with several stamp sets and supplies from Stamp Simply!


To create this card:

De-static two panels of white cardstock (4 ¼” x 5 ½”) with an embossing powder tool.

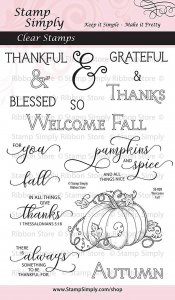
With Versafine Onyx Black ink, stamp the coffee cup /images from the Have A Cup On Us Bundle and on the other panel, stamp the sentiment from Welcome Fall.

Apply clear embossing powder and heat set with a heat tool.

Once the embossing has cooled, create a mask with a sticky note and stamp/heat emboss the leaf image from Harvest onto the coffee cups in the same manner as above.

Die cut the coffee cups using the coordinating Have A Cup On Us Bundle dies and color with water-based markers. Add a bit of shimmer with a clear glitter pen to both cups and set aside.

Trim the panel with the “pumpkins and spice…” sentiment to approx. 2 ¾” x 4 ¼” . 

Ink the subway style background stamp from A Cup of Java with teal ink (I used the same teal marker to color the stamp), stamp onto the bottom of the panel.


De-static the panel and heat emboss the sentiment “Rise & Shine” from the A Cup of Java stamp set with clear embossing powder (same steps as above for the heat embossing).

Add a strip of plaid designer paper (a scrap from the Doodlebug Design Pumpkin Spice 6x6Paper Pad) and mount onto a piece of teal cardstock.

Wrap a few strands of natural twine (wrapping the twine ends behind the panel) add the twine bow with a button.

Trim the pieces of Carta Bella Welcome Autumn designer paper to approx. 3 ¾” x 2 ½” and layer onto a piece of white cardstock.  Mount the panel onto a piece of teal cardstock, trim again and mount onto a piece of black cardstock, finally mounting onto a white card base.

Adhere a piece of 3/8" white crochet lace and a piece of scrap cardstock to cover the raw edges of the designer paper.


Adhere the layered twine/button panel onto the card front using dimensional foam and add the stamped/die cut coffee cups with dimensional foam as well.

Finish off the card with a few black rhinestones.

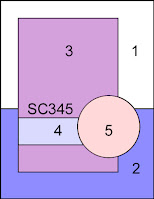
As many of you know, I enjoy participating with online challenges and used the Splitcoaststampers SC345 Sketch for the layout and will also be linking to the Simon Says Monday “Emboss It” Challenge, the Addicted to Stamps and More #439 Any Occasion Challenge and the Word Art Wednesday #563-#564 “Anything Goes” Challenge.

If you have not already had a chance to do so, I hope you visit the Stamp Simply blog to see all of the inspiration from the rest of the SS Design Team as well as the above challenge sites- gorgeous  galleries from all!


Stamp Sets: A Cup of Java, Have A Cup On Us Bundle, Harvest, Welcome Fall (Stamp Simply)

Ink/Mediums: Versafine Onyx Black, Stampin' Write Markers- Coastal Cabana, Tangelo Twist; Zig Wink of Stella Clear Glitter Marker

Cardstock/Paper:  White, Black, Coastal Cabana; Doodlebug Design Pumpkin Spice 6x6 Paper Pad, Carta Bella Welcome Fall 6x6 Paper Pad

Accessories/Tools: Gemini, Jr., Stamp Simply Dies- Have A Cup on Us Bundle. White Crochet Lace, Natural Twine, Black Rhinestones, Pumpkin Button (from my stash)


Thanks again for stopping by! I am praying for those of you in the path of Hurricane Ian and hope you are staying as safe as possible.  

Related Posts Plugin for WordPress, Blogger...