Wednesday, March 30, 2022

The Card Concept #172 Easter Blessings


Hi Friends!


It’s time for the
#172 {Easter Blessings} Challenge at The Card Concept!

I was inspired by the bunnies (especially the moss covered bunny) in the wood tiered tray along with the Easter theme to create a Clean and Layered Mixed Media card!

Luckily, I had this Bunny Retreat image from Inkadinkado already heat embossed and colored in my stash!  

FYI- Sometimes when I pull out my older stamps, I will stamp a few images and keep them for later use. 


With my hubby still in the nursing home/rehab, this already colored image was perfect for our challenge! I have not had time to spend stamping or creating and I miss it!  Plus, I already had the white dry embossed background panel in my stash along with the green polka dot designer paper :-)  Love it when that happens...


I decided to create a Clean and Layered card, so I layered all of the panels onto black cardstock, stamped and heat embossed the verse sentiment from a retired Verve stamp set, and the card was finished!


The Splitcoaststampers SC177 Sketch was incorporated into the layout (many of you know that it is a personal goal of mine to create a card from each of the over 850+ sketches at Splitcoaststampers- yea, another one done!)

If you have not had a chance to visit us at The Card Concept , I hope you will take a moment to do so! Gorgeous designs from the rest of my sisters on The Card Concept Design Team

Stamp Sets: Bunny Retreat (Inkadinkado), Scripture Medley 2 (retired Verve Stamps)

Ink/Mediums: Versafine Black Onyx, various Water-based Markers (Stampin’ Up!)- Grays, Greens, Pink, Pool Party; Wink of Stella Clear Glitter Marker

Cardstock/Paper: Whisper White, Basic Black; Stampin ‘ Up! designer paper (retired and from my stash)

Accessories/Tools: Big Shot™,  Stitched Rectangle A2 STAX Dies (My Favorite Things), retired Lacy Brocade Embossing Folder (Stampin' Up!),  Embossing Powder Tool, Clear Embossing Powder, Heat Tool, Rhinestones

Thanks again for stopping by! I hope you will have the time to create a card based on our inspiration photo and join us!

Saturday, March 26, 2022

The Fear of the Lord


Hi Friends!

Today I am sharing another quick card designed with the brand new release stamp bundle, A Man of Knowledge along with the Craft Consortium Patina 6x6 Paper Pad and other supplies all from Stamp Simply!


The new A Man of Knowledge stamp bundle is perfect for all types of card, masculine or feminine- I love the book image as well as the sentiments and verses!

Also, I think all the patterns in the new Craft Consortium Patina 6x6 paper pad are fantastic for rustic, mixed media as well as masculine cards. 


Again, it was a bit difficult for me to get a good photo with the gold embossing, but in real life, the embossing looks so elegant, especially on the image of the books!


I enjoy playing along with online challenges and will be linking this card to the Word Art Wednesday #535-#536 “Anything Goes” Challenge , along with the Tic-Tac-Toe #154 Featured Designer Joanne Challenge (diagonal right to left- Die Cut, Free, Gold) and the My Time to Craft #478 “Lots of Layers- Minimum 3” Challenge

If you have not already had a chance to do so, I hope you take the time to visit the Stamp Simply blog and check out the inspiration from the rest of the SS Design Team as well as the above challenge sites- fabulous galleries from all!

To create this card:

Trim a piece of the gorgeous Patina designer paper from  Craft Consortium to approx. 4” x 5 1/4” and mount onto a piece of gold metallic cardstock, trim close to the edge and mount onto a piece of espresso cardstock.


Wrap a strip of 5/8” Teal Twill Ribbon over the background and wrap the ends behind the panel.

Adhere the background panel to a white card base.


Add a scrap strip of the
gold metallic cardstock over the center of the twill ribbon.

De-static another piece of the Patina 6x6 paper with an embossing powder tool, stamp the book image from A Man of Knowledge Bundle with Versamark ink onto the prepared panel, apply gold embossing ink and heat set with a heat tool.

Die cut with the coordinating die from A Man of Knowledge, also cutting another image from espresso cardstock (to layer behind the stamped image).

Repeat the above steps with white cardstock using the verse sentiment from A Man of Knowledge Bundle set.  Once the embossing has cooled, die cut the sentiment with the Fishtail Sentiment Banners Die.

Die cut another banner from espresso cardstock and layer behind the verse sentiment.

Add the banner sentiment to the card front with dimensional foam and mount the book image over the sentiment banner using a double layer of dimensional foam to finish off the card. 

Stamp Sets: A Man of Knowledge Bundle or A Man of Knowledge clear stamp set (Stamp Simply)

Ink/Mediums: Versamark™

Cardstock/Paper:  White, Espresso; Craft Consortium Patina 6x6 Paper Pad

Accessories/Tools: Gemini, Jr., Stamp Simply Clear Stamps- A Man of Knowledge Bundle, Stamp Simply Dies- Fishtail Sentiment Banners, May Arts 5/8” Twill- 30 yd spool- Teal,  Embossing Powder Tool, Gold Embossing Powder, Heat Tool

An update on my hubby- he is in a sub-acute rehab recovering from surgery for his primary brain tumor (a glioblastoma).  We are still waiting on the pathology report to determine the grade of the tumor and what the future holds.  

He is unable to speak more than an occasional "OK" but does seem to have retained most of his long-term memory, but has a very short attention span.  Also, his short term memory is basically non-existent.  He is getting a bit stronger physically each day but is still very weak compared to prior to his surgery.

Thank you, again for your prayers and well wishes- we are fully trusting in the Lord and know that He has the Perfect Plan for our lives!

Also, don’t forget to check out the new release at Stamp Simply!  So many wonderful sets for all occasions!


Saturday, March 19, 2022

Happy Anniversary Iris


Hi Friends!

Today I am sharing an Anniversary card designed with the brand new release stamp bundle, Happy Day Iris along with the new Echo Park My Favorite Spring 6x6 paper pad along with other supplies from Stamp Simply.


As I have mentioned before, irises were my Mother’s favorite flower and the Echo Park My Favorite Spring 6x6 Paper pad has such pretty pastels that pair well with irises as well as with the Craft Consortium Ink Drops- Vivid 6x6 paper pad!

I enjoy playing along with online challenges and am linking to the As You See It #270 Spring is in the Air Challenge, the Festive Friday #105 World Party Day (Sparkle, Bright Colors, Celebratory Sentiment, Rhinestones, Layers) and the Word Art Wednesday #533-#534 “Anything Goes” Challenge.  

If you have not already had a chance to do so, I hope you visit the Stamp Simply blog to see all of the inspiration from the rest of the SS Design Team as well as the above challenge sites- gorgeous  galleries from all!


To create this card:

Trim a piece of the light green designer paper from the My Favorite Spring 6x6 paper and a piece of light purple designer paper from the Craft Consortium Ink Drops- Vivid 6x6  paper pad (this was a scrap from my last Iris project) to approx. 2 ½” x 4” each.


Emboss a piece of white cardstock approx. 4” x 5 ½” with the Brickwork embossing folder. 

Add the piece of light green My Favorite Spring designer paper to the bottom of the embossed brick background panel.

Die cut the lace trim from white cardstock using the Tim Holtz Crochet Die and layer over the top edge of the light green strip.

Layer the light purple  Craft Consortium Ink Drops- Vivid 6x6 designer paper over the top of crochet die cut.

Adhere the entire layered background panel to a piece of 4 ⅛” x 5 ¼” black cardstock.


Add a strip of the light purple seam binding from the Blues Purples Seam Binding Bundle over the top edge of the white crochet die cut, wrapping the ends behind the panel.  Mount the panel onto a white card base.

De-static a piece of white cardstock with an embossing powder tool, stamp the iris image from the Happy Day Iris Bundle with archival black ink onto white cardstock, apply clear embossing powder and heat set with a heat tool.

Once the embossing has cooled, watercolor the image with water-based markers and die cut with the coordinating Happy Day Iris die (also die cut another iris from plain white cardstock to adhere behind the colored image).

Die cut a piece of white cardstock with an elegant oval die , de-static with an embossing powder tool, stamp the sentiment from the  Happy Day Iris Bundle with archival black ink onto white cardstock, apply clear embossing powder and heat set with a heat tool.

Layer the die cut oval sentiment directly onto the card front.

Adhere the colored/die cut iris onto the card front with dimensional foam.

Repeat the embossing process noted above for the word “Anniversary”, die cut with a rectangle die, mount onto black cardstock and trim close to the edge.

Mount the rectangle die cut sentiment to the card front using dimensional foam.

Adhere the bow created from the same light purple seam binding (from the Blues Purples Seam Binding Bundle ) and add a few light green rhinestones.

To finish off the card, use a clear glitter marker to add shimmer to the iris petals.

Stamp Sets: Happy Day Iris Bundle (Stamp Simply)

Ink/Mediums: Versafine Onyx Black, Stampin’ Write Markers- Granny Apple Green, Mossy Meadow, Highland Heather, Gorgeous Grape, Rich Razzleberry; Zig Wink of Stella Brush- Clear Glitter Marker

Cardstock/Paper:  White, Black;  Echo Park My Favorite Spring 6x6 Paper Pad; Craft Consortium Ink Drops- Vivid 6x6

Accessories/Tools: Gemini, Jr., Stamp Simply Steel Dies- Happy Day Iris (part of the Happy Day Iris Bundle), Sizzix 3D Texture Fades A6 Embossing Folder- Brickwork, Spellbinders Elegant Oval Dies , Sizzix Thinlit Dies by Tim Holtz- Crochet, Kaisercraft Self-Adhesive Round Rhinestones- Split Pea,  , Seam Binding Sampler- Blues Purples- 30 yards, Embossing Powder Tool, Clear Embossing Powder, Heat Tool

Don't forget to check out the new release and other sales at Stamp Simply- plus free shipping and handling on net orders of $100 or more!


Thanks again for taking the time to stop by-  I hope all of you have a blessed week!  

Thursday, March 17, 2022

Your Word is Truth


Hi Friends!

Today I am sharing another card designed with the brand new release stamp bundle, A Man of Knowledge along with the new God's Word clear stamp set , Craft Consortium Patina 6x6 Paper Pad and other supplies all from Stamp Simply.  

I absolutely love the new A Man of Knowledge stamp bundle- perfect for all types of card, masculine or feminine!  Plus, the new God’s Word stamp set has so many great Scripture verses that are perfect for all year round!


I decided to pair the stamps listed above with the new Craft Consortium Patina 6x6 paper and create a more masculine type of card.  Also, my apologies, I had a hard time getting a good photo of this card due to the shine on the gold embossing but in real life, the gold looks so elegant, especially on the image of the books!

For those of you who follow me, you know that I enjoy playing along with online challenges and one of my personal goals is to create a card for each of the Splitcoaststampers sketches (over 880 now).  I was able to incorporate the SCS sketch #SC15 (modified layer #3 for the sentiment) into the design.    


I am also linking to the Word Art Wednesday #535-#536 “Anything Goes” Challenge and the FUSION 03/17/22 “Bookshelf” Challenge (I was inspired by the books). 

If you have not already had a chance to do so, I hope you visit the Stamp Simply blog to see the inspiration from the rest of the SS Design Team as well as the above challenge sites- fabulous galleries from all!


To create this card:

Trim a piece of the gorgeous Patina designer paper from  Craft Consortium to approx. 4” x 5 1/4” ( I really love all of the patterns in this paper pad and have a hard time covering them up, lol!) and mount onto a piece of white cardstock, trim close to the edge and mount onto a piece of espresso cardstock.

Wrap a strip of the Patina Bundle seam binding around the front of the panel wrapping the ends behind the panel. 

Adhere the panel onto a white card base.

De-static a piece of white cardstock with an embossing powder tool, ink the verse sentiment from God’s Word with Versamark ink, stamp onto the prepared panel, apply gold embossing powder and heat set with a heat tool.

Die cut the sentiment with the Stamp Simply Fishtail Sentiment Banner dies , Die cut another banner the same size from espresso cardstock, cut in half and layer behind the sentiment to create a small border on the edges.


Repeat the process above with a piece of espresso cardstock to emboss the book image from A Man of Knowledge and die cut with the coordinating die from the A Man of Knowledge Bundle (this cardstock was a bit thicker but, again, I die cut another piece of espresso cardstock to layer behind the stamped image to give it more stability).

Mount the layered sentiment directly to the card front and add the gold embossed book image with dimensional foam or chipboard (my preferred method).

Quick and easy, perfect for an encouragement or general thinking of you.

Stamp Sets: A Man of Knowledge Bundle or A Man of Knowledge clear stamp set , God’s Word clear stamp set (Stamp Simply)

Ink/Mediums: Versamark™

Cardstock/Paper:  White, Espresso; Craft Consortium Patina 6x6 Paper Pad

Accessories/Tools: Gemini, Jr., Stamp Simply Clear Stamps- A Man of Knowledge Bundle, Stamp Simply Dies- Fishtail Sentiment Banners, Seam Binding Sampler- Patina – 30 yards, Embossing Powder Tool, Gold Embossing Powder, Heat Tool

Don't forget to check out the new release from Stamp Simply! Plus select sets are 35% off (no code needed- sale price already noted) and free shipping on net orders of $100 or more.  

Thanks again for taking the time to stop by!  A quick update from my last post, my hubby is in the rehab center now and we are praying that he will be able to be strong enough to come home in a few weeks :-)  

Thanks for all of your prayers and well wishes, hugs and I hope you have a blessed week!  

Wednesday, March 16, 2022

The Card Concept #171 - Cast Your Cares Tulip


Hi Friends!

It’s 
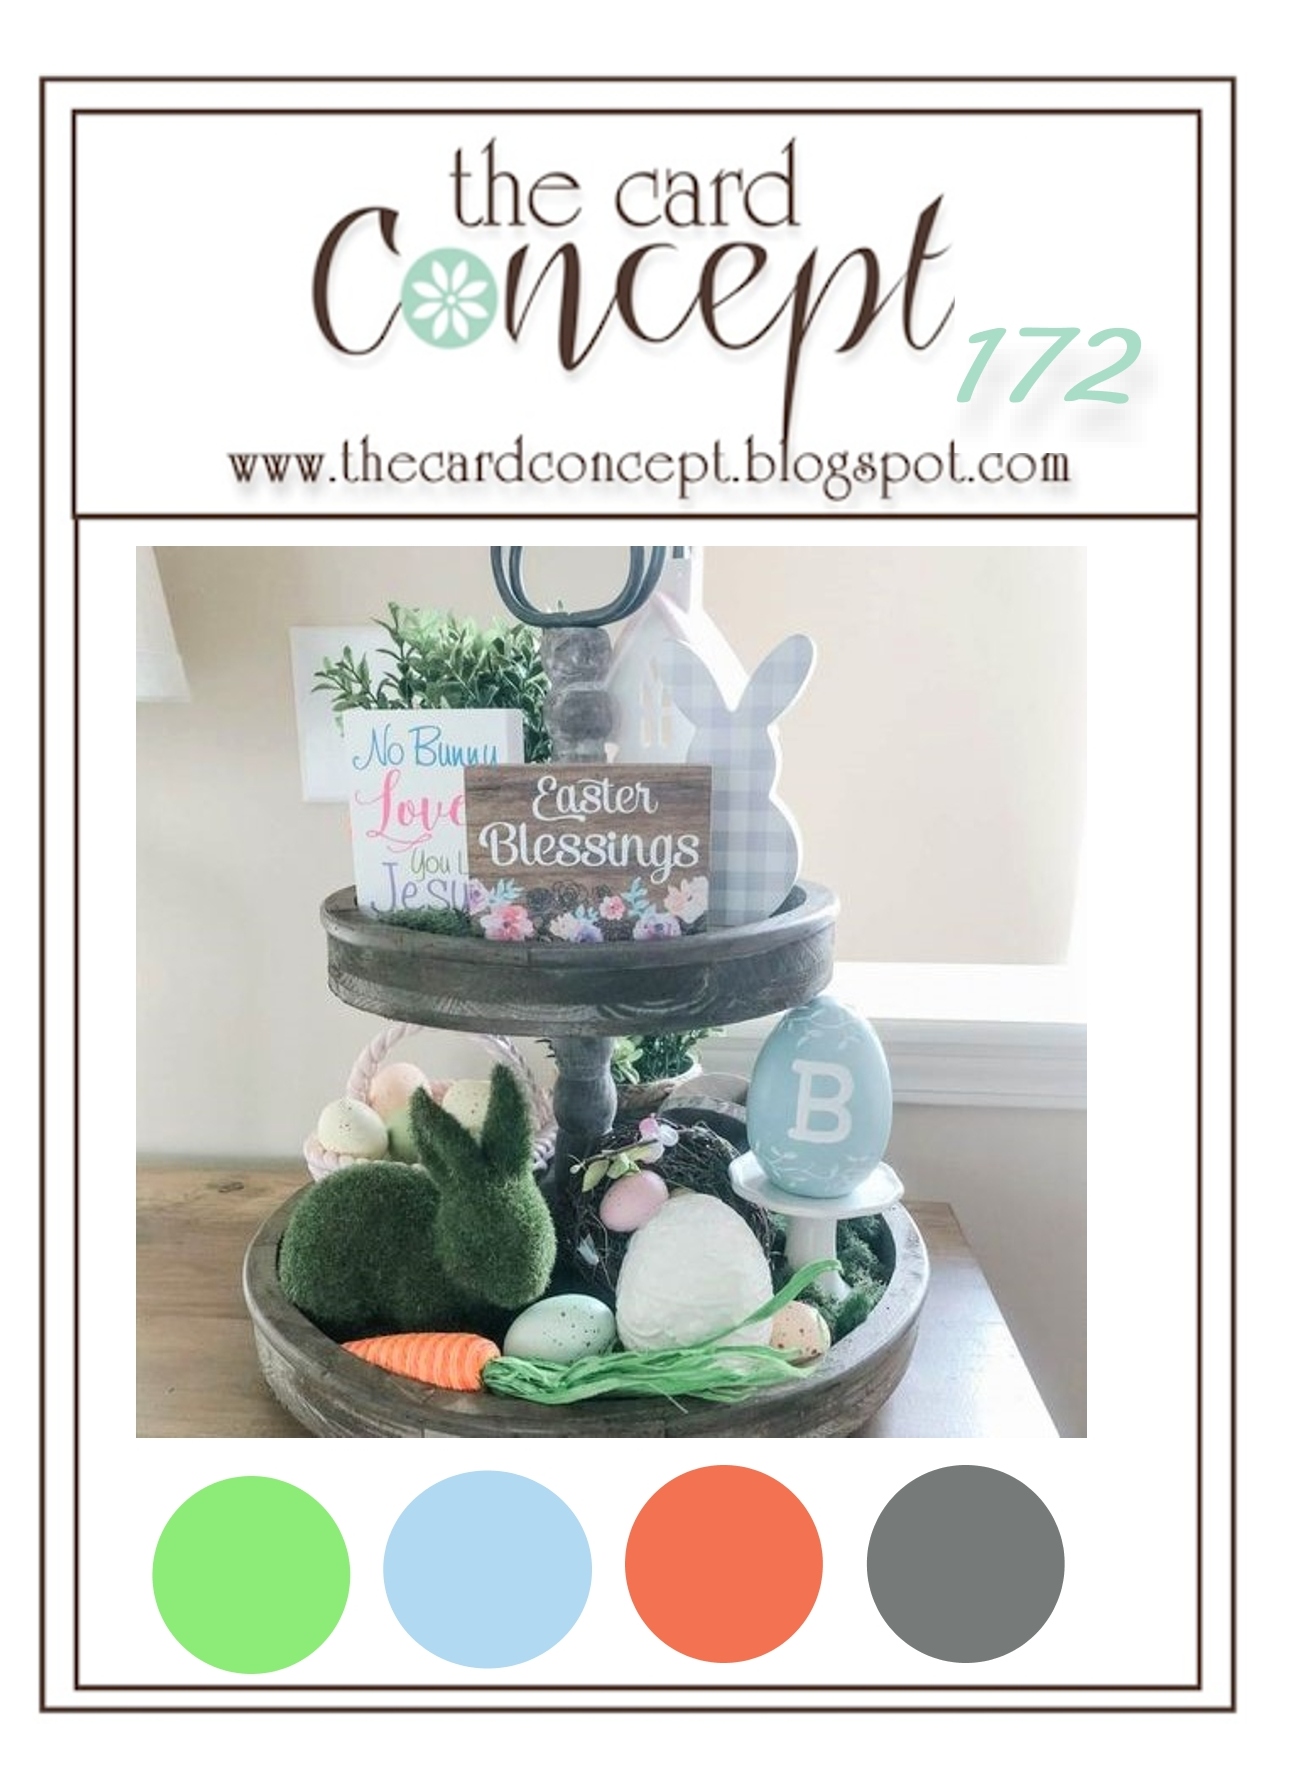
time for the #171 {Spring Garden} Challenge at The Card Concept!

I was inspired by the colors and flowers in our photo as well as the Spring Theme to create a Clean and Layered/Mixed Media card!  I enjoy the cooler weather of spring, and here in Maryland, the last few days have had temperatures in the 50’s & 60’s- my kind of spring weather for sure! 

I also wanted to share with those of you who follow my blog, I have not been posting as frequently as I would like.  My hubby, Dave has been battling five different cancers over the last 20 years and the most recent cancer was just diagnosed on Monday, March 7th.  After exhibiting increasingly rapid dementia type symptoms (over the course of about a week), it was discovered that he had a primary brain tumor the size of a lemon in his left frontal lobe.

Dave had brain surgery on Wednesday, March 9th and they were not able to remove all of the tumor (due to blood vessels that were intertwined within the mass).  He is being transported (hopefully today) from Johns Hopkins to a rehab center near my home and my prayers are that he would get stronger physically, so I can bring him home to be with me.

We know that the Lord has the perfect plan for us, and while I may wish to keep my hubby here with me on this earth, if the Lord decides to take him home to heaven, I know that it would be far better for Dave.  Unfortunately, Dave will never regain his short-term and some of his long-term memory (or possibly the ability to speak) again.

One of our favorite verses is
“For to me, to live is Christ, and to die is gain.   Philippians 1:21 (NKJV)

Thanks for the chance to share a bit with my followers- I feel like we are family even though we may never have a chance to meet here on earth :-)

Also, many of you know that I enjoy participating with online challenges and will be linking this card to one of my favorite challenge sites, Retro Rubber Blog Challenge #178 “Anything Goes”.  

The Retro Rubber Blog Challenge requires that you use a stamp that is at least one year 
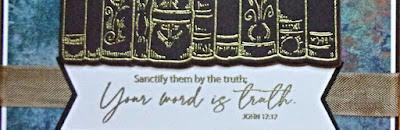
old (one of my goals as well).  The sentiment on this image from Stamp Simply is many years old as well as the main Power Poppy digital floral image.  FYI- I had this image printed and hand colored in my stash since 2019 (when my hubby had his bladder/prostate removal surgery), 

Thankfully, this image was perfect for both challenges! If you have not had a chance to visit us at The Card Concept , I hope you will take a moment to do so! Gorgeous designs from the rest of my sisters on The Card Concept Design Team, plus stop by the Retro Rubber Challenge Blog and check out their talented Design Team as well!

Other than the time it took to hand color/watercolor this image, the card took very little time to create!

To create this card:

Using a editing software (I used the retired Stampin’’ Up! My Digital Studio), download the digital Tulips in Hobnail Pitcher image from Power Poppy by Marcella, resize and print onto white cardstock.


Hand color the image with watercolor pencils and water-based markers.  I used a water soluble graphic pencil as well for the shadow area (or you could use a black watercolor pencil).  Once you are satisfied with the colors, die cut the panel with a stitched rectangle die.

De-static the lower right hand area for the panel with an embossing powder tool.  Ink the verse sentiment from the Fear Not clear stamp set  (Stamp Simply) with Versafine Black Onyx ink, stamp onto the prepared area, apply embossing powder and heat set with a heat tool.  I just love the fonts used in the Stamp Simply Fear Not stamp set, don't you?  Plus this verse is also one of our favorites! 

Layer the main focal image panel onto black cardstock and trim close to the edge.

Layer a piece of designer paper (approx. 4” x 5 ¼”) onto a 4 ¼” x 5 ½” piece of black cardstock and mount onto a white card base.

Adhere the main focal image panel to the card front.

Use a clear glitter marker to add shimmer to the tulips and you are done!

So easy and flat for mailing!

Stamp Sets: Fear Not (Stamp Simply), Tulips in Hobnail Pitcher digi image (Power Poppy by Marcella)

Ink/Mediums: Versafine Black Onyx, various Watercolor Pencils- Derwent, Stampin Up!, Water-based Markers (Stampin’ Up!), Water Soluble Graphite Pencil; Wink of Stella Clear Glitter Marker

Cardstock/Paper: Whisper White, Basic Black; Stampin ‘ Up! designer paper (retired and from my stash)

Accessories/Tools: Big Shot™,  Stitched Rectangle A2 STAX Dies (My Favorite Things). Embossing Powder Tool, Clear Embossing Powder, Heat Tool

Thanks again for taking the time to visit! I hope you will have the time, create a card based on our #171 {Spring Garden} inspiration photo and join us!

Related Posts Plugin for WordPress, Blogger...