
Hi
Friends!
Today I am sharing an Easter card designed with the brand new release Happy Day Iris Bundle along with the new Salvation stamp set and other
paper, dies and supplies from Stamp Simply.

I love all of the new release stamp sets-they are absolutely gorgeous! The two sets that I used for this card, the Happy Day Iris Bundle and Salvation stamp sets are perfect for Easter as well as all year round!


If
you have not already had a chance to do so, I hope you visit the Stamp Simply blog to
see all of the inspiration from the rest of the SS Design Team as well as the
above challenge sites- fabulous galleries from all!
To
create this card:
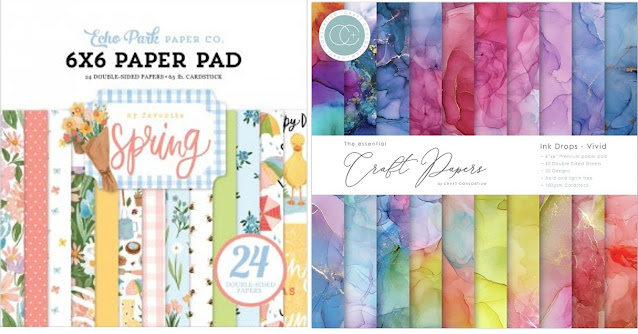
Trim
a piece of the light green designer paper from the My
Favorite Spring 6x6 paper to approx. 2 ½” x 5 1/4”.
Emboss
the panel with the Darice
Vine Pattern Embossing Folder and adhere to the top of a piece of 4 ¼ ” x 5
½” cardstock.

Trim
a piece of the purple Craft
Consortium Ink Drops- Vivid 6x6 designer paper to approx. 3” x 5 ¼”, mount
onto the bottom of the card front.
To cover
the cut seams of the designer paper, add a strip of purple seam binding from the
Blues
Purples Seam Binding Bundle, wrapping the ends behind the panel.

De-static a piece of white cardstock with an embossing powder tool, stamp the iris image from the Happy Day Iris Bundle with archival black ink onto white cardstock, apply clear embossing powder and heat set with a heat tool.
Once
the embossing has cooled, watercolor the image with water-based markers and die
cut with the coordinating
Happy Day Iris die (also die cut another iris from
plain white cardstock to adhere behind the colored image).
Die
cut a piece of white cardstock with an elegant oval
die , de-static with an embossing powder tool, stamp the sentiment and the
cross from the Salvation
stamp set with archival black ink, apply clear embossing powder and heat
set with a heat tool.
Layer
the die cut oval sentiment onto the card front and mount onto a white card
base.
Adhere
the colored/die cut iris onto the card front with dimensional foam.
To
finish off the card, use a clear
glitter marker to add shimmer to the iris petals and add a self-adhesive
pearl to the center of the cross.
Stamp
Sets: Salvation, Happy Day
Iris Bundle (Stamp Simply)
Ink/Mediums:
Versafine Onyx Black, Stampin’ Write Markers- Granny Apple Green, Mossy Meadow,
Highland Heather, Gorgeous Grape; Zig Wink
of Stella Brush- Clear Glitter Marker
Cardstock/Paper: White, Echo Park
My Favorite Spring 6x6 Paper Pad
Accessories/Tools:
Gemini, Jr., Stamp
Simply Steel Dies- Happy Day Iris (part
of the Happy Day Iris Bundle), Spellbinders
Elegant Oval Dies , Darice
Embossing Folder- Vine Pattern, Seam
Binding Sampler- Blues Purples- 30 yards, Kaisercraft Self-Adhesive
Round Pearls- Pearl, Embossing Powder
Tool, Clear Embossing Powder, Heat Tool
Thanks
again for taking the time to stop by- I hope all of you have a blessed week!

1 comment:
Julie, this is so pretty - gorgeous iris. I love the touch of sparkle!
Post a Comment