Showing posts with label Salvation. Show all posts

Saturday, March 2, 2024

By His Wounds


Hi Friends!

I hope all of you are having a wonderful week so far!

Today I am sharing another card for Easter designed with stamps, dies and paper all from Stamp Simply.  
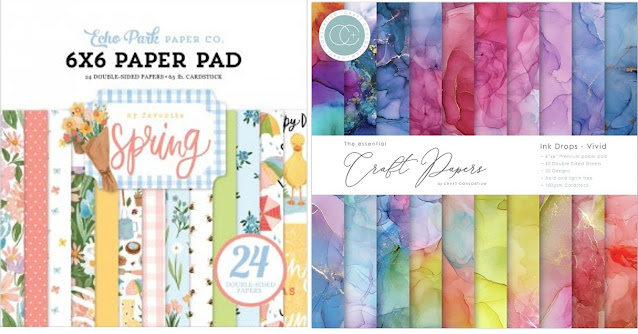
I love the Ink Drops paper line by Craft Consortium and used a piece if the purple from the Vivid Ink Drops 6x6 paper pad for this card.

This card is very easy to create and would be a good card for multiples.

It is fairly flat for mailing so there should not be additional postage needed as well (a plus these days since postage is getting to be so expensive)!

As many of you who follow my blog know, I have a goal to create a card using each one of the over 950+ sketches at Splitcoaststampers.  I used the SC873Sketch for the layout.

I also enjoy playing along with online challenges and will be linking this card to the As You See It #318 Go Theme Go! “Let’s Get Eggy” Easter Challenge


To me,  Easter is all about our Lord and Savior, Jesus Christ.  His sacrifice for our sins, death on the cross and His Resurrection are the true reason for Easter.  To all of those who believe in the Lord,  Jesus Christ shall be saved and will have eternal life with Him (Acts 16:9).

I am also playing along with the Simon Says Wednesday “Anything Goes” Challenge.


To create this card:

De-static the bottom right hand area of 4” x 5 ¼” piece of white cardstock with an embossing powder tool, stamp the sentiment from the Salvation stamp set with Versafine Onyx Black ink, apply clear embossing powder and heat set with a heat tool.

Once the embossing powder has cooled, mount onto a piece of black cardstock and adhere to a white card base.

Trim a piece of the Vivid Ink Drops paper to 3 ¾” x 5”, tear along an angle and ink the edges with purple ink.

Adhere the ink drops panel to the card front.

Die cut the cross image using the largest cross from the Crosses Dies from gold mirror cardstock

Die cut a second cross from extra thick white cardstock to layer behind the gold die cut.


Mount the die cut cross to the card front using dimensional foam.

Quick and easy!

If you have not had a chance to check out my Sister Design Team cards on the Stamp Simply blog, I hope you will do so- gorgeous inspiration from all!!


Stamp Sets: Salvation  (Stamp Simply)

Ink/Mediums: Versafine Onyx Black

Cardstock/Paper:  White, Black, Craft Consortium Ink Drops- Vivid 6x6, Bazzill Mirror Cardstock 8.5 x 11- Gold 15 ct

Accessories/Tools:  Gemini, Jr.,  Stamp Simply Steel Dies- Crosses,  Embossing Powder Tool, Clear Embossing Powder, Heat Tool

Don’t forget to stop by and check out the current specials at Stamp Simply!


Thanks again for visiting and I hope you have a great weekend! 


Saturday, February 10, 2024

For God So Loved


Hi Friends!

I hope all of you are having a great week!    With Easter approaching at the end of March, our Design Team has been creating Easter and spring encouragement cards this week on the Stamp Simply blog.  

For my Easter card, I decided to pull out two stamp sets- Salvation (for the verse sentiment) along with the  Get Well Tulip Stamp/Die Bundle and paired them with the pink gingham pattern from the Echo Park My Favorite Easter paper pad and other accessories from Stamp Simply.


To create this card:

De-static the upper right hand area of a 4” x 5 ⅛” piece of white cardstock with an embossing powder tool.

Ink the verse sentiment from the Salvation stamp set with Versafine Onyx Black Ink, apply clear embossing powder and heat set with a heat tool.

Trim two pieces of the pink gingham My Favorite Easter paper – one approx. 3.75” x 3” and the other approx. 3.75” x 1”.

Mount the larger piece onto the bottom half of the verse panel.


Adhere the layered card front to a piece of 4” x 5 ¼” piece of black white cardstock.

Trim and mount onto a white 4 ¼” x 5 ½” card base.

Die cut a piece of white cardstock with the Tim Holtz Crochet Die.

Adhere the smaller piece of designer paper (from above- 1” x 3.75”) onto white cardstock. 

Trim and adhere the die cut paper lace behind the panel before mounting onto the card front.

De-static another piece of white cardstock with an embossing powder tool, ink the tulip from the Get Well Tulip Bundle with Versamark Onyx Black Ink, apply clear embossing powder and heat set with a heat tool.

Once the embossing has cooled, color the tulip with water-based markers.

Die cut the tulip with the coordinating die and cut two additional tulips from white cardstock to layer behind the colored image.

Adhere the tulip to the card front using dimensional foam.

Add a few pearls to the upper right hand and lower left hand corners to finish off the card.

If you have not had a chance to check out my Sister Design Team cards on the Stamp Simply blog, I hope you will do so- such beautiful inspiration from all!!


Stamp Sets: Get Well Tulip Bundle, Salvation (Stamp Simply)

Ink/Mediums: Versafine Onyx Black, Stampin’ Write Markers- Blushing Bride, Flirty Flamingo, Wild Wasabi, Gumball Green


Cardstock/Paper:  White, Black, Echo Park My Favorite Easter 6x6 Paper Pad

Accessories/Tools:  Gemini, Jr., Get Well Tulip Bundle, Sizzix Dies by Tim Holtz- Crochet,  Embossing Powder Tool, Clear Embossing Powder, Heat Tool, Kaisercraft Self-Adhesive Round Pearls- Pearl


Don’t forget to stop by and check out the current specials at Stamp Simply!


I am playing along with the Word Art Wednesday #623-#624 "Anything Goes" Challenge.  I hope you  have the time to visit their site as well- such amazing inspiration!

Thanks again for visiting and I hope you have a blessed weekend!


Saturday, March 5, 2022

You Have Been Healed


Hi Friends!

Today I am sharing an Easter card designed with the brand new release Happy Day Iris Bundle along with the new Salvation stamp set and other paper, dies and supplies from Stamp Simply.

I love all of the new release stamp sets-they are absolutely gorgeous!  The two sets that I used for this card, the Happy Day Iris Bundle and Salvation stamp sets are perfect for Easter as well as all year round!


Whenever I see irises I think of my Mother- (they were her favorite flower) and the color of irises goes well with the Echo Park My Favorite Spring 6x6 Paper pad .  So many pretty pastels and the purple pattern from the Craft Consortium Ink Drops- Vivid 6x6 paper pad seemed to be the perfect match !


I enjoy playing along with online challenges and am linking to the Tic-Tac-Toe #151 Challenge (top row across, Bright Colors-Flowers-Ribbon/Twine), the Word Art Wednesday #533-#534 “Anything Goes” Challenge and the Simon Wednesday “Add a Die Cut” Challenge. 

If you have not already had a chance to do so, I hope you visit the Stamp Simply blog to see all of the inspiration from the rest of the SS Design Team as well as the above challenge sites- fabulous galleries from all!

To create this card:

Trim a piece of the light green designer paper from the My Favorite Spring 6x6 paper to approx. 2 ½” x 5 1/4”. 

Emboss the panel with the Darice Vine Pattern Embossing Folder and adhere to the top of a piece of 4 ¼ ” x 5 ½” cardstock.  

Trim a piece of the purple  Craft Consortium Ink Drops- Vivid 6x6 designer paper to approx. 3” x 5 ¼”, mount onto the bottom of the card front.

To cover the cut seams of the designer paper, add a strip of purple seam binding from the Blues Purples Seam Binding Bundle, wrapping the ends behind the panel.

De-static a piece of white cardstock with an embossing powder tool, stamp the iris image from the Happy Day Iris Bundle with archival black ink onto white cardstock, apply clear embossing powder and heat set with a heat tool.

Once the embossing has cooled, watercolor the image with water-based markers and die cut with the coordinating Happy Day Iris die (also die cut another iris from plain white cardstock to adhere behind the colored image).

Die cut a piece of white cardstock with an elegant oval die , de-static with an embossing powder tool, stamp the sentiment and the cross from the Salvation stamp set with archival black ink, apply clear embossing powder and heat set with a heat tool.

Layer the die cut oval sentiment onto the card front and mount onto a white card base.

Adhere the colored/die cut iris onto the card front with dimensional foam.

To finish off the card, use a clear glitter marker to add shimmer to the iris petals and add a self-adhesive pearl to the center of the cross.

Stamp Sets: Salvation, Happy Day Iris Bundle (Stamp Simply)

Ink/Mediums: Versafine Onyx Black, Stampin’ Write Markers- Granny Apple Green, Mossy Meadow, Highland Heather, Gorgeous Grape; Zig Wink of Stella Brush- Clear Glitter Marker

Cardstock/Paper:  White, Echo Park My Favorite Spring 6x6 Paper PadCraft Consortium Ink Drops- Vivid 6x6

Accessories/Tools: Gemini, Jr., Stamp Simply Steel Dies- Happy Day Iris (part of the Happy Day Iris Bundle), Spellbinders Elegant Oval Dies , Darice Embossing Folder- Vine Pattern, Seam Binding Sampler- Blues Purples- 30 yards,  Kaisercraft Self-Adhesive Round Pearls- Pearl, Embossing Powder Tool, Clear Embossing Powder, Heat Tool

Thanks again for taking the time to stop by- I hope all of you have a blessed week! 

Related Posts Plugin for WordPress, Blogger...