Showing posts with label Gorgeous Grunge. Show all posts

Wednesday, October 5, 2022

TCC181 Colors of Fall


Hi Friends!

Welcome to the #181 Colors of Fall Challenge

Don’t you just love all of the vibrant colors in our inspiration photo?  I was inspired by the colors, the leaves and nature to create a Mixed Media card. 

I pulled out a few retired Stampin’ Up! sets for this card and used a heat emboss resist technique.

As many of you know that follow my blog, I enjoy playing along with online challenges and will be linking this card to the Featured Designer Jeanne #181 Tic-Tac-Toe Challenge (far right column down Autumn Colors-Enamel Dots/Gems- Ink Blending).  I used Nuvo™ Jewel Drops (hopefully they qualify as enamel dots).  

I am also linking to the Use Your Stuff #468 "Autumn or Fall" Challenge (I chose Fall and used stamps that are many years old (French Foliage is from approx. 2010), the Shopping Our Stash #480 "Leaf Me Alone" Challenge , the Stamping Sensation October "All Things Autumn" Challenge , the We Love Stamping "Autumn" Challenge and the Make My Monday #184 "Autumn Flora or Fauna" Challenge (I love the leaves in the fall).

If you have not had a chance to visit our Design Team/gallery at The Card Concept Challenge, or the other challenge sites,  I hope you will find time to do so- wonderful inspiration from all!


This was a fairly easy Mixed Media card to create:

Using a stencil brush, apply Fossilized Amber Distress Oxide Ink to the majority of a 4 ¼” x 5 ½” coated white cardstock panel.

Repeat the above with Candied Apple, Crazed Pumpkin, applying less ink than the Amber and heat set the ink with a heat tool.

De-static the panel with an embossing powder tool, ink the leaf images from the retired Stampin’ Up! French Foliage using Versamark™ ink, stamp a few leaves onto the panel (not overlapping at this point), apply clear embossing powder and heat set with a heat tool.

Create a mask for each leaf, apply a bit more distress oxide ink onto the panel, mask the leaves that have already been stamped and embossed, ink the stamps again with Versamark™ ink, stamp over the masked leaves and repeat the above embossing steps.

Once you have embossed the leaves to your satisfaction, apply Seedless Preserves Distress Oxide ink over the embossed images.  Wipe the ink off the embossed images.

Using a purple water-based marker, deepen the shadows around some of the leaves and blend into the background,


Ink the script stamp with Versafine™ Onyx Black and repeatedly stamp over the background (sporadic and not pressing too hard), stamping off to lighten the ink as well.

Repeat the above with the canceled postage image and stamp the Gorgeous Grunge splatter image with Seedless Preserves. Wipe off the ink from the embossed images and heat set the background carefully (being careful not to melt the previously embossed leaves).

Trim the panel, mount onto light yellow cardstock, trim again and mount onto black cardstock. Adhere the panel to a white card base.

De-static a scrap piece of black cardstock, ink the sentiment from Moon Lake with Versamark™ ink, apply white embossing powder and heat set with a heat tool.

Cut the pieces of the sentiment apart and mount onto the card front with dimensional foam.

To finish off the card, add a few Nuvo™ Morning Dew Jewel Drops and allow them to dry naturally. 

Stamp Sets:  French Foliage, Gorgeous Grunge, Moon Lake (all retired Stampin’ Up!)

Ink/Mediums:  Versafine™ Onyx Black, Versamark™, Tim Holtz® Distress Oxide- Fossilized Amber, Candied Apple, Carved Pumpkin, Seedless Preserves; Stampin’ Write Elegant Eggplant Marker, Nuvo™ Morning Dew Jewel Drops

Cardstock/Paper: Coated White (not sure of manufacturer, in my stash), Barely Banana, Basic Black

Accessories/Tools: Embossing Powder Tool, Clear and Extra Fine White Embossing Powder, Heat Tool, Stencil Brushes

Thanks so much for stopping by-I hope you have been inspired to join us with our #181 Colors of Fall Challenge!

Thursday, August 17, 2017

One Layer CAS Timeless Classic Thank You


Hi Friends!!

I am still working on organizing my stamping area but decided to take a break to create a One Layer CAS (Clean and Simple) card using the Timeless Classic stamp set along with the large splatter image from the retired Stampin’ Up! Gorgeous Grunge stamp set.  I  had originally purchased the Timeless Classic stamp set from Sweet ‘n Sassy Stamps several years ago (it is retired now from SNSS but is still available from Impression Obsession™ t/a I/O Stamps) and have only inked it up once before today :-)


If you have not already had a chance to visit the above challenge sites, I hope you will do so- fabulous examples from their Design Teams as well as in their galleries!

To create this card:

1). Score a 4 ¼” x 11” piece of Stampin’ Up! Naturals White (retired) cardstock in half and stamp the Timeless Classic truck image onto the front of the card using Versafine™ Onyx Black Ink.  Heat set the ink with a heat tool and color using an AquaPainter™ with ink from the Bermuda Bay, Pear Pizzazz and Calypso Coral Classic Ink Pads.  Use a Spectrum Noir™ CB8 Alcohol Marker to add additional color to the truck and the Calypso Coral Stampin’ Write Marker for shadows.

2). Mask the entire truck image and stamp the large splatter image from Gorgeous Grunge with Bermuda Bay and Pear Pizzazz Classic Ink (I did use the AquaPainter™ to blend the ink a bit).

3). Remove the mask and use a Faber-Castell™ Silver Pitt Pen Marker to color the gears, border frame, wheel covers and fender.  Add shimmer to the truck panels with a Spectrum Noir™ Clear Glitter Pen and white highlights to the wheels with an Extra Fine Sharpie® White Paint Pen.

4). Finish off the card by stamping the sentiment from Timeless Classic with Versafine™ Onyx Black Ink and adding a few drops to the center of the gears using Nuvo™ Gloss Black Crystal Drops.
Stamp Sets: Timeless Classic (I/O Stamps), Gorgeous Grunge (retired Stampin’ Up!)

Ink/Mediums: Versafine™ Onyx Black; SU! Classic Ink- Bermuda Bay, Pear Pizzazz, Calypso Coral; Stampin’ Write Calypso Coral Marker, Spectrum Noir™ CT8 Alcohol Marker and Clear Glitter Pen, Extra Fine Sharpie® White Paint Pen, Faber-Castell™ Pitt-Pen Silver Marker, Nuvo™ Gloss Black Crystal Drops

Paper: Naturals White 

Accessories/Tools:  AquaPainter™, Masking Paper


Thanks again for stopping by- hugs and I hope all of you have a wonderful week!

Tuesday, May 23, 2017

SUO175 Farewell to The Wilderness Awaits


Hi Friends!   

It’s time for the #175 “Mainly Masculine” Challenge atSU-Only Challenges!  I am so sad to see that The Wilderness Awaits is one of the stamp sets on the Stampin’ Up! retired list so I decided to create a card using the fox image as well as the sentiment.


If you have not had a chance to stop by the SU-Only Challenge site to check out the rest of the Design Team projects or the other challenge galleries yet,  I encourage you to do so- wonderful inspiration from all!

To create this card:

1). Ink the fox image from The Wilderness Awaits stamp set using Basic Black Archival Ink and stamp onto a piece of Whisper White cardstock.  Use the AquaPainter™ to color with Stampin’ Up! Watercolor pencils- Calypso Coral and Basic Black.  Use the water brush with ink from the Rich Razzleberry and Dapper Denim Classic Ink Pads to water color the sky area.

2). Use the Heat Tool to dry the panel and die cut the image with the Stitched Shapes Framelits™. Die cut another oval using the same size framelit™ from black cardstock, split in half and mount behind the fox image so just a bit of the black shows. 

3). Using the AquaPainter™, watercolor Dapper Denim and Rich Razzleberry Classic Ink onto a piece of Whisper White cardstock.  Ink the small splatter stamp from Gorgeous Grunge (another set to be retired) with Archival Basic Black ink, stamp off and stamp onto the panel several times.  Trim the panel and mount onto a piece of Basic Black cardstock.  Mount the entire panel onto the Extra Thick Whisper White card base.

4). Stamp the sentiment from The Wilderness Awaits with Versamark™ onto a piece of Basic Black cardstock, apply Stampin’ Emboss® White Embossing Powder and heat set with the Heat Tool.  Hand trim and create the banner points.

 5). Mount the fox oval image with Stampin’ Dimensionals and add the sentiments to finish off the card.
Stamp Sets: The Wilderness Awaits, Gorgeous Grunge
Ink/Mediums: Classic Ink- Dapper Denim, Rich Razzleberry, Stampin’ Archival™ Basic Black; Versamark™; Stampin’ Up! Watercolor Pencils- Calypso Coral, Basic Black
Paper: Extra Thick Whisper White, Whisper White, Basic Black
Accessories/Tools: AquaPainter™, Embossing Buddy®, Stampin’ Emboss® White Embossing Powder, Heat Tool

Thanks again for taking the time to stop by and I hope that you will create your own Stampin’ Up! Only project and play along with our “Mainly Masculine” challenge!  Hugs and I hope you have a wonderful week!

Monday, June 6, 2016

Vintage Birthday with Butterfly Basics

Hi Stampers! 

Here is another Mixed Media card that I created this weekend using heat embossing, masking and a bit of distressing.

All items on this card are Stampin’ Up! with the exception of the crochet lace from my stash :-)

I incorporated the Simon Says Wednesday “Mask It” Challenge along with the Splitcoaststampers’ CC585 Color Challenge and the Tic-Tac-Toe #11 Challenge- I used the far right hand column Garden, Twine (Gold Cord) and Scalloped Border (Crocheted Lace).

If you have not had a chance to visit any of the above challenge sites, I hope you will do so- fabulous Design Teams samples and entries from all!

This colors on this card look richer IRL- I have such a difficult time
photographing red tones :-)


To create this card:

Ink the floral image from Butterfly Basics using Stampin’ Archival™ Basic Black ink and stamp onto a piece of Whisper White cardstock, re-ink and stamp onto a piece of sticky note paper, heat set both images with the Heat Tool.

Carefully cut out the image from the sticky note paper and mask the initial image, re-ink the flower image and stamp onto the card panel again.

Mask the flowers again and ink the honeycomb stamp image from Butterfly Basics with Sahara Sand Classic Ink and repeatedly stamp over the background.

Ink the large bold splatter stamp from Gorgeous Grunge using Wild Wasabi Classic Ink and stamp over the background.

Use an AquaPainter™ with Cherry Cobbler and Wild Wasabi Classic Ink and color the floral images, add additional detail with Stampin’ Write Markers in the same colors and add shadows with the Sahara Sand Stampin’ Write Marker.

Ink the canceled postage stamp with Cherry Cobbler ink and stamp onto the card front (re-masking the floral image before stamping).

De-static the panel with the Embossing Buddy®, stamp the sentiment from Butterfly Basics with Versamark™ ink, apply Stampin’ Emboss® Gold Embossing Powder and heat set with the Heat Tool.

Close-up of masking and flowers 
Use a Sponge Dauber to add additional Sahara Sand Classic Ink over the background panel (to “age” the paper), add the crochet trim and scrap piece of Cherry Cobbler cardstock across the front of the panel and adhere knotted Gold Cord (wrapping the ends of the cord behind the card front).

Mount the card front onto a piece of Cherry Cobbler cardstock, trim and mount onto a piece of Wild Wasabi cardstock and mount onto the Extra Thick Whisper White card base.

Use the retired Gold Stampin’ Dazzle™ Marker to add highlights to the flower centers to finish off the card.

Stamp Sets: Butterfly Basics, Gorgeous Grunge

Ink: Versamark™, Stampin’ Archival™ Basic Black, Cherry Cobbler, Wild Wasabi, Sahara Sand; Stampin’ Write Markers- Cherry Cobbler, Wild Wasabi, Sahara Sand, Stampin’ Dazzle™ Gold Marker (retired)

Paper/Cardstock:  Whisper White, Cherry Cobbler, Wild Wasabi, Extra Thick Whisper White

Accessories: Embossing Buddy®, Stampin’ Emboss® Gold Embossing Powder, Heat Tool, Gold Cord, Sponge Dauber, White Crochet Lace


Thanks again for visiting- hugs and have a wonderful week!

Sunday, May 29, 2016

CAS Seascape


Hi Again Friends!


I love the sentiments in the Rose Wonder set- the fonts look great with all types of card styles and there is a sentiment for most occasions :-)  

This card will be sent to a gentlemen from our church that has been going through a very tough time battling cancer- our thoughts and prayers are with him and his family for sure....

If you have not had a chance to visit the above challenge galleries yet, I encourage you to do so- gorgeous cards and inspiration!!

To create this card:

Mask a square area onto the Extra Thick Whisper White card base, ink an acrylic block with an Island Indigo Stampin’ Write Marker, lightly spritz with water and stamp the card front.

Ink the lined Gorgeous Grunge stamp with Mint Macaron Classic Ink and stamp over the acrylic block stamping.

Ink the coral image from By The Tide using Island Indigo Classic Ink and stamp onto the background.

Ink the small splatter stamp from Timeless Textures using Island Indigo Classic Ink and stamp onto the background and add the large splatter from Gorgeous Grunge (also with Island Indigo Classic Ink).

Add the Clear Wink of Stella® to add highlights to the background area.

Ink the sea turtle and jellyfish images with Stāz-On® Jet Black Ink and stamp onto Whisper White cardstock, color with Stampin’ Write Markers and an AquaPainter™- Mint Macaron, Tip Top Taupe and Island Indigo.

Fussy-cut the images, add Clear Wink of Stella® and set aside.
Stamp the sentiment from Rose Wonder with Tip Top Taupe and mount the fussy-cut images with dimensional foam.

Stamp Sets: Rose Wonder, From Land to Sea, Gorgeous Grunge, Timeless Textures, By the Tide

Ink: Stāz-On® Jet Black, Island Indigo, Mint Macaron, Tip Top Taupe, Stampin’ Write Markers- Island Indigo, Mint Macaron, Tip Top Taupe; Clear Wink of Stella®

Paper: Extra Thick Whisper White, Whisper White

Accessories: Acrylic Block, AquaPainter™, Paper for masking, Water Spritzer Bottle


Thanks again for visiting- have a relaxing and safe weekend!

Tuesday, March 29, 2016

By The Tide- Thinking of You

Hi Friends!

I hope all of you are having a great week so far!  I decided to create a masculine card using one of my favorite Stampin’ Up! sets, By The Tide along with Gorgeous Grunge and Teeny Tiny Wishes.

I just love the By The Tide stamp set for masculine as well as feminine cards and can always use a few "Thinking of You" cards in my stash :-)

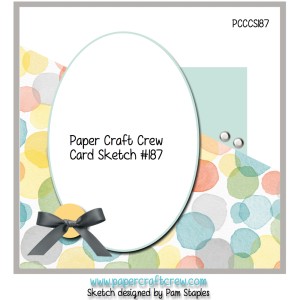
This card was designed using the Paper Craft Crew Challenge #187 Sketch along with the Can You Case It #113 Color Challenge and the Just Us Girls #336 InspirationPhoto for inspiration.

If you have not had a chance to visit the above galleries yet, I hope you will find the time to do so- wonderful designs by all!

All items used to create this card are from Stampin’ Up! with basic stamping techniques- if you have any questions, please feel free to let me know in the comments :-)

Stamp Sets: By The Tide, Gorgeous Grunge, Teeny Tiny Wishes

Ink: Basic Gray, Crumb Cake, Night of Navy, Stāz-On® Jet Black, Champagne Mist Shimmer Paint, White Gel Pen

Paper: Whisper White, Basic Gray, Crumb Cake, retired Crumb Cake and Pocketful of Posies DSP

Accessories: Big Shot™, Oval Framelits™, retired Fancy Fan Textured Impressions™ Embossing Folder, Hexagon Punch, Word Window Punch, Brayer, retired Crumb Cake Button, Natural Linen Thread, Rhinestones


Thanks again for taking the time to visit- hugs and I hope you have a fabulous week!!

Tuesday, March 15, 2016

SUO144 Blooms for Spring


Hi Friends!   

It’s time for the SUO144 “Welcome Spring” Challenge and I decided to combine a few stamp sets to create my floral card (definite sign of spring for me are spring flowers).


I hope you will have a chance to check out my sister DesignTeam member samples at the SU-Only Challenge site as well as the fantastic Design Team samples and gallery at the other galleries- wonderful inspiration from all!


To create this card:

Ink the blossom image from Birthday Blooms using Stāz-On® Jet Black Ink and stamp onto Whisper White cardstock.

Original version
Color the flower using Wisteria Wonder and Wild Wasabi Stampin’ Write Markers softening the edges with the AquaPainter™, fussy cut the bloom and set aside.

Ink the Timeless Textures scroll image using Wisteria Wonder Classic Ink , stamp off onto a piece of Whisper White cardstock and stamp the large splatter stamp from Gorgeous Grunge using Pool Party Classic Ink.

Ink the sentiment from Trust God with Stāz-On® Jet Black Ink  and stamp onto the upper left hand corner of the panel.

Ink the grid stamp from Timeless Textures stamp set using Pool Party Classic Ink and repeatedly stamp onto a piece of Pool Party cardstock, ink the small splatter stamp from Timeless Textures using Wisteria Wonder Classic Ink, repeatedly stamp over the panel, cut the panel on an angle and add to the Whisper White stamped panel.
Stepped up version

Trim the panel, mount onto a piece of Wisteria Wonder cardstock and add the ½ White Tea Lace Paper Doily along with a strip of Wisteria Wonder cardstock and ¼” Pool Party Stitched Satin Ribbon over the seam.

Add the entire panel to the Basic Black card base, adhere the strips of Pearls over the ribbon and add the Pearls to the corners to finish off the card.

Stamp Sets:  Birthday Blooms, Timeless Textures, Trust God, Gorgeous Grunge

Ink:  Stāz-On® Jet Black, Pool Party, Wisteria Wonder; Stampin’ Write Markers- Wisteria Wonder, Wild Wasabi
Paper/Cardstock: Whisper White, Pool Party, Wisteria Wonder, Basic Black
Accessories: White Tea Lace Paper Doily, Pearls

Thanks again for stopping by and we hope to see your Stampin’ Up! Only project in our “Welcome Spring” Challenge gallery!

Tuesday, January 19, 2016

Isaiah 41:10- Fear Not, For I Am With You


Hi Again Stampers!!

I am on a Clean and Simple (CAS) trend this weekend and wanted to share a card that was created using the Pals Paper Arts PPA283 Color Challenge- the colors that Brian chose for the challenge remind me of spring and with all of the cold weather that has arrived here on the East Coast, I thought a few flowers were in order :-)


I just love this passage of Scripture:

"Fear not, for I am with you;
Be not dismayed, for I am your God.
I will strengthen you,
Yes, I will help you,

I will uphold you with My righteous right hand. "
Isaiah 41:10 (NKJV)

I think that this verse is appropriate for so many occasions...Illness, Sympathy, Encouragement and even for a "Just Because" card and am so thankful that it was included in the Rose Wonder stamp set :-)

Again, if you have not already done so, I hope you will find the time to visit the Pals Paper Arts site to check out their spectacular Design Team samples as well as their fabulous challenge galleries- I am always inspired by this group of designers!

To create this card:

Ink the Watercolor Wash background stamp with Mint Macaron Classic Ink and use a Sponge Dauber to pounce over the stamp and remove some of the ink.

With the inked background stamp facing upward, lay a piece of Whisper White cardstock over the stamp and press with your fingers to transfer the inked image to the cardstock.

Ink the sentiment from Rose Wonder with Memento™ Tuxedo Black Ink as well as two of the leaf stems and stamp directly onto the background panel.

Ink the large splatter stamp from Gorgeous Grunge with Memento™ Tuxedo Black Ink, stamp off onto a piece of scrap paper and stamp onto the panel.

Ink the smaller blossom image from Rose Wonder with Memento™ Tuxedo Black Ink and stamp three of the flowers onto a piece of Whisper White cardstock.

Use an AquaPainter™ with Melon Mambo Classic Ink to color the flowers and once dried, color the center petals and shadows onto the outer petals with the Stampin’ Write Melon Mambo Marker (using the AquaPainter™ to soften the edges of the marker on the outer petals).

Color the center of the flowers with the Basic Black Stampin’ Write Marker, fussy cut each flower and set aside.

Use the Mint Macaron Stampin’ Write Marker to color the leaves and add shadows with the Sahara Sand Stampin’ Write Marker.

Trim the background panel and mount onto the Basic Black card base.
Add two of the flowers directly onto the card front and the third (center) flower, mount onto the card front using a Stampin’ Dimensional®.

Add the Pearls to centers of each flower to finish off the card.

Stamp Sets: Rose Wonder, Watercolor Wash (background stamp), Gorgeous Grunge

Ink: Memento™ Tuxedo Black, Melon Mambo, Mint Macaron; Stampin’ Write Markers- Basic Black, Melon Mambo, Mint Macaron, Sahara Sand

Paper: Whisper White, Basic Black

Accessories: AquaPainter™, Pearls


Thanks again for taking the time to visit- hugs and have a great day!!  

Tuesday, December 22, 2015

Happy New Year!! The Sky's the Limit :-)


Hello Friends!   

Woohoo- it’s time for the new SUO138 “Into the New Year” Challenge!

Since I do not own any of the traditional New Year's "celebration" type stamps (at least not current ones), I decided to create a “sneak peek” card using some of the new items from the upcoming Occasions Mini Catalog as well as the 2016 Sale-A-Bration Catalog.

I have also incorporated the Paper Craft Crew PCCCS174 Sketch Challenge in my design- my thoughts were that the plane could be spelling out the “Happy New Year”- lol!!

 I hope you will have a chance to check out my sister Design Team member samples at the SU-Only Challenge site as well as the fantastic Design Team samples at the Paper Craft Crew site- wonderful inspiration from all!


To create this card:

Use the Big Shot™ with the new World Traveler Textured Impressions™ Embossing Folder to emboss a piece of Sahara Sand cardstock (inking the embossing folder with Sahara Sand Classic Ink before inserting the cardstock and embossing).
Trim the embossed panel and mount onto the Basic Black card base.

Ink the plane image from the Limited Edition Sale-A-Bration (SAB) set, Sky is the Limit using Stāz-On® Jet Black Ink onto Whisper White cardstock, color with Stampin’ Write Markers (I used Sahara Sand and Crumb Cake), add some distressing with Crumb Cake Classic Ink and the splatter stamp from Gorgeous Grunge, trim and mount onto Gold Foil cardstock.

Stamp the sentiment from Teeny Tiny Wishes with Stāz-On® Jet Black Ink onto Whisper White cardstock, distress with Crumb Cake Classic Ink and the splatter stamp from Gorgeous Grunge, create the banner ends with the Banner Punch, mount onto Basic Black cardstock and punch the ends to match.

Add the Gold Foil Banner Punch pieces to the ends of the sentiment, adhere Gold Trim looped behind the sentiment and mount the sentiment with Stampin’ Dimensionals®.

Adhere a piece of the Going Places Designer Series Paper (DSP) onto Basic Black cardstock, add the embossed Basic Black pieces (with the Chevron Textured Impressions™ Embossing Folder, mount the embossed black strips onto Gold Foil scrap pieces, add the strips to the embossed Sahara Sand card front and mount the Going Places DSP panel.

Add the plane focal image with Stampin’ Dimensionals® to finish off the card.

After I posted my first design (without the numbers to the SUO Challenges site), I decided to cut some numbers with the retired GoGo Boots Sizzlits™ Alphabet Die Set and added to the card front ...I think the numbers make it look more festive, don’t you?


Stamp Sets:  Sky is the Limit, Teeny Tiny Wishes, Gorgeous Grunge

Ink:  Stāz-On® Jet Black, Crumb Cake, Sahara Sand; Stampin’ Write Markers- Crumb Cake, Sahara Sand
Paper/Cardstock: Whisper White, Basic Black, Sahara Sand; Gold Foil, Going Places DSP
Accessories: Big Shot™, Chevron and World Traveler Textured Impressions™ Embossing Folders, Banner Punch, Gold Trim, retired GoGo Boots Sizzlits™ Alphabet Dies (2nd card)

Thanks again for stopping by and we hope to see your Stampin’ Up! Only project in our “Into the New Year” Challenge gallery!
Related Posts Plugin for WordPress, Blogger...