Showing posts with label By the Tide. Show all posts

Tuesday, March 10, 2020

RRCB130 Come To Me


Hi Friends!!

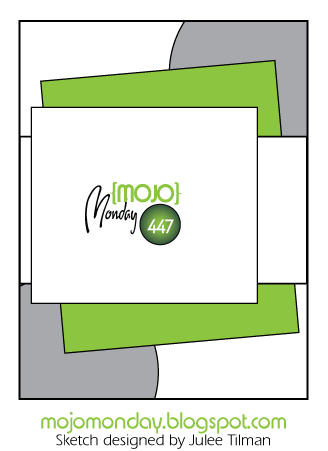
I am so thrilled to be a Guest Designer for The Retro Rubber Challenge Blog #130 Sketch Challenge!

As many of you know, I have a personal goal to ink up some of my "unloved" sets as well as older favs,  so since one of the requirements for The Retro Rubber Blog Challenge Blog is to use stamps that are at least one year old,  I love playing along with their challenge!  

They have a very versatile sketch for the #130 Challenge- I think that this sketch would work for a CAS card as well as an elaborate layered card (I was inspired to create a fairly simple Mixed Media card). 
.

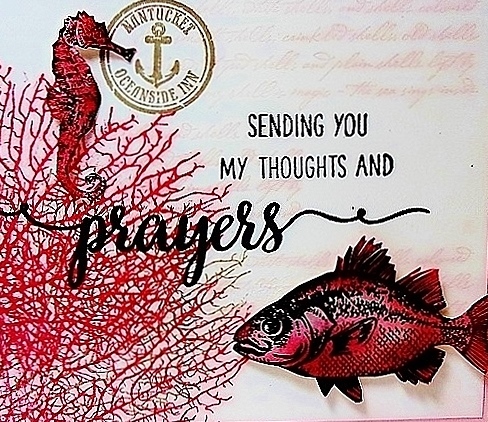
For this challenge, I pulled out one of my favorite retired Stampin’ Up! sets, By the Tide (circa 2013) and combined it with a current Divinity Designs, LLC (formerly Our Daily Bread Designs) stamp set, Scripture Collection 4 (circa 2010). 


To create this card:

De-static a piece of white cardstock with an embossing powder tool, ink the By the Tide images with Versafine™ Onyx Black Ink and stamp onto the panel.  Apply clear embossing powder and heat set with a heat tool. 

Once the embossing has cooled, water color with Distress Oxide inks as well as water-based markers (see below for colors).  Fussy cut each image and set aside.

For the background panel and center squares,  tap Distress Oxide inks onto a silicone mat (I used a combination ofTumbled Glass, Salty Ocean, Twisted Citron and Peacock Feathers), spritz lightly with water, mix the inks together a bit, press the panels into the ink and lift up to move the ink around the panels.

Repeat the steps above using a heat tool between layers until you are satisfied with the results.

Randomly stamp the script image from By The Tide using Black Soot Distress ink onto the larger background panel and the coral image with Peacock Feathers towards the bottom of the panel.

Trim the smaller panel for the three rectangles for the sketch, mount each rectangle onto black cardstock and trim close to the edge.

De-static the background panel with an embossing powder tool, ink the sentiment from Scripture Collection 4 with Versafine™ Onyx Black ink, stamp onto the panel, apply clear embossing powder and heat set with a heat tool.

Trim the panel, mount onto black cardstock, trim close to the edge and mount onto a white card base.

Mount the outside rectangles (per the sketch) directly to the card front and use dimensional foam to mount the center rectangle.

Add the fussy cut images directly to the card front and use dimensional foam to “pop” up the main fish in the center as well as the shell/seahorse in the lower left hand corner.

Use a clear glitter pen to add shimmer to the images as well as an extra fine white paint pen to add highlights to the eye of the center fish.

Finish off the card with a few clear Nuvo™ jewel drops.

Stamp Sets: By the Tide (retired Stampin’ Up!), Scripture Collection 4 (Divinity Designs, LLC)

Ink/Mediums: Versafine™ Onyx Black; Stampin’ Write Markers- Pool Party, Coastal Cabana, Gumball Green; Tim Holtz™ Distress Oxide Inks- Tumbled Glass, Salty Ocean, Peacock Feathers, Twisted Citron, Black Soot; Spectrum Noir™ Clear Glitter Pen, Sharpie™ Extra Fine White Paint Pen, Nuvo™ Morning Dew Jewel Drops

Cardstock/Paper:  Whisper White, Basic Black

Accessories: MISTI™, Embossing Buddy®, Clear EP, Heat Tool, AquaPainter™, Silicone Mat

I hope I have inspired you to create something this week and if you have the time, I know that we would love to your creation using the #130 Sketch at The Retro Rubber Challenge Blog!  

Thanks again for taking the time to visit- I hope all of you have a fabulous week!

Sunday, May 29, 2016

CAS Seascape


Hi Again Friends!


I love the sentiments in the Rose Wonder set- the fonts look great with all types of card styles and there is a sentiment for most occasions :-)  

This card will be sent to a gentlemen from our church that has been going through a very tough time battling cancer- our thoughts and prayers are with him and his family for sure....

If you have not had a chance to visit the above challenge galleries yet, I encourage you to do so- gorgeous cards and inspiration!!

To create this card:

Mask a square area onto the Extra Thick Whisper White card base, ink an acrylic block with an Island Indigo Stampin’ Write Marker, lightly spritz with water and stamp the card front.

Ink the lined Gorgeous Grunge stamp with Mint Macaron Classic Ink and stamp over the acrylic block stamping.

Ink the coral image from By The Tide using Island Indigo Classic Ink and stamp onto the background.

Ink the small splatter stamp from Timeless Textures using Island Indigo Classic Ink and stamp onto the background and add the large splatter from Gorgeous Grunge (also with Island Indigo Classic Ink).

Add the Clear Wink of Stella® to add highlights to the background area.

Ink the sea turtle and jellyfish images with Stāz-On® Jet Black Ink and stamp onto Whisper White cardstock, color with Stampin’ Write Markers and an AquaPainter™- Mint Macaron, Tip Top Taupe and Island Indigo.

Fussy-cut the images, add Clear Wink of Stella® and set aside.
Stamp the sentiment from Rose Wonder with Tip Top Taupe and mount the fussy-cut images with dimensional foam.

Stamp Sets: Rose Wonder, From Land to Sea, Gorgeous Grunge, Timeless Textures, By the Tide

Ink: Stāz-On® Jet Black, Island Indigo, Mint Macaron, Tip Top Taupe, Stampin’ Write Markers- Island Indigo, Mint Macaron, Tip Top Taupe; Clear Wink of Stella®

Paper: Extra Thick Whisper White, Whisper White

Accessories: Acrylic Block, AquaPainter™, Paper for masking, Water Spritzer Bottle


Thanks again for visiting- have a relaxing and safe weekend!

Thursday, May 12, 2016

Roanoke River Lighthouse- Watercolor Pencil Fun


Hi Friends!

I hope all of you are having a fabulous week so far!  


I love the colors in this inspiration photo as well as the feeling of relaxation- I have owned this Impression Obsession, Inc. stamp for quite a while and had not had a chance to ink it up yet, so I thought it would be a great one to use for this challenge as well as the others :-) 

If you have not had a chance to check out the above challenge sites, I hope you will find time to do so- such inspiration from all!

To create this card:

Ink the Roanoke River Lighthouse (I/O) using Stāz-On® Jet Black Ink and stamp onto a piece of Whisper White cardstock.

Color the image with Rexel Derwent® Watercolor Pencils (I used Light Blue, Terracotta, Cedar Green and Gunmetal) and use the AquaPainter™ to watercolor.

Add additional touches as needed with the Chinese White Pencil, trim and mount onto a piece of Marina Mist cardstock, trim and mount onto a piece of Whisper White cardstock).

Ink the script sentiment from By The Tide with Cajun Craze Classic Ink and stamp repeatedly onto a piece of Very Vanilla cardstock, trim the panel and mount onto a piece of Cajun Craze cardstock, trim and mount onto the Marina Mist card front.

Use the Big Shot™ with the My Favorite Things™ (MFT) Stitched Circle STAX Dies to cut a circle from Graphic 45® By The Sea Designer Paper (also cut a circle from Cajun Craze cardstock using the same size die).

Split the circles in quarters and adhere the designer paper onto the Cajun Craze pieces, mount onto the opposite corners of the card front (per the sketch).

Cut a rectangle from Cajun Craze cardstock using the Big Shot™ with the My Favorite Things™ (MFT) Stitched Rectangle STAX Dies and emboss this panel with the Chevron Textured Impressions™ Embossing Folder.
 
Cut a piece of Cajun Craze cardstock using the Big Shot™ with the MFT Horizontal Stitched Strip Dies and use the edges only of this die cut to layer behind a piece of Marina Mist cardstock (embossed with the retired Square Lattice Textured Impressions™ Embossing Folder).

Mount the embossed rectangle on an angle onto the card front (per the sketch) and add the embossed horizontal strip to the card front as well.

Use a Sponge Applicator with Ranger® Tim Holtz® Old Paper Distress Ink to age the edges of the focal image panel and mount the panel to the card front with dimensional foam to finish off the card.

I decided to leave the front of the card without a sentiment so that I can use this card as needed for any occasion (plus I love the artwork in this image and did not want to cover it up :-)).

Stamp Sets: By The Tide, Timeless Textures (both SU!), Roanoke River Lighthouse (I/O)

Ink/Mediums: Stāz-On® Jet Black, Cajun Craze, Ranger® Tim Holtz® Old Paper Distress Ink, Derwent® Watercolor Pencils

Paper: Whisper White, Very Vanilla, Cajun Craze, Marina Mist; Graphic45® By The Sea Designer Paper

Accessories: Big Shot™, Chevron Textured Impressions™ Embossing Folder, MFT Stitched Circle STAX Dies, Sponge Dauber, AquaPainter™


Thanks again for taking the time to stop by- hugs and enjoy the rest of your week!

Monday, April 11, 2016

By The Tide- Congratulations

Hi Again Friends!

I had fun this weekend stamping images, coloring and fussy-cutting (I know, sounds like fun- right :-)?)!  

Anyway, I decided to put together one more card this evening/ morning and used the fussy-cut Lobster from By The Tide along with the Create with Connie and Mary CCMC401Sketch,  the CC557 Splitcoaststampers’ (SCS) Color Challenge and Alphabet Week 12 “L” Challenge (“L”for Lobster).

I hope you will take the time to visit the above galleries- so much inspiration from the Design Teams as well as the entries!

Other than the fussy-cutting of the lobster, this card was fairly easy to create:

Hard to see in the photo but the lobster is raised up above the panel :-)
Ink the Lobster image from By The Tide using Basic Black Stampin’ Archival Ink and stamp onto Whisper White cardstock.

Heat set the image with the Heat Tool and use an AquaPainter™  with Cherry Cobbler Classic Ink to color the lobster and add additional shadows with the Cherry Cobbler Stampin’ Write Marker.
 
Carefully fussy-cut the image, add Clear Wink of Stella® over the entire Lobster and set aside.

Ink the square stamp from Work of Art with Soft Sky Classic Ink and stamp repeatedly onto a piece of Whisper White cardstock.

Add additional splatter with Timeless Textures and Soft Sky Ink, trim to a square image (I used the Big Shot™ with the Square Framelits™ and mount onto Basic Black cardstock (trimming close to the edge).

Emboss a piece of retired Wild Wasabi Designer Series Paper (DSP) with the Woodgrain Textured Impressions™ Embossing Folder, trim and mount onto a square of Basic Black cardstock (also die cut with the Square Framelits™).

Mount the Soft Sky layered square onto the Wild Wasabi DSP square using dimensional foam and add the Lobster image with dimensional foam as well.

Create the Soft Sky banner using Soft Sky cardstock and the Banner Triple Punch, ink the Timeless Textures stamp with Soft Sky Classic Ink and stamp over the entire banner.

Layer the banner onto a Basic Black banner created in the same manner as above but cut a bit wider.

Create the Wild Wasabi strip in the same manner as the Soft Sky banner (using Wild Wasabi cardstock and ink) and once the banner has been layered, cut it in half.

Use the Big Shot™ with the Woodgrain Textured Impressions™ Embossing Folder to emboss a piece of Whisper White cardstock, trim and mount onto the Basic Black card base.

Mount the banners, the layered Lobster panel and sentiment to finish off the card.

Stamp Sets: By The Tide, Work of Art, Timeless Textures, Express Yourself (retired Hostess Set)

Ink: Basic Black Stampin’ Archival, Cherry Cobbler, Soft Sky, Cherry Cobbler Stampin’ Write Marker, Clear Wink of Stella®

Paper: Whisper White, Basic Black, Soft Sky, Wild Wasabi

Accessories: Big Shot™, Square Framelits™, Woodgrain Textured Impressions™ Embossing Folder, Banner Triple and Hexagon Punch, AquaPainter™


Thanks again for taking the time to visit- hugs and I hope you have a fabulous week!!

Sunday, April 10, 2016

Amazing You- A Color, Sketch and Technique Challenge


Hi Friends!

I had a chance to play around with some ink today and decided to create a Mixed Media card using the Pals Paper Arts PP295 Color Challenge along with the Global Design Project GDP030 Sketch and the Just Us Girls Trend Week JUGS338 “Smooshing”Challenge.

If you have not had a chance to visit the above challenge site galleries yet, again, I highly encourage you to do so- fabulous inspiration from all!

To create this card:

De-static a piece of Basic Black cardstock with the Embossing Buddy®, ink the script image from By the Tide using Versamark™ Ink, stamp onto the prepared cardstock, apply Stampin’ Emboss® White Embossing Powder and heat set with the Heat Tool.

Once the embossing powder has cooled, use the Big Shot™ with the My Favorite Things® (MFT) Stitched Horizontal Strip Dies to cut out the image and mount onto Bermuda Bay cardstock, trim the edges and set aside.

For the background, cut open a clear envelope (I slit the one side, top and bottom of a clear packaging envelope to create an opening like a book), add Bermuda Bay and Cucumber Crush Classic Ink directly to the inside of the clear envelope, spritz with water and “close” the top part of the envelope.

Smoosh the ink inside with your fingers, open the envelope and two pieces of Whisper White cardstock down onto the ink on both sides of the envelope.

Dry the panels with the Heat Tool and set one aside for a future project.

Cut out the “smooshed” background panel with the Big Shot™ using the MFT Blueprints 13 Die (the large stitched rectangle), ink the splatter stamp from Timeless Textures with Crumb Cake Classic Ink and stamp repeatedly onto the panel.

Dilute Black Gesso® with water and use a small paint brush to splatter the Gesso® over the panel.
Use the Big Shot™ with the Memory Box® Delicate Border Die to cut the border and mount onto the background panel.

Stamp the sentiment from the retired Express Yourself hostess stamp set with Versamark™ ink, apply Stampin’ Emboss® Black Embossing Powder and heat set with the Heat Tool.

Adhere the background panel to a piece of Bermuda Bay cardstock, trim and mount onto a piece of Basic Black cardstock, trim and mount onto the Whisper White card base.

Using the Black Stampin’ Archival Ink Pad, stamp the jellyfish image (From Land to Sea) onto Whisper White cardstock, heat set the ink with the Heat Tool and use an AquaPainter™ with Crumb Cake, Bermuda Bay and Cucumber Crush Classic Ink to watercolor the image.

Fussy cut the jellyfish and add Clear Wink of Stella® over the entire image.

Mount the horizontal script panel and jellyfish using dimensional foam.

Add a few Rhinestones to finish off the card.

Stamp Sets:  From Land to Sea, By The Tide, Timeless Textures, Express Yourself (retired Hostess set)

Ink: Versamark™, Bermuda Bay, Crumb Cake, Cucumber Crush, Clear Wink of Stella®

Paper/Cardstock: Whisper White, Basic Black, Bermuda Bay

Accessories:  Big Shot™, MFT Stitched Horizontal Strip Dies, MFT Blueprints 13 Dies,  MB Delicate Border Die, Embossing Buddy®, Stampin’ Emboss® White  and Black Embossing Powder, Heat Tool, Black Gesso®, Rhinestones


Thanks again for taking the time to visit- I hope you have a terrific week, my friends!

Tuesday, March 29, 2016

By The Tide- Thinking of You

Hi Friends!

I hope all of you are having a great week so far!  I decided to create a masculine card using one of my favorite Stampin’ Up! sets, By The Tide along with Gorgeous Grunge and Teeny Tiny Wishes.

I just love the By The Tide stamp set for masculine as well as feminine cards and can always use a few "Thinking of You" cards in my stash :-)

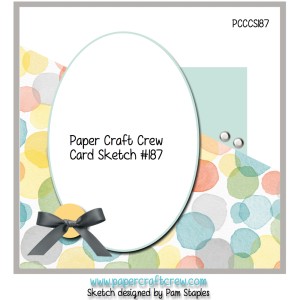
This card was designed using the Paper Craft Crew Challenge #187 Sketch along with the Can You Case It #113 Color Challenge and the Just Us Girls #336 InspirationPhoto for inspiration.

If you have not had a chance to visit the above galleries yet, I hope you will find the time to do so- wonderful designs by all!

All items used to create this card are from Stampin’ Up! with basic stamping techniques- if you have any questions, please feel free to let me know in the comments :-)

Stamp Sets: By The Tide, Gorgeous Grunge, Teeny Tiny Wishes

Ink: Basic Gray, Crumb Cake, Night of Navy, Stāz-On® Jet Black, Champagne Mist Shimmer Paint, White Gel Pen

Paper: Whisper White, Basic Gray, Crumb Cake, retired Crumb Cake and Pocketful of Posies DSP

Accessories: Big Shot™, Oval Framelits™, retired Fancy Fan Textured Impressions™ Embossing Folder, Hexagon Punch, Word Window Punch, Brayer, retired Crumb Cake Button, Natural Linen Thread, Rhinestones


Thanks again for taking the time to visit- hugs and I hope you have a fabulous week!!

Monday, February 1, 2016

By The Tide- A Color, Sketch and Theme Challenge :-)


Hi Friends! 

I hope you had a fabulous weekend!  I am sharing a card today that I created this morning using the Pals Paper Arts PPA285 Color Challenge along with the Freshly Made Sketches FMS221 Sketch Challenge and the Just Add Ink JAI296 "Just Add Nature" Challenge . 

If you have not had a chance to visit the above sites, I hope you will find time to do so- wonderful inspiration from all!

To create this card:

Ink the script stamp from By the Tide (Stampin’ Up!) with Pink Pirouette Classic Ink and stamp repeatedly onto a piece of Whisper White cardstock.

Ink the coral image using Tip Top Taupe Classic Ink and stamp into the corner of the panel, clean the stamp and ink the coral image again with Watermelon Wonder Classic Ink, stamp off onto a scrap piece of paper, stamp onto the panel and repeat with the coral image using Watermelon Wonder Classic Ink.

Ink the Nantucket image using Tip Top Taupe Classic Ink , ink the sentiment from Blessed (Mama Elephant) using Memento™ Tuxedo Black Ink and stamp onto the panel (I used my MISTI® Tool to position and stamp this image).

Trim the stamped panel and mount onto Pink Pirouette cardstock.
Trim a piece of Whisper White cardstock for the background panel, mount onto Pink Pirouette cardstock and mount onto the Tip Top Taupe card base.

It is difficult to see the beautiful sheen from the Wink of Stella
Ink the fish and seahorse images using Stāz-On® Jet Black Ink and stamp onto Whisper White cardstock.

Color the images with the AquaPainter™ and ink from the Pink Pirouette, Watermelon Wonder and Tip Top Taupe Classic Ink pads.
Fussy cut each image, add a bit of Clear Wink of Stella™ and mount the fussy cut images onto the stamped panel using Stampin’ Dimensionals®.

Add the focal image panel to the card front to finish off the card using Stampin’ Dimensionals® to finish off the card.

Stamp Sets:  By the Tide (Stampin’ Up!), Blessed (Mama Elephant)

Ink: Stāz-On® Jet Black, Memento™ Tuxedo Black, Pink Pirouette, Watermelon Wonder, Tip Top Taupe

Paper: Whisper White, Pink Pirouette, Tip Top Taupe

Accessories: Clear Wink of Stella™, MISTI® Too, Stampin’ Dimensionals®


Thanks again for stopping by!!  Tomorrow will be the start of the new SUO-Only Challenge and Wednesday the new Card Concept Challenge begins- hugs and have a blessed week, my friends!!

Saturday, August 15, 2015

CAS By The Tide- A Quick Aquatic Card


Hi Stampers!!

I had a chance to play in my craft room this evening and decided to create a Clean and Simple (CAS) card using the Colour...Me! "Striking" CMCC84 Challenge along with the CASology #159 Aquatic Challenge and the Splitcoaststampers CAS335 “Let’s Get Beachy” Challenge.

Again, if you have not already done so, I hope you will find the time to visit the above challenge sites to check out the wonderful Design Team samples as well as their fabulous galleries!

This card was quick and easy to create:

Use the Big Shot™ with the MFT Stitched Rectangle Die to cut out a rectangle from Whisper White cardstock.

Repeatedly stamp the coral using Tangerine Tango Classic Ink (stamping off on a few of the images before stamping onto the panel) and use a Sponge Dauber to apply Tangerine Tango around the edges and into the coral area a bit  :-).

Stamp the script image  (stamping off before stamping onto the panel) along with the Nantucket image using Cucumber Crush Classic Ink.

On another piece of Whisper White cardstock, stamp fish image just once along with the seahorse with Stāz-On® Jet Black Ink.

Using Memento™ Tuxedo Black Ink, stamp another fish image onto acetate and transfer to Whisper White cardstock (this will give you the "mirror" image :-))  ***FYI- you can use a clear envelope versus acetate as well ***

Color the seahorse and fish images using Tangerine Tango and Cucumber Crush Classic Ink and “fussy-cut” out the images.

Mount the rectangle die cut onto the Whisper White card base along with the aquatic images using Stampin’ Dimensionals®. 

Add a few highlights to the fish using a White Gel Pen to finish off the card.

I decided to leave the sentiment off so I can add as needed in the future :-)

Stamp Sets:  By The Tide

Ink:  Cucumber Crush, Tangerine Tango; Stāz-On® Jet Black, Memento™ Tuxedo Black, White Gel Pen

Paper: Whisper White

Accessories: Big Shot™, MFT™ Stitched Rectangle Die, Acetate, Sponge Dauber


Thanks again for stopping by- I hope you have a fabulous weekend!
Related Posts Plugin for WordPress, Blogger...