Showing posts with label Chevron EF. Show all posts

Thursday, May 12, 2016

Roanoke River Lighthouse- Watercolor Pencil Fun


Hi Friends!

I hope all of you are having a fabulous week so far!  


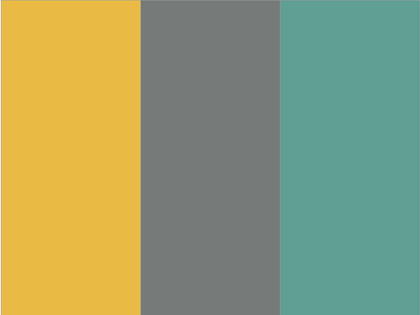
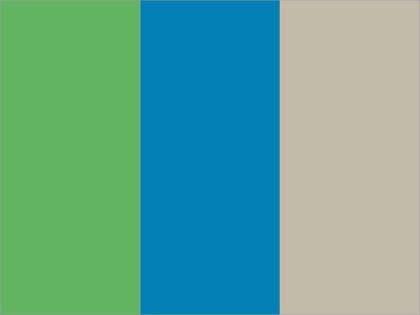
I love the colors in this inspiration photo as well as the feeling of relaxation- I have owned this Impression Obsession, Inc. stamp for quite a while and had not had a chance to ink it up yet, so I thought it would be a great one to use for this challenge as well as the others :-) 

If you have not had a chance to check out the above challenge sites, I hope you will find time to do so- such inspiration from all!

To create this card:

Ink the Roanoke River Lighthouse (I/O) using Stāz-On® Jet Black Ink and stamp onto a piece of Whisper White cardstock.

Color the image with Rexel Derwent® Watercolor Pencils (I used Light Blue, Terracotta, Cedar Green and Gunmetal) and use the AquaPainter™ to watercolor.

Add additional touches as needed with the Chinese White Pencil, trim and mount onto a piece of Marina Mist cardstock, trim and mount onto a piece of Whisper White cardstock).

Ink the script sentiment from By The Tide with Cajun Craze Classic Ink and stamp repeatedly onto a piece of Very Vanilla cardstock, trim the panel and mount onto a piece of Cajun Craze cardstock, trim and mount onto the Marina Mist card front.

Use the Big Shot™ with the My Favorite Things™ (MFT) Stitched Circle STAX Dies to cut a circle from Graphic 45® By The Sea Designer Paper (also cut a circle from Cajun Craze cardstock using the same size die).

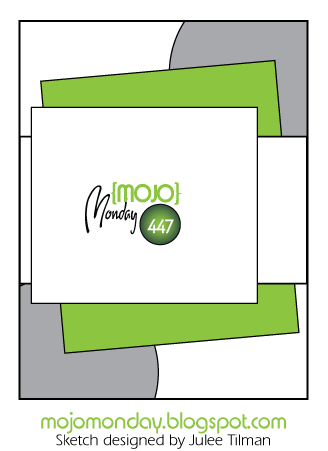
Split the circles in quarters and adhere the designer paper onto the Cajun Craze pieces, mount onto the opposite corners of the card front (per the sketch).

Cut a rectangle from Cajun Craze cardstock using the Big Shot™ with the My Favorite Things™ (MFT) Stitched Rectangle STAX Dies and emboss this panel with the Chevron Textured Impressions™ Embossing Folder.
 
Cut a piece of Cajun Craze cardstock using the Big Shot™ with the MFT Horizontal Stitched Strip Dies and use the edges only of this die cut to layer behind a piece of Marina Mist cardstock (embossed with the retired Square Lattice Textured Impressions™ Embossing Folder).

Mount the embossed rectangle on an angle onto the card front (per the sketch) and add the embossed horizontal strip to the card front as well.

Use a Sponge Applicator with Ranger® Tim Holtz® Old Paper Distress Ink to age the edges of the focal image panel and mount the panel to the card front with dimensional foam to finish off the card.

I decided to leave the front of the card without a sentiment so that I can use this card as needed for any occasion (plus I love the artwork in this image and did not want to cover it up :-)).

Stamp Sets: By The Tide, Timeless Textures (both SU!), Roanoke River Lighthouse (I/O)

Ink/Mediums: Stāz-On® Jet Black, Cajun Craze, Ranger® Tim Holtz® Old Paper Distress Ink, Derwent® Watercolor Pencils

Paper: Whisper White, Very Vanilla, Cajun Craze, Marina Mist; Graphic45® By The Sea Designer Paper

Accessories: Big Shot™, Chevron Textured Impressions™ Embossing Folder, MFT Stitched Circle STAX Dies, Sponge Dauber, AquaPainter™


Thanks again for taking the time to stop by- hugs and enjoy the rest of your week!

Thursday, April 21, 2016

Bear Hugs- You're So Sweet


Hi Friends!

I had a chance to create another quick card this evening and decided to participate in the #60 Bear Hugs Challenge at What Will You Stamp? (a new challenge site for me)  along with the Stampin’ Celebration SC127 Sketch Challenge and the Splitcoaststampers' CC579 Color Challenge.

If you have not had a chance to check out the above sites, I encourage you to do so- wonderful samples from all!
I love this sweet bear set, but must confess, I truly struggle with designing "cute" cards...

The background was created with the Smakin' Acetate technique (I am addicted- lol!)....

Cut open a clear envelope (or transparency sheet) and gently press the Hello Honey Classic Ink Pad directly onto the acetate (not the whole pad only partial areas), press the envelope together, smoosh the ink around a bit, re-open the envelope and press a piece of Whisper White cardstock down onto the ink on one side of the envelope.

Once the ink dries, use the Big Shot™ with the retiring Honeycomb Textured Impressions™ Embossing Folder to emboss the panel.

Trim and mount onto a piece of Lost Lagoon cardstock, trim and mount onto a piece of Basic Gray, trim and mount onto the Hello Honey card base.

Emboss a piece of Whisper White cardstock with the retiring Chevron Textured Impressions™ Embossing Folder, trim and mount onto a piece of Lost Lagoon cardstock, trim and mount onto a piece of Basic Gray cardstock and adhere onto the card front.

Ink the large bear image, the honeypot and the sentiment with Stāz-On® Jet Black Ink and stamp onto a piece of Whisper White cardstock. 

Stamp the skirt image onto a piece of retired Moonlight Designer Series Paper using Stāz-On® Jet Black Ink.

Use the Big Shot™ with the Bear Hugs Framelits™ to cut out the bear and honeypot images (fussy-cut the skirt image).

Color the bear with an AquaPainter™ and Basic Gray Classic Ink and fold up the arms.

Use an AquaPainter™ with Lost Lagoon Classic Ink to color the skirt and lower part of the honeypot adding shadows to both with the Stampin’ Write Lost Lagoon Marker.

Color the honey with the Hello Honey Stampin’ Write Marker and add Crystal Effects™ over the honey (set aside to dry).

Trim the sentiment, create the banner points with the retiring Hexagon Punch, mount onto Lost Lagoon cardstock, trim and create the banner points again with the punch and add a strip of Basic Gray cardstock (also creating the banner points with the Hexagon Punch- I am going to miss this punch in the catalog). 

Wrap a few pieces of the retired SAB 2015 In-Color Thick Baker's Twine around the sentiment and set aside.

Mount the bear, sentiment and honey pot using Stampin’ Dimensionals®.

Add the two Lost Lagoon buttons (with separated and knotted Hello Honey Thick Baker’s Twine in the center) to finish off the card.

Stamp Sets: Bear Hugs

Ink/Mediums: Stāz-On® Jet Black, Basic Gray, Hello Honey, Lost Lagoon; Stampin’ Write Markers- Hello Honey, Lost Lagoon; Crystal Effects™

Paper: Whisper White, Basic Gray, Hello Honey, Lost Lagoon

Accessories: Big Shot™, Bear Hugs Framelits™, Honeycomb and Chevron Textured Impressions™ Embossing Folders, Clear Envelope, retired SAB 2015 Hello Honey and Lost Lagoon Thick Baker’s Twine, retired SAB 2015 Lost Lagoon buttons


Thanks again for taking the time to visit- I hope you have a fantastic weekend!

Monday, April 11, 2016

Bravo! You Did It!


Hi Friends!

I had another chance to play around the Smakin’ Acetate technique today (see the Splitcoaststampers’ tutorial here) and decided to use the PaperCraft Crew PCCCS189 Sketch Challenge along with the Splitcoaststampers’ CC564Color Challenge and the Cards for a Cause April C4AC38 Challenge.
 
If you have not had a chance to visit the above challenge site galleries yet, I highly encourage you to do so- fabulous inspiration from all!

To create this card:

For the background, cut open a clear envelope (I slit the one side, top and bottom of a clear packaging envelope to create an opening like a book), add Pacific Point  and Cucumber Crush Classic Ink directly to the inside of the clear envelope, spritz with water and “close” the top part of the envelope.

Smoosh the ink inside with your fingers, open the envelope and two pieces of Whisper White cardstock down onto the ink on both sides of the envelope.

Dry the panels with the Heat Tool and set one aside for a future project.

Trim the “smooshed” background panel, repeatedly stamp the small splatter stamp from Timeless Textures with Sahara Sand Classic Ink over the background, mount onto Sahara Sand cardstock, trim and mount onto the Pacific Point card base.

Ink the sentiments from Bravo using Pacific Point Classic Ink and stamp onto the card front.

Use the Big Shot™ with the Banner Framelits™ to cut out the banner from Whisper White, Cucumber Crush and Pacific Point cardstock and use the Lots of Tags Framelits™ to cut the tag element from Sahara Sand cardstock.

Emboss the Whisper White banner with the Chevron Textured Impressions™ Embossing Folder and layer onto the Pacific Point and Cucumber Crush banners.
Use the Big Shot™ with the Boho Chic Textured Impressions™ Embossing Folder to emboss the Sahara Sand tag, cut off the one end of the tag and attach behind the layered banner.

Mount the banner onto the card front with dimensional foam, add the stamped Pacific Point and Cucumber Crush strips to the top (also mounted with dimensional foam) along with the retired Silver Basics Designer Button.

Using the Black Stampin’ Archival Ink Pad, stamp the sailfish image (From Land to Sea) onto Whisper White cardstock, heat set the ink with the Heat Tool and use an AquaPainter™ with Sahara Sand and Pacific Point Classic Ink to watercolor the image.

Fussy cut the sailfish, add Clear Wink of Stella® over the image and mount onto the layered banner with dimensional foam to finish off the card.

Stamp Sets:  From Land to Sea, Timeless Textures, Bravo

Ink: Basic Black Stampin’ Archival, Cucumber Crush, Pacific Point, Sahara Sand, Clear Wink of Stella®

Paper/Cardstock: Whisper White, Cucumber Crush, Pacific Point, Sahara Sand

Accessories:  Big Shot™, Banner and Lots of Tags Framelits™, Boho Chic and Chevron Textured Impressions™ Embossing Folder, AquaPainter™, Silver Basics Designer Button (retired)


Thanks again for taking the time to stop by- I hope you have a wonderful week, my friends!

Friday, November 20, 2015

F4A300 Prayerful Thoughts Quilt

Hi Friends!!


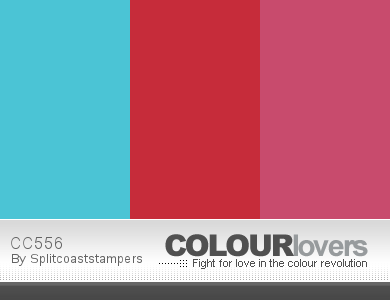
The 300th challenge details are to create a project using one of the first ten “Free For All” Challenges and I chose the F4A7 “Make a Quilt” Challenge along with the CC556 Color Challenge and CAS350 “To Grandma’s House We Go” Challenge (although this card could also qualify for the F4A1 "Textures, Colors & Patterns" that you normally would not use together- I truly struggle with pinks and reds together :-)).

I always remember the colorful quilts at my grandmother’s house- they were made from scraps and most of them were what she called popcorn quilts but I decided to create a bright colorful quilt for my card.

I hope you will find the time to come play along- check out the gallery for the F4A300 entries as well as the CC556 Gallery and CAS350 Gallery- wonderful inspiration from all!!

I chose the Sweet ‘n Sassy Stamps (SNSS) Prayerful Thoughts for the sentiment (I thought it would be perfect for this quilt theme)- if your day is sewn together with prayer, it is definitely less likely to become unraveled for sure!

This is a very easy card to create- emboss the background with the Chevron and retired Square Lattice Embossing Folders, cut the quilt from the different color challenge cardstocks along with white, put the quilt together onto scrap paper, emboss with the Square Lattice Embossing Folder, punch apart with the 1” Square Punch, layer with dimensional foam onto cardstock, stamp the sentiment from the SNSS stamp set and cut with a stitched square die, layer onto Real Red cardstock, add the lace onto the embossed card front, mount the quilt panel and sentiment, add the Bow Builder Punched Paper Bow with the button along with Pearls to finish off the card.


Ink: Real Red

Paper: Whisper White, Real Red, Tempting Turquoise, retired Primrose Petals

Accessories: Big Shot™, Chevron and retired Square Lattice Textured Impressions™ Embossing Folders, MFT Stitched Square STAX Dies, MFT Blueprints 20 Dies, Bow Builder Punch, 1” Square Punch, retired Brights Collection Button, White Crochet Lace from my stash, Pearls


Thanks again for stopping by- I hope you have a fantastic Friday, my friends!

Thursday, October 29, 2015

HYCCT1527HERO Fight Cancer Like A Superhero

Hi Friends!!

This card was created for the Splitcoaststampers’  “Hope You Can Cling To” HYCCT1527HERO Fantastic Four’s “You Are My Superhero” Challenge to create a card with a superhero theme :-)

Again, if you have not had a chance to do so, I hope you will find the time to visit the above gallery- "super" inspiration from all!!

This was another difficult challenge for me since I do not own any stamps with superheroes but then I remembered that I had purchased the Stampin’ Up! Calling All Heroes stamp brush set to use with the retired My Digital Studio (MDS)- yippee!!

To create this card:

Open a blank document in MDS and insert the cityscape image from the Calling All Heroes stamp brush set along with the cat eye mask- resize if needed.

Using the alphabet, spell BAM! and POW! -  insert into the zagged word bubble, arrange as a group and re-size.

Create a text box and type the sentiment.

Print all onto Whisper White cardstock, fussy cut the building image along with the word bubbles, trim the sentiment and create the banners with the Hexagon Punch.

Use the Big Shot™ to emboss a piece of Pink Pirouette cardstock using the Chevron Textured Impressions™ Embossing Folder, trim and mount onto a piece of Basic Black cardstock.

Mount the panel onto the Whisper White card base, adhere the city scape and cat eye mask images directly onto the embossed panel and mount the word bubbles along with the sentiment using dimensional foam.

BAM! You are finished!!

Stamp Sets:  Calling All Heroes (MDS version)
Ink: Printer Ink- Black
Paper: Whisper White, Basic Black, Pink Pirouette
Accessories: Big Shot™, Chevron Textured Impressions™ Embossing Folder, Hexagon Punch

Thanks again for taking the time to visit- I will be posting more of the Hope You Can Cling To Challenge cards later this evening and tomorrow!  

Sunday, September 13, 2015

So Very Thankful Bloom for You :-)


Hi Friends!

I decided to create a Clean and Layered card using the Pals Paper Arts PPA267 Color Challenge along with the Mojo414 Sketch Challenge  and the Splitcoaststampers; F4A286 “Three Cheers” Challenge (use 3 die cuts and/or punches). 

Again, if you have not already done so, I hope you will find the time to visit the above links to check out their wonderful Design Team entries as well as their galleries!

To create this card:

Use the Big Shot™ to emboss the Whisper White background with the Boho Chic Textured Impressions™ Embossing Folder.  Also die cut a piece of Tangelo Twist cardstock, Whisper White and retired I Am Me Designer Series Paper (DSP) with MFT Stitched Rounded Rectangular and Jumbo Fishtail Banner Dies. 

Emboss the Tangelo Twist rounded rectangular die cut and a scrap piece of Pool Party cardstock with the Chevron Textured Impressions™ Embossing Folder.

Layer the Pool Party embossed panel with the 1 ¼” Burlap Ribbon over the Whisper White Boho Chic embossed background, mount onto a piece of Tangelo Twist cardstock and mount onto the Pool Party card base.

Stamp the Bloom for You flower using Crushed Curry Classic Ink and use the Rock-n-Roll technique with Tangelo Twist Classic Ink. 

Fussy-cut the flower, add a 7/8” Scallop Circle punch from the retired I Am Me DSP to the center along with the retired Sycamore Street button and Natural Linen Thread.

Stamp the sentiment using Tangelo Twist Classic Ink onto the Whisper White die cut piece.

Add the knotted Natural Linen Thread to the Pool Party chevron banner (created above from I Am Me DSP), adhere the banner onto the chevron embossed Tangelo Twist die cut, add the Whisper White sentiment die cut and mount the entire layered panel onto the card front using Stampin’ Dimensionals®.

Add the flower using Stampin’ Dimensionals® and a few Pearls to the sentiment layer to finish off the card.

Stamp Sets: Bloom for You, Pretty Patches- Apple (Wplus9 Designs)

Ink: Crushed Curry, Tangelo Twist

Paper: Whisper White, Pool Party, Tangelo Twist, retired I Am Me DSP

Accessories: Big Shot™, Boho Chic and Chevron Textured Impressions™ Embossing Folders, MFT Stitched Rounded Rectangular STAX, Stitched Jumbo Fishtail Banner STAX, 7/8” Scallop Circle Punch, 1 ¼” Burlap Ribbon, Natural Linen Thread, Pearls, retired Sycamore Street Button


Thanks again for taking the time to stop by- hugs and have a great day, my friends!

Sunday, August 23, 2015

ODBDSCL251 To Everything There Is A Season


Hi Again Stampers!!


Again, if you have not already done so, I hope you will find the time to visit the above sites to check out the gorgeous Design Team samples as well as their inspirational challenge galleries!

This card was fairly easy to create:

Stamp the images from the Our Daily Bread Designs Crocheted Poppy Circle and Crocheted Border onto Whisper White cardstock using Stāz-On® Jet Black Ink.

Watercolor the petals on the Poppy image using an AquaPainter™ with the Bermuda Bay Stampin’ Write Marker (scribble the marker onto an acrylic block and pick up the ink with the AquaPainter™), the leaves with the retired Lucky Limeade Stampin’ Write Marker and the background grid with Basic Gray and Sahara Sand markers.

Use the Big Shot™ with the coordinating ODBD Crochet Circle and Crochet Border Dies to cut out the images.

Emboss a piece of Bermuda Bay cardstock with the Big Shot™ and the Chevron Textured Impressions™ Embossing Folder, trim and mount onto a piece of Basic Gray cardstock, trim and add the Crochet Border pieces.

Mount the embossed chevron  panel onto a piece of Whisper White cardstock, trim and mount onto a piece of Basic Gray cardstock, trim and mount onto the Bermuda Bay card base.

Use Stāz-On® Jet Black Ink to stamp the sentiment from the ODBD Scripture Collection I  at the bottom of the panel and add the focal image circle using Stampin’ Dimensionals® to finish off the card.

Stamp Sets: Crocheted Poppy Circle, Crochet Border, Scripture Collection I (Our Daily Bread Designs)

Ink: Stāz-On® Jet Black, Stampin’ Write Markers- Bermuda Bay, Basic Gray, Sahara Sand, retired Lucky Limeade

Paper: Whisper White, Basic Gray, Bermuda Bay

Accessories: Big Shot™,  ChevronTextured Impressions™ Embossing Folder, ODBD Crocheted Circle Die, ODBD Crocheted Border Die, AquaPainter™


Thanks again for taking the time to stop by- I hope all of you have a fabulous week!  

Tuesday, February 24, 2015

SUO117 Hello There Teen Card

Hi Stampers!   

It’s time for the new SUO117 “Just for Teens” Challenge and I decided to create a card using the new hostess set, Time to Celebrate along with a Project Life® by Stampin’ Up! Everyday Adventure project card as the base for the images.  

Not sure if a teen would like this card but I think the bird image in this set is so cute!

I was also inspired by the Splitcoaststampers "Try A New Technique" TLC520 Embossing Folder Stamping Challenge- see their gallery here.   I did use the embossing folder to stamp the chevron on the right hand side of the bird image :-)

I hope you will find the time to check the both challenge sites and create your own Stampin’ Up! Teen Card to join in on the fun!

To create this card:
Use the Big Shot™ with the Zig Zag Textured Impressions™  Embossing Folder to emboss a piece of Whisper White cardstock, trim and mount onto a piece of Strawberry Slush cardstock, trim and mount onto the Bermuda Bay card base.
Using the card from the Project Life® by Stampin’ Up! Everyday Adventure set, stamp the bird and sentiment from the hostess set, Time to Celebrate using Memento™ Tuxedo Black Ink.
Color the bird using Stampin’ Write Markers- Bermuda Bay, Crushed Curry and Rose Red (I could not locate my Strawberry Slush marker- oops!) :-).   Use the Crumb Cake Stampin’ Write marker to add shadows around the bird, circle border, arrow and the sentiment box. 
Ink the large splatter image from Gorgeous Grunge with Crumb Cake Classic Ink and stamp over the bird and sentiment images. 
Ink the interior of the Chevron Textured Impressions™ Embossing Folder using Rose Red Classic Ink and spritz with a bit of water.  Create a mask for the circle and sentiment box on the Project Life® card and lay the inked/spritzed part of the embossing folder face down onto the masked card to “stamp” the chevron. 
Trim the Project Life® panel and round the top right hand corner using the 3/8” Project Life® Corner Rounder Punch.  Use the 2 ½” Circle Punch to punch out a portion of the top left had corner. 
Mount the panel onto a piece of Strawberry Slush cardstock, round the top tight hand corner and remove part of the top left hand corner using the same punches as above.
Create the banner using the Banner Punch punching pieces from Bermuda Bay and Strawberry Slush cardstock as well as the retired Eastern Elegance Designer Series Paper (DSP).
Using a Craft Mat with a Hot Glue Gun, adhere the banners together in an arch form and add the Bermuda Bay Sequin Trim to cover the glued edges.
Using the same papers as above, add a few banners to the lower right hand side of the panel as well.
Mount the panel to the card front using Stampin’ Dimensionals® and add a few Rhinestones near the sentiment to finish off the card. 
Stamp Sets:  Time to Celebrate, Gorgeous Grunge
Ink: Memento™ Tuxedo Black Ink, Crumb Cake and Rose Red Classic Ink; Stampin’ Write Markers- Bermuda Bay, Crushed Curry, Rose Red, Crumb Cake
Paper/Cardstock: Whisper White, Bermuda Bay, Strawberry Slush; Everyday Adventure Project Life® by Stampin’ Up!, retired Eastern Elegance DSP
Accessories: Big Shot™, Chevron and Zig Zag Textured Impressions™ Embossing Folders,  Banner Punch, Rhinestones, Bermuda Bay Sequin Trim

Thanks again for taking the time to visit – I hope that you will join in on in on the fun with your Stampin’ Up! Only creations and create your own “Just for Teens” project!

Sunday, July 20, 2014

When I Need A Friend- Another Color and Sketch Challenge :-)


Hi Again Stampers! 

I had a great time creating a few cards this weekend and this card was created using the Around the World AW21 Color Challenge along with the Pals Paper Arts PPA212 Sketch Challenge. 

If you have not linked up to the challenge sites yet, I urge you to do so- great inspiration from all!

To create this card:

Stamp the blossom from Choose Happiness using Basic Gray Classic Ink onto Whisper White cardstock.  

Use a Sponge Dauber with Strawberry Slush Classic Ink and “pounce” the ink onto the images, “fussy-cut” the blossoms and sponge a bit of Basic Gray around the outside edges.  Add a few highlights using the Chalk Marker to the flower centers.

Ink the Dictionary background stamp using Basic Gray Classic Ink and stamp onto a piece of Basic Gray cardstock. 

Use the Big Shot™ with the Chevron Textured Impressions™ Embossing Folder to emboss a piece of Pool Party cardstock and layer onto the background panel (adhering ½ of a White Tea Lace Paper Doily to the lower edge and a strip of Strawberry Slush cardstock to the upper edge).

Trim the background panel and mount onto a piece of Pool Party cardstock, trim and mount onto a piece of Strawberry Slush cardstock and trim once more mounting onto the Basic Gray card base.

Add the flowers using Stampin’ Dimensionals® to the card front.

Stamp the sentiment using Basic Gray Classic Ink and stamp onto a piece of Whisper White cardstock.  Cut the banner points using the Hexagon Punch and mount onto the card front using Stampin’ Dimensionals®. 

Add Pearls to finish off the card.
  
Stamp Sets: Choose Happiness, Dictionary

Ink: Basic Gray, Strawberry Slush, Chalk Marker

Paper: Whisper White, Basic Gray, Pool Party, Strawberry Slush

Accessories: Big Shot™, Chevron Textured Impressions™ Embossing Folder,  Hexagon Punch, Sponge Daubers, White Tea Lace Paper Doily,  Pearls

Thanks again for stopping by- have a wonderful Sunday and God Bless!!

Saturday, June 21, 2014

Another Fun Card using the Packing Tape Technique :-)

Hi Again Stampers!!

Here is my second card that I created yesterday using my Gelli Arts® Gel Printing Plate and the Packing Tape Technique (see this post for the steps to create the packing tape strips) :-)


Again, I hope you have the time to check out all of the challenge sites- so many different interpretations and ideas!

To create this card:

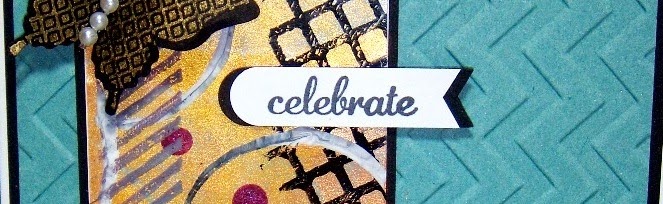
Use one of the packing tape layers to create the banner and adhere to a piece of Basic Black cardstock. Add the White Baker’s Twine to the top of the banner. 

Use the Big Shot™ with the Chevron Textured Impressions™ Embossing Folder to emboss a piece of Lost Lagoon cardstock, trim and mount onto a piece of Basic Black cardstock.  Trim and mount onto the Whisper White card base and add the banner to the card front.  

Using Gold Encore™ Ink, stamp the butterflies from Papillon Potpourri onto Basic Black cardstock and punch out using the Elegant Butterfly Punch.  Adhere to another butterfly (also punched with the Elegant Butterfly Punch from Basic Black cardstock) and mount the butterflies to the card front.

Close-Up of the banner
Stamp the sentiment from Express Yourself using Memento™ Tuxedo Black Ink onto Whisper White cardstock, punch out using the Word Window Punch and create the banner points using the Hexagon Punch.

Mount onto a layer of Basic Black cardstock (also punched with the Word Window Punch along with banner points created from the Hexagon Punch).  Add to the front of the card. 

Add the Pearls to the butterfly centers to finish off the card.

Stamp Sets: Papillon Potpourri, Gorgeous Grunge, Express Yourself

Ink: Memento™ Tuxedo Black , Encore™ Gold Pigment Ink, Acrylic Paints- Metallic Titanium Teal, Light Village Green, Metallic Green Patina, Soft Black, Soft White, metallic Crown Red Velvet  

Paper: Whisper White, Basic Black, Lost Lagoon

Accessories: Big Shot™, Chevron Textured Impressions™ Embossing Folder, Gelli Arts® Gel Printing Plate, Brayer, Punches- Hexagon, Elegant Butterfly; Pearls

Thanks again for visiting- I have one more card to share using the Packing Tape strips and will do so shortly.   I hope all of you have a great weekend- God Bless!
Related Posts Plugin for WordPress, Blogger...