Showing posts with label From Land To Sea. Show all posts

Sunday, June 12, 2016

Happy Father's Day!


Hi Again Friends!

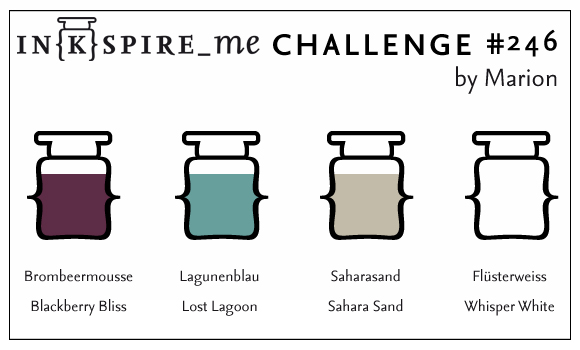
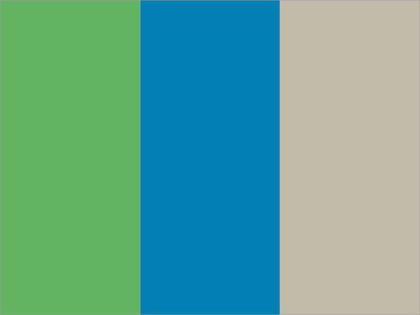
I wanted to share another card that I had fun creating this weekend using the Pals Paper Arts PPA304 Sketch Challenge (I flipped the sketch) along with the CC586 Color Challenge and the Simon Says Wednesday “Father’s Day/Guy Card” Challenge.
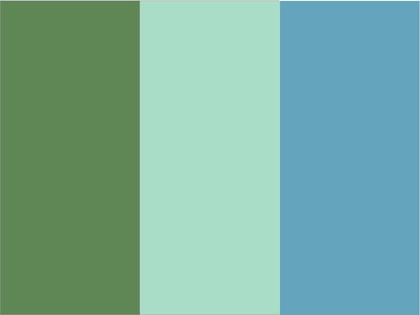

If you have not had a chance to visit the above challenge galleries yet, I encourage you to do so- wonderful ideas and projects by all!

To create this card:

Ink the Stampin’ Up! From the Land to Sea sailfish image with Stāz-On® Jet Black Ink and stamp onto Whisper White cardstock.

Color the image with an AquaPainter™ and ink from Stampin’ Write Markers- Pool Party, Marina Mist and Garden Green, fussy cut the image and add Clear Wink of Stella® to the fins and body.

FYI- I used a modified version of the Smakin' Acetate technique for the background and focal image panels :-)

To create the background, open up a clear envelope and press Pool Party and Marina Mist onto the acetate, spritz with water, close the envelope and “smoosh” the ink with your fingers through the acetate, open the envelope and press a 2 ½” x 4 ¼” panel of Whisper White cardstock into the ink, mount the panel onto Garden Green cardstock.

Repeat the above process with a piece of 4 ¼” x 5 ½” panel of Whisper White cardstock, trim the panel and adhere to a piece of Garden Green cardstock, trim and mount onto the Extra Thick Whisper White card base.

Use the Big Shot™ with retired Square Lattice Textured Impressions™ Folder to emboss a piece of Marina Mist cardstock, cut the embossed panel with the MFT Stitched Circle STAX die (I already had this piece embossed and cut in my scrap paper stash :-)).

Add the embossed circle to the card front and mount the splattered panel to the card front with dimensional foam (per the sketch).

Use a Sponge Dauber with Marina Mist Classic Ink to add a bit more color for the “water”, adhere the looped Silver Cord and mount the sailfish image with dimensional foam.

Ink the sentiment from More Great Greetings with Versamark™ Ink, de-static a piece of Basic Black cardstock with an Embossing Buddy®, stamp the sentiment onto the prepared cardstock, apply Stampin’ Emboss® White Embossing Powder and heat set with the Heat Tool.

Cut the sentiment apart and mount onto the card front with dimensional foam to finish off the card.

Stamp Sets: From Land to Sea, More Great Greetings (retired)

Ink: Stāz-On® Jet Black, Versamark™, Classic Ink-Marina Mist, Pool Party; Stampin’ Write Markers- Pool Party, Marina Mist, Garden Green; Clear Wink of Stella®

Paper: Whisper White, Extra Thick Whisper White, Basic Black, Garden Green

Accessories: Big Shot™, retired Square Lattice Textured Impressions™ Embossing Folder, MFT Stitched Circle STAX Dies, AquaPainter™, Embossing Buddy®, Stampin’ Emboss® White Embossing Powder, Heat Tool, Silver Cord, Clear Envelope, Water Spritzer Bottle


Thanks again for visiting- you are all such an encouragement to me!!  I hope all of you have a fabulous week, my friends!

Sunday, May 29, 2016

CAS Seascape


Hi Again Friends!


I love the sentiments in the Rose Wonder set- the fonts look great with all types of card styles and there is a sentiment for most occasions :-)  

This card will be sent to a gentlemen from our church that has been going through a very tough time battling cancer- our thoughts and prayers are with him and his family for sure....

If you have not had a chance to visit the above challenge galleries yet, I encourage you to do so- gorgeous cards and inspiration!!

To create this card:

Mask a square area onto the Extra Thick Whisper White card base, ink an acrylic block with an Island Indigo Stampin’ Write Marker, lightly spritz with water and stamp the card front.

Ink the lined Gorgeous Grunge stamp with Mint Macaron Classic Ink and stamp over the acrylic block stamping.

Ink the coral image from By The Tide using Island Indigo Classic Ink and stamp onto the background.

Ink the small splatter stamp from Timeless Textures using Island Indigo Classic Ink and stamp onto the background and add the large splatter from Gorgeous Grunge (also with Island Indigo Classic Ink).

Add the Clear Wink of Stella® to add highlights to the background area.

Ink the sea turtle and jellyfish images with Stāz-On® Jet Black Ink and stamp onto Whisper White cardstock, color with Stampin’ Write Markers and an AquaPainter™- Mint Macaron, Tip Top Taupe and Island Indigo.

Fussy-cut the images, add Clear Wink of Stella® and set aside.
Stamp the sentiment from Rose Wonder with Tip Top Taupe and mount the fussy-cut images with dimensional foam.

Stamp Sets: Rose Wonder, From Land to Sea, Gorgeous Grunge, Timeless Textures, By the Tide

Ink: Stāz-On® Jet Black, Island Indigo, Mint Macaron, Tip Top Taupe, Stampin’ Write Markers- Island Indigo, Mint Macaron, Tip Top Taupe; Clear Wink of Stella®

Paper: Extra Thick Whisper White, Whisper White

Accessories: Acrylic Block, AquaPainter™, Paper for masking, Water Spritzer Bottle


Thanks again for visiting- have a relaxing and safe weekend!

Tuesday, April 26, 2016

SUO147 Bravo! You Did It- Congratulations

Hi Friends!   

It’s time for the SUO147 “Congratulations” Challenge and I decided to create another card for the Splitcoaststampers’ April 2016 Cards for A Cause (see details here about this card drive).


 I hope you will have a chance to check out my sister Design Team member samples at the SU-Only Challenge site as well as the fantastic Design Team samples and entries at the other galleries- wonderful inspiration from all!


To create this card:

The background was designed using the Smakin' Acetate Technique using a page protector or clear envelope (acetate)- open one side and the bottom to create a “book”, press the Blackberry Bliss and Lost Lagoon Classic Ink pads onto the right hand side (I use the ink pads directly versus the markers as in the tutorial),  spritz with water, close the envelope and “smoosh” the ink a bit with your finger, reopen the envelope and insert a piece of Whisper White cardstock onto each side (you will receive two background panels).

Trim the one panel, stamp the coral image from By The Tide with Blackberry Classic Ink, de-static the panel, ink the “Bravo!” sentiment with Versamark™ ink, re-ink immediately with Blackberry Bliss Classic Ink, stamp onto the panel, apply Stampin’ Emboss® Clear Embossing Powder and heat set with the Heat Tool.

Allow the embossed panel to cool, ink the “Bravo!” sentiment with Versamark™ ink, offset from the original stamped sentiment a bit to the left, stamp onto the panel, apply Stampin’ Emboss® White Embossing Powder and heat set with the Heat Tool.
Trim the panel and mount onto a piece of Blackberry Bliss cardstock.
Ink the Chalk Lines border stamp using Blackberry Bliss and stamp onto the left hand side of the remaining panel (created in step 1 with the  Smakin’ Acetate technique). 
Ink the splatter stamp from Timeless Textures with Lost Lagoon Classic Ink and add a bit of distressing to the background as well as the embossed sentiment focal image panel.

Trim the background panel, decide where you would like to place the focal image panel and stamp the “you did it” stamp with Blackberry Bliss Classic Ink.

Mount the trimmed background panel onto the Blackberry Bliss card base.

Ink the sea turtle image with Stāz-On® Jet Black Ink and stamp onto Whisper White cardstock.

Color the image with and AquaPainter™ and ink from the Sahara Sand and Lost Lagoon Classic Ink Pads.

Use the Sahara Sand and Lost Lagoon Stampin’ Write Markers to add shadows and additional color, fussy-cut the image and apply Clear Wink of Stella® over the turtle.

Mount the focal image panel along with the sea turtle using dimensional foam to finish off the card.

Stamp Sets:  From Land to Sea, By The Tide, Bravo, Chalk Lines, Timeless Textures

Ink:  Versamark™, Blackberry Bliss, Lost Lagoon, Sahara Sand; Stampin’ Write Markers- Lost Lagoon, Sahara Sand ; Clear Wink of Stella®

Paper/Cardstock: Whisper White, Blackberry Bliss
Accessories: Clear Envelope, Embossing Buddy®, Heat Tool, Stampin’ Emboss® White and Clear Embossing Powder

Thanks again for stopping by and we hope to see your Stampin’ Up! Only project in our “Congratulations” Challenge gallery!

Monday, April 11, 2016

Bravo! You Did It!


Hi Friends!

I had another chance to play around the Smakin’ Acetate technique today (see the Splitcoaststampers’ tutorial here) and decided to use the PaperCraft Crew PCCCS189 Sketch Challenge along with the Splitcoaststampers’ CC564Color Challenge and the Cards for a Cause April C4AC38 Challenge.
 
If you have not had a chance to visit the above challenge site galleries yet, I highly encourage you to do so- fabulous inspiration from all!

To create this card:

For the background, cut open a clear envelope (I slit the one side, top and bottom of a clear packaging envelope to create an opening like a book), add Pacific Point  and Cucumber Crush Classic Ink directly to the inside of the clear envelope, spritz with water and “close” the top part of the envelope.

Smoosh the ink inside with your fingers, open the envelope and two pieces of Whisper White cardstock down onto the ink on both sides of the envelope.

Dry the panels with the Heat Tool and set one aside for a future project.

Trim the “smooshed” background panel, repeatedly stamp the small splatter stamp from Timeless Textures with Sahara Sand Classic Ink over the background, mount onto Sahara Sand cardstock, trim and mount onto the Pacific Point card base.

Ink the sentiments from Bravo using Pacific Point Classic Ink and stamp onto the card front.

Use the Big Shot™ with the Banner Framelits™ to cut out the banner from Whisper White, Cucumber Crush and Pacific Point cardstock and use the Lots of Tags Framelits™ to cut the tag element from Sahara Sand cardstock.

Emboss the Whisper White banner with the Chevron Textured Impressions™ Embossing Folder and layer onto the Pacific Point and Cucumber Crush banners.
Use the Big Shot™ with the Boho Chic Textured Impressions™ Embossing Folder to emboss the Sahara Sand tag, cut off the one end of the tag and attach behind the layered banner.

Mount the banner onto the card front with dimensional foam, add the stamped Pacific Point and Cucumber Crush strips to the top (also mounted with dimensional foam) along with the retired Silver Basics Designer Button.

Using the Black Stampin’ Archival Ink Pad, stamp the sailfish image (From Land to Sea) onto Whisper White cardstock, heat set the ink with the Heat Tool and use an AquaPainter™ with Sahara Sand and Pacific Point Classic Ink to watercolor the image.

Fussy cut the sailfish, add Clear Wink of Stella® over the image and mount onto the layered banner with dimensional foam to finish off the card.

Stamp Sets:  From Land to Sea, Timeless Textures, Bravo

Ink: Basic Black Stampin’ Archival, Cucumber Crush, Pacific Point, Sahara Sand, Clear Wink of Stella®

Paper/Cardstock: Whisper White, Cucumber Crush, Pacific Point, Sahara Sand

Accessories:  Big Shot™, Banner and Lots of Tags Framelits™, Boho Chic and Chevron Textured Impressions™ Embossing Folder, AquaPainter™, Silver Basics Designer Button (retired)


Thanks again for taking the time to stop by- I hope you have a wonderful week, my friends!

Sunday, April 10, 2016

Amazing You- A Color, Sketch and Technique Challenge


Hi Friends!

I had a chance to play around with some ink today and decided to create a Mixed Media card using the Pals Paper Arts PP295 Color Challenge along with the Global Design Project GDP030 Sketch and the Just Us Girls Trend Week JUGS338 “Smooshing”Challenge.

If you have not had a chance to visit the above challenge site galleries yet, again, I highly encourage you to do so- fabulous inspiration from all!

To create this card:

De-static a piece of Basic Black cardstock with the Embossing Buddy®, ink the script image from By the Tide using Versamark™ Ink, stamp onto the prepared cardstock, apply Stampin’ Emboss® White Embossing Powder and heat set with the Heat Tool.

Once the embossing powder has cooled, use the Big Shot™ with the My Favorite Things® (MFT) Stitched Horizontal Strip Dies to cut out the image and mount onto Bermuda Bay cardstock, trim the edges and set aside.

For the background, cut open a clear envelope (I slit the one side, top and bottom of a clear packaging envelope to create an opening like a book), add Bermuda Bay and Cucumber Crush Classic Ink directly to the inside of the clear envelope, spritz with water and “close” the top part of the envelope.

Smoosh the ink inside with your fingers, open the envelope and two pieces of Whisper White cardstock down onto the ink on both sides of the envelope.

Dry the panels with the Heat Tool and set one aside for a future project.

Cut out the “smooshed” background panel with the Big Shot™ using the MFT Blueprints 13 Die (the large stitched rectangle), ink the splatter stamp from Timeless Textures with Crumb Cake Classic Ink and stamp repeatedly onto the panel.

Dilute Black Gesso® with water and use a small paint brush to splatter the Gesso® over the panel.
Use the Big Shot™ with the Memory Box® Delicate Border Die to cut the border and mount onto the background panel.

Stamp the sentiment from the retired Express Yourself hostess stamp set with Versamark™ ink, apply Stampin’ Emboss® Black Embossing Powder and heat set with the Heat Tool.

Adhere the background panel to a piece of Bermuda Bay cardstock, trim and mount onto a piece of Basic Black cardstock, trim and mount onto the Whisper White card base.

Using the Black Stampin’ Archival Ink Pad, stamp the jellyfish image (From Land to Sea) onto Whisper White cardstock, heat set the ink with the Heat Tool and use an AquaPainter™ with Crumb Cake, Bermuda Bay and Cucumber Crush Classic Ink to watercolor the image.

Fussy cut the jellyfish and add Clear Wink of Stella® over the entire image.

Mount the horizontal script panel and jellyfish using dimensional foam.

Add a few Rhinestones to finish off the card.

Stamp Sets:  From Land to Sea, By The Tide, Timeless Textures, Express Yourself (retired Hostess set)

Ink: Versamark™, Bermuda Bay, Crumb Cake, Cucumber Crush, Clear Wink of Stella®

Paper/Cardstock: Whisper White, Basic Black, Bermuda Bay

Accessories:  Big Shot™, MFT Stitched Horizontal Strip Dies, MFT Blueprints 13 Dies,  MB Delicate Border Die, Embossing Buddy®, Stampin’ Emboss® White  and Black Embossing Powder, Heat Tool, Black Gesso®, Rhinestones


Thanks again for taking the time to visit- I hope you have a terrific week, my friends!

Monday, October 5, 2015

HYCCT1504 Thinking of You- A Renovated Design :-)

Hi Again Friends!

This is the final card that I completed this weekend in honor of World Card Making Day and it was created for the Splitcoaststampers' Hope You Can Cling To  HYCCT1504 Diane’s “Undergoing Renovation” Challenge along with the As You SeeIt #106 Sketch Challenge. 

The challenge was to re-create a card that you created in the past so I chose this card to "renovate" :-)

Again, I hope you have a chance to check out the challenge sites- so much inspiration from all!

To create this card:

Stamp the images from The Open Sea along with From Land to Sea using Stāz-On® Jet Black Ink and Early Espresso, Cherry Cobbler and Midnight Muse Classic Ink (masking as necessary).

Sponge the edges with Sahara Sand Classic Ink and adhere the retired Nautical Expedition Designer Series Paper (DSP) using a sewing machine with a zig zag stitch to a piece of Early Espresso cardstock.

Use the Banner Punch to create the banners and add to the vertical stitched strip.
Finish off with the Nautical Charm and Vintage Trinket.

Stamp Sets: The Open Sea, From Land to Sea, Gorgeous Grunge, Teeny Tiny Wishes

Another view of the collage images :-)
Ink: Stāz-On® Jet Black, Cherry Cobbler, Early Espresso, retired Midnight Muse

Paper: Whisper White, retired Nautical Expedition DSP    
  

Accessories: Big Shot™, Square Lattice Textured Impressions™ Embossing Folder, Sewing Machine, Distressing Tool, Sponge Dauber, scrap paper for masking, Punches- Word Window, Banner, Nautical Metal Charm, Vintage Trinket

Thanks again for stopping by- I hope you have a marvelous Monday, my friends!

Tuesday, August 25, 2015

Sending Wishes Your Way- A Fun Sketch with a Nautical Theme :-)

Hi Again Stampers!!

This card was created using the Pals Paper Arts PPA264 Sketch Challenge along with the Time Out #38 Inspiration Challenge.

If you have not already done so, I hope you will find the time to visit the above sites to check out the fantastic Design Team samples as well as their galleries!

To create this card:

Stamp the lighthouse image and the sentiment using  Night of Navy Classic Ink onto Whisper White cardstock.  Carefully "fussy-cut" the lighthouse and color the stripes using the Real Red Stampin’ Write marker.

Create the banner for the sentiment using the Hexagon Punch, mount onto a piece of Night of Navy cardstock creating the banner points again with the Hexagon Punch.

Use the Big Shot™ with the Stylish Stripes Textured Impressions™ Embossing Folder to emboss a piece of Whisper White cardstock, trim and mount onto Night of Navy cardstock, trim and mount onto the Real Red card base.

Trim the retired I Am Me DSP into strips, mount onto Night of Navy cardstock and adhere to the card front using Stampin’ Dimensionals®.

Cut the anchor die using the Big Shot™ from Silver Foil paper and create the “rope” with Natural Linen Thread, looping around the sentiment.

Add the banners (created with the Banner Punch from scraps of Maritime and I Am Me DSP) along the bottom of the sentiment and mount the sentiment panel onto the card front.

Add the lighthouse image to the card front using Stampin’ Dimensionals®  to finish off the card.

Stamp Sets: From Land to Sea, Butterfly Basics

Ink: Night of Navy; Stampin’ Write Real Red Marker

Paper: Whisper White, Night of Navy, Real Red, Silver Foil;  Retired I Am Me and Maritime DSP

Accessories: Big Shot™,  Stylish Stripes Textured Impressions Embossing Folder™, Wplus9 Design Studio Nautical Notions Die, Punches- Hexagon and Banner, Linen Thread


Thanks again for taking the time to stop by- you are all such a huge encouragement to me!!

Sunday, July 12, 2015

Under the Sea- A Mixed Media Card for a Color, Sketch and Doodling Challenge :-)


Hi Stampers!!

I had a chance to stamp last night and created a card using the CMCC79 Colour Me..! Striking Challenge along with the FabFri68 Sketch Challenge and the Splitcoaststampers Mix-Ability MIX128 “Doodley-Doo” Challenge (see details here and gallery here).

Again, I hope you will take the time to visit the above sites- fabulous Design Team creations as well as gorgeous galleries and inspiration from all! 

To create this card:

Trim a piece of Whisper White cardstock and mount onto a piece of Basic Black cardstock.

Using the large splatter stamp from Gorgeous Grunge, add splatter with Marina Mist and Bermuda Bay Classic Ink.

Stamp the sentiment using Stāz-On® Jet Black Ink and mount the entire panel onto the Bermuda Bay card front.

Use an AquaPainter™ with Marina Mist and Bermuda Bay Classic Ink and create a wash onto a piece of Whisper White cardstock.

Trim the panel and use Stāz-On® Jet Black Ink to stamp the coral image from By The Tide and the script stamp (re-inking and repeatedly stamping the script image) above the coral.

Use a paint brush to apply Titanium White Acrylic Paint and mount the panel onto Basic Black cardstock.

Stamp the seahorse and Nantucket images as well as the jellyfish using Stāz-On® Jet Black Ink onto Whisper White cardstock.

Use the ¾” Circle Punch to punch out the Nantucket image and also punch a circle from Basic Black cardstock.  Split the Basic Black circle in half and adhere behind the Nantucket image.   Mount the Nantucket image onto the focal image panel.

Color the seahorse and jellyfish images with the AquaPainter™ using Marina Mist and Bermuda Bay Classic Ink.

Fussy cut the images,  add additional details with the Faber-Castell Pitt Pen White marker on the seahorses and Frost White Shimmer Paint for the jellyfish.

Mount the seahorses and jellyfish onto the focal image panel using Stampin’ Dimensionals®.

Use a Faber-Castell® Pitt Pen Medium Black Marker to add the doodling by hand around the focal image panel.

Add the Rhinestones to finish off the card

Stamp Sets: By The Tide, From Land to Sea, Gorgeous Grunge, Express Yourself (retired hostess set)

Ink: Stāz-On Jet Black Ink, Bermuda Bay, Marina Mist; Faber-Castell Black and White Pitt Pen markers

Paper: Whisper White, Basic Black, Bermuda Bay

Accessories: AquaPainter™, Frost White Shimmer Paint, Titanium White Acrylic Paint, Rhinestones, ¾” Circle Punch


Thanks again for taking the time to stop by- it is such an encouragement to me!  Have a wonderful day, my friends!

Tuesday, June 23, 2015

SUO125 Sending Wishes- A Fun Banner Edge and Nautical Theme

Hi Stampers!   

It’s time for the new SUO125 “Cutting Edge” Challenge (make a card edge that is not straight) so I decided to create a banner edge to a nautical themed card.   

FYI- The images on the focal panel are created using masking with ink and markers (so the main panel is all one layer) and of course, the banners are more than one layer and are the "cutting edge" to this card :-)

I also incorporated the Create with Connie and Mary CCMC360 Color Challenge along with the Splitcoaststampers’ Free For All F4A277 “JUNE Recipe” (J=Jewels, U=Uneven Edge, N= Nautical and E= Embossing)-see details here and gallery here.

I hope you will find the time to check out all the rest of our Design Team ideas at SUO Challenges as well as those at the other two challenge sites- great inspiration from all!

To create this card:
The angle of my camera lens makes  this card  look a  bit crooked, but trust me, it is not :-)
Ink the lighthouse image from the new set, From Land to Sea with Stāz-On® Jet Black Ink and stamp onto a piece of Whisper White cardstock.  Stamp another image onto a piece of scrap paper to use as a mask.
Mask the lighthouse image and ink the map image from The Open Sea using Chocolate Chip Classic Ink and stamp onto the panel (also stamping another map onto a piece of scrap paper to create a mask).
Keep the mask in place for the lighthouse image and mask the map image. 
Use Smoky Slate Classic Ink to ink the script stamp from By The Tide, stamp off once before stamping onto the panel, re-ink the stamp, stamp off and repeat the steps to cover the background. 
Using Island Indigo Classic Ink to stamp the seahorse and compass images from By The Tide (re-inking and stamping the seahorse twice).
Using Smoky Slate Classic Ink, stamp the coral image from By The Tide onto the panel.
Remove the masks, use an AquaPainter™ with Island Indigo Classic Ink to  color  the lighthouse and add shadows with the Sahara Sand Stampin’ Write Marker.
Add color to the compass with the Island Indigo, Chocolate  Chip and Sahara Sand  Stampin’ Write markers.
Re-mask the lighthouse and map, ink the large splatter stamp from Gorgeous Grunge using Island Indigo, stamp off onto scrap paper a few  times, huff onto the stamp and add a  bit of  splatter to the background.
Stamp the sentiment from Butterfly Basics using Stāz-On® Jet Black Ink, trim the background panel and mount onto a piece of Smoky Slate cardstock, trim and mount onto a piece of  Chocolate Chip cardstock, trim and mount onto a piece of Island Indigo cardstock.
Create the banners using embossed Whisper White cardstock (embossed with the Woodgrain Textured Impressions™ Embossing Folder), mounted onto Smoky Slate cardstock and again onto Chocolate Chip cardstock (I used the Hexagon Punch to create the banner points since they were of varying widths and shorter lengths).
For the small banners, use the Banner Punch to punch out banners from Smoky Slate, Island Indigo and Chocolate Chip cardstock.  Layer the banners in a rectangle shape onto a scrap piece of paper and stamp with the ledger stamp from The Open Sea using Island Indigo Classic Ink.
Mount the layered focal image panel onto a 5 ½” x  5 ¼” Square card base from Whisper White cardstock.
Add the banners on the edge starting with the larger embossed banners first, next layer the smaller stamped banners on top.
Finish off the edge with a strip of Island Indigo cardstock layered onto a piece of Chocolate Chip cardstock.
Create the photo corners from a scrap piece of Chocolate Chip cardstock- Use the  1” Square Punch to punch out a “notch” from the scrap piece of cardstock, then re-position the punch from the notch to punch out the “photo corner,”, create the angle on the edges with your scissors and there you have it, a photo corner  
Use the same steps as above to create another photo corner from the remaining cardstock for the opposite corner.
Add the photo corners to the card front and add the Rhinestones to finish off the card.
Stamp Sets:  By The Tide, From Land to Sea, The Open Sea, Gorgeous Grunge, Butterfly Basics
Ink: Stāz-On® Jet Black, Chocolate Chip, Island Indigo, Smoky Slate; Stampin’ Write Markers- Chocolate Chip, Island Indigo, Sahara Sand
Paper/Cardstock: Whisper White, Chocolate Chip, Island Indigo, Smoky Slate
Accessories: Big Shot™, Woodgrain Textured Impressions™ Embossing Folder, Punches:  Hexagon, Banner, 1” Square, Rhinestones, scrap paper (for masking)

Thanks again for stopping by – I hope to see your Stampin’ Up! Only project in our “Cutting Edge” Challenge  gallery!
Related Posts Plugin for WordPress, Blogger...