Showing posts with label Stitching. Show all posts

Saturday, March 19, 2016

Friendship Never Melts Away

Hi Friends!

Today I am sharing my Mixed Media card on the  Artistic Outpost blog and decided to highlight the gorgeous Skating Emporium stamp set.


I hope you will take the time to visit the Artistic Outpost Blog as well as the galleries for the challenge sites linked above.

To create this card:

Using the Memory Box™ Winter Flurry Frame, apply Crackle Texture Paste with a palette knife onto a piece of Very Vanilla cardstock.

Once the embossing paste has dried (I carefully used a Heat Tool to speed up the process), apply Ranger® Tim Holtz® Old Paper and Tea Dye Distress Stain to the background (again, drying with the Heat Tool).

Spritz Champagne Mist Shimmer Paint (Champagne Mist Shimmer Paint mixed in a spritzer bottle with rubbing alcohol) over the entire panel.

Stamp the three images from Skating Emporium (the skaters on the lake along with the two Central Park advertisements) using Stāz-On® Jet Black Ink onto a piece of OurDaily Bread Designs Vintage Ephemera 6x6 Paper.

Trim the images and apply Ranger® Tim Holtz® Tea Dye Distress Ink to the images, position the two advertisement panels onto the background and adhere using Ranger® Tim Holtz® Crazing Distress Medium.

Use a zigzag stitch to attach the background panel onto a piece of Basic Black cardstock.

Adhere the skaters on the lake image onto a piece of Basic Black cardstock and apply Ranger® Tim Holtz® Crazing Distress Medium over the panel.

De-static  a piece of Basic Black cardstock with the Embossing Buddy®, stamp the sentiment with Versamark™ Ink, apply Stampin’ Emboss® Winter White Embossing Powder heat with the Heat Tool and apply the embossing to dry.

Cut the sentiment apart by hand and mount the skaters on the lake image along with the sentiment onto the card front using dimensional foam.

Add the snowflake charm with Gold Thread and add a Pearl to the center of the charm.

Mount the entire panel onto the card base, using a Sponge Dauber with Ranger® Tim Holtz® Tea Dye Distress Ink to the edges.

Stamp the skate image onto Very Vanilla cardstock using Stāz-On® Jet Black Ink, fussy cut the image, apply Ranger® Tim Holtz® Tea Dye Distress Ink with a Sponge Dauber and add Ranger® Tim Holtz® Crazing Distress Medium over the image.

Add the skates to the card front to finish off the card.

Stamp Sets: SkatingEmporium (Artistic Outpost)

Ink: Versamark™, Stāz-On® Jet Black; Ranger® Tim Holtz® Old Paper and Tea Dye Distress Stains, Tea Dye Distress Ink, Champagne Mist Shimmer Paint Spray

Paper: Very Vanilla, Basic Black; Vintage Ephemera 6x6 Paper Collection (ODBD)

Accessories: MB Winter Flurry Frame Stencil, Ranger® Tim Holtz® Crazing Distress Medium , Embossing Buddy®, Heat Tool, retired Stampin’ Emboss® Winter White Embossing Powder, Pearls, Snowflake Charm, Gold Thread


Thanks again for stopping by- hugs and I hope all of you have a fabulous weekend!

Tuesday, February 16, 2016

SUO142 Trust In The Lord


Hi Friends!   

It’s time for the SUO142 “Stampin' Up! Sale-A-Bration 2016” Challenge (Sale-A-Bration (SAB), an annual Stampin’ Up! promotion that allows you to choose one item from the SAB Catalog for every $50 in sales).  We want to see what you have created with this year's SAB Products :-)

I decided to use two SAB items on my card, the What I Love photopolymer stamp set along with the Botanical Gardens Designer 6x6 Vellum Pack.

This card also incorporates the Pals Paper Arts PPA284 ColorChallenge and the #TGIF42 Sketch Challenge (I flipped the sketch to the right to use the design in a portrait orientation :-)).    

I hope you will have a chance to check out my sister Design Team member samples at the SU-Only Challenge site as well as the fantastic Design Team samples and galleries at the other two challenge sites- gorgeous inspiration from all!

To create this card:

Use the Big Shot™ with the Woodgrain Textured Impressions™ Embossing Folder to emboss a piece of Lost Lagoon cardstock. Trim the panel and mount onto the Calypso Coral card base.

Use a sewing machine with a zig zag stitch to adhere a piece of the Botanical Gardens Vellum to a piece of Old Olive cardstock and mount onto the lower portion of the card front.

De-static another piece of the Botanical Gardens Vellum with the Embossing Buddy®, ink the floral image from What I Love with Versamark™ Ink and stamp onto the printed side of the vellum.  Apply White Stampin’ Emboss® Embossing Powder and heat set with the Heat Tool.

Create a mask for the flower image with a sticky note, mask the flower and repeat the steps above to stamp two more flowers and three stems.

Once the embossing powder has cooled (only a few seconds), flip the stamped vellum panel over and color the images from behind using Stampin’ Write Markers- Calypso Coral for the flowers and Old Olive for the stems.

I curved the center of the stamped panel
by adding an additional layer of Stampin’ Dimensionals®
so the sentiment could be pressed against
vellum :-)
Ink the sentiment from Trust God using Stāz-On® Jet Black Ink and stamp onto a piece of Whisper White cardstock.

Adhere the stamped Vellum panel to the Whisper White panel with the zig zag stitch, mount onto Lost Lagoon cardstock and ad the 3/8” Lost Lagoon Silky Taffeta Ribbon strip and triple bow to the corners.

Add a White Tea Lace Doily behind the panel and mount to the card front using Stampin’ Dimensionals®.

Add a few Pearls to finish off the card.

Stamp Sets:  What I Love (2016 SAB), Trust God

Ink:  Versamark™, Stāz-On® Jet Black; Stampin’ Write Markers- Calypso Coral, Old Olive
Paper/Cardstock: Whisper White, Calypso Coral, Lost Lagoon, Old Olive; Botanical Blossoms Vellum (2016 SAB)
Accessories: Big Shot™, Woodgrain Textured Impressions™ Embossing Folder, Embossing Buddy®, Stampin’ Emboss® White Embossing Powder, Heat Tool, Sewing Machine, White Thread, White Tea Lace Doily, Pearls, retired 3/8” Lost Lagoon Silky Taffeta Ribbon

Thanks again for stopping by and we hope to see your Stampin’ Up! Only project in our “Stampin' Up! Sale-A-Bration 2016” Challenge gallery!

Saturday, November 21, 2015

Wishing You An Old-Fashioned Christmas


Hello Friends!


If you have not already checked out the CAS-ual Chic CCC05 Challenge or Splitcoaststampers' CCC15 Christmas Card galleries yet, I would encourage you to do so- fabulous inspiration from all!

To create this card:

Use the Embossing Buddy® to de-static a piece of Very Vanilla cardstock, ink  the main  image from Old-Fashioned Christmas using Versamark™ Ink and stamp onto the prepared cardstock.

Apply Stampin’ Emboss® Gold Embossing Powder and heat set with the Heat Tool.

Once the embossing powder has cooled, ink the Winter Blessings stamp set using Ranger® Tim Holtz® Old Paper Distress Ink and stamp over the image.

Lightly wipe off the ink from the embossed image using a paper towel and add additional Ranger® Tim Holtz® Old Paper Distress Ink over the entire image to “antique the paper, trim and mount onto retired More Mustard cardstock, trim and mount onto Cherry Cobbler cardstock. 

Add the burgundy triple ribbon bow to the corner of the panel and adhere the Snowflake Elements wooden snowflake to the center of the bow (I “painted” the snowflake using a Metallic Gold Sharpie®).
Repeat the same steps as above for embossing and layering the sentiment panel.

Ink the Winter Blessings stamp set using Ranger® Tim Holtz® Old Paper Distress Ink and stamp onto another piece of Very Vanilla cardstock, add the strips of designer paper, distress the edges with a Distressing Tool and sew the panel with a zigzag stitch onto a piece of More Mustard cardstock.

“Antique” the panel with Ranger® Tim Holtz® Old Paper Distress Ink and mount the stitched panel onto the Cherry Cobbler card base.
Mount the focal image along with the sentiment using dimensional foam and add the Pearls to the center of the wooden snowflake and edges of the sentiment to finish off the card.

Ink: Versamark™, Ranger® Tim Holtz® Old Paper Distress Ink, Metallic Gold Sharpie® Marker

Paper: Very Vanilla, Cherry Cobbler, retired More Mustard; Misc. Designer Paper (from my stash)

Accessories:  Sewing Machine, Thread, Distressing Tool, Sponge Daubers, Embossing Buddy®, Heat Tool, Stampin’ Emboss® Gold Embossing Powder, 5/8” Burgundy Wired Ribbon (from my stash), Snowflake Elements, Pearls

Thanks again for taking the time to visit- hugs and have a blessed week, my friends!

Monday, November 9, 2015

Happy 8th Birthday Sweet 'n Sassy Stamps!


 Hello Friends!

Woohoo!!  Today we are celebrating Sweet ‘n SassyStamps 8th Birthday with a fun Design Team blog hop!   Check out the Design Diva's links below to visit all of their blogs and leave a comment (we have a Birthday Prize drawing as well- see more details below) :-)

Domestic USPS -
use codeBDAYFREESHIP
In addition to the blog hop, we have another SWEET deal for you- all orders of $30 or more receive FREE SHIPPING!! (please use code BDAYFREESHIP during checkout- offer ends Thursday, November 12,2015).  NOTE: Free shipping is for Domestic First Class through the USPS.  Happy shopping!

I decided to share a card that I designed using the fun Snowman Soup Stamp Set along with WinterBlessings for a warm, winter celebration card!   FYI- I am also linking this card to the Splitcoaststampers' F4A298 "Coffee Please" Challenge (I rarely drink coffee but love hot cocoa in the winter) :-)

To create this card:

Sweet 'n Sassy Stamps- Snowman Soup, Winter Blessings
Ink the Snowman Soup image using Memento™ Tuxedo Black Ink and stamp onto Very Vanilla cardstock.

Color the hat, coat and mug with a water brush and retired Stampin’ Up!  More Mustard and Midnight Muse Classic Ink, use Stampin’ Write Markers for the scarf and mittens (Pear Pizzazz), the carrot nose (Pumpkin Pie) and Sahara Sand for the shadows.

You can cut the image out with the coordinating Snowman Soup Dies (I have these on my wish list so I  fussy-cut the image) and set aside.

Ink a portion of the Winter Blessings stamp with retired More Mustard Classic Ink and stamp onto retired More Mustard cardstock.

Trim the More Mustard stamped panels and stitch a rectangle with a zigzag stitch onto Midnight Muse cardstock, trim carefully and mount onto a piece of More Mustard cardstock.

Add the Snowman Soup image to the panel using dimensional foam and adhere the 5/8” Gold Satin Triple Ribbon Bow.

Adhere a piece of My Mind’s Eye™ Asparagus™ Designer Paper to a piece of More Mustard cardstock with a zigzag stitch on the sewing machine, trim carefully and mount onto the Midnight Muse card base.

Add the horizontal strips of stamped More Mustard panels mounted onto Midnight Muse with the zigzag stitch and mount the entire panel onto the card base (I generally use white but you can use any color you choose since you will not see this base from the front of the card).

Stamp the sentiment with Memento™ Tuxedo Black Ink onto a scrap piece of Very Vanilla cardstock, huff onto the previously inked portion of the Winter Blessings stamp, lay the sentiment down to stamp a bit of the background onto the panel, trim and create the flag by hand or with a punch.

Adhere the snowflake charm with gold thread to the card front (making sure that the end will be behind the sentiment- I use Hot Glue for this step) and mount the sentiment to the card front using dimensional foam.

Add the focal image panel to the card and finish off with a few Pearls to the corners of the card and a Rhinestone to the center of the snowflake charm.

I hope you enjoy this fun card!  I would love to see your comments and hope you have time to visit and comment on all of my DT Sister's blogs for our Special 8th Birthday Blog Hop!  Don't  forget to comment for a chance to win this fabulous Birthday Party Prize!!


Linky Code:
Snowman Soup

Stamp Sets: Snowman Soup, Winter Blessings  (SNSS)

Ink: Memento™ Tuxedo Black Ink, Stampin’ Up! Classic Ink- retired More Mustard and Midnight Muse; Stampin’ Write Markers- Pear Pizzazz, Sahara Sand, Pumpkin Pie

Winter Blessings
Paper: Stampin’ Up! Very Vanilla, retired More Mustard and Midnight Muse cardstock; My Mind’s Eye™ Asparagus™ Designer Paper

Accessories: Sewing Machine, Hexagon Punch, Snowflake Charm, Pearls, Rhinestone, 5/8” Gold Satin Ribbon

Hugs and have a blessed week, my friends!

Monday, October 5, 2015

HYCCT1504 Thinking of You- A Renovated Design :-)

Hi Again Friends!

This is the final card that I completed this weekend in honor of World Card Making Day and it was created for the Splitcoaststampers' Hope You Can Cling To  HYCCT1504 Diane’s “Undergoing Renovation” Challenge along with the As You SeeIt #106 Sketch Challenge. 

The challenge was to re-create a card that you created in the past so I chose this card to "renovate" :-)

Again, I hope you have a chance to check out the challenge sites- so much inspiration from all!

To create this card:

Stamp the images from The Open Sea along with From Land to Sea using Stāz-On® Jet Black Ink and Early Espresso, Cherry Cobbler and Midnight Muse Classic Ink (masking as necessary).

Sponge the edges with Sahara Sand Classic Ink and adhere the retired Nautical Expedition Designer Series Paper (DSP) using a sewing machine with a zig zag stitch to a piece of Early Espresso cardstock.

Use the Banner Punch to create the banners and add to the vertical stitched strip.
Finish off with the Nautical Charm and Vintage Trinket.

Stamp Sets: The Open Sea, From Land to Sea, Gorgeous Grunge, Teeny Tiny Wishes

Another view of the collage images :-)
Ink: Stāz-On® Jet Black, Cherry Cobbler, Early Espresso, retired Midnight Muse

Paper: Whisper White, retired Nautical Expedition DSP    
  

Accessories: Big Shot™, Square Lattice Textured Impressions™ Embossing Folder, Sewing Machine, Distressing Tool, Sponge Dauber, scrap paper for masking, Punches- Word Window, Banner, Nautical Metal Charm, Vintage Trinket

Thanks again for stopping by- I hope you have a marvelous Monday, my friends!

HYCCT1503 Strength of a Warrior


Hi Again Friends!


I hope you have a chance to check out the challenge sites- so much inspiration from all!

To create this card:

Create a mask for the moon using the 1 ¼” Circle Punch and sponge  Delightful Dijon, Tangerine Tango and Blackberry Bliss onto a piece of Very Vanilla cardstock.

Ink the Sweet ‘n Sassy Landscape Silhouettes stamp using Memento™ Tuxedo Black Ink and stamp onto the sponged background.

Add additional foreground with the Faber-Castell® Black Pitt Pen marker, trim the panel and stitch onto a piece of Very Vanilla cardstock (layered onto Early Espresso cardstock).

Distress the edges of the retired Outlaw DSP and emboss the lower panel using a star embossing folder.

Stitch all of the layers onto a piece of Early Espresso cardstock, distress the edges with the Distressing Tool.

Ink the paisley stamp from the retired Wanted set using Blackberry Bliss cardstock and stamp over the central stitched panel.

Lightly sand the stars and use a Sponge Dauber to lightly add Blackberry Bliss Classic Ink over the background. 

Mount the entire background onto the Very Vanilla card base.

Stamp the Four Feathers stamps using Hello Honey Classic Ink and sponge Blackberry Bliss Classic Ink over the images.  Carefully fussy-cut the feathers and fringe the edges.

Mount the focal image to the card front along with the feathers using Stampin’ Dimensionals®.

Use the Blackberry Bliss Stampin’ Write Marker to selectively ink the sentiments from the retired script stamp in Strength & Hope and stamp onto Very Vanilla cardstock, punch out with the retired Jewelry Tag Punch, sponge with a bit of Hello Honey and Blackberry Bliss Classic Ink and mount onto the card front.

Add the Antique Brad to finish off the card.

Stamp Sets: Landscape Silhouettes (SNSS), Retired SU!- Four Feathers, Strength & Hope

Ink: Hello Honey, Blackberry Bliss, Pumpkin Pie; Faber-Castell® Black Pitt Pen Marker

Paper: Very Vanilla, Early Espresso; retired Outlaw DSP   
  
Accessories: Big Shot™, Star Embossing Folder, Sewing Machine, Distressing Tool, Sponge Dauber, scrap paper for masking, Jewelry Tag Punch, Antique Brad

Thanks again for stopping by- I hope you can join in on the Hope You Can Cling To Challenges this month :-)


Monday, September 28, 2015

A Floral Birthday- A Color, Sketch and Designer's Choice Challenge :-)


Hi Friends!


Again, I hope you will take the time (if you have not done so already) to visit the above challenge sites to check out all of the Design Team entries as well as the galleries- tremendous inspiration from all!

To create this card:

Ink the retired background stamp, En Francais using Calypso Coral Classic Ink and stamp onto a piece of Whisper White cardstock, trim and mount onto a piece of Blushing Bride cardstock, trim and mount onto a piece of Watermelon Wonder card stock.

Use the Big Shot™ with the retired Finishing Touches Edgelit™ to cut out the strip from Whisper White cardstock, add to the bottom of the panel along with a scrap strip of Calypso Coral cardstock.

Emboss a piece of Blushing Bride cardstock with the Honeycomb Textured Impressions™ Embossing Folder and use a sewing machine to add the embossed panel to a piece of Calypso Coral cardstock.  Trim and mount onto the Whisper White card base.

Ink the honeycomb background from Butterfly Basics with Blushing Bride  Classic Ink and stamp onto a piece of Blushing Bride cardstock, trim and stitch to a piece of Calypso Coral cardstock for the horizontal strip in the sketch. 

Add this panel to the stamped panel created in the first step and mount to the card front.

Ink the floral image from Butterfly Basics using Stāz-On® Jet Black Ink and stamp onto a piece of Whisper White cardstock.

Color the image using Stampin’ Write Markers- Blushing Bride, Calypso Coral and Watermelon Wonder (using an AquaPainter™ behind layers to soften the edges).  Add a few white highlights to the flower center with the White Gel Pen.

Create a loose mask from scrap paper to cover the flower and stamp the honeycomb image using Blushing Bride Classic Ink.  Add the canceled stamp image using Watermelon Wonder Classic Ink and a few shadows to all of the images with the Sahara Sand Stampin’ Write Marker.

Trim the panel and mount onto Blushing Bride cardstock, trim again and mount onto Calypso Coral cardstock.

Mount the panel onto the card front using Stampin’ Dimensionals®.

Ink the butterfly using Stāz-On® Jet Black Ink and stamp onto a piece of Whisper White cardstock, color with the Blushing Bride and Calypso Coral Stampin’ Write Markers and punch out with the Elegant Butterfly Punch.

Add the butterfly to the card front (I used Hot Glue for this step and part of a dimensional behind the butterfly).

Ink the sentiment with Stāz-On® Jet Black Ink and stamp onto a piece of Whisper White cardstock, punch out with the Word Window Punch and add a layer of Blushing Bride and Calypso Coral cardstock (also punched with the Word Window Punch and all three punched on the end with the Hexagon Punch to create the banner points).

Adhere the sentiment to the card front and add the Pearls to the corners.

Create a Calypso Coral bow with the Bow Builder Punch and mount to the card front along with the Antique Brad to finish off the card.

Stamp Sets: Butterfly Basics, Papillon Potpourri, Teeny Tiny Wishes, En Francais (retired)

Ink:  Stāz-On® Jet Black, Blushing Bride, Watermelon Wonder;  Stampin’ Write Markers- Blushing Bride, Calypso Coral, Watermelon Wonder, Sahara Sand; White Gel Pen

 Paper: Whisper White, Blushing Bride, Calypso Coral

Accessories: Big Shot™, Honeycomb Textured Impressions™ Embossing Folder, Finishing Touches Edgelits™ (retired), AquaPainter™, Sewing Machine, Punches- Elegant Butterfly, Bow Builder, Word Window, Hexagon, Antique Brad, Pearls


Thanks again for stopping by- I hope you have a glorious day and stop by tomorrow for the new SUO Challenge!

Wednesday, September 16, 2015

Snowman Soup- Wishing You A Merry Christmas!!


Hi Friends!


Although I do drink coffee occasionally, I have to "doctor" it up with Hot Chocolate so a true coffee drinker would say "That's not coffee at all!" - lol!!  So, I guess, Hot Chocolate would be my choice of drink :-)

Again, if you have not already done so, I hope you will find the time to visit the above links to check out their wonderful Design Team entries as well as all of their galleries!

This card was extremely easy to make:

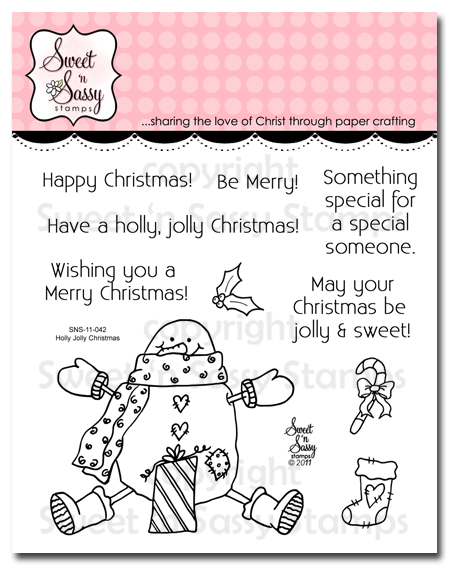
Sweet 'm Sassy Stamps- Snowman Soup, Holly Jolly Christmas
Use the Big Shot™ to emboss the background paper with the Square Lattice Textured Impressions™ Embossing Folder (retired Stampin’ Up!) and stitch this layer to a piece of Chocolate Chip cardstock.  Mount the entire panel onto the white card base.

Stitch a coordinating piece of background paper to a piece of Chocolate Chip cardstock for the upper layer of the sketch and adhere the 5/8” Chocolate Chip Satin Ribbon triple bow.

Punch out three circles from Chocolate Chip cardstock and add the three circles of background paper (also punched and mounted onto circles of white cardstock).

Adhere an embossed piece of Real Red cardstock to Chocolate Chip for the vertical layer of the sketch and add the three punched circles.

Stamp the Sweet ‘n Sassy Stamps Snowman Soup image using a waterproof black ink and color with water brush and water based markers.  Carefully cut out the image (I decided to fussy cut but there is a coordinating Snowman Soup die set from Sweet ‘n Sassy Stamps  as well).

Stamp the sentiment from Holly Jolly Christmas with black ink and create the banner points with the Hexagon Punch or by hand.

To assemble the card- add the stitched layer with the bow to the card front, mount the vertical strip with the three punched elements using dimensional foam, add the Snowman Soup image and Holly Jolly Christmas sentiment with dimensional foam.

Add a few Pearls to the center of the snowflakes on the punched images and the snowman’s hat to finish off the card.
Snowman Soup
Holly Jolly Christmas


Stamp Sets: SnowmanSoup, Holly Jolly Christmas ( both SNSS)

Ink: Stāz-On® Jet Black, Stampin’ Write Markers- Chocolate Chip, Old Olive, Pumpkin Pie, Real Red, Tempting Turquoise, Sahara Sand

Paper: Whisper White, Chocolate Chip, Real Red, retired DSP

Accessories: Big Shot™, retired Square Lattice and Pretty Petals Textured Impressions™ Embossing Folders,  Punches- 1”  and 1 3/8” Circle, Hexagon; retired 5/8” Chocolate Chip Satin Ribbon, Pearls


So which do you prefer- Coffee, Tea or Hot Chocolate?

Thanks again for taking the time to stop by- hugs and have a great day, my friends!
Related Posts Plugin for WordPress, Blogger...