Showing posts with label The Open Sea. Show all posts

Wednesday, October 30, 2019

PP465 The Open Sea


Hi Friends!!

I am sharing another card today that I created using scraps that I discovered during my recent craft room reorganization. 

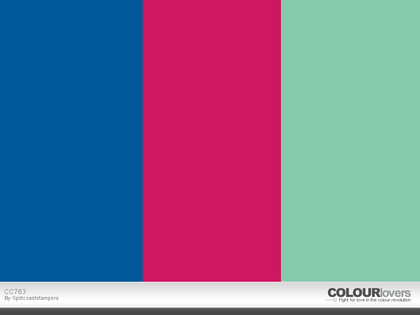
The main focal image and compass had been printed out from My Digital Studio (The Open Sea) a few years ago and decided to watercolor using the Splitcoaststampers CC763 "Lovely Coastal Blueberries" Color Challenge and included the optional dessert- Nautical. 

 If you have not had a chance to do so, I hope you will visit the above challenge sites- gorgeous inspiration from all!

To create this card:

Trim a piece of white cardstock to 4” x 5 ¼”.  Ink the sentiment with Memento™ Tuxedo Black ink and stamp onto the lower right-hand portion of the panel. 

Scribble the dark blue marker onto a silicone mat, spritz with water and press the panel into the ink to create the splatter background.  Add a bit more texture with the splatter stamp inked with black ink.

Mount the panel onto a piece of aqua cardstock, trim and mount onto a piece of hot pink cardstock. 

Add the strip of corrugated blue cardstock, add the knotted silver cord (wrapping the ends behind the panel) and adhere the entire panel onto a white card base.

Watercolor The Open Sea images with water-based markers, trim and mount onto aqua cardstock, trim and mount onto hot pink cardstock.

Add the small photo corners from hot pink cardstock, insert silver brads and mount the layered image onto the card front with dimensional foam or chipboard.

Punch the compass image out using circle punches, die cut a piece of aqua cardstock and adhere the enter part of the compass with dimensional foam.  

Insert a silver mini brad in the center and mount the compass onto the card front with dimensional foam.

Finish off the card with a clear glitter pen over the water and an extra fine white paint pen for the tops of the waves.

Stamp Sets: The Open Sea (digital images – Stampin’ Up!), New Mercies (retired Verve Stamps)

Ink/Mediums: Memento™ Tuxedo Black, Stampin’ Write Markers- Brilliant Blue, Coastal Cabana, Lovely Lipstick; Wink of Stella™ Clear Glitter Pen, Sharpie® Extra Fine White Paint Pen

Cardstock/Paper: Whisper White, Coastal Cabana, Lovey Lipstick, retired Brilliant Blue

Accessories: Big Shot™, Corrugated Dynamic Textured Impressions Embossing Folder, Sizzix Circles Dies; 1” and ¾” Circle Punches; AquaPainter, Silver Cord, Mini Silver Brads

Thanks again for taking the time to stop by- I hope all of you have a wonderful week!

Tuesday, October 27, 2015

SUO134 Thank You


Hello Friends!

It’s time for the new SUO134 “Thank You Very Much” Challenge and I decided to create a somewhat masculine “thank you” card using the Pals PaperArts PPA273 Sketch Challenge along with the FabFri75 Color Challenge.

I hope you will have a chance to check out the Pals Paper Arts and Fab Friday Challenge sites as well as my sister Design Team member samples at the SU-Only Challenges- great inspiration from all!

To create this card:

Stamp the ship image using Stāz-On® Jet Black Ink on Whisper White cardstock.
Create the circle mask for the sun/moon with the 1 ¼” Circle Punch and using Sponge Daubers, apply Tangelo Twist Classic Ink to the sky area and Bermuda Bay to the water.

Use an AquaPainter™ to blend some of the ink and wash a bit of the color over the sun/moon. 

Once you are satisfied with the sponging, use the fine tip end of the Basic Black Stampin’ Write Marker to add additional waves in the foreground and a few birds to the sky.

Use the Sahara Sand Stampin’ Write Marker to add shadows to the sails and lightly sponge a bit of Tangelo Twist over the waves as a reflection of the sky.

Use the Big Shot™ with the Square Collection Framelits™ to cut out the image and mount onto a piece of Basic Black cardstock, trim and set aside.

Ink the globe image using Bermuda Bay Classic Ink and stamp onto Bermuda Bay cardstock.

Punch out the globe image with a 2” Circle Punch and also punch a 2” circle from Basic Black cardstock.

Cut both the stamped circle and black circle in half and adhere each of the black circle halves behind the stamped globe halves and mount behind the focal image square.

Use the Big Shot™ along with the Chevron Textured Impressions™ Embossing Folder to emboss a piece of Whisper White cardstock, trim and mount onto a piece of Basic Black cardstock.

Use the Stampin’ Write Basic Black Marker to color in the “thank you” from the Me=Grateful sentiment and stamp onto a piece of Bermuda Bay cardstock.

Add the chevron embossed panel, trim and mount the knotted Natural Linen Thread to the center.

Add the panel to a piece of Whisper White cardstock, trim and mount onto a piece of Basic Black cardstock, trim and mount onto the Whisper White card base.

Add the focal image using Stampin’ Dimensionals® and a few Rhinestones near the sentiment to finish off the card.
Stamp Sets:  The Open Sea, Me=Grateful
Ink: Stāz-On® Jet Black,  Bermuda Bay, Tangelo Twist; Stampin’ Write Markers- Basic Black, Sahara Sand
Paper/Cardstock: Whisper White, Basic Black, Bermuda Bay
Accessories: Big Shot™, Square Collection Framelits™, Chevron Textured Impressions™ Embossing Folder, Sponge Daubers, 1 ¼” Circle Punch, Natural Linen Thread, Rhinestones

Thanks again for stopping by and we hope to see your Stampin’ Up! Only project in our “Thank You Very Much” Challengegallery!

Monday, October 5, 2015

HYCCT1504 Thinking of You- A Renovated Design :-)

Hi Again Friends!

This is the final card that I completed this weekend in honor of World Card Making Day and it was created for the Splitcoaststampers' Hope You Can Cling To  HYCCT1504 Diane’s “Undergoing Renovation” Challenge along with the As You SeeIt #106 Sketch Challenge. 

The challenge was to re-create a card that you created in the past so I chose this card to "renovate" :-)

Again, I hope you have a chance to check out the challenge sites- so much inspiration from all!

To create this card:

Stamp the images from The Open Sea along with From Land to Sea using Stāz-On® Jet Black Ink and Early Espresso, Cherry Cobbler and Midnight Muse Classic Ink (masking as necessary).

Sponge the edges with Sahara Sand Classic Ink and adhere the retired Nautical Expedition Designer Series Paper (DSP) using a sewing machine with a zig zag stitch to a piece of Early Espresso cardstock.

Use the Banner Punch to create the banners and add to the vertical stitched strip.
Finish off with the Nautical Charm and Vintage Trinket.

Stamp Sets: The Open Sea, From Land to Sea, Gorgeous Grunge, Teeny Tiny Wishes

Another view of the collage images :-)
Ink: Stāz-On® Jet Black, Cherry Cobbler, Early Espresso, retired Midnight Muse

Paper: Whisper White, retired Nautical Expedition DSP    
  

Accessories: Big Shot™, Square Lattice Textured Impressions™ Embossing Folder, Sewing Machine, Distressing Tool, Sponge Dauber, scrap paper for masking, Punches- Word Window, Banner, Nautical Metal Charm, Vintage Trinket

Thanks again for stopping by- I hope you have a marvelous Monday, my friends!

Tuesday, June 23, 2015

SUO125 Sending Wishes- A Fun Banner Edge and Nautical Theme

Hi Stampers!   

It’s time for the new SUO125 “Cutting Edge” Challenge (make a card edge that is not straight) so I decided to create a banner edge to a nautical themed card.   

FYI- The images on the focal panel are created using masking with ink and markers (so the main panel is all one layer) and of course, the banners are more than one layer and are the "cutting edge" to this card :-)

I also incorporated the Create with Connie and Mary CCMC360 Color Challenge along with the Splitcoaststampers’ Free For All F4A277 “JUNE Recipe” (J=Jewels, U=Uneven Edge, N= Nautical and E= Embossing)-see details here and gallery here.

I hope you will find the time to check out all the rest of our Design Team ideas at SUO Challenges as well as those at the other two challenge sites- great inspiration from all!

To create this card:
The angle of my camera lens makes  this card  look a  bit crooked, but trust me, it is not :-)
Ink the lighthouse image from the new set, From Land to Sea with Stāz-On® Jet Black Ink and stamp onto a piece of Whisper White cardstock.  Stamp another image onto a piece of scrap paper to use as a mask.
Mask the lighthouse image and ink the map image from The Open Sea using Chocolate Chip Classic Ink and stamp onto the panel (also stamping another map onto a piece of scrap paper to create a mask).
Keep the mask in place for the lighthouse image and mask the map image. 
Use Smoky Slate Classic Ink to ink the script stamp from By The Tide, stamp off once before stamping onto the panel, re-ink the stamp, stamp off and repeat the steps to cover the background. 
Using Island Indigo Classic Ink to stamp the seahorse and compass images from By The Tide (re-inking and stamping the seahorse twice).
Using Smoky Slate Classic Ink, stamp the coral image from By The Tide onto the panel.
Remove the masks, use an AquaPainter™ with Island Indigo Classic Ink to  color  the lighthouse and add shadows with the Sahara Sand Stampin’ Write Marker.
Add color to the compass with the Island Indigo, Chocolate  Chip and Sahara Sand  Stampin’ Write markers.
Re-mask the lighthouse and map, ink the large splatter stamp from Gorgeous Grunge using Island Indigo, stamp off onto scrap paper a few  times, huff onto the stamp and add a  bit of  splatter to the background.
Stamp the sentiment from Butterfly Basics using Stāz-On® Jet Black Ink, trim the background panel and mount onto a piece of Smoky Slate cardstock, trim and mount onto a piece of  Chocolate Chip cardstock, trim and mount onto a piece of Island Indigo cardstock.
Create the banners using embossed Whisper White cardstock (embossed with the Woodgrain Textured Impressions™ Embossing Folder), mounted onto Smoky Slate cardstock and again onto Chocolate Chip cardstock (I used the Hexagon Punch to create the banner points since they were of varying widths and shorter lengths).
For the small banners, use the Banner Punch to punch out banners from Smoky Slate, Island Indigo and Chocolate Chip cardstock.  Layer the banners in a rectangle shape onto a scrap piece of paper and stamp with the ledger stamp from The Open Sea using Island Indigo Classic Ink.
Mount the layered focal image panel onto a 5 ½” x  5 ¼” Square card base from Whisper White cardstock.
Add the banners on the edge starting with the larger embossed banners first, next layer the smaller stamped banners on top.
Finish off the edge with a strip of Island Indigo cardstock layered onto a piece of Chocolate Chip cardstock.
Create the photo corners from a scrap piece of Chocolate Chip cardstock- Use the  1” Square Punch to punch out a “notch” from the scrap piece of cardstock, then re-position the punch from the notch to punch out the “photo corner,”, create the angle on the edges with your scissors and there you have it, a photo corner  
Use the same steps as above to create another photo corner from the remaining cardstock for the opposite corner.
Add the photo corners to the card front and add the Rhinestones to finish off the card.
Stamp Sets:  By The Tide, From Land to Sea, The Open Sea, Gorgeous Grunge, Butterfly Basics
Ink: Stāz-On® Jet Black, Chocolate Chip, Island Indigo, Smoky Slate; Stampin’ Write Markers- Chocolate Chip, Island Indigo, Sahara Sand
Paper/Cardstock: Whisper White, Chocolate Chip, Island Indigo, Smoky Slate
Accessories: Big Shot™, Woodgrain Textured Impressions™ Embossing Folder, Punches:  Hexagon, Banner, 1” Square, Rhinestones, scrap paper (for masking)

Thanks again for stopping by – I hope to see your Stampin’ Up! Only project in our “Cutting Edge” Challenge  gallery!

Friday, March 6, 2015

Thinking of You- A Color, Sketch and Theme Challenge :-)


Hi Stampers! 

This card was created using the CQC282 ColourQ Challenge (I substituted Marina Mist for Brocade Blue) along with the CCMC345 Create with Connie and Mary Sketch Challenge and the Splitcoaststampers’ WT521 “Hoop It Up” Challenge (details here and gallery here).   

I hope you will have the time to check out all of the linked sites- gorgeous creations and inspiration from all!

To create this card:

Using Stāz-On© Jet Black Ink stamp the ship from Traveler, ledger and compass from The Open Sea, sentiment from Moon Lake onto Very Vanilla cardstock and the World Map onto Marina Mist and Soft Sky cardstock.

Cut the World Map images diagonally, distress the edges with the Distressing Tool and mount onto a piece of Basic Black cardstock. 

Using a Sponge Dauber, apply Baked Brown Sugar Classic Ink to edges and over the background to “antique” the paper.

Add the strip of diagonal Basic Black cardstock as per the sketch (plus this covers the seams).

Use the Big Shot™ with the Circle Collection Framelits™ to cut out the ship and ledger images plus a circle from a piece of Typeset Designer Series Paper (DSP)- also cut the same size circles from Basic Black cardstock to add as frames behind the images.

Create a moon mask from a piece of scrap paper and apply Soft Sky Classic Ink onto the ship image for the sky, mask the ship a bit and apply Marina Mist for the ocean.  

Color the ship using the Marina Mist Stampin’ Write marker and add a shadow for the ship along with a few birds in the sky with the Basic Black Stampin’ Write marker. 

Mount the image onto the split Basic Black circle frame, use a Distressing Tool to lightly distress the edges.

Do the same for the Typeset Designer Series circle as well as the ledger and compass.

Use the Marina Mist and Soft Sky Stampin’ Write markers to color the compass and use a Sponge Dauber with Baked Brown Sugar Classic Ink to “antique” the paper on all of the circle elements. 

Ink the large splatter stamp from Gorgeous Grunge using Baked Brown Sugar Classic Ink and stamp over all images and the background.

Mount the Typeset DSP and ledger circles to the card front.  Add the ship image along with the compass using Stampin’ Dimensionals®.

Use the Word Window Punch to punch out the sentiment, add the banner using the Hexagon Punch, apply Baked Brown Sugar with a Sponge Dauber and mount the sentiment using Stampin’ Dimensionals®.

Add a small Rhinestone to the center of the compass and a few larger ones to the diagonal Basic Black cardstock to finish off the card.

Stamp Sets: Traveler, World Map, The Open Sea, Moon Lake, Gorgeous Grunge

Ink: Stāz-On© Jet Black, Marina Mist, Soft Sky, Baked Brown Sugar; Stampin’ Write Markers- Marina Mist, Soft Sky, Basic Black

Paper:  Very Vanilla, Marina Mist, Soft Sky, Basic Black; Typeset DSP

Accessories: Big Shot™, Circle Collections Framelits™, Distressing Tool, Sponge Daubers, Hexagon Punch , Rhinestones


Thanks again for visiting- I hope you have a wonderful Friday!!

Wednesday, December 31, 2014

Happy New Year's Eve and Happy New Year- 2015!!


Happy New Year's Eve Stampers! 

I hope all of you have a safe Happy New Year's Eve and wonderful 2015!  It has truly been a blessing to me to see how many of you visit my blog and I read and treasure each one of your comments :-)  

2014 has been a bit of a tough year for us since my husband was diagnosed with cancer in the fall, but Lord Willing, he is handling the chemo well so far and we are praying that he will be in remission once the chemo is finished in the spring :-)   We know that all things work together for good to those who love Him and we are resting in His Promises :-)
 
This card was the first one I originally created for the  SUO113 “Project Life by Stampin’ Up!®” Challengeand decided to hold it one extra day for the New Year :-)

I decided to incorporate a few of my favorite weekly challenges as well- the FMS167 Challenge at Freshly Made Sketches and the SC94 Inspiration Photo at Stampin’ Celebration.   
 
If you have not already done so, I hope you will find the time to check the rest of the Design Team projects at all of the challenge sites and come join in on the fun!

To create this card:
Mount a piece of Hello Honey Moonlight Designer Series Paper (DSP) to a piece of Basic Black cardstock, trim and mount onto the Whisper White card base.
Trim the Project Life® by Stampin’ Up!® Smoky Slate plaid card from the Everyday Adventure collection in half and punch along the bottom with the Spiral Border Punch.
Punch a piece of Basic Black cardstock with the Spiral Border Punch (I used a scrap strip wide enough for the vertical panel created above) and adhere behind the bottom portion of the PLxSU plaid panel, offset just a bit to create a shadow effect.
Add the vertical punched panel to the card front per the sketch.
Trim two additional Project Life® by Stampin’ Up!® cards from the Everyday Adventure collection (Smoky Slate Polka Dot and the Days of the Week), mount the Smoky Slate Polka Dot piece onto a piece of Basic Black cardstock, trim and adhere onto the Days of the Week panel.   Mount this panel to the card front.
FYI- I had the globe image from The Open Sea already printed and ready to go from a previous My Digital Studio (MDS) card project (in my organized scrap bag)- you can also stamp the image onto Whisper White cardstock using Memento™ Tuxedo Black Ink.  
Punch out the globe with the 2 ½” Circle Punch and punch out another 2 ½” Circle from Basic Black cardstock (split the black circle in half and mount behind the globe image).
Create the Basic Black bow using the new Bow Builder Punch and add the Smoky Slate button to the center (use a small silver of Basic Black cardstock to mimic thread in the button).   Add the globe image to the card front using Stampin’ Dimensionals®.
Use the Big Shot™ with the retired GoGo Boots Sizzlits™ to cut out the numbers from Smoky Slate cardstock and add to the card front.
Stamp the sentiment from the 2015 Sale-A-Bration set, A Happy Thing, using Memento™ Tuxedo Black Ink onto Whisper White cardstock and create the banner using the Hexagon Punch.   Mount onto a piece of Basic Black cardstock and create the banner points, again with the Hexagon Punch.
Add the sentiment to the card front using Stampin’ Dimensionals® to finish off the card
Stamp Sets:  The Open Sea (MDS version), A Happy Thing
Ink: Memento™ Tuxedo Black; Printer Ink- Black
Paper/Cardstock:  Project Life® by Stampin’ Up!® Everyday Adventure, Basic Black, Whisper White, Smoky Slate
Accessories:  Big Shot™, retired GoGo Boots Sizzlits™, Punches- Bow Builder,  Hexagon and Spiral Border; Smoky Slate button,

Thanks again for taking the time to stop by – I sincerely hope that all of you have a fabulous and blessed 2015!   

Tuesday, August 5, 2014

Your Labor in the Lord- Two Challenges in One


Hi Stampers! 

I wanted to create a card using a few images that I had previously printed out from My Digital Studio (MDS) and decided to use the FabFri47 Sketch Challenge along with the Just Add Ink JAI225 Color Challenge.

I hope you will have time to check out the both challenge sites - so much inspiration!!

To create this card:

Open a blank document in My Digital Studio (MDS), position the ship and compass images from The Open Sea and print out onto Whisper White cardstock.  

Add shadows to the sails, ocean and compass using the Smoky Slate Stampin’ Blendabilities™ Collection and add a few more waves using a Sakura .005 Micron Pen.

Use the Big Shot™ with the Deco Label Collection Framelits™ to cut out the ship image and the Circle Framelits™ for the compass (cutting an extra piece from Basic Black cardstock).   Cut the Basic Black frames in half and spread about a bit behind the images to allow a bit of the Basic Black to show.

Use the Big Shot™ to emboss a piece of I Am Me Designer Series Paper (DSP) with the Woodgrain Textured Impressions™ Embossing Folder and adhere this panel to a piece of Basic Black cardstock.

Add the ship focal image with a few scraps of Basic Black cardstock on the sides, adhere the layered sentiment (from Our Daily Bread stamped onto Whisper White cardstock, trimmed and mounted onto Basic Black cardstock) and compass using Stampin’ Dimensionals®. 

Add the Basic Gray Candy Dots to finish off the card.

Stamp Sets:  The Open Sea (MDS version), Serve The Lord (Our Daily Bread Designs)

Ink: Printer Ink- Black, Memento™ Tuxedo Black, Blendabilities™- Smoky Slate Collection, Sakura .005 Micron Pen

Paper: Whisper White, Basic Black, So Saffron DSP (retired I Am Me DSP)

Accessories: Big Shot™, Deco Label and Circle Collection Framelits™, Wooodgrain Textured Impressions™ Embossing Folder, Candy Dots


Thanks again for stopping by- I hope you have a terrific Tuesday!!

Monday, May 5, 2014

Happy Birthday- Nautical Birthday for Three Challenges!


Hi Stampers!

I had another chance to stamp and decided to create a Clean and Layered (CAL) Nautical themed card for the Stampin’ Celebration SC78 Challenge along with the HSSC184 Hand StampedSentiments Sketch and the Seize the Birthday "Anything Goes" Challenge :-)
  
I hope you have a chance to check out all three of the challenge sites- the Design Teams have terrific projects and the galleries provided so much inspiration!!

To create this card:

Use the Big Shot™ with the Woodgrain Textured Impressions™ Embossing Folder to emboss a piece of Whisper White cardstock and adhere into the Midnight Muse card base.

Trim a piece of the Fresh Prints Designer Series Paper (DSP) and adhere to a piece of Midnight Muse cardstock. 

Create a few banners using the Banner Punch from Midnight Muse and Real Red cardstock and one from the Fresh Prints DSP.  Adhere the banners below the horizontal panel and mount onto the Woodgrain background.

Using the anchor, compass and ship image from The Open Sea, stamp each onto Whisper White cardstock using Midnight Muse Classic Ink.
 Punch out the compass and anchor image using the 1 ¼” Square Punch and use the 1 3/8” Square Punch to create the Real Red frames, mount onto Midnight Muse cardstock, trim around each and add the brad to the center of the compass using the 1/16” Handheld Punch.  

Trim around the ship, mount onto Real Red cardstock, trim again and mount onto Midnight Muse cardstock.

Stamp the sentiment from Express Yourself using Midnight Muse Classic Ink onto Whisper White cardstock, cut out using the Big Shot™ with the Bitty Banners Framelits™ cutting also a banner from Midnight Muse cardstock. 

Add the images and sentiment to the card front using Stampin’ Dimensionals® to finish off the card.

Stamp Sets: The Open Sea, Express Yourself

Ink: Midnight Muse

Paper: Midnight Muse, Real Red, Fresh Prints DSP

Accessories: Big Shot™, Woodgrain Textured Impressions™ Embossing Folder, Bitty Banners  Framelits™, Punches- 1 ¼” and 1 3/8” Square, Banner, 1/16” Handheld Punch;   Metallic Brad


Thanks again for visiting- I hope all of you have a blessed week!

Sunday, April 27, 2014

MIX65 Crazy Mixed Up World

Hi Again Stampers! 

I am having so much fun with the Splitcoaststampers MIX65 Challenge- Back to Kindergarten (using crayons) and decided to use the crayon rubbed embossing technique on this card as well as creating another card with the CMCC#17 Colour Me! Challenge colors.   
 I hope you will have the time to check out the gallery at both sites- again, so much talent and inspiration!!

To create this card:

Using the crayon rubbed embossing technique (here is the link to the forum and the technique videos), open the Textured Impressions™ Embossing Folder and place a piece of Whisper White cardstock on top of the raised portion of the folder.   Rub the White Crayon over the cardstock (press firmly) and use a brayer to apply Coastal Cabana Classic Ink. 

 
Use a paper towel to rub the ink off the crayon areas, use a Sponge Dauber first with Bermuda Bay Classic Ink, then again with Pacific Point Classic Ink and finally with Tempting Turquoise Classic Ink. 

Mask the areas using either scrap paper or sticky notes and using The Open Sea, stamp the images randomly in different areas (a modified retriform/grid technique) with Basic Gray Classic Ink. Rub off the excess ink with a dry paper towel. 

Use a 1 ¼” Square Punch to punch out the panel, rearrange the squares into the desired pattern and mount onto a piece of Basic Black cardstock.

When choosing the sentiment,  I already had this one previously printed from My Digital Studio and thought it would be perfect since the images were re-arranged in a random pattern and showcased the mixed up “world”  :-)

Add the 5/8” Basic Black Satin Ribbon bow to the edge of the sentiment and mount the entire panel onto the Whisper White card base.

Stamp Sets: The Open Sea, Favorite Thoughts (MDS version)

Ink: Bermuda Bay, Coastal Cabana, Pacific Point, Tempting Turquoise, Basic Gray

Paper/Cardstock:  Whisper White, Basic Black


Accessories: Sizzix Textured Impressions™ Embossing Folder, White Crayon, Sponge Daubers,  5/8” Basic Black Satin Ribbon, Hexagon Punch (for sentiment banner)

Thanks again for stopping by!  Hope you have a great week- I still have a few more creations to share and will post this evening :-)

Saturday, April 26, 2014

A Final Farewell to the Dynamic Duos

Hi Stampers! 

This week is the 100th Dynamic Duos Challenge and will not only be the final challenge for my time on the Design Team as well as the final challenge for the Dynamic Duos!  It has been my honor to participate with my fellow Designers as well as Anne Marie and Lesley and I will miss this weekly challenge. 

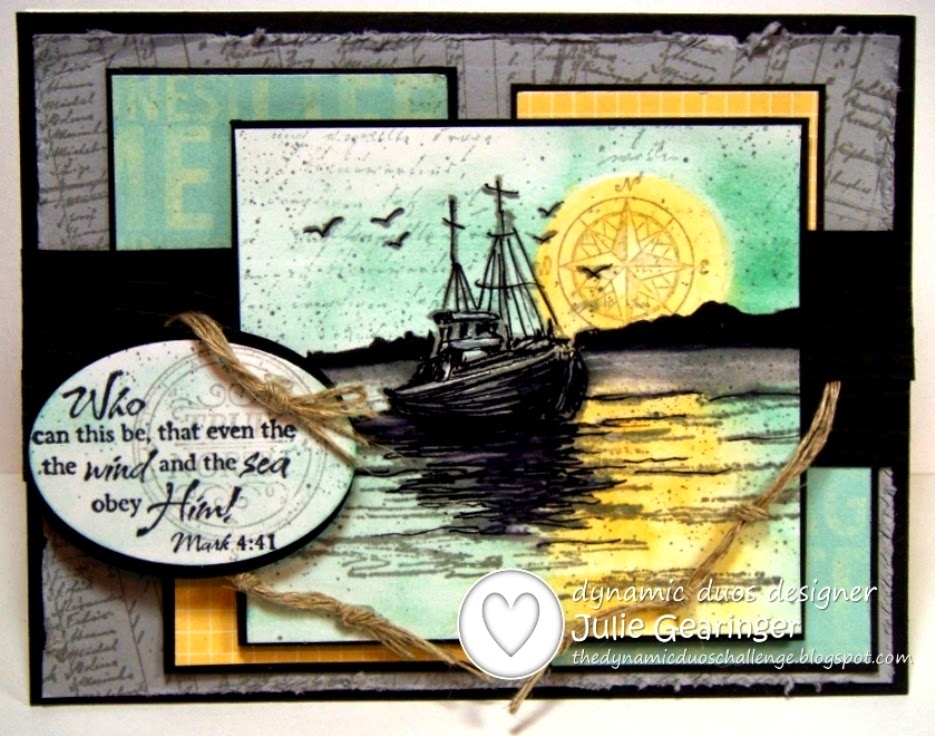
I decided to incorporate the Our Daily Bread Designs ODBDSLC199Sketch Challenge along with the DD100 Dynamic Duos “Triple Threat” colors- So Saffron, Pool Party and Smoky Slate.

I hope you will have the time to visit and check out the rest of the fantastic Design Team projects as well as create your own and share with us in our final Dynamic Duos Challenge :-)!

To create this project:

Create a sun mask using the 1 ¼” Circle Punch from a sticky note- use a Sponge Dauber with So Saffron Classic Ink to create the sun and reflection on the water.  Use a Sponge Dauber with Pool Party Classic Ink for the sky and water.

Ink the boat image from Waves on the Sea using Smoky Slate Classic Ink and stamp onto the sponged scene.  Use a Basic Black Stampin’ Write Marker to accentuate the shadows and waves.

Ink the Notable Notions script stamp and stamp over the sky area, the compass image from The Open Sea using Smoky Slate and stamp over the sun.  Use the Color Spritzer Tool along with the Smoky Slate Stampin’ Write marker to add a bit of distressing. Trim and mount onto Basic Black cardstock.

Ink the ledger stamp from The Open Sea using Smoky Slate Classic Ink onto Smoky Slate cardstock.  Use the Distressing Tool to distress the edges of the cardstock and mount onto a piece of Basic Black cardstock. 

Adhere the Epic Day This and That Designer Series Paper (DSP) and the I Am Me DSP onto Basic Black cardstock, adhere to the Smoky Slate background.   
Add the Basic Black cardstock strips (embossed with the Woodgrain Textured Impressions™ Embossing Folder-difficult to see in the photo).  I used a combination of four strips to allow the knotted Natural Linen Thread to be inserted under the top strip.
Mount the focal image using Stampin’ Dimensionals®, add the sentiment and wrap the Natural Linen knotted “ropes” to finish off the card.
Stamp Sets: The Open Sea, Notable Notions, Waves on the Sea (ODBD)
Ink: So Saffron, Pool Party, Smoky Slate, Stampin’ Write Marker- Basic Black, Smoky Slate
Paper/Cardstock:  Smoky Slate, Basic Black, Epic Day This and That DSP, I Am Me DSP
Accessories: Big Shot™, Woodgrain Textured Impressions™ Embossing Folder, Sponge Daubers, Sticky Notes for Masking, Color Spritzer Tool, Natural Linen Thread

Thanks again for stopping by - I hope all of you have a wonderful week and a chance to join in on our final “DD100 Triple Threat” Challenge!
Related Posts Plugin for WordPress, Blogger...