Showing posts with label Square Lattice EF. Show all posts

Monday, June 20, 2016

How's It Growing?


Hi Friends! 

I hope all of you had a great Father’s Day weekend!! I am so thankful that my father is still alive and he had safe travels to his home in Florida.  Although we have not seen each other in a while, I was able to talk with him today on the phone and he is doing as well as possible:-)

Today I am sharing this card on the Sweet ‘n Sassy Stamps blog today and wanted to share with you here as well.

This Clean and Layered (CAL) card was designed using the new Sweet ‘n Sassy Stamps (SNSS) set Winnie’s Garden (designed by Wynne Gettelfinger) using the Mojo Monday Mojo452 Sketch Challenge (I decided to flip the sketch and it is too late to link to their gallery:-)).

If you have not had a chance to stop by the Sweet ‘n Sassy blog or the Mojo Monday Challenge site, I hope you will find the time to do so- wonderful inspiration from all of my Creative Team Sisters as well as the fabulous Mojo Monday gallery!

To create this card:

Ink the girl image with flowers from Winnie’s Garden (SNSS) with Stampin’ Archival™ Basic Black Ink onto watercolor paper and heat set the ink with the Heat Tool.

Color the stamped image using Stampin’ Write Markers with an AquaPainter™- Dapper Denim (jeans and head scarf), Hello Honey (hair), Blushing Bride with Sweet Sugarplum (tee shirt), Real Red (tulips and lips), Garden Green (leaves),  Rich Razzleberry with Sweet Sugarplum (large flower) and Blushing Bride with Sweet Sugarplum (remaining flowers).

Use the AquaPainter™ with Ranger® Tim Holtz® Distress Markers- Salty Ocean (sky) and Mowed Lawn (grass) to create the landscape.
Die cut the image using the Big Shot™ with the My Favorite Things® (MFT) Stitched Square Dies and mount onto Dapper Denim cardstock (trimming close to the die cut to create a thin frame).

Repeat the above steps for the sentiment from Winnie's Garden as well.

Use the Big Shot™ with the retired Square Lattice Textured Impressions™ Embossing Folder to emboss a piece of Dapper Denim cardstock (scrap piece in my stash) along with a piece of retired Tempting Turquoise and Wild Wasabi Designer Series paper mounted onto a piece of Wild Wasabi cardstock.

Layer the embossed DSP onto the Dapper Denim card front and mount onto the Extra Thick Whisper White card base.

Die cut a piece of Home Sweet Home Graphic 45® Designer Paper with the MFT Stitched Circle Die (also die-cutting a piece of Dapper Denim)- layer the two together and adhere to the card front.

Add the Winnie’s Garden focal image panel along with the embossed Dapper Denim strip (per the sketch) and mount the layered sentiment with dimensional foam to finish off the card.

Stamp Sets:  Winnie’s Garden (Sweet ‘n Sassy Stamps)

Ink:  Basic Black Stampin’ Archival™, Stampin’ Write Markers- Dapper Denim, Hello Honey Blushing Bride, Sweet Sugarplum, Real Red, Garden Green, Rich Razzleberry; Ranger® Tim Holtz® Distress Markers- Salty Ocean, Mowed Lawn

Paper: Watercolor, Dapper Denim, Wild Wasabi; Graphic® Home Sweet Home 6x6 Paper, retired Stampin’ Up! Tempting Turquoise and Wild Wasabi Designer Series Paper

Accessories: Big Shot™, MFT Stitched Square and Circle Dies, retired Swuare Latticve Textured Impressions™ Embossing Folder, AquaPainter™


Thanks again for stopping by- I am so encouraged by your visits and sweet comments!  Have a blessed week, my friends!

Saturday, May 14, 2016

Puppy Love


Hi Friends!

I hope you are having a great weekend so far!  I have been having fun creating cards for the May 2016 MISSION- Cards for A Cause (Rose’s Fund for Animals- see details here) and decided to create a card using the Splitcoaststampers’ SC592 Sketch Challenge and the Free For All F4A323 “Dogs Are Kids Too” Challenge.

The Puppy Love Clear Stamp Set from Sweet ‘n Sassy Stamps (SNSS) is perfect for all sorts of cards for your dog loving friends and I decided to pair the Puppy Love Clear Stamp Set with Grunge Elements Clear Stamp Set to design this card.

If you have not had a chance to check out the above challenge sites, I hope you will find time to do so- wonderful samples from all!

To create this card:

Ink the dog image from Puppy Love with Memento™ Tuxedo Black Ink and stamp onto Very Vanilla cardstock.

Use the Big Shot™ with the Circle Framelits™ to cut out the image and cut another circle from Basic Black cardstock for the frame.

Using Ranger® Tim Holtz® Old Paper Distress Ink, stamp the paw prints from the Puppy Love set around the dog image along with the lined image and splatter stamp from Grunge Elements Clear Stamp Set (SNSS).

Use a Faber-Castell® Pitt Pen Black XS Marker to add dots to the foreground as well as additional shadows.

Mount the die cut dog image onto the Basic Black cie cut circle frame and set aside.

Ink the sentiment from Puppy Love with Memento™ Tuxedo Black Ink and stamp onto Very Vanilla cardstock, add a few paw prints with Ranger® Tim Holtz® Old Paper Distress Ink, trim and add the banner points with the Hexagon Punch.

Mount onto Basic Black cardstock (again adding banner points with the Hexagon Punch).

Emboss a piece of Very Vanilla cardstock with the Woodgrain Textured Impressions™ Folder, trim and mount onto a piece of Basic Black cardstock, trim and mount onto the Real Red card base.

Emboss a piece of Real Red Designer Series Paper with the Square Lattice Textured Impressions™ Folder, trim on an angle, mount onto Basic Black cardstock and add to the front of the card.

Add the Gold Trim to the card front, mount the dog image and sentiment with dimensional foam along with the Pearls to finish off the card.
Stamp Sets: Puppy Love, Grunge Elements (Sweet ‘n Sassy Stamps)

Ink/Mediums: Memento™ Tuxedo Black Ink, Ranger® Tim Holtz® Old Paper Distress Ink;Faber-Castell® Pitt Penn XS Black Marker

Paper: Very Vanilla, Basic Black, retired Real Red DSP
Accessories: Big Shot™, Woodgrain and retired Square Lattice Textured Impressions™ Embossing Folders, Circle Framelits™, Hexagon Punch, Gold Trim, Pearls


Thanks again for taking the time to visit- I hope you have a fabulous week!

Friday, November 20, 2015

F4A300 Prayerful Thoughts Quilt

Hi Friends!!


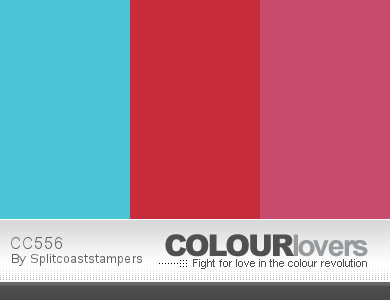
The 300th challenge details are to create a project using one of the first ten “Free For All” Challenges and I chose the F4A7 “Make a Quilt” Challenge along with the CC556 Color Challenge and CAS350 “To Grandma’s House We Go” Challenge (although this card could also qualify for the F4A1 "Textures, Colors & Patterns" that you normally would not use together- I truly struggle with pinks and reds together :-)).

I always remember the colorful quilts at my grandmother’s house- they were made from scraps and most of them were what she called popcorn quilts but I decided to create a bright colorful quilt for my card.

I hope you will find the time to come play along- check out the gallery for the F4A300 entries as well as the CC556 Gallery and CAS350 Gallery- wonderful inspiration from all!!

I chose the Sweet ‘n Sassy Stamps (SNSS) Prayerful Thoughts for the sentiment (I thought it would be perfect for this quilt theme)- if your day is sewn together with prayer, it is definitely less likely to become unraveled for sure!

This is a very easy card to create- emboss the background with the Chevron and retired Square Lattice Embossing Folders, cut the quilt from the different color challenge cardstocks along with white, put the quilt together onto scrap paper, emboss with the Square Lattice Embossing Folder, punch apart with the 1” Square Punch, layer with dimensional foam onto cardstock, stamp the sentiment from the SNSS stamp set and cut with a stitched square die, layer onto Real Red cardstock, add the lace onto the embossed card front, mount the quilt panel and sentiment, add the Bow Builder Punched Paper Bow with the button along with Pearls to finish off the card.


Ink: Real Red

Paper: Whisper White, Real Red, Tempting Turquoise, retired Primrose Petals

Accessories: Big Shot™, Chevron and retired Square Lattice Textured Impressions™ Embossing Folders, MFT Stitched Square STAX Dies, MFT Blueprints 20 Dies, Bow Builder Punch, 1” Square Punch, retired Brights Collection Button, White Crochet Lace from my stash, Pearls


Thanks again for stopping by- I hope you have a fantastic Friday, my friends!

Monday, October 5, 2015

HYCCT1504 Thinking of You- A Renovated Design :-)

Hi Again Friends!

This is the final card that I completed this weekend in honor of World Card Making Day and it was created for the Splitcoaststampers' Hope You Can Cling To  HYCCT1504 Diane’s “Undergoing Renovation” Challenge along with the As You SeeIt #106 Sketch Challenge. 

The challenge was to re-create a card that you created in the past so I chose this card to "renovate" :-)

Again, I hope you have a chance to check out the challenge sites- so much inspiration from all!

To create this card:

Stamp the images from The Open Sea along with From Land to Sea using Stāz-On® Jet Black Ink and Early Espresso, Cherry Cobbler and Midnight Muse Classic Ink (masking as necessary).

Sponge the edges with Sahara Sand Classic Ink and adhere the retired Nautical Expedition Designer Series Paper (DSP) using a sewing machine with a zig zag stitch to a piece of Early Espresso cardstock.

Use the Banner Punch to create the banners and add to the vertical stitched strip.
Finish off with the Nautical Charm and Vintage Trinket.

Stamp Sets: The Open Sea, From Land to Sea, Gorgeous Grunge, Teeny Tiny Wishes

Another view of the collage images :-)
Ink: Stāz-On® Jet Black, Cherry Cobbler, Early Espresso, retired Midnight Muse

Paper: Whisper White, retired Nautical Expedition DSP    
  

Accessories: Big Shot™, Square Lattice Textured Impressions™ Embossing Folder, Sewing Machine, Distressing Tool, Sponge Dauber, scrap paper for masking, Punches- Word Window, Banner, Nautical Metal Charm, Vintage Trinket

Thanks again for stopping by- I hope you have a marvelous Monday, my friends!

Wednesday, September 16, 2015

Snowman Soup- Wishing You A Merry Christmas!!


Hi Friends!


Although I do drink coffee occasionally, I have to "doctor" it up with Hot Chocolate so a true coffee drinker would say "That's not coffee at all!" - lol!!  So, I guess, Hot Chocolate would be my choice of drink :-)

Again, if you have not already done so, I hope you will find the time to visit the above links to check out their wonderful Design Team entries as well as all of their galleries!

This card was extremely easy to make:

Sweet 'm Sassy Stamps- Snowman Soup, Holly Jolly Christmas
Use the Big Shot™ to emboss the background paper with the Square Lattice Textured Impressions™ Embossing Folder (retired Stampin’ Up!) and stitch this layer to a piece of Chocolate Chip cardstock.  Mount the entire panel onto the white card base.

Stitch a coordinating piece of background paper to a piece of Chocolate Chip cardstock for the upper layer of the sketch and adhere the 5/8” Chocolate Chip Satin Ribbon triple bow.

Punch out three circles from Chocolate Chip cardstock and add the three circles of background paper (also punched and mounted onto circles of white cardstock).

Adhere an embossed piece of Real Red cardstock to Chocolate Chip for the vertical layer of the sketch and add the three punched circles.

Stamp the Sweet ‘n Sassy Stamps Snowman Soup image using a waterproof black ink and color with water brush and water based markers.  Carefully cut out the image (I decided to fussy cut but there is a coordinating Snowman Soup die set from Sweet ‘n Sassy Stamps  as well).

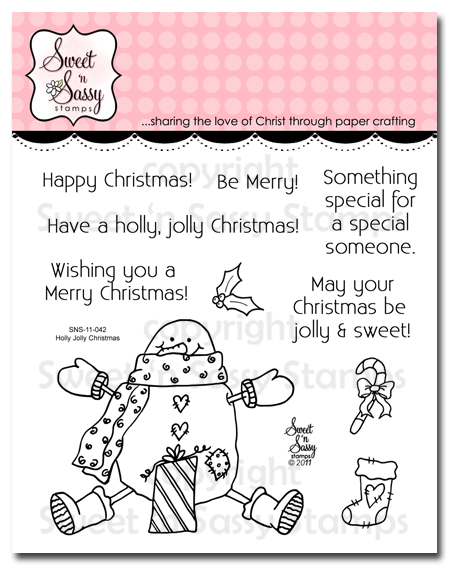
Stamp the sentiment from Holly Jolly Christmas with black ink and create the banner points with the Hexagon Punch or by hand.

To assemble the card- add the stitched layer with the bow to the card front, mount the vertical strip with the three punched elements using dimensional foam, add the Snowman Soup image and Holly Jolly Christmas sentiment with dimensional foam.

Add a few Pearls to the center of the snowflakes on the punched images and the snowman’s hat to finish off the card.
Snowman Soup
Holly Jolly Christmas


Stamp Sets: SnowmanSoup, Holly Jolly Christmas ( both SNSS)

Ink: Stāz-On® Jet Black, Stampin’ Write Markers- Chocolate Chip, Old Olive, Pumpkin Pie, Real Red, Tempting Turquoise, Sahara Sand

Paper: Whisper White, Chocolate Chip, Real Red, retired DSP

Accessories: Big Shot™, retired Square Lattice and Pretty Petals Textured Impressions™ Embossing Folders,  Punches- 1”  and 1 3/8” Circle, Hexagon; retired 5/8” Chocolate Chip Satin Ribbon, Pearls


So which do you prefer- Coffee, Tea or Hot Chocolate?

Thanks again for taking the time to stop by- hugs and have a great day, my friends!

Thursday, March 5, 2015

Spirit of Christmas- A Color, Sketch and Embossing Challenge :-)

Hi Stampers! 

I had a chance to play in my craft room this evening and in honor of our newest snowstorm (just helped hubby shovel out the driveway, etc. of 10" of snow :-)), and I decided to create another Christmas card  for my 2015 stash using the Merry Monday #148 Red & Green Challenge along with the HSSSC206 Hand Stamped Sentiments Sketch Challenge and SR268 Stampin’ Royalty Embossing Challenge 


I am using a set from Wplus9 Design Studio that I have had for over a year and not inked yet…needed to give this one some “love”- lol!! :-)

All of the above sites have tremendous Design Teams and inspiration- hopefully you will take the time to visitl! 

To create this Clean and Layered (CAL) card:

Using Mossy Meadow Classic Ink stamp the pine tree and sentiment images onto Whisper White cardstock and cut out the tree image using the Big Shot™ with the coordinating die.

Stamp the heart using Cherry Cobbler Classic Ink and again, cut out using the Big Shot™ with the coordinating die.

Create the tag from Soft Suede cardstock using the Scalloped Tag Topper Punch and mount onto another tag (just a bit larger) from Cherry Cobbler cardstock (rounding the corners of each using the 3/8” Project Life® Corner Rounder Punch).

Trim the sentiment and mount to the lower part of the tag, add a strip of Cherry Cobbler Cardstock to hide the seam.

Mount the tree and heart to the tag using Stampin’ Dimensionals®. 

Emboss a piece of Whisper White cardstock using the Big Shot™ with the Northern Flurry Textured Impressions™ Embossing Folder, trim and mount onto a piece of Soft Suede cardstock, trim and mount onto a piece of Garden Green cardstock, trim and mount onto a piece of Cherry Cobbler cardstock, trim and mount onto the Whisper White card base.

Cut the horizontal banners from pieces of Trim the Tree Designer Series Paper (DSP), create the banner points using the Hexagon Punch and mount onto Cherry Cobbler cardstock (using the Hexagon Punch to “mirror” the banner points again).  

Use the Big Shot™ with the retired Square Lattice Textured Impressions™ Embossing Folder to emboss the banners and mount onto the card front.

Add the tag to the card front using Stampin’ Dimensionals®.

Use the Bow Builder Punch to create the bow from Cherry Cobbler cardstock, add the bow to the tag, adhere the retired Star brad to the bow center and the Rhinestone to the center of the heart to finish off the card.

Stamp Sets: Pretty Patches: Tree (Wplus9 Design Studio)

Ink: Cherry Cobbler, Mossy Meadow

Paper: Whisper White, Cherry Cobbler, Garden Green, Soft Suede, Trim the Tree DSP

Accessories: Big Shot™, Northern Flurry and retired Square Lattice Textured Impressions™ Embossing Folders, Wplus9 Design Studio Pretty Patches: Tree Die, Punches- Scallop Topper Tag, 3/8” Project Life® Corner Rounder, Bow Builder and Hexagon, Rhinestone, retired Star brad


Thanks again for stopping by- I hope you all have a fabulous Friday!! 

Monday, August 11, 2014

DTGD14SweetMissDaisy Times and Seasons

Hi Again Stampers!!

This is another card was I created for one of the hostesses at this past week’s DareTo Get Dirty Challenge at Splitcoaststampers.  This is an annual challenge that participants are able to not only have fun creating cards but also the possibility to receive prizes from the member companies :-)

To participate in Dare To Get Dirty, you have to be a Splitcoaststampers Fan ClubMember, and if you are not a Fan Club member, here is the link to learn moreabout joining.    While it is close to the deadline for this year’s challenge, you can always create the cards after the challenge date and next year, participate to possibly win the free prizes!!

While the Splitcoaststampers site is free, there are many benefits to becoming a FanClub member and for the $25.00 a year membership fee (approx. 6.5 cents a day), you can help support this wonderful stamping resource!  I personally visit this site several times a day- so for me it seems to be a terrific bargain!!  And no, I do not receive a commission if you sign up- lol!!, I am just one of their unofficial “cheerleaders” since I love the site so much- between the galleries of wonderful inspiration, free tutorials, forums and challenges- this site has helped me immensely with my journey into the world of papercrafting!

One rule of participation in the Dare To Get Dirty Challenges is that the actual challenge details are secret to all except the Fan Club Members…I can share the card but not the details on the actual challenge (unfortunately, any details on this card will reveal the challenge details, so if you have any questions, please let me know in the comment area).   

Stamp Sets: Times and Seasons (retired)

Ink: Memento™ Tuxedo Black, Crumb Cake, Stampin’ Blendabilities™ Collections- Cherry Cobbler, Daffodil Delight, Night of Navy, Old Olive, Pumpkin Pie, Smoky Slate; Stampin’ Write marker- Crumb Cake

Paper: Whisper White, Really Rust and Ballet Blue (retired); retired Really Rust and Ballet Blue DSP

Accessories: Big Shot™, retired Square Lattice Textured Impressions™ Embossing Folder, Hexagon Punch, Natural Linen Thread, retired Really Rust buttons, Sewing Machine, Gingham Ribbon from my stash


Thanks again for stopping by- I will be a few more cards throughout the day that were created for this past week’s 2014 Dare To Get Dirty Challenge hostess samples… I hope you have a chance to visit again soon!!

Monday, August 4, 2014

CC490 You Make the World a Better Place :-)

Hi Again Stampers! 

This month, I have been invited to be one of the Guest Designers for the Splitcoaststampers’ Color Challenge :-)

I found the CC490 Challenge Colors to be delightful together- Coastal Cabana, Cherry Cobbler, Daffodil Delight, Wild Wasabi...the challenge came in when you could have a flower on the card but it cannot be the focal image (nor can the sentiment be the focal image)...  I decided to add a map for the WT490 Ways to Use It Challenge as well :-)

Again, I hope you will find time to visit the gallery this week and possibly join in on the fun and create a card of your own!

To create this card (see the previous post for the 1st card):

Stamp the ship from Traveler onto Whisper White cardstock using Memento™ Tuxedo Black Ink.   Stamp another image onto a sticky note and mask the ship.

Use the 1 3/8” Circle Punch to punch out a circle from a piece of scrap paper and mask the area on a piece of Whisper White cardstock (with the circle cut out and over the ship area).

Use a Sponge Dauber with Daffodil Delight Classic Ink to color in the center of the masked circle, remove the mask and re-mask the “sun” using just the circle portion of the mask.

Create a mask for the horizon line (to mimic the ocean).   Keep the circle and ship masks in place and using a Sponge Dauber, apply Daffodil Delight Classic Ink to show the reflection of the sun, Coastal Cabana Classic Ink for the water around the ship and Cherry Cobbler for the reflection of the ship.

Use the Stampin’ Blendabililites™ Cherry Cobbler Collection to color the ship.   Re-mask the ship along with the sun and using Sponge Daubers, add Coastal Cabana along with Cherry Cobbler for the sky area.   Use a Sakura .005 Micron Pen to add additional water lines to the ocean portion.  

Punch the image out using the Big Shot™ with the Circles Collection Framelits™ and cut an additional circle from Cherry Cobbler and Wild Wasabi cardstock.

Repeat the above masking and sponging steps for the globe image as well as the suitcase- coloring the globe using the Coastal Cabana Stampin’ Blendabilities™ Collection along with the Wild Wasabi Stampin’ Write marker and the suitcase with the Stampin’ Blendabilities™ Cherry Cobbler, Coastal Cabana and Daffodil Delight Collections along with the Crumb Cake and Wild Wasabi Stampin’ Write markers. 
Use the Big Shot™ with the Ovals Collection Framelits™ to cut out the images and another oval from Cherry Cobbler cardstock. 

Before mounting the images on the matching ovals, ink the World Map background using Memento™ Tuxedo Black ink – remask the ship, globe and suitcase images before stamping with the World Map.

Use a Sponge Dauber to apply Crumb Cake Classic Ink over the images to “antique” the Whisper White cardstock and apply Cherry Cobbler Classic Ink around the edges.

Mount the ship onto the Cherry Cobbler and Wild Wasabi circles (cut the circles in half to allow a bit to show outside of the ship image).   Mount the globe and suitcase images onto the ovals of Cherry Cobbler cardstock (cutting the ovals in half prior to mounting).

Stamp the World Map image using Memento™ Tuxedo Black ink onto Coastal Cabana cardstock and distress the edges using the Distressing Tool.  Apply Crumb Cake Classic Ink using a Sponge Dauber and mount onto a piece of Cherry Cobbler cardstock, trim and mount onto the Wild Wasabi card base.

Mount a piece of Wild Wasabi cardstock (previously embossed with the Big Shot™ and the retired Square Lattice Textured Impressions™ Embossing Folder) onto a piece of Cherry Cobbler cardstock.  Add an additional strip of Cherry Cobbler cardstock and mount the strip onto the Coastal Cabana map background.

Add the ship, suitcase and globe images using Stampin’ Dimensionals® to the card front.

Ink the sentiment from Starburst Sayings using Coastal Cabana Classic Ink and stamp onto Whisper White cardstock.  Re-ink the same stamp using Cherry Cobbler Classic Ink and stamp again onto Whisper White cardstock.   Use the Big Shot™ with the Starburst Framelits™ Collection to cut out both sentiments- carefully trim the WORLD from the Coastal Cabana image.

Add the Daffodil Delight details on the sentiment using the Daffodil Delight Stampin’ Blendabilities™ marker and sponge additional Cherry Cobbler Classic ink along the edges.

Mount the Coastal Cabana “WORLD” image and add the sentiment to the card front using Stampin’ Dimensionals™. 

Add a few Daffodil Delight Candy Dots to finish off the card.

Stamp Sets: Traveler, World Map, Starburst Sayings
Ink: Daffodil Delight, Coastal Cabana, Cherry Cobbler, Wild Wasabi, Memento™ Tuxedo Black, Sakura .005 Micron Pen

Paper/Cardstock:  Whisper White, Coastal Cabana, Cherry Cobbler, Wild Wasabi


Accessories: Big Shot™,  Circles, Ovals and Starburst Framelit™ Collections, Sponge Daubers, Distressing Tool, scrap paper for masking, Candy Dots


Thanks again for visiting- have a fabulous evening and I hope you can join in on the challenges this week!

Tuesday, April 22, 2014

Floral Anniversary- Three Challenges in One!

Hi Stampers! 

Time for the new SUO95 SUO-Only Challenge is “FeaturingFlowers” and I decided to incorporate the FUSION8 Challenge (sketch along with the inspiration photo) along with using an Oval for the WT475 Splitcoaststampers “Way to Use It” Challenge. 

I hope you will have the time to visit and check out the rest of the fantastic Design Team projects at all sites and if you have a chance, join in on the fun!

To create this project:
Create the oval using the Big Shot™ with the Ovals Collection Framelits™ to cut the oval out of a piece of Whisper White cardstock, emboss with the Stripes Textured Impressions™ Embossing Folder.
Emboss a piece of Soft Sky cardstock using the Square Lattice Textured Impressions™ Embossing Folder and use the Lattice Bigz™ Original Die to cut the lattice from a piece of Whisper White cardstock. 
Adhere the lattice behind the oval opening and add the embossed Soft Sky cardstock.  Adhere the entire panel to a piece of So Saffron cardstock, mount onto a piece of Crisp Cantaloupe and add to the Wisteria Wonder card base.
Create the rolled flowers from So Saffron, Crisp Cantaloupe, Soft Sky and Wisteria Wonder cardstock using the 2 3/8” and 1 ¾” Scallop Circle Punch, crimp with the retired Crimper Tool, hand cut a wavy spiral and roll up from the outside toward the center.  
Create the leaves using Pistachio Pudding cardstock using the Bird Builder Punch and adhere the leaves and flowers to the card front along the lower edge of the oval. 
Stamp the sentiment using Wisteria Wonder Classic Ink onto Whisper White cardstock, trim and create the banner using the Hexagon Punch.
Adhere the ½” Soft Sky Seam Binding Triple Ribbon bow along with the Pearls to finish off the card.
Stamp Sets: Express Yourself
Ink: Wisteria Wonder
Paper/Cardstock:  Whisper White, Crisp Cantaloupe, Soft Sky, So Saffron, Wisteria Wonder
Accessories: Big Shot™, Square Lattice and Stripes Textured Impressions™ Embossing Folders, Ovals Collection Framelits™, Lattice Bigz™ Original Die, Punches: 2 3/8” and 1 ¾” Scallop Circle, Hexagon, Bird Builder; ½” Soft Sky Seam Binding Ribbon, Pearls

Thanks again for stopping - I hope you have a chance to join in on our “Featuring Flowers” SU-Only Challenge!

Saturday, March 8, 2014

DD93 Sew Glad We're Friends

Hi Stampers! 

It’s time for the DD93 “Subtly Yours” Dynamic Duo Challenge combining Blushing Bride and Sahara Sand.

I hope that you will find the time to stop by and check out the rest of the fabulous Dynamic Duos Design Team projects and create one of your own using this week’s colors - we would love to have you join us!!


To create this card:

Use the Big Shot™ with the Square Lattice Textured Impressions™ Embossing Folder to emboss a piece of Blushing Bride Designer Series Paper (DSP) and to the lower half of a piece of Blushing Bride cardstock and lightly distress the edge with your fingernail.

Using My Digital Studio™ (MDS), insert the vintage sewing machine from Puns from the Past stamp brush set, re-size the image and print out onto Whisper White cardstock- color the image using Stampin’ Write markers- Blushing Bride and Sahara Sand.  

Distress the edges using the Distressing Tool, sponge the edges using the Sponge Dauber with Sahara Sand Classic Ink and add a bit more distressing from the splatter stamp from Gorgeous Grunge (also inked with Sahara Sand Classic Ink).

Emboss a piece of Sahara Sand cardstock using the Big Shot™ along with the Pretty Print Textured Impressions™ Embossing Folder, trim and mount onto the upper half of the Blushing Bride cardstock layer. 

Add one half of a White Tea Lace Paper Doily along with the ½” Blushing Bride Grosgrain Ribbon to cover the edges of the DSP/cardstock layer.

Layer the distress sewing machine image onto a piece of Modern Medley DSP (embossed with the retired Lacy Brocade Textured Impressions™ Embossing Folder, lightly sanded and distressed).   Add the scrap piece of lace to the lower edge and a scrap piece of the Blushing Bride ribbon to the upper edge.   Add to the card front using Stampin’ Dimensionals®.

Create the rolled flowers using the 2 3/8” and 1 ¾” Scallop Punches (punch out the scallop circles from Blushing Bride cardstock, crimp with the Crimper Tool, wavy cut a spiral toward the center, roll the flower from the outside edge toward the center and adhere- see tutorial here ).  Add the Sahara Sand leaves created from the Petite Petals Punch. 

Use the distressing tool to distress the sentiment and create the banner using the Hexagon Punch for the “points”. Use the Piercing Tool to create a hole to add the Vintage Trinket safety pin and adhere the end of the banner using Stampin’ Dimensionals®. 

Adhere the rolled roses (I used a Hot Glue Gun) and Pearls to the upper and lower corners of the card base and also the upper left hand corner of the sewing machine layer to finish off the card.   

Stamp Sets:  Puns from the Past (MDS version), Gorgeous Grunge
Ink: Printer Ink- Black, Sahara Sand, Stampin’ Write Marker- Blushing Bride, Sahara Sand
Paper/Cardstock:  Whisper White, Sahara Sand, Blushing Bride DSP
Accessories: Big Shot™, Pretty Print, Square Lattice and retired Lacy Brocade Textured Impressions™ Embossing Folders, Punches- 2 3/8” and 1 ¾” Scallop Circle, Hexagon, Petite Petals; Crimper Tool, Distressing Tool, Vintage Trinkets, Pearls, Sanding Block, lace from retired Artisan Embellishment kit, White Tea Lace Paper Doily, retired ½” Blushing Bride Grosgrain Ribbon

Thanks again for taking the time to stop by- I hope you can join in the fun with our DD93 Dynamic Duos“Subtly Yours” Challenge!
Related Posts Plugin for WordPress, Blogger...