Showing posts with label #snsstamps. Show all posts

Wednesday, December 10, 2025

TCC222 Christmas Light


Hi Friends!

Today, we are starting our December #222 Christmas Gathering Challenge at The Card Concept today and I was inspired by this beautifully decorated kitchen,  colors, and Christmas theme from our photo this month to create a Mixed Media card.

We hope that you will take a moment to stop by our challenge blog and check out how the rest of our fabulous Design Team was inspired as well!

I have been trying to ink up some of my neglected stamp sets and decided to pull out the retired Christmas Light stamp set and coordinating die from Sweet ‘n Sassy Stamps to create this quick Mixed Media card.

This is the season for giving and Karen L. (one of our designers) has graciously offered a cute stamp set to one of our gallery entries (USA only, sorry).  

We hope you can play along with us, you may be the lucky winner!  The deadline to join us is Monday, January 12th at noon EDT. 


To create this card:

De-static a piece of white cardstock with an embossing powder tool, ink the sentiment from Christmas Light with Versafine Black Onyx ink, stamp onto the upper left-hand area of the prepared cardstock paper and apply clear embossing powder.


Heat set the powder with a heat tool and once cooled, trim the panel to approx. 4” x 5 ¼” and mount onto a piece of black cardstock.

Repeat the embossing steps above for the candle image, and when the embossing has cooled, watercolor with distress oxide inks and water-based markers.

Die cut the image with the coordinating die, layer onto another die cut from white cardstock.

Trim a piece of plaid designer paper to approx. 2 ½” x 3 ¾” and mount onto the lower part of the card front.

Add a strip of white crochet lace, layer a piece of 1” black satin ribbon over the lace and wrap the ends behind the card front.

Mount the entire panel onto a white card base.

Loop the gold cord and adhere to the card front before mounting the die cut candle image with dimensional foam.

Add a few black rhinestones to finish off the card.

Stamp Sets: Christmas Light (retired Sweet ‘n Sassy Stamps)

Inks/Mediums: Versafine Black Onyx, Distress Oxide- Fossilized Amber, Mustard Seed, Iced Spruce, Evergreen Bough, Forest Moss, Candied Apple, Hickory Smoke; Stamoin’ Write Markers- Hello Honey, Gumball Green

Cardstock/Paper: White, Black, Tartan Plaid (Craft Consortium)

Accessories/Tools: Gemini, Jr. Christmas Light Die (retired SNSS), Embossing Powder Tool, Clear Embossing Powder, Heat Tool, 1” Black Satin Ribbon, Crochet Lace, Gold Cord, Black Rhinestones

I hope you have had a chance to stop by The Card Concept to see how the rest of the Design Team were inspired as well as check out the other challenge gallery entries- wonderful inspiration from all!

We hope you are inspired to create a card and join us for our Christmas Gathering Challenge at The Card Concept!  The deadline to play along is Monday, January 12th at noon EDT. 

Wednesday, January 8, 2025

TCC213 Joy

 Hi Friends!

Happy New Year!  We are back with our challenges at The Card Concept with our #213 Winter Solace Challenge. 

I was inspired by the beautiful deer, the metallic colors and the textures for my Clean and Layered Mixed Media card.

I decided to ink up a few of my neglected stamps (I am still working on my goal of inking up stamps from my stash).  I was able to incorporate at least three different older stamp sets, an older embossing folder and die set into the design, yea!!

I am also participating with the Word Art Wednesday #681-#682 “Anything Goes” Challenge . 

If you have not had a chance to check out challenge blog to see how the rest of The Card Concept Design Team were inspired as well as check out the Word Art Wednesday challenge gallery to see their fabulous creations!

To create this card:

De-static a piece of white cardstock with an embossing powder tool, ink the stag image from the Yuletide Deer stamp set with Versamark ink, stamp onto the prepared paper, apply pewter embossing powder and heat set with a heat tool.

Repeat the above steps with the “Joy” sentiment from Endless Wishes.


Once the embossing has cooled, use a fine tip bronze water-based marker to color in some of the design elements on the stag image.

Die cut the image with the Hemstitch Square Die, mount onto a piece of silver mirror cardstock (trimmed to slightly smaller than the die cut square).

De-static the lower left-hand area near the stag, ink the sentiment from the retired Endless Wishes with Versamark ink, apply pewter embossing powder and heat set with the heat tool.

For the background panel, use a paintbrush to apply Champagne and Pewter Metallic Ink.  Use a heat tool to dry the ink.

De-static and stamp the Grunge Elements 2 image with Versamark ink over the metallic ink areas,  apply gold and pewter embossing powder, heat set with a heat tool (it is hard to see this part of the stamped images, but they are there).


Trim the background panel to 4” x 5 ¼”, mount onto a 4 ¼” x 5 ½” piece of silver mirror cardstock. 

Adhere the entire panel to a white card base.

Emboss a piece of the silver mirror cardstock with a diamond embossing folder.  Trim and adhere behind the stag image.

To finish off the card, mount the entire stag image onto the card front with dimensional foam.

Stamp Sets:  Yuletide Deer (STAMPlorations), Endless Wishes (retired Stampin’ Up!), Grunge Elements 2 (Sweet ‘n Sassy Stamps)

Inks/Mediums: Versamark, Tsukineko Champagne and Platinum Metallic Inks, Arteza Bronze Extra Fine Marker

Cardstock/Paper: White, Silver Mirror Cardstock (from my stash)

Accessories/Tools: Gemini, Jr., Spellbinders Hemstitch Square Dies, Sizzix Diamond Embossing Folder, Embossing Powder Tool, Gold and Pewter Embossing Powder, Heat Tool

Thanks again for taking the time to stop by! I hope you are inspired to create a card and join us for our #213 {Winter Solace} Challenge at The Card Concept!  The deadline to play along is Monday, February 10th at noon EDT.  

Wednesday, January 19, 2022

The Card Concept #167 Cuppa Cocoa or Coffee?


 Hi Friends!

It’s time for the #167 {Cuppa Cocoa or Coffee?} Challenge at The Card Concept!


I know that most people drink coffee and several of my friends as well as my father like it black, but I have to “doctor” my coffee with a tablespoon of hot cocoa and top it off with whipped cream, lol!

So obviously, I am not a true coffee aficionado and since I am trying to limit my sugar intake, I do not drink my coffee or hot chocolate often :-)

I do love our inspiration photo though and was inspired by the Nordic patterns on the cups, the overall colors and the theme to create a Clean and Layered card!

I decided to pull out several unused items from my stash- the MFT Hot Cocoa Cups Die-namics, some retired Stampin’ Up! items- papers, ribbon, embossing folder and a still current but unloved Sweet ‘n Sassy Stamp set- Cocoa's Cups!

I also was able to use the Splitcoaststampers’ SC727 Sketch for the layout and am linking to the Stamping Sensations “Anything Goes with Stamping and optional Add A Die”Challenge.

I hope you have a chance to check out the rest of The Card Concept Design Team cards and, if you have time, create a card based on our inspiration photo and join us!

This card was simple to create- dry and heat embossing, die cutting and layering. 


The following items were used:

Stamp Sets: Cocoa’s Cups (Sweet ‘n Sassy Stamps)

Ink/Mediums: Ground Espresso Distress Oxide, Zig Wink of Stella Clear Glitter Marker

Cardstock/Paper: White; Early Espresso, Garden Green, retired Purely Pomegranate (all Stampin’ Up!), retired Snow Festival DSP and other DSP (Stampin’ Up!)

Tools/Accessories:  Big Shot, retired Lacy Brocade Embossing Folder, My Favorite Things Dies- Hot Cocoa Cups Die-namics, Stitched Circle and Oval STAX; Circle Dies (retired Stampin’ Up!), Embossing Powder Tool, Clear Embossing Powder, Heat Tool, 3/8” Raspberry Ripple Stitched Ribbon (retired Stampin’ Up!), Rhinestones

Thanks again for taking the time to visit- we hope you have a blessed week!

Tuesday, July 28, 2020

Let the Earth Rejoice


Hi Friends!

I am sharing a quick Clean and fairly Simple Mixed Media card that was designed with the retired Sweet ‘n Sassy Stamps Bare Tree Die set along with a retired Scripture Medley 4 (Verve Stamps) verse sentiment.

As many of you know, mixed media does not have to be complicated- use any two mediums along with some texture or dimension and that usually qualifies as mixed media.  Since I tend to heat emboss and watercolor almost all of my cards, I am usually creating with mixed media:-)

For this card,  I used distress oxide inks along with acrylic paint and heat embossing as the "mediums".  Texture was added with dimension as well as the sequins.  If you follow my blog, you know that Clean and Simple (CAS) is not my normal  "go-to" style but I am am working on it, lol!

I enjoy participating with online challenges and will be linking this card to the Just Add Ink #515 “Mixed Media” Challenge and the Word Art Wednesday #448-#449 “Anything Goes”Challenge.

To create this card:

Using an acetate envelope (or craft sheet), pat distress oxide ink onto the surface, spritz with water and press a piece of white cardstock into the ink.  Continue the process until you are satisfied with the results and heat dry with a heat tool between layers.

Trim the panels and apply white acrylic shimmer paint, allow the panels to dry before mounting onto black cardstock.

Use an embossing powder tool to de-static the lower right hand corner of a piece of white cardstock, stamp the verse sentiment with archival black ink, apply clear embossing powder and heat set with a heat tool.

Die cut the verse panel with a stitched rectangle die, mount onto black cardstock (trim close to the edge).

Die cut several of the trees from black cardstock and layer onto one another (this adds dimension plus a bit of strength to the die cut).

Layer the four oxide panels onto the card front using chipboard (or dimensional foam) and add the tree die cut.

Mount the panel onto a white card base and finish off the card with a few clear iridescent sequins.

Stamp Sets: Scripture Medley 4 (retired Verve Stamps)

Ink/Mediums: Versafine™ Onyx Black, Tim Holtz™ Broken China, Picked Raspberry, Tumbled Glass Distress Oxide; Frost White Shimmer Paint

Paper/Cardstock: Whisper White, Basic Black

Accessories/Tools: Gemini, Jr™, Dies- My Favorite Things™ Stitched Rectangle A2 Set 1, Sweet ‘n Sassy Stamps retired Tree; Embossing Buddy®, Clear Embossing Powder, Heat Tool, Clear Iridescent Sequins, Acetate Envelope, Water Spritzer Bottle

Thanks again for taking the time to stop by- I hope I have inspired you to create a mixed media project :-)  Hugs and have a great week, sweet friends!

Wednesday, March 4, 2020

Sympathy Skyline


Hi Friends!!

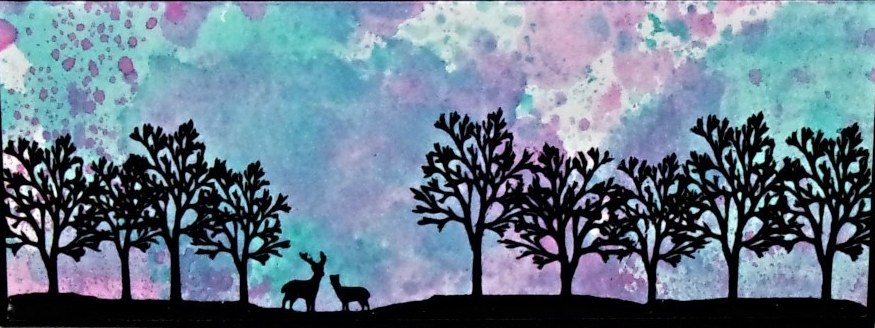
This morning, I am sharing a Clean and Simple (CAS) Mixed Media card that I designed using two stamps sets currently available at Sweet 'n Sassy Stamps- Landscape Silhouettes and Tender Thoughts.

I needed to restock my supply of sympathy cards and thought that the Splitcoaststampers SC42 Sketch Challenge  would be great for the layout (woohoo, another sketch, now only approx. 450 or so to go :-)) and I love the font on the "With Deepest Sympathy" stamp from the Tender Thoughts set.

In case you have not seen my previous blog posts, I have a personal goal to create a card for each of the Splitcoaststampers Sketch Challenges and they now are up to sketch #791 thankfully the challenges never expire :-)).

I am also playing along with the CASOLOGY #363 “Skyline” Challenge (most of their Design Team had city skylines so hopefully a nature skyline will qualify) :-). 

To create this card:

On a piece of acetate (I used a clear envelope that had saved from stamp set packaging), tap a bit of Tumbled Glass, Broken China and Picked Raspberry Distress Oxide Ink onto the acetate. 

Lightly spritz the ink with water, fold the acetate together to “smoosh” the ink, insert a piece of white cardstock and press the ink onto the paper.  Keep repeating until you are satisfied with the results.

De-static the panel with an embossing powder tool, ink the landscape image with Versafine™ Onyx Black Ink (I used my MISTI™ tool to ink up a few times) and stamp onto the panel.  Apply clear embossing powder and heat set with a heat tool. 

Trim the panel and mount onto a piece of black cardstock, trim close to the edge.

De-static a piece of white cardstock for the background, ink the sentiment with Versafine™ Onyx Black Ink and stamp onto the panel (below where you will position the focal image panel).  Apply clear embossing powder and heat set with a heat tool. 

Trim the background panel, mount onto black cardstock and trim close to the edge.  

Mount onto a white card base.

Mount the focal image using dimensional foam to finish off the card.

Stamp Sets: Landscape Silhouettes, Tender Thoughts (both Sweet ‘n Sassy Stamps)

Ink/Mediums: Versafine™ Onyx Black;Tim Holtz™ Distress Oxide Inks- Tumbled Glass, Broken China, Picked Raspberry

Cardstock/Paper:  Whisper White, Basic Black

Accessories: MISTI™, Embossing Buddy®, Clear EP, Heat Tool, Acetate Envelope, Water Spritzer

I am so thankful that you took the time to visit my blog- hugs and I hope you have a fabulous week!

Monday, December 31, 2018

Star of Wonder


Hi Friends!

Happy New Year’s Eve!  I hope all of you are having a safe and fun New Year’s Eve!

Tonight I am sharing another Christmas card designed with We Three Kings from Sweet ‘n Sassy Stamps.

I love the We Three Kings stamp set with the silhouette images and all the different sentiments- perfect for so many styles of cards.  I needed a few additional Christmas cards and decided to pull out my Distress Oxide inks to create a fairly quick and easy card.

I enjoy participating with online challenges and am linking this card to the Simon Says Wednesday “Anything Goes” Challenge. 

If you have not had a chance to visit the Simon Says Wednesday site or the SNSS Blog/FB Page yet, I encourage you to do so- wonderful inspiration from all!

To create this card:

1). Using Tim Holtz® Distress Oxide Inks, apply Tumbled Glass with a sponge dauber onto a piece of white cardstock.  Add a bit of Faded Denim and Picked Raspberry until you are satisfied with the color.  Lightly spritz with water and dry with a heat tool.

2). On another piece of white cardstock, de-static with an embossing powder tool, ink the wiseman image from We Three Kings with archival black ink, stamp onto the prepared cardstock, apply clear embossing powder and heat set with a heat tool.  Once the embossing has cooled, die cut the image with a domed stitched die.

3).  Using the same distress oxide inks as in step 1, apply ink to the sky area to mimic part of the background on the main panel.

4).  De-static the left hand side of the panel with an embossing powder tool, stamp the sentiment and star image from We Three Kings with archival black ink, apply clear embossing powder and heat set with a heat tool. 

5). Mount the die cut domed image with dimensional foam and add a rhinestone to the center of the star.
 
6).  Add a few stars with a Sharpie® Extra Fine White Paint Pen to finish off the card.


Ink/Mediums: Versafine™ Onyx Black, Tim Holtz® Distress Oxide- Tumbled Glass, Faded Denim and Picked Raspberry

Paper/Cardstock: Whisper White

Accessories/Tools:  Big Shot™, MFT Stitched Dome STAX Dies, Embossing Buddy®, Clear Embossing Powder, Heat Tool, Rhinestones

Thanks again for taking the time to visit- hugs and I hope you have a great week!

Sunday, December 30, 2018

Snow Glad We're Friends


Hi Friends!

Today I am sharing another card designed with Sweet ‘n Sassy Stamps-  Snowy Hello and  Texture Tiles 3 using the Try Stampin’ On Tuesday #387 Sketch Challenge for the layout.


If you have not had a chance to visit the above challenge sites or the SNSS Blog/FB Page yet, I encourage you to do so- fabulous inspiration from all!

To create this card:

1). De-static a piece of white cardstock with an embossing powder tool, ink the snowman image from Snowy Hello with Versafine™ Onyx Black ink, apply clear embossing powder and heat set with a heat tool.  Once the embossing has cooled, color the images with water-based markers and die cut with a stitched oval die.  Mount onto an oval doily die from dusty pink cardstock.  Use a permanent marker to create the snow line and apply Tim Holtz® Tumbled Glass Distress Oxide Ink with a sponge to the background.  Add a few snowflakes using a Sharpie® Extra Fine White Paint Pen.

 2).  Stamp the sentiment from  Snowy Hello with Versafine™ Onyx Black ink onto a piece of white cardstock, trim and create the banner by hand.  Mount onto dusty  carpinkdstock and mount onto the lower portion of the oval focal image. 

3). Stamp the texture image from Texture Tiles 3 with Versamark™ ink onto a piece of white cardstock, apply white embossing powder and heat set with a heat tool.  Use a sponge dauber to apply Twisted Citron and Tattered Rose Distress Oxide Ink, wipe the excess off with a dry paper towel.  Trim the panel and mount onto dusty pink cardstock. 

4). Trim a piece of white cardstock to 4” x 5 ¼”  and mount onto a piece of dusty pink cardstock 4 ¼” x 5 ½”.  Adhere the panel to a white card base and add the panel of horizontal panel created in step 3.

5). Mount the snowman image with dimensional foam and add a few sequins.  Use a clear glitter pen to add shimmer to the snow and snowman to finish off the card.


Ink/Mediums: Versamark™, Versafine™ Onyx Black, Stampin’ Write markers- Blushing Bride, Early Espresso, Lemon Lime Twist, Pumpkin Pie, Smoky Slate; Tim Holtz® Distress Oxide- Tumbled Glass, Twisted Citron, Tattered Rose; Spectrum Noir™ Clear Glitter Pen,  Sharpie® Extra Fine White Paint Pen

Cardstock/Designer Paper: Whisper White, Blushing Bride (Stampin’ Up!)

Accessories/Tools: Embossing Buddy®, Clear & White Embossing Powder, Heat Tool,  My Favorite Things Dies- Stitched Oval STAX, Oval Open Scallop Doily; AquaPainter™, Sponge Dauber, Sequins

Thanks again for taking the time to stop by- I hope all of you have a wonderful and safe New Year’s Eve and New Year!

Related Posts Plugin for WordPress, Blogger...