Showing posts with label Snowman. Show all posts

Sunday, December 30, 2018

Snow Glad We're Friends


Hi Friends!

Today I am sharing another card designed with Sweet ‘n Sassy Stamps-  Snowy Hello and  Texture Tiles 3 using the Try Stampin’ On Tuesday #387 Sketch Challenge for the layout.


If you have not had a chance to visit the above challenge sites or the SNSS Blog/FB Page yet, I encourage you to do so- fabulous inspiration from all!

To create this card:

1). De-static a piece of white cardstock with an embossing powder tool, ink the snowman image from Snowy Hello with Versafine™ Onyx Black ink, apply clear embossing powder and heat set with a heat tool.  Once the embossing has cooled, color the images with water-based markers and die cut with a stitched oval die.  Mount onto an oval doily die from dusty pink cardstock.  Use a permanent marker to create the snow line and apply Tim Holtz® Tumbled Glass Distress Oxide Ink with a sponge to the background.  Add a few snowflakes using a Sharpie® Extra Fine White Paint Pen.

 2).  Stamp the sentiment from  Snowy Hello with Versafine™ Onyx Black ink onto a piece of white cardstock, trim and create the banner by hand.  Mount onto dusty  carpinkdstock and mount onto the lower portion of the oval focal image. 

3). Stamp the texture image from Texture Tiles 3 with Versamark™ ink onto a piece of white cardstock, apply white embossing powder and heat set with a heat tool.  Use a sponge dauber to apply Twisted Citron and Tattered Rose Distress Oxide Ink, wipe the excess off with a dry paper towel.  Trim the panel and mount onto dusty pink cardstock. 

4). Trim a piece of white cardstock to 4” x 5 ¼”  and mount onto a piece of dusty pink cardstock 4 ¼” x 5 ½”.  Adhere the panel to a white card base and add the panel of horizontal panel created in step 3.

5). Mount the snowman image with dimensional foam and add a few sequins.  Use a clear glitter pen to add shimmer to the snow and snowman to finish off the card.


Ink/Mediums: Versamark™, Versafine™ Onyx Black, Stampin’ Write markers- Blushing Bride, Early Espresso, Lemon Lime Twist, Pumpkin Pie, Smoky Slate; Tim Holtz® Distress Oxide- Tumbled Glass, Twisted Citron, Tattered Rose; Spectrum Noir™ Clear Glitter Pen,  Sharpie® Extra Fine White Paint Pen

Cardstock/Designer Paper: Whisper White, Blushing Bride (Stampin’ Up!)

Accessories/Tools: Embossing Buddy®, Clear & White Embossing Powder, Heat Tool,  My Favorite Things Dies- Stitched Oval STAX, Oval Open Scallop Doily; AquaPainter™, Sponge Dauber, Sequins

Thanks again for taking the time to stop by- I hope all of you have a wonderful and safe New Year’s Eve and New Year!

Friday, January 15, 2016

Snowman with Skates- Sweet 'n Sassy Stamps New Digi Release


Hi Again Friends!

Woohoo!  Today, Sweet ‘n Sassy Stamps is releasing several new digital (“digi”) stamps and this is the second card that I created with a few of the new release digis as well as a traditional clear stamp set  (please see this post for my first card using Snowman's Gift).

This Clean and Simple (CAS) card showcases the Sweet 'n Sassy Stamps (SNSS) Snowman with Skates Digital Stamp along with the sentiment from the Snowman Soup Sentiments Digital Set and actual ink stamping with the Winter Blessings Clear Stamp Set.   I think this snowman is so cute with his skates and cocoa mug, don’t you?


I also incorporated the CAS356 “Some People Are Worth Melting For”Challenge along with the SC574 Sketch Challenge – both at Splitcoaststampers’ (SCS) for the layout.

If you have not visited the Sweet ‘n Sassy Stamps (SNSS) site or the SCS galleries yet, I hope you will find time to do so- fabulous samples from all!


To create this card:


Print the images out onto Whisper White cardstock and color with a water brush and markers.

Mask the snowman and sponge Pool Party Classic Ink around the “sky” and stamp the Winter Blessings snowflakes with Pool Party Classic Ink as well.

Use a Black Marker to draw the horizon line, punch out the image with a 2 ½” Circle Punch and mount onto a circle punched from Island Indigo cardstock.

Use the Big Shot™ with the Darice® Snowflake Swirl Embossing Folder to emboss a piece of Whisper White cardstock, trim and mount onto a piece of Island Indigo cardstock.

Add the two strips of ¼” Stitched Island Indigo Satin Ribbon and mount onto the Pool Party card base.

Stamp a few snowflakes from Winter Blessings with Pool Party Classic Ink over the sentiment, trim and create the banner points by hand or with a punch.  Create banner points into a scrap piece of Island Indigo cardstock and mount behind the sentiment.

Mount the Snowman with Skates  digi image along with the Snowman Soup Digital Sentiment onto the card front to the card front using dimensional foam.

Paint the wooden snowflake with Titanium White Acrylic Paint and mount onto the snowflake image, add the Pearl to the center of the snowflake to finish off the card.


Ink: Printer Ink- Black, Pool Party, Stampin’ Write Markers- Island Indigo, Pink Pirouette, Pumpkin Pie, Sahara Sand, Smoky Slate; Titanium White Acrylic Paint

Paper: Whisper White, Island Indigo, Pool Party

Accessories:  Big Shot™, Darice® Snowflake Swirl Embossing Folder, Punches- 2 ½” Circle, Banner; Wooden Snowflake, Water Brush, Pearl, retired  ¼” Stitched Island Indigo Satin Ribbon 

I know I had fun creating with the new Sweet 'n Sassy Digital Stamps and I hope you will give it a tryl!


Thanks again for stopping by- have a blessed weekend, my friends!

Tuesday, December 8, 2015

SUO137 Snowman Fun

Hello Friends!   

It’s time for the new SUO137 “Cards or Gifts for Children” Challenge – create a card or project for children for the Christmas holiday or any other holiday of your choice.

I have to admit, this was a tough one for me...since we no longer have young children in our family, I do not have many current “cutesy” Stampin’ Up! sets... so I decided to go with punch art (I used Pinterest for inspiration and there are so many great ideas out there :-))

I hope you will have a chance to check out my sister Design Team member samples at the SU-Only Challenge site, pull out your Stampin’ Up! supplies and create your own “Stampin’ Up! Only” project for our challenge gallery. 

I am also linking to the Dragonfly Journeys #34 "Do You Wanna Build A Snowman?" Challenge (thanks, Jeannie for letting me know about your challenge) :-)  

This is a very easy card to make:

Punch two circles from Whisper White cardstock for the snowman’s body, the arms are from Early Espresso cardstock using the Tree Builder Punch, the hat is created from the 1 ⅜” Square Punch and a few scraps of cardstock, the holly is from the Bird and Owl Builder Punches and the carrot nose was cut free-hand.

The sentiment banner is from the White Christmas stamp set (stamped using Memento™ Tuxedo Black Ink and colored with the Delightful Dijon Stampin’ Write Marker).

Quick and fun- do you think a child would enjoy this card? Or maybe even an adult who likes snowmen?  I know I giggled as I made this card so hopefully someone would like to receive it :-)

Stamp Sets:  White Christmas

Ink:  Memento™ Tuxedo Black, Smoky Slate (sponging around the body); Stampin’ Write Markers-  Delightful Dijon and Sahara Sand; White Gel Pen
Paper/Cardstock: Whisper White, Basic Black, Delightful Dijon, Cucumber Crush, Cherry Cobbler
Accessories: Big Shot™, Decorative Dots Textured Impressions™ Embossing Folder, Sponge Dauber, Punches- 1 ¾” and 2 ½” Circle, Bird Builder, Owl Builder, Tree Builder, 1 ⅜” Square

Thanks again for stopping by and we hope to see your Stampin’ Up! Only project in our “Cards orGifts for Children” Challenge gallery!  Hugs and have a blessed week, my friends!

Monday, November 9, 2015

Happy 8th Birthday Sweet 'n Sassy Stamps!


 Hello Friends!

Woohoo!!  Today we are celebrating Sweet ‘n SassyStamps 8th Birthday with a fun Design Team blog hop!   Check out the Design Diva's links below to visit all of their blogs and leave a comment (we have a Birthday Prize drawing as well- see more details below) :-)

Domestic USPS -
use codeBDAYFREESHIP
In addition to the blog hop, we have another SWEET deal for you- all orders of $30 or more receive FREE SHIPPING!! (please use code BDAYFREESHIP during checkout- offer ends Thursday, November 12,2015).  NOTE: Free shipping is for Domestic First Class through the USPS.  Happy shopping!

I decided to share a card that I designed using the fun Snowman Soup Stamp Set along with WinterBlessings for a warm, winter celebration card!   FYI- I am also linking this card to the Splitcoaststampers' F4A298 "Coffee Please" Challenge (I rarely drink coffee but love hot cocoa in the winter) :-)

To create this card:

Sweet 'n Sassy Stamps- Snowman Soup, Winter Blessings
Ink the Snowman Soup image using Memento™ Tuxedo Black Ink and stamp onto Very Vanilla cardstock.

Color the hat, coat and mug with a water brush and retired Stampin’ Up!  More Mustard and Midnight Muse Classic Ink, use Stampin’ Write Markers for the scarf and mittens (Pear Pizzazz), the carrot nose (Pumpkin Pie) and Sahara Sand for the shadows.

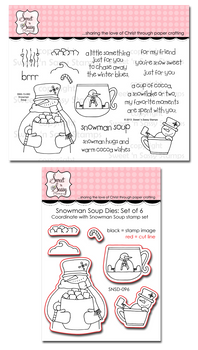
You can cut the image out with the coordinating Snowman Soup Dies (I have these on my wish list so I  fussy-cut the image) and set aside.

Ink a portion of the Winter Blessings stamp with retired More Mustard Classic Ink and stamp onto retired More Mustard cardstock.

Trim the More Mustard stamped panels and stitch a rectangle with a zigzag stitch onto Midnight Muse cardstock, trim carefully and mount onto a piece of More Mustard cardstock.

Add the Snowman Soup image to the panel using dimensional foam and adhere the 5/8” Gold Satin Triple Ribbon Bow.

Adhere a piece of My Mind’s Eye™ Asparagus™ Designer Paper to a piece of More Mustard cardstock with a zigzag stitch on the sewing machine, trim carefully and mount onto the Midnight Muse card base.

Add the horizontal strips of stamped More Mustard panels mounted onto Midnight Muse with the zigzag stitch and mount the entire panel onto the card base (I generally use white but you can use any color you choose since you will not see this base from the front of the card).

Stamp the sentiment with Memento™ Tuxedo Black Ink onto a scrap piece of Very Vanilla cardstock, huff onto the previously inked portion of the Winter Blessings stamp, lay the sentiment down to stamp a bit of the background onto the panel, trim and create the flag by hand or with a punch.

Adhere the snowflake charm with gold thread to the card front (making sure that the end will be behind the sentiment- I use Hot Glue for this step) and mount the sentiment to the card front using dimensional foam.

Add the focal image panel to the card and finish off with a few Pearls to the corners of the card and a Rhinestone to the center of the snowflake charm.

I hope you enjoy this fun card!  I would love to see your comments and hope you have time to visit and comment on all of my DT Sister's blogs for our Special 8th Birthday Blog Hop!  Don't  forget to comment for a chance to win this fabulous Birthday Party Prize!!


Linky Code:
Snowman Soup

Stamp Sets: Snowman Soup, Winter Blessings  (SNSS)

Ink: Memento™ Tuxedo Black Ink, Stampin’ Up! Classic Ink- retired More Mustard and Midnight Muse; Stampin’ Write Markers- Pear Pizzazz, Sahara Sand, Pumpkin Pie

Winter Blessings
Paper: Stampin’ Up! Very Vanilla, retired More Mustard and Midnight Muse cardstock; My Mind’s Eye™ Asparagus™ Designer Paper

Accessories: Sewing Machine, Hexagon Punch, Snowflake Charm, Pearls, Rhinestone, 5/8” Gold Satin Ribbon

Hugs and have a blessed week, my friends!

Wednesday, September 16, 2015

Snowman Soup- Wishing You A Merry Christmas!!


Hi Friends!


Although I do drink coffee occasionally, I have to "doctor" it up with Hot Chocolate so a true coffee drinker would say "That's not coffee at all!" - lol!!  So, I guess, Hot Chocolate would be my choice of drink :-)

Again, if you have not already done so, I hope you will find the time to visit the above links to check out their wonderful Design Team entries as well as all of their galleries!

This card was extremely easy to make:

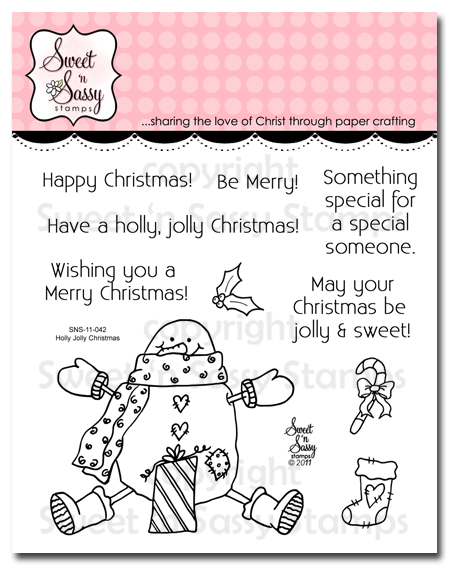
Sweet 'm Sassy Stamps- Snowman Soup, Holly Jolly Christmas
Use the Big Shot™ to emboss the background paper with the Square Lattice Textured Impressions™ Embossing Folder (retired Stampin’ Up!) and stitch this layer to a piece of Chocolate Chip cardstock.  Mount the entire panel onto the white card base.

Stitch a coordinating piece of background paper to a piece of Chocolate Chip cardstock for the upper layer of the sketch and adhere the 5/8” Chocolate Chip Satin Ribbon triple bow.

Punch out three circles from Chocolate Chip cardstock and add the three circles of background paper (also punched and mounted onto circles of white cardstock).

Adhere an embossed piece of Real Red cardstock to Chocolate Chip for the vertical layer of the sketch and add the three punched circles.

Stamp the Sweet ‘n Sassy Stamps Snowman Soup image using a waterproof black ink and color with water brush and water based markers.  Carefully cut out the image (I decided to fussy cut but there is a coordinating Snowman Soup die set from Sweet ‘n Sassy Stamps  as well).

Stamp the sentiment from Holly Jolly Christmas with black ink and create the banner points with the Hexagon Punch or by hand.

To assemble the card- add the stitched layer with the bow to the card front, mount the vertical strip with the three punched elements using dimensional foam, add the Snowman Soup image and Holly Jolly Christmas sentiment with dimensional foam.

Add a few Pearls to the center of the snowflakes on the punched images and the snowman’s hat to finish off the card.
Snowman Soup
Holly Jolly Christmas


Stamp Sets: SnowmanSoup, Holly Jolly Christmas ( both SNSS)

Ink: Stāz-On® Jet Black, Stampin’ Write Markers- Chocolate Chip, Old Olive, Pumpkin Pie, Real Red, Tempting Turquoise, Sahara Sand

Paper: Whisper White, Chocolate Chip, Real Red, retired DSP

Accessories: Big Shot™, retired Square Lattice and Pretty Petals Textured Impressions™ Embossing Folders,  Punches- 1”  and 1 3/8” Circle, Hexagon; retired 5/8” Chocolate Chip Satin Ribbon, Pearls


So which do you prefer- Coffee, Tea or Hot Chocolate?

Thanks again for taking the time to stop by- hugs and have a great day, my friends!

Thursday, September 3, 2015

Snowman Soup- Snowman Hugs and Warm Cocoa Wishes :-)


Hi Friends!

Woohoo!  I am so excited to be a Guest Designer for Sweet ‘n Sassy Stamps for the month of September and October!! 

This card highlights one of the stamp sets offered in the September Sweet Perks Club, Snowman Soup Bundle  and I have incorporated the Freshly Made Sketches FMS202 Sketch  as well as the  Splitcoaststampers CAS309 "Snowmen" Challenge for my design.

This card was extremely easy to create:

Stamp the Sweet ‘n Sassy (SNSS) Snowman Soup image using Stāz-On® Jet Black Ink and color with water based markers, trim and mount onto Early Espresso cardstock.

Mount the designer paper onto white cardstock, trim and mount onto the Early Espresso card base.

Add the sentiment banner to the Snowman Soup image (heat embossed using White Embossing Powder) along with the Cherry Cobbler button and Natural Linen Thread.

Mount the focal image onto the card front with foam squares to finish off the card.

I think this image would be a cute cover for a pack of cocoa as well, don’t you?

Products Used:  SnowmanSoup (SNSS); Stāz-On® Jet Black, various markers (SU!!), Cardstock- White, Early Espresso (SU!),  retired Trim the Tree Designer Series Paper (SU!), Heat Tool, White Embossing Powder, Natural Linen Thread (SU!), retired Cherry Cobbler button (SU!)


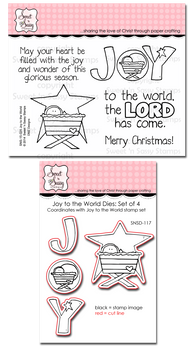
The Snowman Soup bundle along with Holly Jolly Christmas and Joy to the World are available at a discounted price until September 10th.  


Thanks again for taking the time to stop by- hugs and have a blessed day, my friends!
Related Posts Plugin for WordPress, Blogger...