Showing posts with label SNSSDT. Show all posts

Friday, January 15, 2016

Snowman with Skates- Sweet 'n Sassy Stamps New Digi Release


Hi Again Friends!

Woohoo!  Today, Sweet ‘n Sassy Stamps is releasing several new digital (“digi”) stamps and this is the second card that I created with a few of the new release digis as well as a traditional clear stamp set  (please see this post for my first card using Snowman's Gift).

This Clean and Simple (CAS) card showcases the Sweet 'n Sassy Stamps (SNSS) Snowman with Skates Digital Stamp along with the sentiment from the Snowman Soup Sentiments Digital Set and actual ink stamping with the Winter Blessings Clear Stamp Set.   I think this snowman is so cute with his skates and cocoa mug, don’t you?


I also incorporated the CAS356 “Some People Are Worth Melting For”Challenge along with the SC574 Sketch Challenge – both at Splitcoaststampers’ (SCS) for the layout.

If you have not visited the Sweet ‘n Sassy Stamps (SNSS) site or the SCS galleries yet, I hope you will find time to do so- fabulous samples from all!


To create this card:


Print the images out onto Whisper White cardstock and color with a water brush and markers.

Mask the snowman and sponge Pool Party Classic Ink around the “sky” and stamp the Winter Blessings snowflakes with Pool Party Classic Ink as well.

Use a Black Marker to draw the horizon line, punch out the image with a 2 ½” Circle Punch and mount onto a circle punched from Island Indigo cardstock.

Use the Big Shot™ with the Darice® Snowflake Swirl Embossing Folder to emboss a piece of Whisper White cardstock, trim and mount onto a piece of Island Indigo cardstock.

Add the two strips of ¼” Stitched Island Indigo Satin Ribbon and mount onto the Pool Party card base.

Stamp a few snowflakes from Winter Blessings with Pool Party Classic Ink over the sentiment, trim and create the banner points by hand or with a punch.  Create banner points into a scrap piece of Island Indigo cardstock and mount behind the sentiment.

Mount the Snowman with Skates  digi image along with the Snowman Soup Digital Sentiment onto the card front to the card front using dimensional foam.

Paint the wooden snowflake with Titanium White Acrylic Paint and mount onto the snowflake image, add the Pearl to the center of the snowflake to finish off the card.


Ink: Printer Ink- Black, Pool Party, Stampin’ Write Markers- Island Indigo, Pink Pirouette, Pumpkin Pie, Sahara Sand, Smoky Slate; Titanium White Acrylic Paint

Paper: Whisper White, Island Indigo, Pool Party

Accessories:  Big Shot™, Darice® Snowflake Swirl Embossing Folder, Punches- 2 ½” Circle, Banner; Wooden Snowflake, Water Brush, Pearl, retired  ¼” Stitched Island Indigo Satin Ribbon 

I know I had fun creating with the new Sweet 'n Sassy Digital Stamps and I hope you will give it a tryl!


Thanks again for stopping by- have a blessed weekend, my friends!

Snowman's Gift- A New Digital Stamp from Sweet 'n Sassy Stamps

Hi Friends!

I hope all of you are having a wonderful week so far!  Today, Sweet ‘n Sassy Stamps is releasing several new digital (“digi”) stamps and I had a chance to create two cards with some of the new digi stamps (fyi- I will be posting each card in a separate blog post so I can link to the various challenges, etc. .:-))

This card showcases the  Snowman’s Gift Digital Stamp for the main image, the sentiment is from the new Snowman Soup Sentiments Digital Set and I used the Winter Blessings Clear Stamp Set for the snowflakes in the background.   

Isn’t this image adorable?  A cute little bunny giving this sweet snowman a carrot for his nose..what a gift for sure!

I also decided to incorporate the SC571 Sketch from Splitcoaststampers’ (SCS) for the layout.   If you have not visited the Sweet ‘n Sassy Stamps (SNSS) site or the SC571 gallery yet, I hope you will find time to do so- fabulous samples from the SNSS Design Team as well as the SCS gallery!!

To create this card:

Open a Word Document and insert the Snowman’s Gift Digital Stamp image along with the sentiment image from Snowman Soup Digital Sentiments.

Re-size as needed (click here for a fabulous video tutorial from Korin Sutherland, owner of Sweet ‘n Sassy Stamps on how to re-size and crop digital images in Word).

Print the images out onto Whisper White cardstock and color with a water brush and markers.

Mask the images and sponge Pool Party Classic Ink around the “sky” and stamp the Winter Blessing snowflakes.

Use a Black Marker to draw the horizon line, trim the panel and stitch to a piece of Early Espresso cardstock using a zigzag stitch with the sewing machine.

Stitch a piece of Pool Party to a piece of Early Espresso cardstock with a smaller zigzag stitch and stamp a few more snowflakes from Winter Blessing.

Use the Big Shot™ with the retired Square Lattice Textured Impressions™ Embossing Folder to emboss a piece of retired Designer Series Paper (DSP) and use the zigzag stitch to attach it to a piece of Early Espresso cardstock.

Mount the embossed sewn panel onto the Whisper White card base, add the Pool Party background panel to the card front and mount the Snowman’s Gift focal image panel to the front using dimensional foam.

Stamp a few snowflakes from Winter Blessing with Pool Party Classic Ink over the sentiment, trim and create the banner points by hand or with a punch.  Mount onto Early Espresso cardstock, create the banner points and add the snowflake charm with silver cord.

Mount the sentiment to the card front with dimensional foam to finish off the card.


Ink: Printer Ink- Black, Pool Party, Stampin’ Write Markers- Cucumber Crush, retired Going Gray, Melon Mambo, Pink Pirouette, Pumpkin Pie, Sahara Sand, Soft Sky


Paper: Whisper White, Early Espresso, Pool Party, retired DSP

Accessories:  Big Shot™, retired Square Lattice Textured Impressions™ Embossing Folder, Sewing Machine, White Thread, Hexagon Punch, Snowflake Charm, Silver Cord, Water Brush

There are several things that I love about working with digital stamps- of which, you can re-size the images and color just like a regular stamp plus they do not take up any space in your craft room! A "win-win" for me :-)

I hope you will take the time to check out the rest of the new Sweet ‘n Sassy Stamps Digital Release and have fun designing with your new digital stamps!

Thanks again for stopping by, I will be back shortly with my second card :-)

Saturday, November 14, 2015

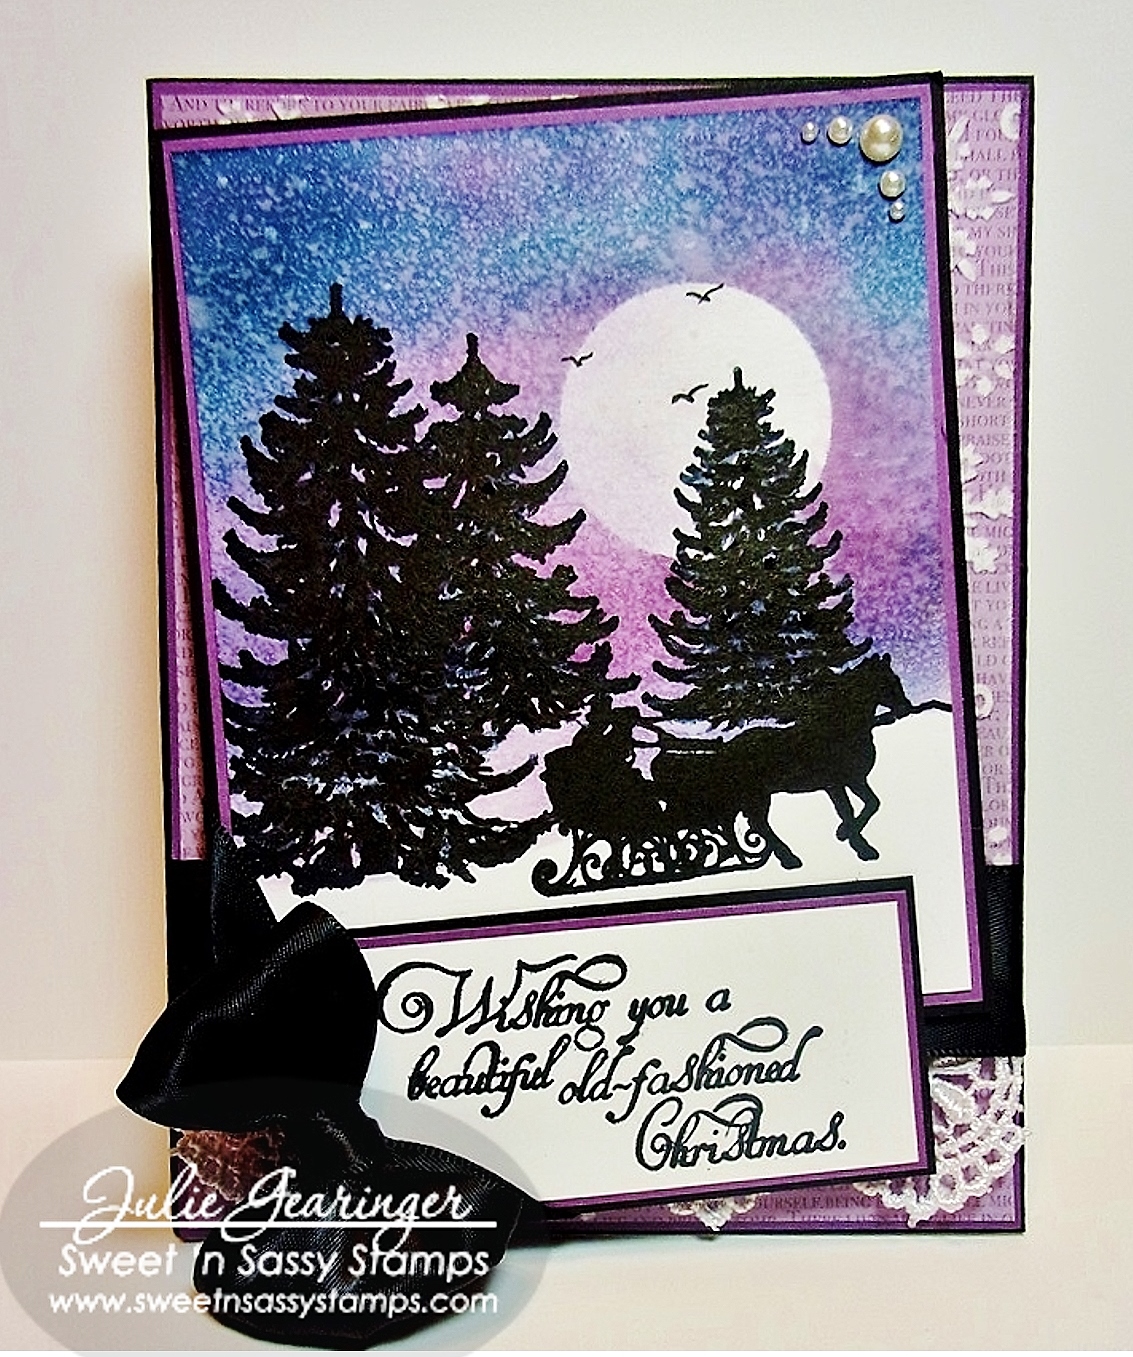
Old-Fashioned Christmas

Hello Friends!

We are still celebrating Sweet ‘n Sassy Stamps’ 8th Birthday all month long in November with lots of fun surprises!  You can check out all the details HERE!  

Don't forget to follow along on Instagram (@sweetnsassystamps) and Facebook for daily inspiration plus a few giveaways throughout the month!

This card was created with the Old-Fashioned Christmas stamp set featured as today’s "throwback" stamp set on the Sweet ‘n Sassy Stamps (SNSS) blog.

This is a very easy card to create using a masking technique- please see the step by step instructions on the SNSS blogpost.

Stamp Sets:  Old Fashioned Christmas

Ink: Versamark™, Stampin’ Up!- Perfect Plum, Wild Wisteria, Midnight Muse

Paper: Stampin’ Up! Whisper White, Basic Black, Perfect Plum; Perfect Plum Designer Series Paper (retired)

Accessories:  Big Shot™, Darice® Snowflake Embossing Folder, MISTI™, Sanding Block, 5/8” Black Satin Ribbon, Pearls, Micron™ Pen, Titanium White Acrylic Paint

Thanks again for stopping by- have a blessed weekend, my friends!

Sunday, October 25, 2015

Name Above All Names- A CAS Christmas Card

Hi Friends!!

I wanted to share another card with one of the new sets from Sweet ‘n Sassy Stamps' October 2015 release, Name Above All Names. 

In addition to being a great set for Bible Art Journaling, it also is fun for quick cards to share with your loved ones!


I hope you will take the time to visit the blog post over at Sweet ‘n Sassy Stamps to check out how I created this quick and easy card for Christmas- it would be really easy to create multiples of this card :-)


I just love the new Name Above All Names set, don’t you? 

Saturday, October 17, 2015

HYCCT1516 Sending You Warm Hugs

Hi Again Friends!!

This card was created for the Splitcoaststampers Hope You Can Cling To  HYCCT1516 Lisa’s (aka Shoe Girl)  “Hugs!” Challenge along with the Freshly Made Sketches FMS208 Sketch.

The “Hugs!” challenge is to use either an image showing a hug and/or the word hug(s) in the sentiment....it seems that I am a bit short on images with hugs so I chose the “hug” in the sentiment option.

Again, I hope you will have a chance to visit both of the above galleries and possibly take some time to create a card and join in on the fun!!

To create this quick clean and simple (CAS) card:

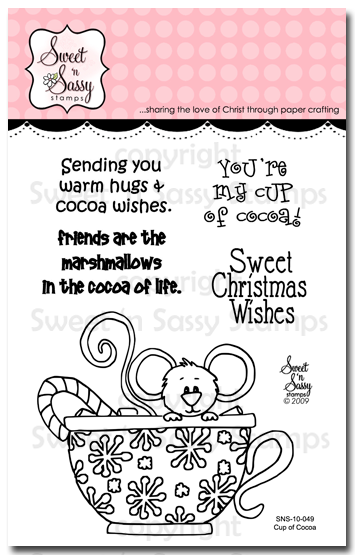
Ink the Sweet ‘n Sassy Stamps Cup of Cocoa using Stāz-On® Jet Black Ink and stamp onto Whisper White cardstock.

Color the Cocoa Mouse image with an AquaPainter™ and Stampin’ Up Markers- Basic Gray and Real Red.  Color the candy cane and cup directly with the Real Red and Night of Navy Markers.

Add shadows with the Sahara Sand Marker and paint the cup with Frost White Shimmer Paint.

Trim the image and mount onto Real Red and Night of Navy cardstock.

Stamp the sentiment with Memento™ Tuxedo Black Ink onto Whisper White cardstock, create the banner with the Hexagon Punch, mount onto Real Red cardstock (creating  the banner with the Hexagon Punch) and mount onto a piece of Night of Navy cardstock (again, creating the banner points with the Hexagon Punch).

Side View- Isn't Cocoa cute?  Love the expression on his face :-)
Emboss a piece of Whisper White cardstock using the Big Shot™ with a snowflake embossing folder, trim and mount onto a piece of Real Red cardstock, trim and mount onto Night of Navy cardstock, add the Denim  Ribbon along with the Real Red Grosgrain Ribbon (wrapping the ends to the back of the panel) and  mount onto the Whisper White card base.

Add the Cocoa Mouse focal image along with the sentiment using dimensional foam.
Paint the wooden Snowflake  Element with Frost White Shimmer Paint, add to the card front along with Rhinestones to finish off the card.
Cup of Cocoa

Stamp Sets:  Cup of Cocoa (SNSS)

Ink: Memento™ Tuxedo Black, Stāz-On® Jet Black, Stampin’ Write Markers- Night of Navy, Real Red, Sahara Sand; Frost White Shimmer Paint

Paper: Whisper White, Night of Navy, Real Red

Accessories: Big Shot™, Sizzix® Snowflake Embossing Folder, Hexagon Punch, 3/8” Denim Ribbon, ¼” Real Red Grosgrain Ribbon, Snowflake Elements, Rhinestones


Thanks again for taking the time to stop by- hugs and have a great weekend!

Friday, October 16, 2015

Sweet 'n Sassy October 2015 Release

Hi Friends!

Woohoo!!  Today is release day at Sweet ‘n Sassy Stamps and I have two cards to share with you from the new sets, Winter Blessings and Message of Hope.

Both cards were created from one main background panel and incorporate different sketch layouts from Splitcoaststampers- card #1 uses Sketch #SC508 and card #2 uses Sketch #SC515.

To create the background panel:

De-static a piece of watercolor paper with the Embossing Buddy®, ink the background stamp from Winter Blessings with Versamark™ ink and stamp onto the prepared watercolor paper, apply White Embossing Powder and heat set with the Heat Tool.

Spritz the embossed image with water and drop Brusho® Colour Crystals onto the wet areas, spritzing again and allowing the colors to spread (I used Turquoise and Purple).

Heat with the Heat Tool to dry and cut into the sizes needed for your panels.

To create the card #1:

It is a bit difficult to see the white embossed snowflakes on the bottom panel
(the rhinestones are in the centers of a few) 
Use a 1 ¼” Square Punch to punch out the squares from the watercolored /embossed background panel and mount onto piece of purple cardstock, trim and mount onto a piece of brushed silver cardstock, trim and mount onto another piece of purple cardstock.

Stamp the individual snowflakes from Winter Blessings with Versamark™ ink onto a prepared piece of white cardstock, apply white embossing powder, set the powder with the heat tool and stamp the sentiment from Winter Blessings with purple ink.

Trim the heat embossed snowflake panel and add to a piece of purple cardstock.

Dry emboss the remaining piece of white cardstock (from the trimmed panel in the step above) with a snowflake embossing folder, mount onto a piece of brushed silver cardstock and add the 5/8” silver satin ribbon to cover the seam.
Mount the entire background panel onto a piece of purple cardstock, trim and mount onto the white card base.

Add the layered snowflake focal image panel using dimensional foam and add Rhinestones to the snowflake centers to finish off the card.

To create card #2:

Ink the “Peace” Sentiment from Message of Hope with Versamark™ ink, stamp onto a piece of prepared Vellum, apply white embossing powder and heat set with the Heat Tool.

Trim the embossed Winter Blessings Brusho® background panel to approx. 3 “x 3 ½” and add the embossed Vellum “Peace” sentiment  (wrapping the ends of the Vellum behind the panel to secure), mount onto a piece of white cardstock, trim and mount onto a piece of purple cardstock.

Emboss a piece of white cardstock with a snowflake embossing folder, trim and mount onto a piece of purple cardstock, add the white crochet lace along with the 5/8” silver satin ribbon strip and triple satin ribbon bow.  Mount this panel onto the white card base using dimensional foam.

Add the focal image “Peace” panel with dimensional foam and adhere a few Rhinestones to finish off the card.

Two cards from one panel (plus a few strips leftover for my scraps) :-)


To see more gorgeous samples made by the Design Divas using the new stamp sets from the October Release, please click on the links below for our blog hop! Don't forget to leave a little "love" on each blog as you hop along  :-)


Stamp Sets: WinterBlessings, Messages of Hope (SNSS)

Other Supplies: Versamark™ Ink, Elegant Eggplant Classic Ink (Stmapin' Up!); Brusho® Colour Crystals- Turquoise, Purple, Watercolor Paper, Whisper White and Elegant Eggplant cardstock  (Stampin' Up!), Vellum (card  #2), Big Shot™, Darice™ Snowflake Embossing Folder, Embossing Buddy®, Stampin’ Emboss® White Embossing Powder, Heat Tool, 5/8” Silver Satin Ribbon and Rhinestones (Stampin' Up!), Crochet Lace (Hobby Lobby)

Thanks again for stopping  by- have a fabulous Friday, my friends!

Sunday, October 11, 2015

Winter Blessings Quilt- Sneak Peak :-)

Hi Friends!

Today I am sharing a sneek peak of one of the upcoming new sets from Sweet 'n Sassy Stamps (due to be released on 10/16/15). 

I have more details (and another view) on the Sweet 'n Sassy blog post today, so I hope you will stop by to check it out!


Stamp Sets:  
Winter Blessings (release date 10/16/15), 
 Peace of God (SNSS)

Sunday, October 4, 2015

Faith, Hope and Love- Fun with Prim Blessings


Hi Friends!

I hope all of you are having a great weekend so far!  I finally had a chance to play with some of my new Sweet ‘n Sassy Stamps and decided to create a Mixed Media card using Prim Blessings for the  Splitcoaststampers’ F4A290 “Hopeful Change” Challenge as well as the HYCCT1502 "Cancer Free" Freestyle Collage Challenge.

Sunflowers are such a fun sign of summer and to me the hopeful change is when they produce the seeds that the birds will feast on in the fall and winter!  My husband and I love to feed the birds and black oil sunflower seeds are one of their favorite treats :-)

If you have not visited the Splitcoaststampers’ F4A290 gallery yet, I hope you will find the time to do so- great inspiration from all!

This card was fairly easy to create but did take a bit of time with all of the stitching :-)

Stamp the Prim Blessings sunflower and  sentiment onto white cardstock, color with markers and a water brush, carefully cut out the images (or you can use the cute coordinating Primrose Blessings Die Set), add the stenciling to the background paper and use a sewing machine to stitch the distressed layers onto the card.

Finish with a natural linen thread bow and a few punched leaves.


Ink: Basic Black Archival Ink, Delightful Dijon, Daffodil Delight; Stampin’ Write Markers- Daffodil Delight, Delightful Dijon, Early Espresso, Soft Suede; Faber Castell White Pitt Pen marker
Prim Blessings 

Paper: Whisper White, Early Espresso, Pool Party; retired Epic Day This and That and Botanical Gazette DSP

Accessories: Sewing Machine, AquaPainter™, MS Leaf Punch. Natural Linen Thread


Thanks again for taking the time to stop by- hugs and have a blessed day, my friends!
Related Posts Plugin for WordPress, Blogger...