Showing posts with label Paper Quilt. Show all posts

Wednesday, January 14, 2026

TCC223 I Will Give You Rest


Hi Friends!

Today, we are starting our January #223 Cozy New Year Challenge.  

I was inspired by the Nordic pattern in the coffee cup along with the textures from our photo to create a  Clean and Layered/ Mixed Media card.

We hope that you will take a moment to stop by our challenge blog and check out how the rest of our wonderful Design Team was inspired as well!

We are looking forward to seeing how you may be inspired by our photo.  Would it be the colors, coffee/hot chocolate, textures, or something else?

We are looking forward to seeing your card in our gallery!

I enjoy playing along with online challenges and will be linking this card to the Word Art Wednesday #734-#735 “Anything Goes” Challenge.

To create this card:

De-static a piece of white cardstock with an embossing powder tool, ink the sentiment from Scripture Collection 4 with Versafine Black Onyx ink, stamp onto the prepared cardstock paper and apply clear embossing powder.

Heat set the powder with a heat tool and once cooled, die cut with a square die and mount onto a piece of black cardstock (trimming close to the edge).


To create the background, cut five pieces of the Let's Get Cozy designer paper to 3 3/4" x 5".   

Using the Stack ‘n Quilt method (see the tutorial here at Splitcoaststampers),  stack the five pieces together and cut along the diagonal, across, etc., layer onto white cardstock (per the tutorial).

Emboss the panels with the Tin Tile embossing folder, trim close to the edge.

Mount onto another piece of white cardstock, trimming close to the edge. 

Layer a piece of burgundy satin ribbon along with the midnight stitched ribbon over the diagonal, wrap the edges behind the panel.

Mount the entire panel onto a piece of midnight cardstock, trim and adhere to a white card base.

Mount the layered verse sentiment to the card front with dimensional foam to finish off the card.

Stamp Sets: Scripture Collection 4 (Divinity Designs, LLC)

Inks/Mediums: Versafine Black Onyx

Cardstock/Paper: White, Midnight Muse, Let’s Get Cozy (Graphic 45)

Accessories/Tools: Gemini, Jr., Square Die Cuts (Spellbinders), Tin Tile Embossing Folder (Stampin’ Up!), Embossing Powder Tool, Clear Embossing Powder, Heat Tool, 1” Burgundy Satin Ribbon, Midnight Muse Stitched ⅜” Ribbon

I hope you have had a chance to stop by The Card Concept to see how the rest of the Design Team were inspired as well as check out the other challenge gallery entries- wonderful inspiration from all!

We hope you are inspired to create a card and join us for our Cozy New Year Challenge at The Card Concept!  The deadline to play along is Monday, February 9th at noon EDT. 

Wednesday, February 15, 2023

TCC189 Cozy Comfort


Hi Friends!

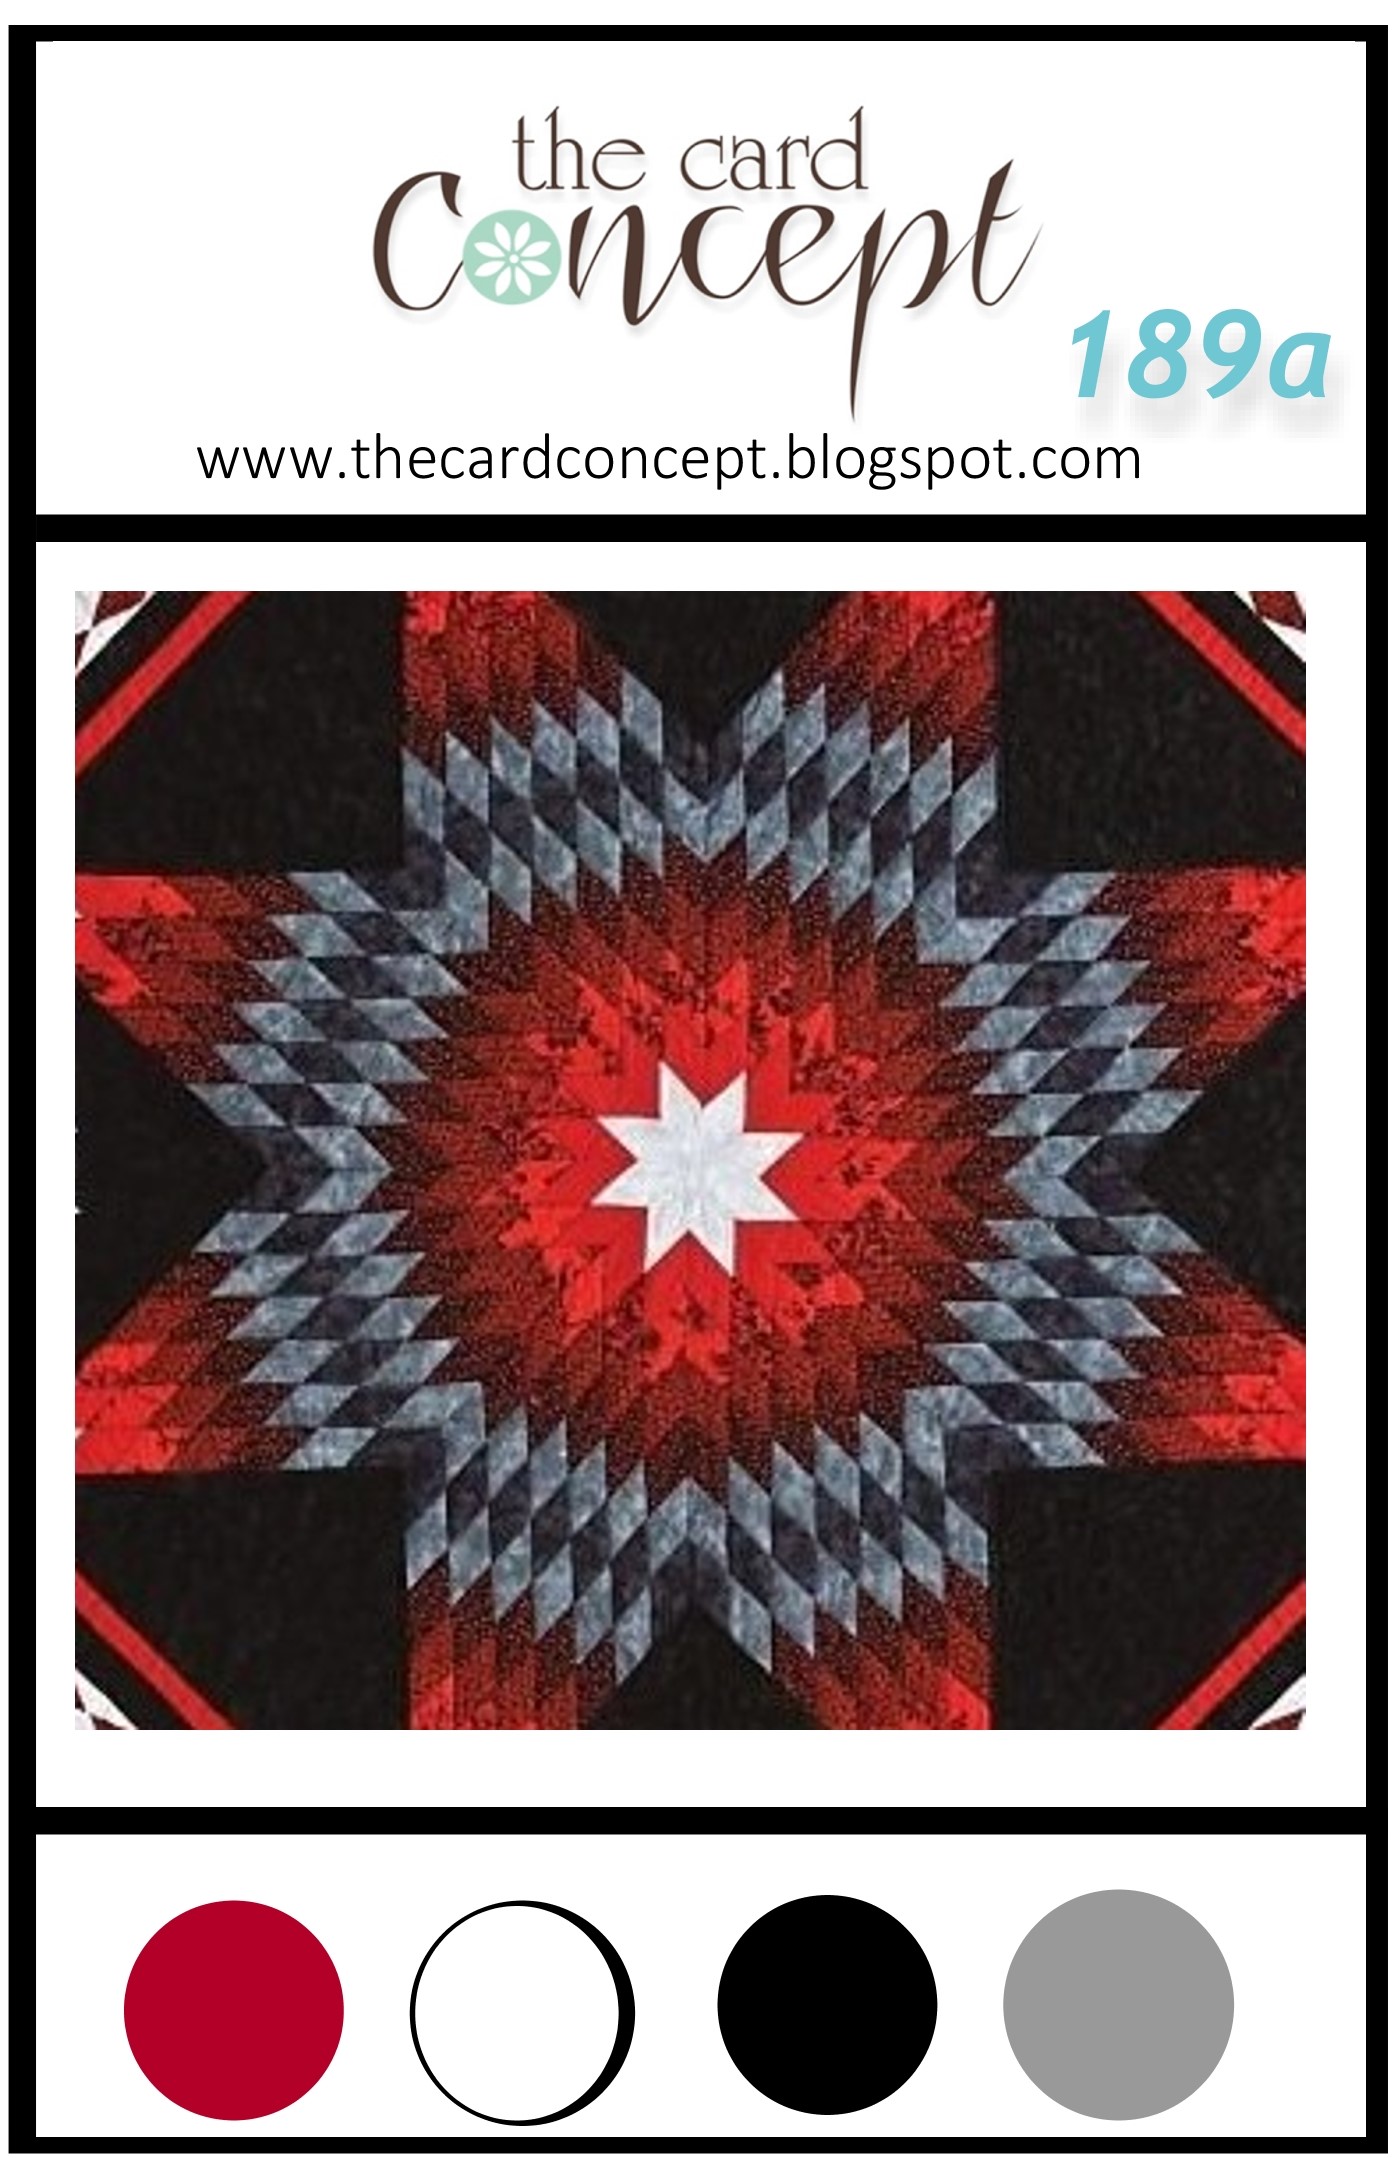
Welcome to our #189 {Cozy Comfort} or {Vintage Hearts} Challenge at The Card Concept! The Card Concept is a bi-weekly challenge and we would love for you to create a card based on one of our inspiration photos and join us!

I love both of the inspiration photos for our mid-month two photo challenge, but I absolutely loved the quilt photo and the bold graphic colors!  I was inspired by the both the quilt and colors for my Clean and Layered / Clean and Graphic card!

As many of you who follow my blog also know, I enjoy participating with other online challenges (I know how much work goes into maintaining a challenge blog and want to give support).  I will be linking this card to the Simon Monday “Frame It” Challenge along with the Through the Purple Haze “#201 Anything Goes” Challenge.  

If you have not had a chance to check out the galleries at the Simon Monday or Purple Haze sites, I hope you will take time to check them out!  Also, stop by the  The Card Concept to see the rest of the DT designs and which photo they chose-  we would love to have you participate with us!


This card was fairly easy to create.  I die cut the quilt die from black and white cardstock as well as from a red and grey sheet of the Craft Consortium Grunge- Dark Tones 6x6 paper pad before piecing them all together on a scrap piece of white cardstock.

The quilted pieced panel was dry embossed with the Wire Fence embossing folder before being mounted, trimmed and framed out with layers of white and black cardstock.

Another horizontal strip of the designer papers along with gray taffeta ribbon were added as well as a rhinestone.


The sentiment was heat embossed with clear embossing powder from the Words of Encouragement stamp set from Stamp Simply.


I love this stamp set for the encouraging Scripture verses that are perfect for cards for those who may be recovering from surgery, illness, facing difficult life situations, and/or just need an encouraging word!

Stamp Sets: Words of Encouragement (Stamp Simply)

Inks/Mediums: Versafine Onyx Black

Cardstock/Paper: White, Black, Craft Consortium Grunge- Dark Tones


Accessories/Tools: Gemini, Jr., Wire Fence Embossing Folder, Quilt Die (retired from Wplus 9), Embossing Powder Tool, Clear Embossing Powder, Heat Tool, Silver Rhinestone, Gray Taffeta Ribbon (retired Stampin’ Up!)


Thanks again for taking the time to visit! Here is the Vintage Hearts photo for your inspiration- you could create a card inspired by either photo- colors, theme, items, texture, or something else could inspire you. 

I hope you are inspired to create a card and join us for ! our #189 {Cozy Comfort} or {Vintage Hearts} Challenge at The Card Concept !  

Wednesday, March 2, 2022

TCC170 Set of Two Kitty Cards


Hi Friends!

It’s time for the #170 {Wearing O’ The Green} Challenge at The Card Concept!

What a fun inspiration photo!  There are so many elements to choose for your card inspiration- items on the pillow (tree, shamrocks or hat, bicycle), the flowers in the background, the white walls, colors or possibly something else?

I was inspired by the colors to create two cards using the same cat punch (I had these "kitties" already punched out and ready to go in my stash) and also used a few other retired items- I love being able to use "stuff" I already have on hand!

I also enjoy playing along with other online challenges as well and am linking my first card to the Try It On Tuesday “Add Some Texture” Challenge, the Sisterhood of Crafters “Favorite Pet” Challenge (Guess what- I love cats! :-)) and the Colorful Options March 2022 "Gorgeous Green" Challenge (this is a ew challenge site for me, thanks Makira for letting me know about this one :-))

To create the first card:


De-static the lower left hand area of a piece of green designer paper, stamp the verse sentiment from Scripture Medley 2 (retired Verve Stamps) with Ground Espresso Distress Oxide ink, apply clear embossing powder, heat set with a heat tool.

Once the embossing has cooled, distress the edges and also distress the edges of a piece of daffodil designer paper (both designer paper pieces were approx. 4” x 2 ¾”).

Mount both pieces onto a piece of espresso cardstock, trim close to the edge.

Add a piece of espresso cardstock over the cut edges of the two pieces of designer paper and mount the panel onto a white card base.

Die cut a doily using the retired Darling Doily Die (Stampin’ Up!).

Emboss the doily die cut with the Wire Fence (Darice) Embossing Folder.

Die cut the quilt from espresso, daffodil and garden green designer paper using the retired SU! Quilt Collection Dies.

Paper piece the quilt onto a scrap piece of white cardstock, trim close to the edge of the quilt (so the white base does not show)- emboss the quilt with the Wire Fence embossing folder.

Mount the doily onto the card front and add the quilt using dimensional foam (or chipboard).

Use the Cat Punch (SU!) to punch out three kitties from espresso cardstock, layer all three together to create a thicker “kitty”.

Mount the kitty onto the card front with dimensional foam or chipboard.

Add a large pearl to the middle of the quilt to finish off the card.

Stamp Sets:  Scripture Medley 2 (retired Verve Stamps)

Ink/Mediums: Tim Holtz™ Ground Espresso Distress Oxide

Cardstock/Paper:  White, Early Espresso; Daffodil Delight, Early Espresso, Garden Green Designer Paper (retired Stampin’ Up!)

Accessories/Tools:  Big Shot™, retired Stampin’ Up!- Darling Doily Thinlit™ and Quilt Builder Framelit™ Dies, Wire Fence Embossing Folder (Darice), Embossing Powder Tool, Clear Embossing Powder, Heat Tool, Cat Punch (Stampin’ Up!), Pearl

---------------------------------------------------------------------------------------------------------------------------

I am linking my second card to the Tic-Tac-Toe #150 Featured Designer Vicky Challenge (bottom row across Bold Sentiment, Ribbon Twine and Stencil), the Simon Monday “Use At Least One Stencil” Challenge and the My Time to Craft #476 “Embossing Theme- Wet or Dry” Challenge (I used both types of embossing).

To create the second card:

Using the Debra Stencil (Simon Says Stamp) along with stencil brushes, apply Distress Oxide Ink- first Fossilized Amber, followed by Twisted Citron, Crushed Olive, Early Espresso and Mowed Lawn.

Once the stenciling has been completed, de-static with an embossing powder tool.


Ink the Bless the Lord stamp (Typografia in Faith by STAMPlorations™ ) with Ground Espresso Distress Oxide ink, stamp onto the prepared stenciled panel, apply clear embossing powder and heat set with a heat tool.

Die cut the sentiment panel with the outside oval from the Spellbinders Amazing Paper Grace- Hemstitch Oval Dies (die cut another oval from white cardstock, layer the sentiment over the blank oval to thicken the layer).

Emboss a piece of white cardstock with the Wire Fence embossing folder, trim and mount onto a piece of espresso cardstock.

Add the white crochet lace to the card panel, adhere the green grosgrain ribbon and wrap the edges behind the panel.

Mount the panel onto a white card base and add the sentiment oval with dimensional foam (or, I prefer, chipboard).

Cut three “kitties” using the SU! Cat Punch, layer to create a thicker “kitty” and adhere onto the card front with dimensional foam.

Use a clear glitter marker to add shimmer to the oval sentiment and finish off the card with a few pearls.

Stamp Sets: Bless the Lord (Typografia in Faith by STAMPlorations™)

Ink/Mediums: Tim Holtz™ Distress Oxide- Crushed Olive, Fossilized Amber, Ground Espresso, Mowed Lawn, Twisted Citron; Wink of Stella Clear Glitter Marker

Cardstock/Paper: Whisper White, Early Espresso

Accessories/Tools: Big Shot™, Wire Fence Embossing Folder (Darice), Spellbinders Amazing Paper Grace Hemstitch Oval Dies, Stencil Brushes, Debra Stencil (Simon Says Stamp), Embossing Powder Tool, Clear Embossing Powder, Heat Tool, Green Grosgrain Ribbon, Cat Punch (Stampin’ Up!), Pearls

Thanks again for taking the time to visit- I hope you have a chance to check out the rest of The Card Concept Design Team cards and, if you have time, create a card based on our inspiration photo and join us!

Saturday, November 21, 2020

Stack and Quilt Floral Cluster- Winter Poinsettia Card Set


 Hi Friends!  

I am having fun creating Christmas cards and this set of five cards was designed with Stamp Simply stamp sets, Winter Poinsettia and Christmas Peace along with the Kaisercraft Peace & Joy paper pad using the Stack and Quilt technique from Splitcoaststampers. 


I love to participate with online challenges and am linking to the Simon Says Wednesday “Christmas”Challenge, The Spot #137 “Color Challenge” and the Word Art Wednesday #466-#467“Anything Goes” Challenge.

If you have not had a chance to check out the Stamp Simply blog yet or the challenge sites above, I encourage you to do so- gorgeous inspiration from all!


To create this set of cards:

Pull out five pieces of 4” x 5 ¼” designer paper from the Peace & Joy paper pad and stack them together before cutting on the diagonal along with three other cuts to create five pieces for the quilt pattern from each piece of designer paper (please see the tutorial for more details). 

Layer and adhere each piece separately onto a piece of white cardstock- you will have five panels when finished. Once you have all five pieces “quilted” to the white cardstock, emboss using the Script Background embossing folder.

Lightly distress the edges of the quilted panel and add the crocheted lace. FYI- make sure you have the embossed script wording upright before adding the crochet lace. See the last card below with the lace and ribbon at the top- I originally added the lace thinking that it was at the bottom, but oops!, the embossed wording was upside down, lol!.  No worries, I removed the lace/ribbon (carefully) and turned the it around but had to keep it at the top since the adhesive tore the paper a bit :-) 

Add the green grosgrain ribbon, adhere the ribbon ends behind the panel and mount onto another piece of white cardstock. Distress the edges and adhere to a piece of black cardstock before mounting the entire panel onto the white card base.


Stamp the Christmas Peace sentiment with Versafine Onyx Black ink onto white cardstock,  apply clear embossing powder applied and heat set with a heat tool.  Die cut with a circle die, mount onto another circle die cut from black cardstock and mount onto the card front with chipboard (or dimensional foam).

Stamp the Winter Poinsettia image with Versafine Onyx Black ink onto white cardstock,  apply clear embossing powder applied and heat set with a heat tool.  Watercolor the image with water-based markers and die cut with the coordinating die.

Mount the poinsettia die cut onto the card front with chipboard or dimensional foam.

Use a clear glitter marker to add shimmer to the poinsettia petals, a white paint pen to add highlights to the berries and flower center and add a few pearls to finish off the card.

I had so much fun creating this set of cards! What a great way to use up some of your designer paper, love this stack and quilt technique!


Stamp Sets: Floral Clusters- Winter Poinsettia,  Christmas Peace (Stamp Simply)

Ink/Mediums: Versafine Onyx Black Ink Pad, Water-based Markers- Real Red, Pear Pizzazz, Mossy Meadow (all Stampin’ Up!), Zig Wink of Stella Brush- Clear Glitter Marker, Extra Fine White Paint Pen

Cardstock/Paper:  White and Black Cardstock; Peace & Joy 6.5 x 6.5 Paper (Kaisercraft)

Accessories/Tools: Gemini, Jr. , Floral Cluster & Sprigs Dies (part of the Floral Clusters Bundle with Die) ; Darice Embossing Folder-Script Background

,  Heat Tool, Ranger Super Fine Embossing Powder- Clear,  Green Grosgrain Ribbon, White Crochet Lace, Pearls

Thanks again for taking the time to stop by and visit- I hope I have inspired you to create something this weekend!  

Tuesday, December 5, 2017

SUO189 Merry Christmas Quilt Card Set


Hi Friends!   

It’s time for the #189 “FavoriteHoliday Colors” Challenge at SU-Only Challenges! I love so many different holiday colors for Christmas- blue with silver, gold and white, pinks and purples but decided that this year I will be designing the bulk of my Christmas cards with the traditional green and red.     

For this challenge, I paired the Christmas Quilt Bundle with the Star of Light stamp set (both from the Holiday Mini Catalog) for this quick and easy card.

I am also participating in the Simon Says Wednesday “Anything Goes” Challenge along with the FUSION “Red Christmas” Challenge (I was inspired by the colors in the photo as well as the plaid patterns).

If you have not had a chance to stop by the SU-Only Challengesite to check out the rest of the Design Team’s samples or the other challenge sites yet, I encourage you to do so- gorgeous inspiration from all!

When you design with the quilt dies, you have to cut an entire "quilt" using each color so you are able to use all of the pieces to create a set of four individual "quilts"- what a bonus!!
  
To create this set of cards:

1). Using the Big Shot™ with the Softly Falling Textured Impressions™ Embossing Folder, emboss four pieces of Whisper White cardstock, trim and mount two onto Garden Green cardstock and two onto onto Real Red cardstock.  Trim each again and mount onto the green bases onto Real Red cardstock and the red bases onto Garden Green cardstock.  Mount each to an Extra Thick Whisper White card base.

2). Using the Big Shot™ with the Quilt Builder Framelits Dies, cut four quilts along with the outside frame, one each from Real Red, Garden Green, Whisper White and the Garden Green gingham pattern from the Quilted Christmas 6” x 6” Designer Series Paper (DSP).  *** Tip- Use Press ‘n Seal® on the back of each die cut (press the sticky side down before you remove the quilt from the die).  This will help keep all of the pieces together as you create each of the quilt designs.

3). Using Whisper White cardstock, cut four pieces 2 ¾” x 2 ¾” square for the “base” of the quilt.  Apply adhesive onto the base and create each of the quilt patterns.

4). Once all of the quilt patterns are completed, mount a quilt onto each card front on the diagonal using Stampin’ Dimensionals®.

5). Ink the sentiment from the Star of Light stamp set with Garden Green Classic Ink and stamp onto a scrap piece of Whisper White cardstock. Trim, create the fishtail banner by hand ((I used the retired Hexagon Punch), mount onto Real Red cardstock and adhere to the card front with Stampin’ Dimensionals®.
 
6). Add the Pearl to the center of each quilt to finish off the cards. 

Stamp Sets: Star of Light

Ink/Mediums: Garden Green

Paper: Whisper White, Extra Thick Whisper White, Garden Green, Real Red; Christmas Quilt 6x6 DSP

Accessories/Tools: Big Shot™, Quilt Builder Framelits™, Softly Falling Textured Impressions™ Embossing Folder,  retired Hexagon Punch, Pearls

Thanks again for taking the time to stop by and I hope that you will create your own Stampin’ Up! Only project and join us for our “Favorite Holiday Colors” challenge!

Wednesday, August 3, 2016

SC604 A True Friend Loves At All Times


Hi Friends!

I hope all of you are having a fabulous week so far!  Woohoo!  I am excited to announce that I will be on the Splitcoaststampers Sketch Challenge Design Team for the next few months!  

I truly love participating in sketch challenges and am always amazed at how many interpretations can be designed using one sketch.

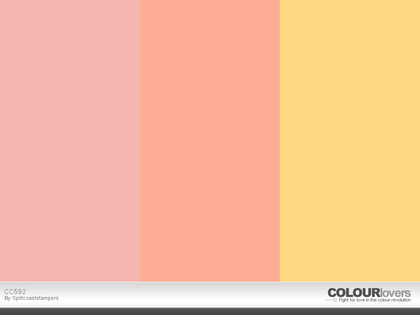
For this Mixed Media card, I used the Splitcoaststampers' SC604 Sketch (see the rest of the SC604 Sketch Gallery here),   the SCS CC592 Color  Challenge and the SCS Dare To Get Dirty “DTGD16basementstamper” Challenge (sorry, I cannot share the details but if you are a Splitcoaststampers Fan Club Member, you can see the details here and if not, you can check out how to join here) as well as the JustUs Girls #354 Wild Card “Let’s Hear It for the Girls” Challenge.


If you have not already visited the above challenge sites, I hope you will have a chance to do so- fabulous inspiration from my Sketch Design Team "Sisters" as well as the rest of the challenge sites!

To create this card:

Die cut a piece of white cardstock with the Our Daily Bread Designs (ODBD) Flourished Star Patterns Dies and mount onto a piece of black cardstock.

Die cut the piece of So Saffron cardstock with the largest ODBD Double Stitched Rectangle Dies, mount onto a piece of black cardstock, trim and mount onto the card front.

Add the strip of 1” Black Satin Ribbon and mount the entire card front onto the white card base.

Die cut a piece of the ODBD Christmas Collection 2015 6x6 Paper with the next to the largest  ODBD Double Stitched Rectangles  Dies, mount onto black cardstock, trim and mount onto the card front.

Die cut and emboss the ODBD Doily Dies from white cardstock and layer onto the front of the card.

Ink the ODBD Star Quilt image using black archival ink, stamp onto white cardstock, color the image with water-based markers and die cut with the ODBD Double Stitched Rectangle Dies.

Layer the quilt image onto black cardstock, trim and apply ModPodge to the entire surface.

Stamp the sentiment from ODBD A True Friend with archival black ink onto white cardstock, die cut with the ODBD Double Stitched Circle Dies and mount onto a die cut from black cardstock using the ODBD Flourish Pattern Dies.

Add the sentiment to the card front with dimensional foam to finish off the card.

I hope this card inspires you to create a project this week and if so, come play along with us at Splitcoaststampers!


Thanks again for visiting- hugs and have a blessed week, my friends!


Related Posts Plugin for WordPress, Blogger...