Showing posts with label #suo. Show all posts

Monday, July 27, 2020

A Day At the Beach


Hi Friends!

I hope all of you had a great weekend! Today I am sharing a card that was designed with the retired Stampin’ Up! Summer by the Sea and Blessings from Heaven. 

I am making a concentrated effort to use my "unloved" stamps and supplies and incorporated some scrap pieces of designer paper and cardstock as well.

I also have a personal challenge to create a card for all of the Splitcoaststampers Sketch Challenges (over 800 sketches and they do not expire- here is the link to all of their sketches). 

I decided to use the SC252 Sketch for the layout on this card (this sketch was from 2009).

Since I also love to participate with online challenges, I am linking this card to the Simon Says Monday “A Day At The Beach” Challenge along with Try It OnTuesday “Summertime” Challenge and the TGIF Challenge!  #274 "Paper Scraps!" (I used a few scraps of the retired Epic Day This 'n That designer paper for the embossed panels and bits of black cardstock to create the photo corners).

If you have not had  a chance to check out the challenge sites yet, I hope you will do so- fabulous inspiration from all!

To create this card:

Ink the Summer by the Sea image with Versamark™ Onyx Black, stamp onto white cardstock, apply clear embossing powder and heat set with a heat tool.

Once the image has cooled, watercolor with water-based markers and distress oxide ink.

Die cut with a stitched square die, mount onto black cardstock.  Using scraps of black cardstock, create the photo corners and add to the corners (I created these by hand- cut a square in half on diagonal, and trim to create the edges and center).

De-static a piece of white cardstock with an embossing powder tool, stamp the sentiment from Blessings from Heaven with Versamark™ Onyx Black, stamp onto white cardstock, apply clear embossing powder and heat set with a heat tool.  Trim the panel and mount onto black cardstock.

Emboss a few pieces of scrap designer paper with a lattice embossing folder, trim and mount onto black cardstock.

Add the layered cardstock panels to the background panel, mount the focal image with chipboard (or dimensional foam) and add a few black rhinestones near the sentiment.

Using a clear glitter pen, add shimmer to the water and sand to finish off the card.

Stamp Sets: Summer By The Sea, Blessings from Heaven (retired Stampin’ Up!)

Ink/Mediums: Versafine™ Onyx Black, Stampin’ Write Markers- Calyspo Coral, Early Espresso, Pool Party, Soft Suede, Pretty in Pink; Tim Holtz™ Tumbled Glass Distress Oxide; Clear Glitter Pen

Paper/Cardstock: Whisper White, Basic Black, retired Epic Day This ‘n That designer series paper

Accessories/Tools: Gemini, Jr™, retired Square Lattice Embossing Folder (Stampin’ Up!), My Favorite Things™ Stitched Square Dies, Embossing Buddy®, Clear Embossing Powder, Heat Tool, Black Rhinestones

Thanks again for taking the time to stop by- I hope all of you have a wonderful week!

Tuesday, March 27, 2018

Pretty Kitty Thank You


Hi Friends!   

I have an announcement to make- this will be my last post as a SU-Only Challenge Designer :-(   

It was a hard decision to make to step down from the team and it has has been my honor to be part of the SUO Challenge DT since 2013! I have enjoyed every moment and have had such a great time getting to know Robin (our coordinator) as well as the rest of the team.  The challenge site will be undergoing some behind the scenes changes along with a few new DT members, so stay tuned :-)

 I wanted to create a "Thank You" Card to show my appreciation for all of the hard work that Robin as well as the rest of the SUO Design Team (DT)put in each week and for my thanks to all of you who have faithfully played along with us over the years! 


I am still planning on creating and posting cards but one less deadline will allow me to spend more time with my hubby (he will be having another surgery soon) and allow us to have more time to complete our other tasks at home.

I decided to create a card using a few stamp sets that I have not had a chance to ink up yet- Pretty Kitty and Bella & Friends (I think both of these sets are so cute!) and paired them with Petal Palette for an easy Clean and Layered card.   


If you have not had a chance to stop by the SU-Only Challenge site to check out the rest of the Design Team projects or the other challenge sites, I hope you will do so- wonderful inspiration from all!

To create this card:

1). De-static a piece of Whisper White cardstock with the Embossing Buddy®, ink the kitty image from Pretty Kitty with Stampin’ Archival Basic Black ink, stamp onto the prepared cardstock, apply Stampin’ Emboss® Clear Embossing Powder and heat set with the heat tool. 

2). Once the embossing has cooled, watercolor the image using an AquaPainter™ along with Stampin’ Up! Watercolor pencils and markers (colors listed below).

3). Die cut the image using the Big Shot™ with the Stitched Layering Framelits™, layer onto black cardstock, trim close to the edge.  Cut the image at the bottom (to create rectangle- the cut area will be hidden by the sentiment).

4). Repeatedly stamp the rose image from Petal Palette using Versamark™ over a piece of Bermuda Bay cardstock.  Trim the panel, mount onto Basic Black cardstock before adhering to the Extra Thick Whisper White card base.  Add the split Pretty Kitty image directly to the card front.

5). De-static a scrap piece of Basic Black cardstock with the Embossing Buddy®, stamp the sentiment from Bella & Friends using Versamark™, apply Stampin’ Emboss® White Embossing Powder and heat set with the Heat Tool.  Once cooled, hand trim and mount onto the card front using Stampin’ Dimensionals®.

 6). Die cut a heart from Calypso Coral cardstock using the Support Ribbon Framelits™, add to the sentiment panel and apply Clear Wink of Stella® for a bit of shimmer.

7). Finish off the card by using the White Gel Pen to add a few highlights to the flower centers.
Stamp Sets:  Pretty Kitty, Petal Palette, Bella & Friends
Ink/Mediums: Versamark™, Stampin’ Archival Basic Black, Stampin’ Write Markers-Old Olive, Calypso Coral, Bermuda Bay, Crushed Curry, Sweet Sugarplum; Stampin’ Up! Watercolor Pencils- Basic Gray, Bermuda Bay, Calypso Coral, Old Olive, Pacific Point, Daffodil Delight, Melon Mambo; Clear Wink of Stella®, White Gel Pen
Paper/Cardstock: Whisper White, Extra Thick Whisper White, Basic Black, Bermuda Bay
Accessories: Big Shot™, Stitched Layering Framelits™, Support Ribbon Framelits™, AquaPainter™, Embossing Buddy®, Stampin’ Emboss® Clear and White Embossing Powder, Heat Tool
Thanks again for taking the time to visit – I hope that you have a wonderful Easter week and stop by again soon!

Tuesday, March 13, 2018

SUO196 Cross of Hope


Hi Friends!   


Easter is only a few weeks away and I have not had a chance to create a card yet with the new Crosses of Hope Framelits™. 

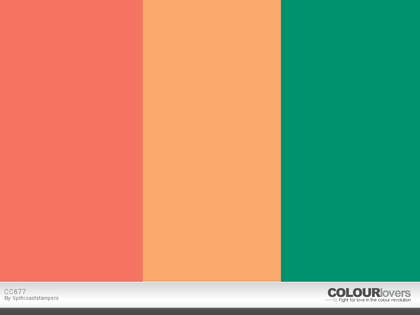
I decided to incorporate the Splitcoaststampers CC677 Color Challenge into the design along with the  Tic-Tac-Toe #038 Challenge (Green, Sparkle, Happy) and the International Art & Soul #28 “Emboss and Use A Die”Challenge.

If you have not had a chance to stop by the SU-Only Challengesite to check out the rest of the Design Team’s samples or the other challenge sites yet, I encourage you to do so- wonderful inspiration from all!

To create this card:

1). Use Stampin’ Write Markers- color the flower spray image from Hold On To Hope using Emerald Envy for the stems and Calypso Coral for the flowers. “Huff” onto the stamp to re-moisten and stamp onto a piece of Peekaboo Peach cardstock. “Huff” again for a second generation stamping, re-color the image and stamp a few more times.

2). Trim the panel to 4” x 5 ¼”.  Stamp the flourish image from Timeless Textures with Versamark™ ink repeatedly around the edges and score at the bottom and top of the panel.  Mount onto a piece of Emerald Envy cardstock, trim and mount onto the Extra Thick Whisper White card base.

3). Die cut the main cross from Crosses of Hope Framelits™ from Calypso Coral cardstock and the intricate cross from Whisper White cardstock.  Layer the two and add shimmer to the Calypso Coral areas with Clear Wink of Stella®.

4). Loop a bit of Gold Metallic Thread behind the area where the cross will be mounted and mount the cross with Stampin’ Dimensionals®.

5). Ink the sentiment from Teeny Tiny Wishes with Versamark™ and stamp onto a scrap piece of Emerald Envy cardstock.  Apply Stampin’ Emboss® White Embossing Powder and heat set with the Heat Tool. Hand trim and add a flag banner on the end before mounting onto the card front with Stampin’ Dimensionals®.

6). Add a Pearl to the middle of the cross to finish off the card.
  
Stamp Sets:  Hold On To Hope, Timeless Textures, Teeny Tiny Wishes

Ink/Mediums: Versamark™, Stampin’ Write Markers- Emerald Envy, Calypso Coral; Clear Wink of Stella®

Paper: Whisper White, Extra Thick Whisper White, Emerald Envy, Peekaboo Peach

Accessories/Tools: Big Shot™, Crosses of Hope Framelits™, Embossing Buddy®, Stampin’ Write® White Embossing Powder, Heat Tool, Gold Metallic Thread, Pearls

Thanks again for taking the time to stop by and I hope that you will create your own Stampin’ Up! Only project and join us for our “Spring is About to Spring” challenge! 

Tuesday, February 27, 2018

SUO195 Favorite Sentiment


Hi Friends!   


I love using Scripture verses on my card so I decided to use the verse from the Occasions Mini stamp set, Hold On To Hope and incorporated the flowers from the Painted Harvest stamp set (carried over from the 2017 Holiday Mini) and a bit of splatter from Timeless Textures for a very simple card :-)

The main panel on this card is just one layer and since I did not have my ink pads near me when I created this card, I used masking along with Stampin’ Write Markers for the entire card (I love using markers for omitting and other techniques, don’t you? :-))


If you have not had a chance to stop by the SU-Only Challengesite to check out the rest of the Design Team’s samples or the other challenge sites yet, I encourage you to do so- terrific inspiration from all!

To create this card:

1). Ink the solid flower image from Painted Harvest with a Blushing Bride marker, stamp onto the lower part of a piece of Whisper White cardstock.  Ink the more detailed petal image with a Berry Burst marker and stamp over the solid image.  Stamp another detailed petal image flower onto a piece of scrap paper (or sticky note/masking paper), fussy cut the image and use this as your mask.

2). Mask the first flower and repeat the steps above to stamp the second and third flower (re-masking each flower as you proceed).  ***FYI- I used Flirty Flamingo as the base for the last two flowers versus Blushing Bride***

3). Ink the flower center image with an Early Espresso marker and stamp in the middle of the petals.  Use an AquaPainter™ to blend any areas that are missing ink or may be a bit misaligned.

4). Re-mask each flower as you stamp the outline leaf image with a Lemon Lime Twist marker.

5). Ink the sentiment from Hold On To Hope with a Basic Black marker (the words on each top line), stamp onto the panel, then ink the “Made You”, “Carry You”, “Sustain You”, “Rescue You” with the Berry Burst marker and re-stamp onto the panel.

6). Add a bit of splatter with the small splatter stamp from Timeless Textures, inked with the Early Espresso marker. 

7). Trim the panel and mount onto a piece of Berry Burst cardstock, trim again and mount onto the Extra Thick Whisper White card base.

8). To finish off the card, apply shimmer to all of the flower petals with Clear Wink of Stella®.

Stamp Sets:  Painted Harvest, Hold On To Hope, Timeless Textures

Ink/Mediums: Stampin’ Write Markers- Blushing Bride, Flirty Flamingo, Berry Burst, Early Espresso, Lemon Lime Twist; Clear Wink of Stella®

Paper: Whisper White, Extra Thick Whisper White, Berry Burst

Accessories/Tools: AquaPainter™

Thanks again for taking the time to stop by and I hope that you will create your own Stampin’ Up! Only project and join us for our “AFavorite Sentiment” challenge!  

Tuesday, January 16, 2018

SUO192 Monochromatic Blues


Hi Friends!   

It’s time for the #192 "Fun with Just One Color" Challenge at SU-Only Challenges! I pulled out a few of my new stamp sets- Hold on to Hope from the 2018 Occasions Mini Catalog and the 2018 Sale-A-Bration stamp set, Amazing You to create a Clean and Simple Mixed Media card :-)


If you have not had a chance to stop by the SU-Only Challengesite to check out the rest of the Design Team’s samples or the other challenge sites yet, I encourage you to do so- fabulous inspiration from all!

To create this card:

1). Using Stampin’ Write Markers- Night of Navy, Dapper Denim and Marina Mist to color the floral spray image from Hold on to Hope. “huff” onto the stamp before stamping onto a piece of Whisper White cardstock.  Clean the stamp, re-ink again with the markers and stamp again onto the panel to create the scroll design.

2). Trim the panel and mount onto a piece of Night of Navy cardstock.  Mount the panel onto the Extra Thick Whisper White card base.

3). Ink the sentiment from Hold on to Hope with Night of Navy Classic Ink, stamp onto a piece of Whisper White cardstock.  Die cut the sentiment with Stitched Shapes Framelits™, mount onto a circle of Night of Navy cardstock using the Layering Circles Framelits™.  Add to the card front with Stampin’ Dimensionals®.

4). In the sentiment again using Versamark™ ink, apply Stampin’ Emboss® White Embossing Powder and heat set with a heat tool.  Trim the portion of the sentiment “And I Will Rescue You” by hand and create a flag point.  Adhere over the sentiment with Stampin’ Dimensionals®.

5). Ink the flowers from Amazing You with Night of Navy Classic Ink, stamp three times onto a piece of Whisper White cardstock.  Scribble ink from the Marina Mist and Dapper Denim marker onto a silicone craft mat and use an AquaPainter™ to watercolor the petals.  Once you are satisfied with the watercolor, dry with a heat tool and fussy-cut out the center portion of the flower.  Mount the flowers around the circle using Stampin’ Dimensionals®.

6). Finish off the card using the White Gel Pen to add highlights to the flower centers and add shimmer to the petals with Clear Wink of Stella®. 


Stamp Sets: Hold on to Hope, Amazing You

Ink/Mediums: Versamark™, Night of Navy, Stampin’ Write Markers- Dapper Denim, Marina Mist, Night of Navy; Clear Wink of Stella®, White Gel Pen

Paper: Whisper White, Extra Thick Whisper White, Night of Navy

Accessories/Tools: Big Shot™, Stitched Shapes Framelits™, Layering Circles Framelits™, Embossing Buddy®, Stampin’ Emboss® White Embossing Powder, Heat Tool

Thanks again for taking the time to stop by and I hope that you will create your own Stampin’ Up! Only project and join us for our “Fun with Just One Color”challenge!  

Wednesday, January 3, 2018

SUO191 Thoughts and Prayers


Hi Friends!   

It’s time for the #191 Brrr...Baby It’s Cold Outside Challenge at SU-Only Challenges!

The weather here on the East Coast has been extremely cold so I decided to create a card using the Flurry of Wishes stamp set along with a few die cuts and a sentiment from Rose Wonder. We have not had a lot of snow yet, but snowflakes remind me of the cold :-)

I have had the Flurry of Wishes stamp set for over a year and this is the first time I have had a chance to ink it up!  That is one of my goals again for this year- use the stamps that have not seen ink in a while :-)

I am also linking this card to the As You See It #166 “Sparkle”Challenge (it is hard to see the glitter in the background but it is there and the card is very sparkly:-)).

If you have not had a chance to stop by the SU-Only Challenge site to check out the rest of the Design Team’s samples or the other challenge sites yet, I encourage you to do so- fabulous inspiration from all!

To create this card:

1). De-static a piece of Whisper White cardstock with an Embossing Buddy®, ink the snowflake images from Flurry of Wishes and stamp onto the panel.  Once the embossing has cooled, tap the Tempting Turquoise Classic Ink Pad onto a silicone craft mat, lightly spritz with water and press the embossed panel into the ink.  Lift up and repeat the process with Dapper Denim and Island Indigo Classic Ink.

2). Allow the panel to dry and use a Sponge Dauber with the same colors of ink in Step #1 to add additional color to the background.  Add a bit of distressing using the splatter stamp from Awesomely Artistic with Island Indigo Classic Ink.Trim the panel and mount onto an Extra Thick Whisper White card base.

3). Die cut several snowflakes from the Swirly Snowflakes Thinlits™ from Whisper White cardstock.

4). Ink the sentiment from Rose Wonder with Island Indigo Classic Ink and stamp onto Whisper White cardstock.  Die cut with the Stitched Shaped Framelits™ , use a sponge dauber to apply a bit of Island Indigo Classic Ink around the edges.  Mount onto the card front with Stampin’ Dimensionals®.

5). Add the die cut snowflakes to the card front along with a few Rhinestones to the centers.

6). Finish off the card using Clear Wink of Stella® over the snowflakes.

Stamp Sets: Flurry of Wishes, Awesomely Artistic, Rose Wonder

Ink/Mediums: Versamark™, Island Indigo, Tempting Turquoise, Dapper Denim; Clear Wink of Stella®

Paper: Whisper White, Extra Thick Whisper White

Accessories/Tools: Big Shot™, Swirly Snowflakes Thinlits™, Embossing Buddy®, Stampin’ Emboss® White Embossing Powder, Heat Tool, Rhinestones

Thanks again for taking the time to stop by and I hope that you will create your own Stampin’ Up! Only project and join us for our “Brrr...Baby It’s Cold Outside” challenge!  

SC678 Hey Chick


Hi Friends!

It’s time for the weekly sketch at Splitcoaststampers! Cathy designed our SC678 sketch this week and I decided to create another Clean and Layered card using the retired stamp set, Hey, Chick along with a bit of splatter with Timeless Textures (both Stampin' Up!).

I am also linking this card to the Simon Says Wednesday “Anything Goes” Challenge as well as a few other Splitcoaststampers challenges- F4A403 “Birthdays Are The Best” and Stamp To Save S2S18A (use a challenge that you were unable to participate in 2017 and I chose S2S17C (Fun/Funny).

If you have not had a chance to visit the Splitcoaststampers’ SC678 Sketch gallery or other challenge sites yet, I hope you will do so- fabulous inspiration from all!

To create this card:

1). Die cut three circles from Whisper White cardstock using the Stitched Shapes Framelits™.  Die cut three circles from Basic Black cardstock using the retired Circle Framelits™. 
 
2). Ink and stamp the chicken images from Hey, Chick using archival black ink, allow the ink to dry before coloring with Stampin’ Up! Watercolor Pencils- Real Red, Basic Black, Rich Razzleberry, Pumpkin Pie. Use an AquaPainter™ to blend the pencil and add a bit of shimmer with a clear glitter pen.  Once the watercolor has dried, add white accents to the crazy chicken’s hair with an extra fine white paint pen.

3). Trim a piece of retired Sycamore Street Designer Paper for the upper and lower panel of the sketch.  Mount the panels on a piece of Basic Black cardstock.

4). Add a piece of 5/8” Basic Black Satin Ribbon over the edges of the DSP, wrap the ends behind the panel.  Mount the entire panel onto the white card base.

5). Adhere the chicken die cut images using dimensional foam for the center image.

6). De-static a piece of Basic Black cardstock with an Embossing Buddy®, stamp the sentiments from Hey, Chick using Versamark™ ink, apply White Embossing Powder and heat set with a Heat Tool. 

7). Trim the sentiments and create the flag banners by hand.  Mount the sentiments to the card front with dimensional foam.  Add a few sequins to finish off the card.

Stamp Sets: Hey, Chick, Timeless Textures (Stampin’ Up!)

Ink/Mediums: Versamark™, Versafine™ Onyx Black; Stampin’ Up! Watercolor Pencils- Real Red, Pumpkin Pie, Rich Razzleberry, Basic Black; Clear Glitter Pen, Extra Fine White Paint Pen

Paper: Whisper White, Basic Black; retired Sycamore Street Designer Series Paper

Accessories/Tools: Big Shot™, Stitched Shapes Framelits™, retired Circle Framelits™, Embossing Buddy®, Stampin’ Emboss® White Embossing Powder, Heat Tool, Sequins (Craft Medley)

Thanks again for stopping by to visit! If you have time, we would love to have you join us at Splitcoaststampers for this week’s sketch challenge!  Hugs and I hope all of you have a great week, sweet friends!

Tuesday, December 19, 2017

SUO190 The Light of Heaven


Hi Friends!   

It’s time for the #190 “A Favorite Holiday Image” Challenge at SU-Only Challenges!

I decided to pull out the Star of Wonder stamp set with the coordinating Starlight dies and create a Clean and Simple Christmas card reflecting the true meaning of Christmas.  

I love the sentiments as well as the stars in the Star of Wonder stamp set! Christmas is all about the birth of our Lord and Savior, Jesus Christ and the star reminds us that Jesus is the Light of the World!  

Other than the dimensional star die cut, this is technically a one layer card that was very easy to create  and am also participating in the following challenges:

If you have not had a chance to stop by the SU-Only Challenge site to check out the rest of the Design Team’s samples or the other challenge sites yet, I encourage you to do so- fabulous inspiration from all!

To create this card:

1). Using the Big Shot™ with the Starlight Thinlits™ and cut out the large scored star from Silver Foil and the smaller ornate star from Whisper White cardstock.  Lightly fold along the score lines of the large star to create dimension and mount the white die cut star to the center.

2). De-static a piece of Whisper White cardstock with an Embossing Buddy®, stamp the star and scroll images along with the sentiments from Star of Light with Versamark™ Ink, apply Stampin’ Emboss® Silver Embossing Powder and heat set with the Heat Tool.

3). Trim the panel, mount onto a piece of Night of Navy cardstock, trim and mount onto the Extra Thick Whisper White card base.

4). Adhere the die cut/layered star with Stampin’ Dimensionals® to the card front (FYI- I layered several dimensionals together to give the star more height in the center).

5). Add a few Rhinestones to the star centers to finish off the card.

Stamp Sets: Star of Light

Ink/Mediums: Versamark™

Paper: Whisper White, Extra Thick Whisper White, Night of Navy, Silver Foil
Accessories/Tools: Big Shot™, Starlight Thinlits™, Embossing Buddy®, Stampin’ Emboss® Silver Embossing Powder, Heat Tool, Rhinestones

Thanks again for taking the time to stop by and I hope that you will create your own Stampin’ Up! Only project and join us for our “Favorite Holiday Image” challenge! 

May we all reflect on Jesus this Christmas season and remember that the greatest gift of all is free- Salvation in Christ Alone! Acts 16:31a Believe on the Lord Jesus Christ and you will be saved; Ephesians 2:8-9- For by grace you have been saved through faith, and that not of yourselves; it is the gift of God, not of works, lest anyone should boast. 


Merry Christmas and Happy New Year to all of you!!
Related Posts Plugin for WordPress, Blogger...