Showing posts with label Crosses of Hope. Show all posts

Tuesday, March 13, 2018

SUO196 Cross of Hope


Hi Friends!   


Easter is only a few weeks away and I have not had a chance to create a card yet with the new Crosses of Hope Framelits™. 
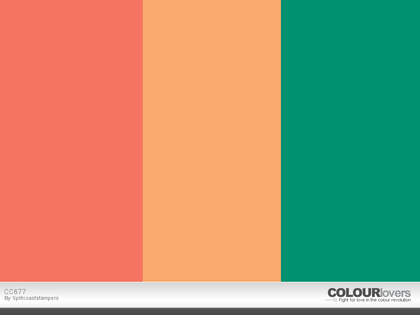
I decided to incorporate the Splitcoaststampers CC677 Color Challenge into the design along with the  Tic-Tac-Toe #038 Challenge (Green, Sparkle, Happy) and the International Art & Soul #28 “Emboss and Use A Die”Challenge.

If you have not had a chance to stop by the SU-Only Challengesite to check out the rest of the Design Team’s samples or the other challenge sites yet, I encourage you to do so- wonderful inspiration from all!

To create this card:

1). Use Stampin’ Write Markers- color the flower spray image from Hold On To Hope using Emerald Envy for the stems and Calypso Coral for the flowers. “Huff” onto the stamp to re-moisten and stamp onto a piece of Peekaboo Peach cardstock. “Huff” again for a second generation stamping, re-color the image and stamp a few more times.

2). Trim the panel to 4” x 5 ¼”.  Stamp the flourish image from Timeless Textures with Versamark™ ink repeatedly around the edges and score at the bottom and top of the panel.  Mount onto a piece of Emerald Envy cardstock, trim and mount onto the Extra Thick Whisper White card base.

3). Die cut the main cross from Crosses of Hope Framelits™ from Calypso Coral cardstock and the intricate cross from Whisper White cardstock.  Layer the two and add shimmer to the Calypso Coral areas with Clear Wink of Stella®.

4). Loop a bit of Gold Metallic Thread behind the area where the cross will be mounted and mount the cross with Stampin’ Dimensionals®.

5). Ink the sentiment from Teeny Tiny Wishes with Versamark™ and stamp onto a scrap piece of Emerald Envy cardstock.  Apply Stampin’ Emboss® White Embossing Powder and heat set with the Heat Tool. Hand trim and add a flag banner on the end before mounting onto the card front with Stampin’ Dimensionals®.

6). Add a Pearl to the middle of the cross to finish off the card.
  
Stamp Sets:  Hold On To Hope, Timeless Textures, Teeny Tiny Wishes

Ink/Mediums: Versamark™, Stampin’ Write Markers- Emerald Envy, Calypso Coral; Clear Wink of Stella®

Paper: Whisper White, Extra Thick Whisper White, Emerald Envy, Peekaboo Peach

Accessories/Tools: Big Shot™, Crosses of Hope Framelits™, Embossing Buddy®, Stampin’ Write® White Embossing Powder, Heat Tool, Gold Metallic Thread, Pearls

Thanks again for taking the time to stop by and I hope that you will create your own Stampin’ Up! Only project and join us for our “Spring is About to Spring” challenge! 

Tuesday, March 10, 2015

SUO118 Happy Easter!!


Hi Stampers!   

It’s time for the new SUO118 “Easter's on the Way” Challenge and I decided to create a “hybrid” card using My Digital Studio (MDS) along with traditional card making techniques.

I decided to also play along with the FM200 Friday Mashup! Challenge and chose the FM72 Sketch Challenge plus the FM97 Marker and Texture Challenge. 

One of the reasons I love using MDS for creating “hybrid” cards is that some of the rubber/clear mount stamp sets that have been retired from the annual catalog are still available as “current” in MDS…plus, the storage issue is solved since they do not take up space in my craft room- oops, two reasons why I love MDS :-) !!

I hope you will find the time to check the both challenge sites and create your own Stampin’ Up! “Easter Fun” project and link up in our gallery!!

To create this card:
Using MDS, position the floral cross from Crosses of Hope and re-size.  
Insert the Easter sentiment from Well Scripted and insert "Happy Easter" from Teeny Tiny Wishes.   Insert a Square Punch image, re-size the punch image to hide the "Easter" portion from the Teeny Tiny Wishes sentiment and position the “Happy” above the Well Scripted “Easter” sentiment.  Arrange the two words with the invisible punch as a group and position on the page leaving enough room to punch the image out with the XL Oval Punch.
If desired, insert other stamp images on the page to fill in all of the space ((to be used in the future) and print out onto Whisper White cardstock.
Using the Stampin’ Blendabilities™ Light Markers in Daffodil Delight, Melon Mambo, Old Olive and Rich Razzleberry, color in the flowers on the cross. If desired, use the Stampin' Write Crisp Cantaloupe marker over the Daffodil Delight (originally I was going to enter this into a color challenge as well and it needed to have Crisp Cantaloupe, but I changed my mind :-))  
Use the White Gel Pen to add crisp white centers to the flowers.
“Fussy-cut” the cross image out by hand and use the XL Oval Punch to punch out the sentiment.
Emboss a piece of Whisper White cardstock with the Big Shot™ and the Stylish Stripes Textured Impressions™  Embossing Folder, trim the embossed panel, mount onto a piece of Basic Black cardstock, trim and mount again onto the  Rich Razzleberry card base.
Add the horizontal strip of Basic Black cardstock (I used a scrap piece and cut it in half with the separation behind the vertical panel- see another secret tip :-)). 
Use the Big Shot™ with the Woodgrain Textured Impressions™  Embossing Folder to emboss a piece of  Rich Razzleberry cardstock, trim the panel and mount onto a piece of Basic Black cardstock.  Add this panel to the card front per the sketch.
Adhere the sentiment onto two XL Ovals punched from Basic Black cardstock (overlapped to create a frame behind the sentiment) and mount onto the card front along with the cross image using Stampin’ Dimensionals®.
Create the bow from Basic Black cardstock using the Bow Builder Punch.  Create a rolled flower using the 1 ¼” Scallop Circle Punch and Rich Razzleberry cardstock (punch one scallop circle and hand cut a wavy spiral toward the center, roll up and adhere in the middle- the leaves are from Old Olive cardstock using the Bird Builder Punch).
Add the bow with the rolled flower to the card front to finish off the card.
Stamp Sets:  Crosses of Hope, Teeny Tiny Wishes, Well Scripted (all MDS versions)
Ink: Printer Ink- Black; Stampin’ Blendabilities™ Light Markers- Daffodil Delight, Melon Mambo, Old Olive, Rich Razzleberry; Stampin’ Write Marker- Crisp Cantaloupe, White Gel Pen
Paper/Cardstock: Whisper White, Basic Black, Rich Razzleberry
Accessories: Big Shot™, Woodgrain and Stylish Stripes Textured Impressions™ Embossing Folders,  Punches- Bow Builder, Bird Builder, 1 ¼” Scallop Circle, XL Oval

Thanks again for taking the time to visit – I hope that you will create your own Stampin’ Up! Only project and play along with our “Easter's on the Way” challenge!

Sunday, April 20, 2014

He Is Risen Indeed!! Happy Resurrection Sunday!


Happy Resurrection Sunday!!  

We had a lovely service this morning celebrating our Risen Lord and Savior, Jesus Christ!!   I am so thankful that Jesus came to earth as a man, paid the penalty for our sins upon the cross and rose again on the third day!! He is Risen, He is Risen Indeed!!

I wanted to share one more Easter card that I created using the DD99 “Black Tie” Challenge (Basic Black and Rich Razzleberry) and the SplitcoaststampersTLC477 “What’s the Point” Technique Challenge along with a bit of a more stylized cross from the set, Crosses of Hope.  

To create this card:

Open a blank document in My Digital Studio (MDS) and position the cross from Crosses of Hope and re-size.  Also position the “Easter” sentiment from Well Scripted and the “Happy” from Fabulous Phrases.  Print onto a 8 ½ x 11” piece of Whisper White cardstock.

Use a Circle Collection Framelit™ as a guide and using the pointillism technique, create the background (I used a Pilot V5 gel pen).  Carefully cut the cross from the lower edge to the center area, bend up a bit to position the Circle Framelit™ and use the Big Shot™ to cut out the circle around the cross.

Use a Rich Razzleberry Stampin’ Write marker to color the cross and use the Pilot V5 pen to create additional depth in the black areas of the cross. 

Use a Sponge Dauber with Rich Razzleberry Classic Ink to color the background around the cross.

Use the Big Shot™ with the Framed Tulips Textured Impressions™ Embossing Folder to emboss a piece of Whisper White cardstock, trim and mount onto a piece of Basic Black cardstock and adhere the cardfront onto the Rich Razzleberry card base.

Use the Big Shot™ with the Paper Doily Sizzlit L™ to cut out a doily from Whisper White cardstock and the Window Frame Collection Framelits™ to cut out the window frame from a piece of Basic Black cardstock. 

Adhere the cross to the window frame and doily and add to the card front using Stampin’ Dimensionals®.

Punch the sentiment out using the XL Oval Punch and adhere to a Basic Black XL Oval piece – adhere behind the window frame and add to the card front with Stampin’ Dimensionals®. 

To finish off the card, add Rhinestones to the cross, sentiment and the retired Frosted Finishes Embellishment to the center. 

Stamp Sets:  Crosses of Hope, Well Scripted, Fabulous Phrases (all MDS versions)

Ink: Printer Ink- Black, Rich Razzleberry, Stampin’ Write Marker- Rich Razzleberry
Paper: Whisper White, Basic Black, Rich Razzleberry

Accessories: Big Shot™, Circle Collection and Window Frames Collection Framelits™, Paper Doily Sizzlit L™, Framed Tulip Textured Impressions™ Embossing Folder, XL Oval Punch, Sponge Dauber, Rhinestones, retired Frosted Finishes embellishment, Pilot V5 Pen


Thanks again for stopping by- I hope all of you have a fabulous Resurrection Sunday and wonderful week!!

Saturday, April 12, 2014

DD98 Cross of Hope- Happy Easter!

Hi Stampers! 

Time for the new DD98 Dynamic Duos “Subtly Yours”  and I decided to turn to My Digital Studio (MDS) along with traditional card making techniques to create my Easter card for this project :-)

I hope you will have the time to visit and check out the rest of the fantastic Design Team projects as well as create your own and share with us!!


To create this project:
Using MDS, open a blank 8.5x11 document and insert the floral cross from Crosses of Hope and enlarge a bit.   Also insert the “Easter” sentiment from Well Scripted, the “Happy” sentiment from Fabulous Phrases (reducing the size of the word Happy and inserting above Easter) and print out onto Whisper White cardstock.
Using Stampin’ Write markers in So Saffron, Wisteria Wonder and Sahara Sand to color the cross image and carefully cut out.  
Punch out the sentiment using the 1 ¾” Circle Punch and mount onto a piece of Basic Black cardstock (also punched with the 1 ¾” Circle Punch).
Use the Big Shot™ with the retired Elegant Bouquet Textured Impressions™ Embossing Folder to emboss a piece of So Saffron cardstock and the retired Lacy Brocade Textured Impressions™ Embossing Folder to emboss a strip of Wisteria Wonder Designer Series Paper (DSP).   
Mount the Wisteria Wonder strip to a piece of Basic Black cardstock and lightly sand with the Sanding Block to expose the white core.  Adhere the sentiment behind the layer and mount onto the So Saffron embossed background.
Adhere the entire panel to the Basic Black card base and add the cross using Stampin’ Dimensionals®. 
Create the rolled flowers using Whisper White, Wisteria Wonder and So Saffron cardstock and the 1 3/4” and 1 ¼” Scallop Circle Punches (punch out the scallops, hand “scrunch” the cardstock to loosen the fibers in the paper, cut a wavy spiral from the outside toward the center and roll up). 
Add the flowers with the Basic Black leaves (from the Bird Builder Punch) and Pearls to finish off the card.
Stamp Sets: Crosses of Hope, Fabulous Phrases, Well Scripted (MDS version)
Ink: Printer Ink- Black, Stampin’ Write Markers- So Saffron, Wisteria Wonder, Sahara Sand
Paper/Cardstock:  So Saffron, Wisteria Wonder, Basic Black, Whisper White, Wisteria Wonder DSP
Accessories: Big Shot™, retired Elegant Bouquet and Lacy Brocade Textured Impressions™ Embossing Folders, Punches: 1 ¾” and 1 1/4” Scallop Circle, Bird Builder, 1 ¾” Circle; Pearls

Thanks again for visiting - I hope you have a chance to join in on our “DD98 Subtly Yours” Challenge!

Sunday, March 31, 2013

Hallelujah, He Is Risen- Card #2 !!


Happy Easter (again)!! 

I needed one more card for Easter so I decided to use the Freshly Made Sketches FMS79 Sketch along with the colors from the CQC182 ColourQ Challenge (since I had those colors still out and embossed parts from the previous post).


Again, if you have not had the time, check out both sites for wonderful examples and inspiration!! 

To create this card:

Using the Embossing Buddy®, de-static a piece of Whisper White cardstock and stamp the image from Crosses of Hope using Versamark™ ink.  Apply Stampin’ Emboss® Early Espresso Embossing Powder and heat with the Heat Tool.   Once cooled, color with the Stampin’ Write markers in Pool Party, Wisteria Wonder, Lucky Limeade and Always Artichoke and carefully cut out. 

Use the Big Shot™ to emboss a piece of Whisper White cardstock with the Lacy Brocade Textured Impressions™ Embossing Folder (difficult to see in the photo).  Cut the Whisper White embossed cardstock with the 2 ½” Circle Punch and layer onto another 2 ½” Circle punched from Early Espresso cardstock.  

Adhere the cross with Mini Glue Dots and add the rolled flower with the leaves (flower was created with the 1 ¼” Scallop Circle Punch and the leaves are from the Bird Builder Punch). 

Add the Wisteria Wonder and Lucky Limeade DSP layers (previously embossed from the last post and lightly sanded to expose the white core).  Layer the ribbon and embossed Vellum per the sketch, add the ribbon bow, sentiment and Pearl to finish off the card. 

Stamp Sets: Crosses of Hope, Teeny Tiny Wishes

Ink: Versamark™, Stampin’ Write Markers- Pool Party, Wisteria Wonder, Lucky Limeade, Always Artichoke, Early Espresso

Paper/Cardstock:  Whisper White, Early Espresso, Wisteria Wonder and Lucky Limeade DSP, Vellum

Accessories:  Big Shot™,  Lacy Brocade, Vintage Wallpaper and Delicate Designs (Lace)Textured Impressions™ Embossing Folders, Large Scallop Edgelit™, Punches- 2 ½” Circle, 1” Square (for banner points), Word Window (for sentiment), 1 ¼” Scallop Circle, Bird Builder; Embossing Buddy®, Stampin’ Write® Early Espresso Embossing Powder, Heat Tool, Pearls, 5/8” Satin Ribbon (from my stash)

Thanks again for visiting- I hope all of you have a wonderful Easter celebrating our Risen Savior!!

Hallelujah - He is Risen!!


Hi Stampers! 

Happy Easter!!  I hope all of you have a wonderful Easter celebrating our Risen Savior!!

I needed to create a few more Easter cards and decided to use the colors from this week’s CQC182ColourQ Challenge along with the Nacho Average NAC39 Sketch Challenge.  If you have not visited these sites yet, stop by- they have great samples from their Design Teams as well as the other entries.

To make this quick and easy “hybrid” card:

Print an image from the Crosses of Hope Brush Set from My Digital Studio (MDS)- I enlarged the image form the original stamp size :-)  Color the flowers and leaves using Stampin’ Write markers in Pool Party, Wisteria Wonder, Lucky Limeade and Always Artichoke.  Carefully cut out the cross and adhere the sentiment banner.

Use the Big Shot™ with the Vintage Wallpaper Textured Impressions™ Embossing Folder to emboss a piece of Wisteria Wonder Designer Series Paper (DSP) and a piece of Lucky Limeade DSP using the Lacy Brocade Textured Impressions™ Embossing Folder.  Lightly sand the DSP to reveal the white core.

Layer the DSP onto Basic Black cardstock, add the embossed Vellum lace edge and the satin ribbon band.   Add the cross image using Stampin’ Dimensionals and the satin ribbon bow to finish off the card.

Stamp Sets:  Crosses of Hope (MDS), Teeny Tiny Wishes

Ink: Printer Ink- Black, Stampin’ Write markers- Pool Party, Wisteria Wonder, Lucky Limeade, Always Artichoke, Basic Black

Cardstock/Paper: Whisper White, Basic Black, Wisteria Wonder DSP, Lucky Limeade DSP, Vellum

Accessories:  Big Shot™, Vintage Wallpaper, Lacy Brocade and Delicate Designs (Lace)Textured Impressions™ Embossing Folders,  Large Scallop Framelit™, Punches- 1” Square (for banner points), 5/8” Satin Ribbon (from my stash)

Thanks again for stopping by- I hope you have a glorious Easter!

Friday, March 15, 2013

Happy Easter- Playing with The Paper Players


Hi Stampers!!

I had another chance to stamp this evening (one of my favorite things to do :-)) and to create an Easter card using the fabulous spring colors in the PP136 Challenge at The Paper Players and this also qualifies for the Stampin' Up! Only SUO66 Challenge- Easter Parade:-) 

I believe that both of these sites, The Paper Players and SUO Challenges have very talented design teams,  and if you have not had a chance to visit their sites yet, I highly encourage you to do so (trust me, you will not be disappointed :-)).

**** 03/28/13**** This card also qualifies for the StillADDinktive Spot that Easter Stamp Easter - this challenge site allows you to back link projects that you have created oor create a new project.  I am not sure if I will have the time to stamp another Easter card before Sunday so I decided to share this one:-)  

I decided to use Crosses of Hope and while I love and own the stamp set, the cross was not as large as I wanted, so I utilized My Digital Studio to create this “hybrid” card :-) 

To create this card:

Open the My Digital Studio program and using a blank page, insert the stamp brush from Crosses of Hope, size to your preference and change the color to Early Espresso (or if you prefer, stamp the cross using Early Espresso Classic Ink).  Print out onto Whisper White cardstock.

Color the flowers and leaves using Stampin’ Write Markers in Pool Party, Regal Rose and Lucky Limeade.  Carefully cut out the cross image and set aside.

Cut a panel of Pool Party and Regal Rose cardstock and overlap in the center (my panel is 3" x 4 1/4") and mount this panel onto Early Espresso cardstock.  Emboss a piece of Vellum using the Big Shot™ and the Lacy Brocade Textured Impressions™ Embossing Folder and layer over the 3" x 4 1/4" Pool Party/Regal Rose panel (I used a thin layer of Two-Way Glue to adhere the Vellum- dries clear and works great!).

Add the embossed lace paper border (this was a previously embossed piece from my scraps using the Big Shot™ , Large Scallop Edgelit™ and the Delicate Designs (Lace) Textured Impressions™ Embossing Folder).  Add the ½” Pool Party Seam Binding Ribbon to cover the paper lace layer where it overlaps (right under the top of the horizontal parts of the cross).

Adhere the cross to the panel with Stampin’ Dimensionals® and add Pearls to the lower right hand corner and to the flowers on the cross.

Emboss a piece of Vellum with the Big Shot™ and Framed Tulips Textured Impressions™ Embossing Folder.  Layer this Vellum panel onto a piece of Regal Rose Designer Series Paper (I used the striped layer but it is a bit difficult to see the stripes in the photo) and adhere this embossed Vellum panel to an Early Espresso card front, add the layered cross panel with Stampin’ Dimensionals®.

Stamp the sentiment using an Early Espresso Stampin' Write marker (so you can omit part of the sentiment to split the words).  Punch out using the Jewelry Punch, add to card front under the area where the bow will be placed using Mini Glue Dots, add the 1/2” Pool Party Seam Binding Ribbon Bow with the Antique Brad to finish off the card.

Stamp Sets: Crosses of Hope (MDS), Teeny Tiny Wishes

Ink:  Printer Ink- Early Espresso, Stampin’ Write Markers- Early Espresso, Lucky Limeade, Pool Party, Regal Rose

Paper: Early Espresso, Pool Party, Regal Rose, Whisper White, Regal Rose Designer Series Paper, Vellum

Accessories:  Big Shot™, Textured Impressions™ Embossing  Folders- Lacy Brocade,  Framed Tulips, Delicate Designs (Lace), Large Scallop Framelit™, Jewelry Tag Punch, ½” Pool Party Seam Binding Ribbon, Antique Brad, Pearls, Stampin' Dimensionals®, Mini Glue Dots, Two-Way Glue

Thanks again for stopping by!  I hope all of you have a wonderful week and God Bless!
Related Posts Plugin for WordPress, Blogger...