Showing posts with label Delicate Designs (Lace) EF. Show all posts

Saturday, October 18, 2014

Ornamental Pine #2- Joy for Two Challenges :-)

Hi Stampers!

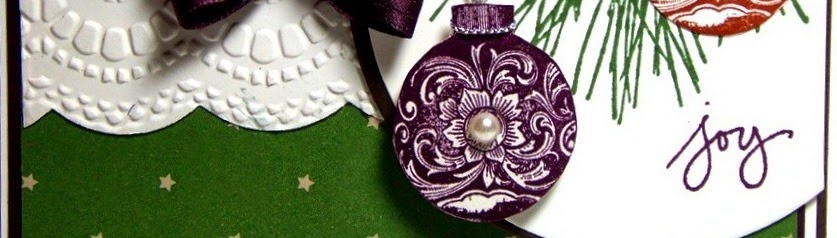
Here is the second card I created using the Ornamental Pine set from the 2014 Holiday Mini catalog.  

This card was created for the Creative Challenge Club #17 Sketch Challenge along with another Christmas card for the CCC14 Christmas Card Challenge atSplitcoaststampers.

As always, if you have not already visited the challenge sites, I hope you will find the time to do so- there are so many wonderful examples from the Design Teams and the galleries!

To create this card:

Using the large branch stamp from Ornamental Pine, ink the image using Garden Green Classic Ink.  Wipe the branch portion off using a baby wipe and color the branch with the Early Espresso Stampin’ Write marker.

Use the Big Shot™ with the Circle Collection Framelits™ to cut out the image along with another circle from Early Espresso cardstock.
Carefully cut along the branch to allow an opening for the Silver Cord (retired) used on the ornament.

Ink the sentiment from Endless Wishes using Blackberry Bliss Classic Ink and stamp onto the circle under the branches.

Stamp the ornaments using Blackberry Bliss and Cajun Craze Classic Ink onto Whisper White cardstock.  Carefully cut out (“fussy-cut”) each ornament and wrap the retired Silver Cord around the top of the ornaments.

Adhere the Cajun Craze ornament directly onto the pine branch image and insert the silver cord into the opening cut around the branch.

Mount the Early Espresso cardstock circle behind the pine branch circle.

Mount a piece of Trim the Tree Designer Series Paper (DSP) to a piece of Blackberry Bliss cardstock, trim and mount onto a piece of Whisper White cardstock. 

Add the paper lace (created using the Big Shot™ along with the Large Scallop Edgelit™ and embossed with the Delicate Designs Lace Framelit™) and top with the 3/8’ Blackberry Bliss triple ribbon bow.

Mount the Blackberry Bliss ornament image onto the pine branch circle using Stampin’ Dimensionals® , tuck the silver cord behind the circle and add the circle to the card front. 

Trim the edge of the circle on the card front per the sketch and mount the entire panel onto the Early Espresso card base.

Add a few Pearls to the upper left hand corner to finish off the card.

Stamp Sets: Ornamental Pine, Endless Wishes

Ink:  Blackberry Bliss, Cajun Craze, Garden Green; Stampin’ Write Marker- Early Espresso

Paper: Whisper White, Blackberry Bliss, Early Espresso, Trim the Tree DSP Pack  
     
Accessories: Big Shot™, Circle Collection Framelits™, Large Scallop Edgelit™, Delicate Designs Textured Impressions™ Embossing Folder, Pearls, retired Silver Cord


Thanks again fortaking the time to visit :-) I have one more card to share using this stamp set- I am having so much fun with this one!  

Have a great weekend, my friends!!

Tuesday, July 29, 2014

Birthday Wishes For LeAnne- A Color, Technique and Sketch Challenge :-)


Hi Stampers! 

I wanted to create another card using one of my favorite stamp sets, An Open Heart and decided to incorporate the C489 Splitcoaststampers' Color Challenge (Bermuda Bay, Pool Party and Calypso Coral) along with the FM170 Friday Mashup! DelftTile Background and Sketch (modified the sketch a bit) and also a birthday cardfor the #119 blog hop at Merry Monday for LeAnne  (Happy Birthday LeAnne!!).   

If you have not had a chance to do, I hope that you will take a moment to visit all of the challenge sites- so many wonderful Design Teams samples and entries!

To create this card:

Use the Simply Scoring Tool™ to score lines on a piece of Whisper White cardstock at 1” increments to create the tile background.

Using Memento™ Tuxedo Black Ink stamp the stem image onto Whisper White cardstock, mask and repeatedly stamp the image again, mask and stamp once more.

Color the floral stem image using the Stampin’ Write markers- Pool Party and Bermuda Bay for the leaves and Calypso Coral for the berries and blossoms.

Use the medium Calyso Coral Blendabilities™ marker to add shadows on the blossoms and the Crumb Cake Stampin’ Write marker to add shadows to the image.

Use a Sponge Dauber with Crumb Cake Classic Ink to sponge over the entire image and allow the “grout” lines to show :-)   Add additional shadows with Soft Suede Classic Ink  and use the Color Spritzer Tool with the Early Espresso Stampin’ Write marker to add more distressing.

Trim the panel and adhere to a piece of Pool Party cardstock, trim again and add to the Calypso Coral cardstock layer.

Add the embossed lace panel- I had this piece in my scraps :-)   It had been previously cut with the Big Shot™ along with the Large Scallop Edgelit™ and embossed with the Delicate Designs Textured Impressions™ Embossing Folder (that had been inked with Crumb Cake Classic Ink prior to embossing the Whisper White cardstock). 

Sponge additional Crumb Cake Classic Ink onto the Calypso Coral cardstock at the bottom of the card and use the Color Spritzer Tool with the Early Espresso Stampin’ Write marker. 

Add the 5/8” Satin Ribbon bow (from my stash)  to cover the seam of the lace embossed piece. 

I also had a pre-printed sentiment in my stash (using My Digital Studio onto Whisper White cardstock)- sponge with Crumb Cake Classic Ink , punch out using the Large Scallop Punch and layered onto a Pool Party cardstock oval punched with the Large Oval Punch as well. 

Layer the panel onto a piece of Bermuda Bay cardstock , trim and mount onto a Whisper White card base.   Sponge Crumb Cake Classic Ink to “antique” the edges of the card and age the Whisper White card base.

Stamp the Carolina Wren image onto Whisper White cardstock using Memento™ Tuxedo Black Ink and color using the Sahara Sand, Crumb Cake and Baked Brown Sugar Stampin’ Write markers and carefully cut out by hand.

Cut a 2” Circle from Whisper White cardstock and create a horizon line using the Basic Black Stampin’ Write marker.  Mask the line and repeatedly stamp the leaf image from World of Dreams using Pool Party Classic Ink, ink the same image using Bermuda Bay Classic Ink and stamp a few leaves with the Bermuda Bay. 

Color the “ground” area with the Crumb Cake and Baked Brown Sugar Stampin’ Write marker and Light Crumb Cake Blendabilities™ marker. 

 Use a Sponge Dauber with Crumb Cake Classic Ink to distress the paper and add the spritzing using the Early Espresso Stampin’ Write marker along with the Color Spritzer Tool.

Punch out a 2” Circle from Pool Party and Calypso Coral cardstock, split the circles in half horizontally and adhere behind the stamped landscape image.

Add the fussy cut wren to the circle using Stampin’ Dimensionals® and adhere to the layered circle.  

Stamp Sets: An Open Heart, World of Dreams, Hugs and Wishes (MDS version)

Ink: Memento™ Tuxedo Black, Crumb Cake, Soft Suede, Stampin’ Write Markers- Basic Black, Baked Brown Sugar, Crumb Cake, Calypso Coral, Bermuda Bay, Pool Party, Sahara Sand; Stampin’ Blendabilities™- Calypso Coral, Crumb Cake Collections

Paper/Cardstock:  Whisper White, Bermuda Bay, Calypso Coral, Pool Party

Accessories: Big Shot™, Large Scallop Edgelit™, Delicate Designs Textured Impressions™ Embossing Folder, Sponge Dauber, Color Spritzer Tool,  Punches- Large Oval, 2” Circle; Simply Scored™ Tool,  5/8” Satin Ribbon (from our stash)


Thanks again for stopping by- I hope you all of you have a wonderful Tuesday and again, Happy Birthday, LeAnne!!  Hugs to you, my friend :-)

Friday, May 16, 2014

Together Forever- A Sneak Peak for the Paper Players

Hi Stampers! 

I had a great time in my craft room last night and created several cards using My Digital Studio, traditional stamps and a sneak peek of the new Blendabilities™.  I created several of the cards using The Paper Players PP195 Color Challenge – So Saffron, CalypsoCoral and Pear Pizzazz

I hope you will have time to check out the Design Team as well as the other entrants- great job by all!!

To create this card:

Open a blank document in My Digital Studio (MDS), position the floral spray from Elements of Style along with the sentiment from Together Forever and print onto an 8 ½ x 11” piece of Whisper White cardstock.

Color the floral spray using the Daffodil Delight, Pumpkin Pie and Old Olive Blendabilities™ . Use the Sahara Sand Stampin’ Write marker to create shadows.
Use the Big Shot™ with the retired Lacy Brocade Textured Impressions™ Embossing Folder to emboss a piece of So Saffron and Pear Pizzazz Designer Series Paper (DSP), lightly sand to expose the white core.

Create the paper lace with the Big Shot™, the Large Scallop Edgelit™ and the Delicate Designs Textured Impressions™ Embossing Folder.

Layer the embossed DSP and paper lace onto the 5 ½” Square piece of Whisper White cardstock and add the ½” Ruffled Calypso Coral Ribbon to hide the seam.

Cut the floral spray image out using the Big Shot™ along with the Heart Collections Framelits™ and also cut out the same size heart using Calypso Coral cardstock.
Layer the hearts using Stampin’ Dimensionals® and add the Pearls to finish off the card.
 
Stamp Sets:  Elements of Style, Together Forever (MDS versions)

Ink: Printer Ink- Black, Blendabilities™- Daffodil Delight, Pumpkin Pie and Old Olive Collections,  Stampin’ Write Marker- Sahara Sand

Paper: Whisper White, Calypso Coral, retired So Saffron and Pear Pizzazz DSP

Accessories: Big Shot™, Heart Collection Framelits™, Large Scallop Edgelit™, Delicate Accents and retired Lacy Textured Impressions™ Embossing Folders, Pearls, retired Calypso Coral ruffled ribbon


Thanks again for visiting- I hope all of you have a wonderful weekend and will post the rest of the cards later this evening :-)

Friday, February 14, 2014

Happy Valentine's Day- Six Punches and A Cool Color Combo :-)

Hi Stampers!

Happy Valentine’s Day!!   I decided to create a Valentine with non-traditional colors and loved Nance’s PP182 Color Combination at The Paper Players and used a few punches for another card for the SUO90 Punch Parade Challenge.  Plus,  this week's Shining the Light Challenge at Our Daily Bread Designs is Non-Traditional Colors- love using non-traditional colors for holidays, don't you?   

Again, I hope you have had a chance to check out all of the entries and Design Team projects!  So much inspiration and alot of hard work goes into creating and maintaining the challenge sites- if you have a chance, leave a comment (what we call "some love") :-)

To create this card:

Use the Big Shot™ with the heart die cut (I used a non SU! Die this time) to cut out the opening on the card front from a piece of Midnight Muse cardstock.   Emboss with the Woodgrain Textured Impressions™ Embossing Folder and trim.

Emboss a piece of Whisper White cardstock using the retired Lacy Brocade Textured Impressions™ Embossing Folder  and adhere behind the heart opening.  Add the paper lace edge to the bottom of the Midnight Muse embossed layer (cut with the Large Scallop Framelits™ and embossed with Lace Delicate Designs Textured Impressions™ Embossing Folder- I had this one in my scraps ready to go :-))

Adhere this panel onto a piece of Gold Foil cardstock and adhere again onto a piece of Crisp Cantaloupe cardstock.  Mount the entire panel onto the Midnight Muse card base.

Stamp the little banner from the stamp set, Follow Your Heart using Midnight Muse Classic Ink onto Whisper White cardstock and punch out using the Bitty Banner Punch. Add to the card front using Mini Glue Dots. 

Emboss a piece of Crisp Cantaloupe cardstock using the retired Lacy Brocade Textured Impressions™ Embossing Folder- cut a strip to hide the seam of the paper lace edge and cover the upper edge of the banner.

Create the paper bow using the Large Oval and Hexagon Punches from the embossed Crisp Cantaloupe cardstock.  Add the Midnight Muse Dahlia to the center of the bow and adhere to the front of the card.

Using the Big Shot™ with the detailed heart die to cut out a piece from the Gold Foil cardstock and add to the card front using Stampin’ Dimensionals®.

Create the rolled flowers using the 1 ¾” and 1 ¼” Scallop Circle Punches from Crisp Cantaloupe cardstock (punch out, cut a spiral towards the center, crimp with the retired Crimper Tool, roll up and adhere).  Use the Bird Builder Punch to punch out the leaves from Midnight Muse cardstock, adhere to the center of the heart and add the rolled flowers to finish off the card. 

Stamp Sets: Follow My Heart

Ink: Midnight Muse

Paper: Whisper White, Crisp Cantaloupe, Midnight Muse, Gold Foil

Accessories: Big Shot™, Woodgrain and retired Lacy Brocade Textured  Impressions™ Embossing Folders, Punches- Bitty Banner, Bird Builder, Hexagon, 1 ¾” and 1 ¼” Scallop Circle , XL Oval;  Dahlia, ODBD Heart Die (non-SU!), retired Crimper Tool


Thanks again for visiting- have a wonderful Valentine's Day! 

Monday, August 12, 2013

Trust in the Lord- A Scrap Card for Three Challenges :-)

Hi Stampers! 

I created this card for the Pals Paper Arts PPA167 Color Challenge along with a new challenge site for me, Word Art Wednesday “Anything Goes” Challenge #92 and the Stampin’ Royalty Challenge SR188 “It’s the Little Things” Challenge to use up small scraps (love being able to use up some of my scraps :-)).  

If you have not had the chance to drop in on any of these sites, I hope you will take the time to do so – again, wonderful inspiration!

To create this card:

Use the Big Shot™ with the Chalk Talk Framelits™ to cut a tag from Basic Black cardstock and the Large Scallop Framelit™ to cut the edges of two Whisper White scrap cardstock pieces.  Emboss the scalloped pieces using the Delicate Accents (Lace) Textured Impressions™ Embossing Folder. 

Use the Embossing Buddy® to de-static the Basic Black cardstock tag, stamp the sentiment from Trust God using Classic White Craft Ink and emboss with the Heat Tool and Stampin’ Emboss® White Embossing Powder.  Smudge a bit of White Craft Ink over the image using a Sponge Dauber. 

Use the AquaPainter™ to brush on Coastal Cabana Classic Ink onto Whisper White cardstock.  Once dried, stamp the En Francais background stamp using Coastal Cabana Classic Ink and trim to size.  Adhere to a piece of Coastal Cabana cardstock and then again onto Crisp Cantaloupe cardstock.

Using a small scrap piece of Eastern Elegance Designer Series Paper (DSP), cut in half and adhered to Coastal Cabana cardstock to create the vertical band for across the card. 

Adhere the two embossed lace paper pieces across the bottom of the card, add the DSP band across the center (you cannot see it but there is a gap under the tag since I used scraps- our little secret :-) )  and mount the black cardstock tag using Stampin’ Dimensionals®.  In fact, if you ever took my cards apart, all of the background layers have been punched in the center to use for future projects and to lower the weight of the card- again, our little secret :-)  We laugh and say they are "holy cards"- lol!!

Create the paper bow from scraps of the same DSP as the vertical band (two large ovals rolled in half and secured to a small scrap strip of DSP, add the two banner points for the tails).  Add the paper bow to the top of the tag using Mini Glue Dots®.

Create the four rolled flowers from Crisp Cantaloupe cardstock using the 1 ¼” Scallop Circle Punch (cut into the circle towards the center and roll up- see the Splitcoaststampers tutorial here) and cut the leaves from Pistachio Pudding cardstock using the Bird Builder Punch.   

Add the flowers and leaves to the bottom of the card and one to the center of the bow using Mini Glue Dots®.

Stamp the postage stamp image from Postage Due onto Whisper White cardstock using Coastal Cabana Classic Ink and cut out by hand.  Adhere to a scrap piece of Basic Black and free cut by hand around the image to create a small frame.  Use the Postage Stamp Punch to punch out a piece of Whisper White, adhere the stamp image and mount to the cardstock using Mini Glue Dots® and a Stampin’ Dimensional®.

Add the Pearls to the centers of the flowers to finish off the card.

Stamp Sets: Trust God, Postage Due, En Francais 

Ink: Coastal Cabana, White Craft Ink

Paper/Cardstock:  Whisper White, Crisp Cantaloupe, Coastal Cabana, Pistachio Pudding, Eastern Elegance DSP, Basic Black

Accessories: Big Shot™, Chalk Talk and Large Scallop Framelits™, Delicate Accents (Lace) Textured Impressions™ Embossing Folder, Sponge Dauber, Punches- 1 ¼” Scallop Circle, Bird Builder, Postage Stamp, Large Oval, Pearls

Thanks again for visiting- I hope you have a marvelous Monday!!

Tuesday, June 4, 2013

SUO72 Wedding Theme- Congratulations!!

Hi Stampers! 

The Stampin’ Up! Only Challenges theme for the SUO72 Challenge is Weddings and what perfect timing (we have two weddings this month to attend).   Please stop by to visit to see all of the details and the other Design Team creations!

To create this card:

Use the Big Shot™ with the Fancy Fan Textured Impressions™ Embossing Folder to emboss a piece of Whisper White cardstock for the background layer (I left the bottom third out of the folder so it would be easier to mount the lace border strips).

Use the Big Shot™ with the Large Scallop Framelit™ to cut two strips from Whisper White cardstock and emboss with the Delicate Designs (Lace) Textured Impressions™ Embossing Folder.  Adhere the two strips at the bottom of the background layer and add the 5/8” White Organza Ribbon strip and triple ribbon bow.

Use the Embossing Buddy® to de-static a piece of Whisper White cardstock and stamp the floral image from Everything Eleanor along with the Congratulations label image from Layered Labels using Versamark™ ink.  Apply Stampin’ Emboss® Silver Embossing Powder and heat with the Heat Tool.   Once cooled, carefully cut out the three flowers and use the Big Shot™ with the Apothecary Accents Framelits™ to cut out the label image. 

Add the background to the Whisper White card base and adhere the Label image.  Mount the flowers using Stampin’ Dimensionals® and add Pearls to finish off the card. 

Stamp Sets:  Eleanor, Layered Labels

Ink: Versamark™

Paper/Cardstock: Whisper White

Accessories:  Big Shot™, Fancy Fan and Delicate Accents Textured Impression ™ Embossing Folders, Apothecary Accents Framelits™, Embossing Buddy®, Stampin’ Emboss® Silver Embossing Powder, Pearls


Thanks again for visiting!  I hope you will take the time to join us for the Wedding Challenge at SUO Challenges!!

Wednesday, April 24, 2013

Happy Birthday! A "Hybrid" Card for A Sketch and Color Challenge :-)


Hi Stampers! 

I hope all of you are having a great Wednesday so far!  Last night while I was working with My Digital Studio, I decided to create a card for the DD49Dynamic Duos Color Challenge and the Pals Paper Arts PPA157 Sketch Challenge.  Both of these sites have wonderful Design Teams and are a source of inspiration for all- of you have not had a chance to do so, I hope you will visit them soon :-)


To make this “hybrid” card:

Print the Postage Due Stamp Brush set and the sentiment from Watercolor Trio onto Whisper White cardstock (I "re-sized" both elements).  

Trim the area around the Postage Due image and use the XL Oval Punch to punch out the sentiment. Adhere the Postage Due layer onto Basic  Gray cardstock and again onto Whisper White cardstock.   

Use the Big Shot™ with the Large Scallop Edgelit™ to cut the edge of a piece of Whisper White cardstock and emboss using the Delicate Accents (Lace) Textured Impressions™ Folder.

Layer a piece of Basic Black Designer Series Paper (DSP) onto Basic Black cardstock (I used a piece from the retired Night and Day), add the additional layers of embossed panel and checkerboard DSP (again, retired SU! background paper from years ago, embossed with the Square Lattice embossing folder).  Add the focal image and sentiment using Stampin' Dimensionals. 

Adhere the 5/8” Black Satin Ribbon bow with a Mini Glue Dot to finish off the card :-)

Stamp Sets:  Postage Due, Watercolor Trio (both MDS)

Ink: Printer Ink- Black

Cardstock: Whisper White, Basic Black, Designer Series Paper- retired Night and Day, retired Background Paper

Accessories:  Big Shot™, Delicate Accents (Lace) and Square LatticeTextured Impressions™ Embossing Folders, XL Oval Punch, 5/8” Black Satin Ribbon

Thanks again for stopping by- I hope all of you have a great day!!

Wednesday, April 10, 2013

Postage Stamp Quilt- Another "Hybrid" and So Much Fun!!


Hi Stampers! 

I hope all of you are having a great week so far!


I loved this week’s spring color challenge at Pals Paper Arts and decided to create another card using My Digital Studio (MDS) along with traditional stamping/paper crafting methods- so another “hybrid” card.  I hope you are not getting tired of these- they are actually quite fun to make :-)
  
If you have not visited Pals Paper Arts yet, stop by- they have a wonderful Design Team and many other entries for the week- the variety and inspiration is amazing!!

To make this “hybrid” card:

Layer the stamp brush set in MDS and re-size the floral images from Everything Eleanor to fit within the 1” Square Punch.  Print out onto Whisper White cardstock along with the sentiment from Hugs & Wishes (a retired stamp set but current in MDS).   This is another thing I love about MDS- retired sets are still technically current when used in MDS- how great is that? :-)).

With the two extra flowers, carefully cut by hand (fussy cut) and apply a bit of re-positional glue to the back of the images ( I used Dotto™).   Adhere the cut image over the printed image to mask the flower and create a mask for the "stamp" area using a piece of scrap paper and the 1” Square Punch.  Hold this square mask over the masked floral image and use Sponge Daubers with Certainly Celery and Marina Mist Classic Ink to sponge over the flowers.  Lift the mask off the flower and carefully sponge a bit of ink over the flower as well (I also had to touch up the edges of the flowers when I lifted the mask with the Stampin’ Write marker in both colors).  Punch the floral images out using the 1" Square Punch and fill in the sides if needed with ink.  

Use the Postage Stamp Punch to punch out four “stamps” from Basic Black cardstock and adhere the floral images.   Using the Color Spritzer Tool with the Marina Mist Stampin’ Write marker, spritz the flowers. 

Apply Bashful Blue Classic Ink to the En Francais background stamp and with the Sponge Dauber, tap a bit of Marina Mist Classic Ink over the Bashful Blue inked area. Stamp the background image onto Bashful Blue cardstock.  

Adhere the floral postage stamp images onto the En Francais background and cut around to create the frame.  Mount onto Basic Black cardstock and again on to Marina Mist.   Add the 5/8” Basic Black Satin Ribbon bow along the side and mount the entire panel onto a Tea Lace Paper Doily. 

Use the Big Shot™ with the Lacy Brocade Textured Impressions™ Embossing Folder to emboss a piece of Certainly Celery cardstock.  Use the Large Scallop Edgelit™ to cut two pieces of Whisper Whtie cardstock and emboss with the Delicate Accents (Lace) Textured Impressions™ Embossing Folder. 

Add the lace borders, and the strip of Bashful Blue (stamped above with En Francais with the Basic Black cardstock strip) to the background panel.  Adhere the focal image with Stampin’ Dimensionals.

Punch out the sentiment using the Large Oval Punch and create a border from two pieces punched with the Large Oval Punch from Basic Black cardstock.  Add to the card using Stampin’ Dimensionals and adhere the Pearls to finish off the card.

Stamp Sets:  Everything Eleanor, Hugs and Wishes (both MDS), En Francais

Ink: Printer Ink- Black, Stampin’ Write markers- Certainly Celery, Marina Mist

Cardstock: Whisper White, Certainly Celery, Marina Mist, Bashful Blue, Basic Black
Accessories:  Big Shot™, Lacy Brocade and Delicate Designs (Lace)Textured Impressions™ Embossing Folders,  Large Scallop Framelit™, Punches- 1” Square, Postage Stamp, Large Oval, Tea Lace Paper Doily, Color Spritzer Tool, Sponge Daubers, Pearls, 5/8” Basic Black Satin Ribbon (retired)

Thanks again for stopping by- I hope all of you have a great Wednesday!!

Sunday, March 31, 2013

Hallelujah, He Is Risen- Card #2 !!


Happy Easter (again)!! 

I needed one more card for Easter so I decided to use the Freshly Made Sketches FMS79 Sketch along with the colors from the CQC182 ColourQ Challenge (since I had those colors still out and embossed parts from the previous post).


Again, if you have not had the time, check out both sites for wonderful examples and inspiration!! 

To create this card:

Using the Embossing Buddy®, de-static a piece of Whisper White cardstock and stamp the image from Crosses of Hope using Versamark™ ink.  Apply Stampin’ Emboss® Early Espresso Embossing Powder and heat with the Heat Tool.   Once cooled, color with the Stampin’ Write markers in Pool Party, Wisteria Wonder, Lucky Limeade and Always Artichoke and carefully cut out. 

Use the Big Shot™ to emboss a piece of Whisper White cardstock with the Lacy Brocade Textured Impressions™ Embossing Folder (difficult to see in the photo).  Cut the Whisper White embossed cardstock with the 2 ½” Circle Punch and layer onto another 2 ½” Circle punched from Early Espresso cardstock.  

Adhere the cross with Mini Glue Dots and add the rolled flower with the leaves (flower was created with the 1 ¼” Scallop Circle Punch and the leaves are from the Bird Builder Punch). 

Add the Wisteria Wonder and Lucky Limeade DSP layers (previously embossed from the last post and lightly sanded to expose the white core).  Layer the ribbon and embossed Vellum per the sketch, add the ribbon bow, sentiment and Pearl to finish off the card. 

Stamp Sets: Crosses of Hope, Teeny Tiny Wishes

Ink: Versamark™, Stampin’ Write Markers- Pool Party, Wisteria Wonder, Lucky Limeade, Always Artichoke, Early Espresso

Paper/Cardstock:  Whisper White, Early Espresso, Wisteria Wonder and Lucky Limeade DSP, Vellum

Accessories:  Big Shot™,  Lacy Brocade, Vintage Wallpaper and Delicate Designs (Lace)Textured Impressions™ Embossing Folders, Large Scallop Edgelit™, Punches- 2 ½” Circle, 1” Square (for banner points), Word Window (for sentiment), 1 ¼” Scallop Circle, Bird Builder; Embossing Buddy®, Stampin’ Write® Early Espresso Embossing Powder, Heat Tool, Pearls, 5/8” Satin Ribbon (from my stash)

Thanks again for visiting- I hope all of you have a wonderful Easter celebrating our Risen Savior!!

Hallelujah - He is Risen!!


Hi Stampers! 

Happy Easter!!  I hope all of you have a wonderful Easter celebrating our Risen Savior!!

I needed to create a few more Easter cards and decided to use the colors from this week’s CQC182ColourQ Challenge along with the Nacho Average NAC39 Sketch Challenge.  If you have not visited these sites yet, stop by- they have great samples from their Design Teams as well as the other entries.

To make this quick and easy “hybrid” card:

Print an image from the Crosses of Hope Brush Set from My Digital Studio (MDS)- I enlarged the image form the original stamp size :-)  Color the flowers and leaves using Stampin’ Write markers in Pool Party, Wisteria Wonder, Lucky Limeade and Always Artichoke.  Carefully cut out the cross and adhere the sentiment banner.

Use the Big Shot™ with the Vintage Wallpaper Textured Impressions™ Embossing Folder to emboss a piece of Wisteria Wonder Designer Series Paper (DSP) and a piece of Lucky Limeade DSP using the Lacy Brocade Textured Impressions™ Embossing Folder.  Lightly sand the DSP to reveal the white core.

Layer the DSP onto Basic Black cardstock, add the embossed Vellum lace edge and the satin ribbon band.   Add the cross image using Stampin’ Dimensionals and the satin ribbon bow to finish off the card.

Stamp Sets:  Crosses of Hope (MDS), Teeny Tiny Wishes

Ink: Printer Ink- Black, Stampin’ Write markers- Pool Party, Wisteria Wonder, Lucky Limeade, Always Artichoke, Basic Black

Cardstock/Paper: Whisper White, Basic Black, Wisteria Wonder DSP, Lucky Limeade DSP, Vellum

Accessories:  Big Shot™, Vintage Wallpaper, Lacy Brocade and Delicate Designs (Lace)Textured Impressions™ Embossing Folders,  Large Scallop Framelit™, Punches- 1” Square (for banner points), 5/8” Satin Ribbon (from my stash)

Thanks again for stopping by- I hope you have a glorious Easter!

Friday, March 15, 2013

Happy Easter- Playing with The Paper Players


Hi Stampers!!

I had another chance to stamp this evening (one of my favorite things to do :-)) and to create an Easter card using the fabulous spring colors in the PP136 Challenge at The Paper Players and this also qualifies for the Stampin' Up! Only SUO66 Challenge- Easter Parade:-) 

I believe that both of these sites, The Paper Players and SUO Challenges have very talented design teams,  and if you have not had a chance to visit their sites yet, I highly encourage you to do so (trust me, you will not be disappointed :-)).

**** 03/28/13**** This card also qualifies for the StillADDinktive Spot that Easter Stamp Easter - this challenge site allows you to back link projects that you have created oor create a new project.  I am not sure if I will have the time to stamp another Easter card before Sunday so I decided to share this one:-)  

I decided to use Crosses of Hope and while I love and own the stamp set, the cross was not as large as I wanted, so I utilized My Digital Studio to create this “hybrid” card :-) 

To create this card:

Open the My Digital Studio program and using a blank page, insert the stamp brush from Crosses of Hope, size to your preference and change the color to Early Espresso (or if you prefer, stamp the cross using Early Espresso Classic Ink).  Print out onto Whisper White cardstock.

Color the flowers and leaves using Stampin’ Write Markers in Pool Party, Regal Rose and Lucky Limeade.  Carefully cut out the cross image and set aside.

Cut a panel of Pool Party and Regal Rose cardstock and overlap in the center (my panel is 3" x 4 1/4") and mount this panel onto Early Espresso cardstock.  Emboss a piece of Vellum using the Big Shot™ and the Lacy Brocade Textured Impressions™ Embossing Folder and layer over the 3" x 4 1/4" Pool Party/Regal Rose panel (I used a thin layer of Two-Way Glue to adhere the Vellum- dries clear and works great!).

Add the embossed lace paper border (this was a previously embossed piece from my scraps using the Big Shot™ , Large Scallop Edgelit™ and the Delicate Designs (Lace) Textured Impressions™ Embossing Folder).  Add the ½” Pool Party Seam Binding Ribbon to cover the paper lace layer where it overlaps (right under the top of the horizontal parts of the cross).

Adhere the cross to the panel with Stampin’ Dimensionals® and add Pearls to the lower right hand corner and to the flowers on the cross.

Emboss a piece of Vellum with the Big Shot™ and Framed Tulips Textured Impressions™ Embossing Folder.  Layer this Vellum panel onto a piece of Regal Rose Designer Series Paper (I used the striped layer but it is a bit difficult to see the stripes in the photo) and adhere this embossed Vellum panel to an Early Espresso card front, add the layered cross panel with Stampin’ Dimensionals®.

Stamp the sentiment using an Early Espresso Stampin' Write marker (so you can omit part of the sentiment to split the words).  Punch out using the Jewelry Punch, add to card front under the area where the bow will be placed using Mini Glue Dots, add the 1/2” Pool Party Seam Binding Ribbon Bow with the Antique Brad to finish off the card.

Stamp Sets: Crosses of Hope (MDS), Teeny Tiny Wishes

Ink:  Printer Ink- Early Espresso, Stampin’ Write Markers- Early Espresso, Lucky Limeade, Pool Party, Regal Rose

Paper: Early Espresso, Pool Party, Regal Rose, Whisper White, Regal Rose Designer Series Paper, Vellum

Accessories:  Big Shot™, Textured Impressions™ Embossing  Folders- Lacy Brocade,  Framed Tulips, Delicate Designs (Lace), Large Scallop Framelit™, Jewelry Tag Punch, ½” Pool Party Seam Binding Ribbon, Antique Brad, Pearls, Stampin' Dimensionals®, Mini Glue Dots, Two-Way Glue

Thanks again for stopping by!  I hope all of you have a wonderful week and God Bless!
Related Posts Plugin for WordPress, Blogger...