Showing posts with label CCC14. Show all posts

Tuesday, December 16, 2014

SUO112 Christmas Wishes- Bow and Stars

Hi Stampers! 

This card was created for the new SUO112 “Merry and Happy” Challenge along with the AW31 Photo Inspiration Challenge.

I hope you will find the time to check the rest of the Design Team projects at both sites as well as the gallery submissions- great inspiration from all!

To create this card:

Stamp the large star from Bright & Beautiful with Mossy Meadow Classic Ink and stamp the medium star using Cherry Cobbler Classic Ink onto Whisper White cardstock.

Using the Big Shot™ with the appropriate size Star Collections Framelits™,  cut out each star.  

Emboss a piece of Whisper White cardstock using the Beautifully Baroque Textured Impressions™ Embossing Folder, trim and mount onto a piece of Cherry Cobbler cardstock, trim and mount onto the Mossy Meadow card base.

Attach ½ of a White Tea Lace Paper Doily to the card base, adhere both the large and medium star using Stampin’ Dimensionals® ( large star overlapping the top of the doily a bit and medium star on an angle).

Use the new Bow Builder Punch to create a bow from Cherry Cobbler cardstock and adhere to the top of the Cherry Cobbler star.

Stamp the sentiment from Ornamental Pine with Cherry Cobbler Classic Ink onto Whisper White cardstock, trim and create the banner points using the Hexagon Punch.

Use a Bone Folder to curve the sentiment and add to the card front over the two stars.

Adhere the Pearls to the edges of the sentiment and center of the Cherry Cobbler star to finish off the card.

Stamp Sets:  Bright & Beautiful, Ornamental Pine
Ink: Cherry Cobbler, Mossy Meadow
Paper/Cardstock:  Whisper White, Cherry Cobbler, Mossy Meadow
Accessories:  Big Shot™, Star Collection Framelits™,  Beautiful Baroque Textured Impressions™ Embossing Folder, Punches- Bow Builder and Hexagon, Pearls, ½ White Tea Lace Doily

Thanks again for taking the time to stop by – I hope that you will join in on in on the fun with your Stampin’ Up! Only creations and create your own “Merry and Happy” project!

SC93 Contempo Christmas Banners and Snowflakes :-)

Hi Stampers! 
I wanted to create a few masculine Christmas cards and decided to use some retired Designer Series Paper along with the Stampin’ Celebration SC93 Sketch Challenge :-)

Again, if you have not already visited the Stampin’ Celebration site, I hope you will find the time to do so- great Design Team samples! 

To create this Clean and Layered (CAL) card:

Cut strips from the retired Candlelight Christmas Designer Series Paper and use the Hexagon Punch to create the banner points. 

Adhere a square panel of Very Vanilla cardstock to a piece of Early Espresso cardstock.  Add the three banners to the panel along with the 5/8” Triple Early Espresso Satin Ribbon bow.

Stamp the sentiment from the retired Contempo Christmas set using Early Espresso Classic Ink onto a piece of Very Vanilla cardstock.  Trim the panel and mount onto the Early Espresso card front.

Add the banner panel using Stampin’ Dimensionals® to the card front.

Add the punched Early Espresso and Very Vanilla snowflakes along with the Pearls to finish off the card

Stamp Sets: Contempo Christmas

Ink: Early Espresso

Paper: Very Vanilla, Early Espresso, retired Candlelight Christmas DSP

Accessories: Hexagon Punch, Snowflake Punch (Martha Stewart), 5/8” Early Espresso Satin Ribbon, Pearls


Thanks again for stopping by- I hope you have a terrific Tuesday and stop by again soon for the new SU-Only Challenge!

Friday, December 5, 2014

Merry Christmas- Garden Snowmen Fun!

Hi Stampers!

I had a chance to play in my craft area last night and pulled out a few of my favorite retired Stampin’ Up! snowmen sets to have some marker fun  :-)

The first card was created was a Clean and Simple card using the CQC270 ColourQ Challenge along with The Card Concept #24 Snowman (Make A Tag) Challenge and the Splitcoaststampers WT507 "Easy Does It" Challenge.
  
If you have not done so, I hope you will find time to visit all of the challenge sites- inspiration from all!

To create this card:

Ink the snowman image using Memento™ Tuxedo Black Ink onto Whisper White cardstock.

Use Stampin’ Write Markers to color the image- Calypso Coral, Island Indigo, Pistachio Pudding and Blush Blossom (retired).  Use the Basic Black marker to color the buttons and branches.
Apply Two-Way Glue to apply Dazzling Diamonds Glitter to the snowman and ground area.

Trim the panel and create the tag using the Scallop Topper Tag Punch.  Use the Project Life® 0.3” Corner Rounder to round the corners.   

Cut another tag a bit larger using Island Indigo cardstock, creating the tag topper and round the corners. 

Layer the focal image onto the Island Indigo tag, add the 3/8” Calypso Coral Seam Binding Ribbon and tie with Natural Linen Thread.   Fray the ends of the ribbon to mimic the scarf on the snowman :-)

Use the Big Shot™ to emboss a piece of Whisper White cardstock using the Northern Flurry Textured Impressions™ Embossing Folder, trim and mount onto a piece of Island Indigo cardstock, trim and mount onto the Island Indigo card front.

Ink the sentiment in the corner using Calypso Coral Classic Ink and mount the focal image using Stampin’ Dimensionals® to finish off the card.

 Stamp Sets: Garden Snowmen,  Christmas Greetings  

Ink:  Memento™ Tuxedo Black Ink, Calypso Coral; Stampin’ Write Markers- Calypso Coral, Island Indigo, Pistachio Pudding, retired Blush Blossom

Paper: Whisper White, Calypso Coral, Island Indigo

Accessories: Big Shot™,  Northern Flurry Textured Impressions™ Embossing Folder,  Scalloped Tag Topper and Project Life® .30” Corner Rounder Punch, Dazzling Diamonds, 3/8” Calypso Coral Seam Binding Ribbon, Natural Linen Thread


Thanks again for stopping by- I hope all of you have a wonderful weekend!

Wednesday, December 3, 2014

Peace on Earth- Three Challenges in One!


Hi Stampers! 

I had a chance to relax and stamp last night and wanted to create a card using the PP224 Tic-Tac-Toe Challenge  (I chose Tree, Embossing and Glitter :-)) along with the CC507 Splitcoaststampers Color Challenge (dessert option of a Tree on your card)  and the SC92 Holiday Inspiration Photo Challenge. 
Again, if you have not visited the above sites, I hope you will do so- great inspiration from all!

To create this card:

Use a scrap piece of paper or a sticky note to mask the snow banks.  Use a Sponge Dauber with Baked Brown Sugar Classic Ink onto the sky area and ink the retired stamp, Evergreen using Early Espresso Classic Ink and repeatedly stamp the trees in the background.

Use a Stampin’ Write Early Espresso marker to darken the trees and add highlights with a Faber-Castell White Pitt Pen.

Add additional highlights with a paint brush and Soft White acrylic paint as well as applying highlights to the snow banks.

Use the Big Shot™ with the Ovals Collection Framelits™ to cut the image into an oval, cut another oval the same size from Early Espresso cardstock- split the Early Espresso oval in half and mount behind the masked image.

Use the Two-Way Glue Pen to apply glue onto the branches and add Dazzling Diamonds glitter.

Use the Big Shot™ with the retired Holiday Frame Textured Impressions™ Embossing Folder to emboss a piece of Whisper White cardstock (ink the interior of the folder before embossing with Baked Brown Sugar Classic Ink).  Carefully cut out the embossed panel.

Adhere a piece of Early Espresso cardstock to the end of a piece of Trim the Tree Designer Series Paper (DSP).  Mount onto a piece of Whisper White cardstock and adhere to the Early Espresso card base.

Add the embossed frame and oval image using Stampin Dimensionals® to the card front.

Stamp the sentiment from the retired Greetings of the Season stamp set using Early Espresso Classic Ink onto Whisper White cardstock.  Create the banner using the Hexagon Punch, mount onto Early Espresso cardstock (creating the banner with the Hexagon Punch as well). 

Add the sentiment to the front of the card using Stampin’ Dimensionals®.

Add the green Satin Ribbon bow to finish off the card.

Stamp Sets: Evergreen, Greetings of the Season

Ink: Baked Brown Sugar, Early Espresso; Faber-Castell White Pitt Pen, Soft White Acrylic Paint

Paper/Cardstock:  Whisper White, Early Espresso; Trim the Tree DSP

Accessories: Big Shot™, retired Holiday Frame Textured Impressions™ Embossing Folder, Oval Framelits™, Sponge Dauber, Dazzling Diamonds, Satin Ribbon (from my stash)


Thanks again for visiting- I hope you have a wonderful Wednesday!!

Tuesday, December 2, 2014

SUO111 Merry Christmas- Season of Tags :-)

Hi Stampers! 

This card was created for the new SUO111 “Tag, You’re It” Challenge along with the Create with Connie and Mary CCMC331 Sketch Challenge.

Instead of one tag, I decided to create a card with three tags :-)

If you have not done so yet, I hope you will find the time to check the rest of the Design Team projects at SUO-Challenges as well as the wonderful samples at Create with Connie and Mary :-)

To create this card:
Using Memento™ Tuxedo Black Ink, stamp the cardinal image from Beauty of the Season onto Whisper White cardstock.

Color the cardinal using Stampin’ Blendabilities™- Light, Medium and Dark Cherry Cobbler for the feathers and berries, Light Smoky Slate for the branches and Light Pumpkin Pie for the cardinal’s beak and legs.

Trim the panel to 4 ½” and cut into three strips 1 ½” wide.  Insert the strips into the Note Punch and punch the end with the angle, flip and re-insert to punch the other end (this gives you a longer tag than the original punch was designed to create).

Punch size regular size tags using the Note Punch from Basic Black cardstock.  Layer two tags behind each of the cardinal tags allowing a bit of the Basic Black to show.

Use the Big Shot™ with the Woodgrain Textured Impressions™ Embossing Folder to emboss a piece of Whisper White cardstock, trim to approx.  4” x 5 ¼”.

Adhere the left and right tags to the woodgrain panel, add the retired Silver cord to the card front and adhere the center tag using Stampin’ Dimensionals®.   

Mount the entire panel onto the Basic Black card base.  

Create a bow using the Silver Cord and add to the top of the card along with Basic Black button.

Stamp the sentiment from Endless Wishes using Memento™ Tuxedo Black Ink onto Whisper White cardstock, trim and create the banner points using the Banner Punch, punch two banners from Basic Black cardstock and add to the ends of the sentiment.


Mount the sentiment to the front of the card using Stampin’ Dimensionals® to finish off the card.
Stamp Sets:  Beauty of the Season, Endless Wishes
Ink: Memento™ Tuxedo Black Ink, Stampin’ Blendabilities™- Light, Medium, Dark Cherry Cobbler, Light Smoky Slate, Light Pumpkin Pie; White Gel Pen
Paper/Cardstock:  Whisper White, Basic Black
Accessories:  Big Shot™, Woodgrain Textured Impressions™ Embossing Folder, Note Punch, Hexagon Punch, Neutral Button, retired Silver Cord

Thanks again for taking the time to stop by – I hope that you will join in on in on the fun with your Stampin’ Up! Only creations and create your own “Tag, You’re It!” project!

Saturday, November 8, 2014

VSNDEC14MINI2 Merry Christmas Deer

Hi Again Stampers!

This card was created for the VSNDEC14MINI2 Challenge for the mini Virtual Stamp Night “Frozen” at Splitcoaststampers.  One of the rules is that you only have one hour to complete your project and you need to be a Splitcoaststampers Fan Club member (this helps to support the best website for stampers) :-) !

To create this card:

Ink the branch image from Beauty of the Season using Memento™ Tuxedo Black Ink and stamp repeatedly onto a piece of Whisper White cardstock.  Darken the branches and color with berries with a Stampin’ Up! Watercolor Pencil. 

Use the Basic Black Stampin’ Write marker to color the dear and tree line on the main deer stamp from the retired set, Noble Deer and stamp near the branches previously stamped in the above step. 

Add a bit of shadows to the snow area with the Black Stampin’ Up! Watercolor pencil and dilute slightly with the AquaPainter™.

Use the Basic Black Stampin’ Write marker to add the horizon line and additional pen lines for the fur on the deer.

Use the Big Shot™ to cut out the image with the Ovals Collection Framelits™ also cutting the same size oval from Cherry Cobbler and Basic Black cardstock.  Cut both the Cherry Cobbler and Basic Black ovals in half and adhere behind the focal image.
Use the Big Shot™ with the Northern Flurry Textured Impressions™ Embossing Folder to emboss a piece of Whisper White cardstock, trim the panel and mount onto a piece of Cherry Cobbler cardstock, trim and mount onto the Basic Black card base and add the focal image using Stampin’ Dimensionals®.

Stamp the sentiment using Memento™ Tuxedo Black Ink onto Whisper White cardstock and create the banner points using the Hexagon Punch.  Layer onto a piece of Cherry Cobbler cardstock, trim and create the points with the Hexagon Punch- repeat the steps again with Basic Black cardstock.

Add the sentiment along with the Rhinestones to finish off the card.

Stamp Sets: Noble Deer, Christmas Greetings

Ink:  Memento™ Tuxedo Black Ink; Stampin’ Up! Black and Burgundy Watercolor Pencil

Paper: Basic Black, Cherry Cobbler, Whisper White

Accessories: Big Shot™, Northern Flurry Textured Impressions™ Embossing Folder, Ovals Collection Framelits™, Hexagon Punch, AquaPainter™, Rhinestones    

Thanks again for visiting- I hope you have a wonderful weekend!!

Wednesday, October 29, 2014

CAS Christmas for Two Challenges :-)

Hi Stampers! 

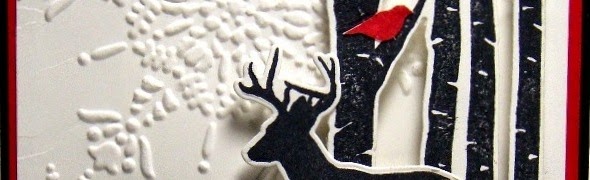
I wanted to create another quick, easy Christmas card and decided to use the Catered Crop Recipe Swap End Zone Inspiration Challenge along with the Sweet ‘n Sassy Special DT Christmas Blog Hop Challenge (plus this is another design for the CCC14 Splitcoaststampers Christmas Card Challenge) . 

If you have not already visited the above sites, I hope you will take the time to stop by- so many examples of projects and so much inspiration!

To create this card:

Ink the Birch background and deer stamp from Tender Thoughts from Sweet ‘n Sassy (SNS) using Memento™ Tuxedo Black Ink and stamp onto a piece of Whisper White cardstock.   

Use the Big Shot™ with the SNS Birch Forest Die set to cut out both images.

Ink the birds from Tender Thoughts using Real Red Classic Ink and stamp onto Whisper White cardstock (I decided to cut these out by hand but you could use the coordinating dies). 

Stamp the sentiment from Endless Wishes using Memento™ Tuxedo Black Ink onto a piece of Whisper White cardstock. 

Trim the panel and emboss with the Big Shot™ and the Northern Flurry Textured Impressions™ Embossing Folder.  Trim again and mount onto a piece of Real Red cardstock, trim and mount onto the Basic Black card base.

Add part of the birch background along with the birds and deer using Stampin’ Dimensionals®.
 
Add the Black Gingham Ribbon bow to finish off the card.

Stamp Sets:  Endless Wishes, Tender Thoughts (SNS)

Ink: Memento™ Tuxedo Black, Real Red

Paper:  Whisper White, Basic Black, Real Red

Accessories:  Big Shot™, Northern Flurry Textured Impressions™ Embossing Folder, Birch Forest Die (SNS), Black Gingham Ribbon (from my stash)


Thanks again for taking the time to stop by- have a wonderful Wednesday, my friends!! 

Thursday, October 23, 2014

CAS Christmas Wishes in Silver and Gold :-)


Hi Stampers!

Here is one more card that I created using the Ornamental Pine stamp set- again, I hope you are not growing tired of seeing this set yet…it has been on my desk for almost a week now and I am still having fun with it!
 
I decided to use Vellum for the AW27 Around the World Product Challenge as well as play along with The Paper Players PP218 Clean and Simple (CAS) Silver or GoldChallenge (had to use both- I could not resist:-)), and of course, another card for the CCC14 Splitcoaststampers Christmas Card Challenge (which is really a challenge you set for yourself to keep creating Christmas cards all year long). 

Again, if you have not had a chance to check out the above sites yet, I would encourage you to do so- great inspiration from all!

To create this CAS card:

Using the Embossing Buddy®, de-static a two pieces of Vellum.  

Ink the large pine leaf stamp using Versamark™ ink and stamp onto one of the prepared  pieces of Vellum.  Apply Stampin’ Emboss® Silver Embossing Powder and heat with the Heat Tool.  

Ink the pine cone image using Versamark™ ink and stamp onto the other piece of Vellum (repeat for three images).   Also ink and stamp the sentiment onto this piece of Vellum as well (stamping in an area where you can trim the sentiment without interfering with the pine cones). 

Apply Stampin’ Emboss® Gold Embossing Powder to the pine cones and sentiment and heat with the Heat Tool. 

Carefully “fussy cut” each pine cone around the embossed image- mount onto the embossed pine images using Stampin’ Dimensionals® (placing the Dimensionals® behind the embossing so you cannot see them).

Trim the Vellum panel and adhere to a piece of Whisper White cardstock (I used Tombow™ Multi Liquid Glue and applied the glue to the back along the pine needles).

Add the sentiment layer (again, I used a thin line of Tombow™ and I cannot see the adhesive at all).

Add the panel to the Whisper White card base using Stampin’ Dimensionals® to finish off the card- "Easy, Peasy" as one of my fellow demonstrators likes to say :-)  but I truly had to restrain myself from adding Pearls- lol!!

Stamp Sets: Ornamental Pine

Ink: Versamark™

Paper/Cardstock:  Whisper White, Vellum


Accessories:  Embossing Buddy®, Stampin’ Emboss® Gold and Silver Embossing Powder, Heat Tool


Thanks again for visiting- have a fabulous Thursday!!

Monday, October 20, 2014

Festive Pines- Christmas Wishes to You and Yours :-)


Hi Stampers!

I still had the Ornamental Pine set on my desk (and decided to create one more card using the Pals PaperArts PPA224 Sketch along with the Festive Friday FFC42 Inspiration Photo and another October design for the CCC14 Christmas Card Challenge at Splitcoaststampers.  Hopefully you  are not tired of this set yet- I love it! :-) 

If you have not already visited the challenge sites, I encourage you to do so- fantastic Design Team samples as well as their galleries!

To create this card:

Using the large branch stamp from Ornamental Pine, ink the image using Always Artichoke Classic Ink.  Wipe the branch portion off with a baby wipe and color the branch with the Early Espresso Stampin’ Write marker and stamp the image onto Whisper White cardstock. 

Re-ink the needle area and stamp at the lower corner of the panel.

Add a few highlights with the White Gel Pen, trim the stamped panel and mount onto Cherry Cobbler cardstock, trim again and mount onto Early Espresso cardstock.

Ink the pine cones using Early Espresso Classic Ink (or the Stampin’ Write marker) and stamp onto Whisper White cardstock.  If needed, darken some of the areas with the marker and carefully cut out my hand (“fussy-cut”) and add the pine cones to the focal image panel using Stampin’ Dimensionals®.

Use the Big Shot™ with the Woodgrain Textured Impressions™ Embossing Folder to emboss a piece of Whisper White cardstock, trim to approx. 3 ¾” x 5 ¼” and mount onto a piece of Cherry Cobbler cardstock, trim and mount onto the Early Espresso card base.

Adhere the strips of Trim the Tree Designer Series Pack (DSP) onto Early Espresso cardstock and add to the card front per the sketch.
Mount the focal image panel onto the card front using Stampin’ Dimensionals®.

Ink the sentiment using Early Espresso Classic Ink (or the Stampin’ Write Early Espresso marker as I did) and stamp onto Whisper White cardstock.  

Punch the sentiment out using the Ticket Duo Punch and mount onto a ticket punched from Cherry Cobbler and another one from Early Espresso (cut the Cherry Cobbler and Early Espresso tickets in half vertically and adhere behind the sentiment so you can see the layers).

Mount the sentiment onto the card front directly onto the panel and using a Stampin’ Dimensional® on the right hand side to attach to the card front.

Add the ½” Always Artichoke Triple Seam Ribbon bow with the Antique Brad along with a few Pearls to finish the card.

Stamp Sets: Ornamental Pine, That’s The Ticket

Ink:  Always Artichoke, Early Espresso; Stampin’ Write Marker- Early Espresso, White Gel Pen

Paper: Whisper White, Cherry Cobbler, Early Espresso, Trim the Tree DSP Pack    
    
Accessories: Big Shot™, Woodgrain Textured Impressions™ Embossing Folder, Ticket Duo Punch,  Pearls, ½” Always Artichoke Seam Binding Ribbon, Antique Brad


Thanks again for stopping by- I will be sharing the new SU-Only Challenge early Tuesday morning…hope you can visit again soon!

Saturday, October 18, 2014

Joy to the World- A Vintage Easel Christmas Card :-)

Hi Stampers! 

Here is another card that I created this week for the Our Daily Bread DesignsODBDSLC215 Anything Goes Challenge (have to use at least one ODBD stamp set) along with another CCC14 Christmas Challenge card for October.

I hope you will have the time to check out both sites linked above- gorgeous cards from all!

To create this card:

Using Midnight Muse Classic Ink , stamp the Wisemen Ornament onto Very Vanilla cardstock.  Mask the wisemen area and sponge Baked Brown Sugar over the edges, remove the mask and add a bit to the wisemen. 

Cut the circle out using the Big Shot™ with the Circle Collection Framelits™ and cut another circle from Midnight Muse cardstock with a large framelit™ from the Sizzix Circle Collection.  

Mount the wisemen image onto the Midnight Muse circle and add the Spellbinders Flourish die cut (split into two) at the top and bottom to create the ornament.

Wrap the Gold Cord around the top of the die cut and set aside.
Stamp the Joy to the World
Side View of easel 
background stamp onto a piece of Very Vanilla cardstock using Midnight Muse Classic Ink.

Stamp the retired Christmas Collage background (onto another piece of Very Vanilla cardstock) also using Midnight Muse Classic Ink.

Distress the background panels using a Sponge Dauber with Baked Brown Sugar Classic Ink.  Trim the Joy to the World panel and mount onto Midnight Muse cardstock.

Cut the Christmas College panel in half and mount onto Midnight Muse cardstock. 

Create the 5.5” x 5.5” easel card using this tutorial from Very Vanilla cardstock. 

Emboss a 5” square piece of Baked Brown Sugar cardstock using the Big Shot™ with the Lacy Brocade Textured Impressions™ Embossing Folder and mount onto a piece of Midnight Muse cardstock.

Add the background panels, the crocheted lace trim, scrap piece of Midnight Muse cardstock, 3/8” Midnight Muse Stitched Satin Ribbon (“antique” with Baked Brown Sugar Classic Ink), sentiment banner panel and ornament to the card front. 

Mount the entire panel onto a 5.5” x 5.5” Very Vanilla card front.

Stamp the Joy and sentiment image onto Very Vanilla cardstock, distress with Baked Brown Sugar Classic Ink and mount onto Midnight Muse cardstock.

Add the panel onto a piece of Midnight Muse cardstock (embossed with the Lacy Brocade EF) and add a few highlights with the White Gel Pen.

Add the Joy panel to the lower part of the easel card and finish off the card with Pearls and a Rhinestone for the star :-)

Stamp Sets: Joy, Bells and Boughs, Christmas College (retired), ODBD Joy to the World and Wisemen Ornament

Ink: Baked Brown Sugar, Midnight Muse

Paper:  Very Vanilla, Midnight Muse, Baked Brown Sugar

Accessories: Big Shot™, Circle Collection Framelits™, Sizzix Circle Framelits™, Spellbinders Flourish Die, Sponge Daubers, Pearls, Rhinestone, retired 3/8” Midnight Muse Stitched Satin Ribbon, Hexagon Punch, lace from my stash


Thanks again for visiting- have a wonderful weekend, my friends!!

IC463 Ornamental Pine #3- A Vintage Masculine Style :-)

Hi Stampers! 

Here is the third card that I created this weekend using the new Ornamental Pine set from the 2014 Holiday Mini Catalog.  

This card was created for the IC463 Inspiration Challenge at Splitcoaststampers (see the details of the challenge here, the gallery is located at this link and the inspiration for the card is pictured at the right and is located at the Vietri site here), plus it is another one of my October designs for the CCC14 Splitcoaststampers Christmas Card Challenge (see the entire CCC14 gallery here). 

To create this card:

Ink the branch image from Ornamental Pine using Mossy Meadow Classic Ink (remove the ink from the branches using a baby wipe) and color the branch area with an Early Espresso Stampin’ Write marker.
Stamp the image onto a piece of Whisper White cardstock and stamp the pine needles again in the upper and lower right hand corners (re-inking with Mossy Meadow Classic Ink each time before stamping).
Add the vintage touches using a Sponge Dauber with Crumb Cake Classic Ink followed with Baked Brown Sugar Classic Ink.
Trim the panel and mount onto a piece of Early Espresso cardstock and onto the Cherry Cobbler card base. 
Add the vertical strip of Trim the Tree Designer Series Paper (DSP) and distress the paper with a Sponge Dauber using Baked Brown Sugar.   Mount onto a piece of Early Espresso cardstock and again onto Cherry Cobbler cardstock.   Mount the DSP layered panel onto the card front. 
Stamp the sentiment onto a piece of Whisper White cardstock with Early Espresso Classic Ink and cut the square out using the Big Shot™ with the Square Framelits™.  Add the pine needles in the corner (I added additional smaller needles by hand with the Mossy Meadow Stampin’ Write marker) and mount onto the Early Espresso scrap (a bit smaller than the sentiment square) and again onto the Cherry Cobbler scrap. 
Add the sentiment to the card using Stampin’ Dimensionals™.
Stamp the pine cone images (four total images) onto Whisper White cardstock using Early Espresso Classic Ink, “fussy-cut” the images out and add to the card front using Stampin’ Dimensionals®. 
Add the snowflakes using a White Gel Pen and a few Pearls to the sentiment layer to finish off the card.
Stamp Sets: Ornamental Pine
Ink: Baked Brown Sugar, Crumb Cake, Early Espresso, Mossy Meadow; Stampin’ Write Markers- Early Espresso, Mossy Meadow; White Gel Pen
Paper/Cardstock:  Whisper White, Early Espresso, Cherry Cobbler; Trim the Tree DSP Pack
Accessories: Big Shot™, Square Collection Framelits™, Sponge Daubers, Pearls

Thanks again for stopping by! I had a great time designing with this Ornamental Pine set and can see so many other possibilities- this one is definitely a “keeper” 
Related Posts Plugin for WordPress, Blogger...