Showing posts with label Greetings of the Season. Show all posts

Thursday, July 23, 2015

CAS Ornamental Pine Christmas- Peace on Earth


Hi Stampers! 

I had a chance to create a quick Clean and Simple (CAS) card last night using the CAS(E)This Sketch #132 Challenge along with the Stampin' Royalty SR287 "Keep It Simple", the Splitcoaststampers’ CC539 Color Challenge (see details here and gallery here) as well as the CCC15 Christmas Card Challenge (see gallery here).
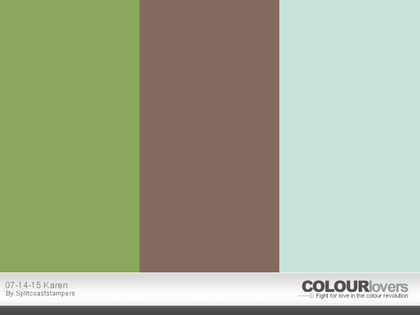
 
I hope you will find the time to visit the above sites and check out all of the inspiration from their Design Teams as well as their galleries!

To create this card:

Using an Acrylic Block- place it directly onto the Soft Sky Classic Ink pad (making sure that it is fully covered with ink) and stamp onto a piece of Whisper White cardstock.

Color the Ornamental Pine stamp using Stampin’ Write Markers- Early Espresso for the branches and Wild  Wasabi for the needles...”huff” onto the stamp to re-moisten the ink and stamp onto the acrylic block panel.

Create shadows using the Sahara Sand Stampin’ Write marker for the branches as well as a bit for the needles.

Stamp the pinecones using Early Espresso Classic Ink onto Whisper White cardstock and carefully fussy-cut the images.

Ink the sentiment with Perfect Plum Classic Ink and stamp onto the panel.

Trim the panel and mount onto the Perfect Plum card base.

Add the pinecones using Stampin’ Dimensionals® and the Rhinestones near the sentiment to finish off the card.

Stamp Sets: Ornamental Pine, Greetings of the Season

Ink: Early Espresso, Soft Sky, Perfect Plum; Stampin’ Write Markers- Early Espresso, Wild Wasabi, Sahara Sand

Paper: Whisper White, Perfect Plum

Accessories: Acrylic Block, Rhinestones


Thanks again for visiting- I hope all of you have a terrific Thursday!

Wednesday, December 3, 2014

Peace on Earth- Three Challenges in One!


Hi Stampers! 

I had a chance to relax and stamp last night and wanted to create a card using the PP224 Tic-Tac-Toe Challenge  (I chose Tree, Embossing and Glitter :-)) along with the CC507 Splitcoaststampers Color Challenge (dessert option of a Tree on your card)  and the SC92 Holiday Inspiration Photo Challenge
Again, if you have not visited the above sites, I hope you will do so- great inspiration from all!

To create this card:

Use a scrap piece of paper or a sticky note to mask the snow banks.  Use a Sponge Dauber with Baked Brown Sugar Classic Ink onto the sky area and ink the retired stamp, Evergreen using Early Espresso Classic Ink and repeatedly stamp the trees in the background.

Use a Stampin’ Write Early Espresso marker to darken the trees and add highlights with a Faber-Castell White Pitt Pen.

Add additional highlights with a paint brush and Soft White acrylic paint as well as applying highlights to the snow banks.

Use the Big Shot™ with the Ovals Collection Framelits™ to cut the image into an oval, cut another oval the same size from Early Espresso cardstock- split the Early Espresso oval in half and mount behind the masked image.

Use the Two-Way Glue Pen to apply glue onto the branches and add Dazzling Diamonds glitter.

Use the Big Shot™ with the retired Holiday Frame Textured Impressions™ Embossing Folder to emboss a piece of Whisper White cardstock (ink the interior of the folder before embossing with Baked Brown Sugar Classic Ink).  Carefully cut out the embossed panel.

Adhere a piece of Early Espresso cardstock to the end of a piece of Trim the Tree Designer Series Paper (DSP).  Mount onto a piece of Whisper White cardstock and adhere to the Early Espresso card base.

Add the embossed frame and oval image using Stampin Dimensionals® to the card front.

Stamp the sentiment from the retired Greetings of the Season stamp set using Early Espresso Classic Ink onto Whisper White cardstock.  Create the banner using the Hexagon Punch, mount onto Early Espresso cardstock (creating the banner with the Hexagon Punch as well). 

Add the sentiment to the front of the card using Stampin’ Dimensionals®.

Add the green Satin Ribbon bow to finish off the card.

Stamp Sets: Evergreen, Greetings of the Season

Ink: Baked Brown Sugar, Early Espresso; Faber-Castell White Pitt Pen, Soft White Acrylic Paint

Paper/Cardstock:  Whisper White, Early Espresso; Trim the Tree DSP

Accessories: Big Shot™, retired Holiday Frame Textured Impressions™ Embossing Folder, Oval Framelits™, Sponge Dauber, Dazzling Diamonds, Satin Ribbon (from my stash)


Thanks again for visiting- I hope you have a wonderful Wednesday!!

Saturday, October 18, 2014

Peace On Earth- Two Challenges in One!

Hi Stampers! 

I just love the Ornamental Pine stamp set in the Holiday Mini and decided to take some time to create a few cards and projects to show the versatility of this stamp set.

The first card I created uses a masked background for the Merry Monday #130 Silent Night Challenge as well as one of my Christmas cards for the CCC14 Splitcoaststampers 2014 Christmas Card Challenge.  

I hope you will have the time to check out both challenge sites- great designs and inspiration from all!

To create this card:

Use the 1 3/8” Circle Punch to punch out a circle from a piece of scrap paper and place the actual circle onto a piece of Whisper White cardstock for the moon.

Create a torn mask for the horizon line (to mimic the snowbanks).   Keep the circle mask over the moon area and using a Sponge Dauber, apply Pool Party Classic Ink, followed by Coastal Cabana Classic Ink and lastly by Pacific Point Classic Ink.

 Remove the mask for the moon and sponge a bit of the Coastal Cabana and Pacific Point Classic Inks onto the moon area.

Keep the mask in place for the snowbanks and stamp the tree line images from Lovely As A Tree using Pacific Point Classic Ink.

Remove all masks and place another for the snow banks in the center of the card and apply ink from the Sponge Daubers used on the sky area.

Ink the leaves on the Ornamental Pine branch stamp using Mossy Meadow Classic Ink and use a baby wipe to remove the ink from the branch area.   Use an Early Espresso Stampin’ Write marker to color the branch area and stamp onto the card front and repeat these steps to stamp the second branch.   

Stamp the sentiment using Pacific Point Classic Ink and trim the panel.  

Sponge additional Pacific Point Classic Ink around the edges and mount onto Coastal Cabana cardstock and again onto the Early Espresso card base.

Add the white highlights to the branches and snowflakes using the White Gel Pen.

Ink the pine cone image using Early Espresso Classic Ink (or the Stampin’ Write marker used for the branches) and stamp three pine cones onto Whisper White cardstock.  Carefully cut out each pine cone (“fussy-cut”) and mount onto the card front using Stampin’ Dimensionals®.

Add the Rhinestones under the sentiment to finish off the card.

Stamp Sets: Ornamental Pine, Lovely As A Tree, Greetings of the Season (retired)
Ink: Coastal Cabana, Early Espresso, Mossy Meadow, Pacific Point, Pool Party; Stampin’ Write Marker- Early Espresso, White Gel Pen
 Paper/Cardstock:  Whisper White, Coastal Cabana, Early Espresso

Accessories: Sponge Daubers, scrap paper for masking, Rhinestones


Thanks again for stopping by- I had so much fun playing around with the Ornamental Pine stamp set and wiill share a few more cards during the next few days :-)  Have a great weekend!!

Tuesday, December 17, 2013

SUO86 Last Minute Gold Snowflake Card with Gift Tag :-)

Hi Stampers! 

It’s time for the new SUO86 SU-Only Challenge and the theme for this challenge is “Last Minute Cards and Gifts”. 

I decided to create a quick, clean and simple (CAS) card along with a matching tag using some of the new Gold Foil Paper and Heat Embossing.

Again, I hope you will find some time during this busy holiday season to check out the SU-Only Challenge site and the rest of the Design Team’s creations- they have great ideas for the last minute card or gift! 

To create this card and matching gift tag:
De-static three pieces of Whisper White cardstock with the Embossing Buddy® and using Versamark™ ink.  Stamp the snowflake image from Best of Snow twice (leaving room for the die cut) onto one of the pieces, the sentiment from Greetings of the Season  onto the other near the bottom right and the sentiment from More Merry Messages onto the third piece. .
Apply Stampin’ Emboss® Gold Embossing Powder to all of the images and heat set with the Heat Tool.
Once cooled, use the Big Shot™ with the Festive Flurry Framelits™ to cut out the snowflake images (I was thrilled to see that second to the smallest die would fit this snowflake) and use the second to the largest die to cut two additional snowflakes out of Gold Foil paper. 
Use the Simply Scored™ Scoring Tool to score the Gold Foil snowflakes and fold at the scores to create dimension.
Use the Big Shot™ with the Chalk Tag Framelit™ to cut a tag out of Whisper White cardstock.  Mount the tag onto a piece of Gold Foil Paper and trim the paper by hand to match the tag corners.
Adhere the embossed snowflake to the scored Gold Foil snowflake.  Mount the snowflake onto the tag using Stampin’ Dimensionals®  as well as the sentiment.  Add a Pearl to the snowflake and the retired Gold Cord to finish off the tag.
Trim a piece of Whisper White cardstock to frame the snowflake for the card, mount this onto a piece of Gold Foil Paper and add to the layer with the Peace on Earth embossed sentiment using Stampin’ Dimensionals®. 
Mount this to another layer of Gold Foil paper and onto the Whisper White card base.
Add the snowflake to the center using Stampin’ Dimensionals® and add the Pearl to the center to finish off the card. 
Stamp Sets: Best of Snow, Greetings of the Season, More Merry Messages
Ink: Versamark™
Paper/Cardstock:  Whisper White, Gold Foil
Accessories: Big Shot™, Chalk Talk and Festive Flurry Framelits™, Embossing Buddy®, Heat Tool, Stampin’ Emboss® Gold Embossing Powder, Simply Scored™ Scoring Tool, Pearls, retired Gold Cord

Thanks again for stopping by- I hope you will find the time to visit us and enter your project into the SU-Only SUO86 “Last Minute Card and Gift” Challenge :-)
Have a fabulous week- Christmas is almost here!!

Saturday, November 30, 2013

DD81 Peace on Earth- Prancing Through the Snow :-)

Hi Stampers! 

This week’s Dynamic Duos DD81 “Your Choice” Week uses Midnight Muse and your choice of color.  As much as I love Night of Navy, I also love Midnight Muse- it has such a rich deep color. 


I hope you will find the time to visit the rest of the fabulous Design Team projects- they did a fabulous job with this color challenge!!


I also used a winter theme for the Stampin' Royalty SR204 Challenge- they have a wonderful Design Team and all of the entries can provide so much inspiration as well!

To create this card:

Use Sponge Daubers and torn sticky notes to create the sponged background- first sponge Pool Party Classic Ink onto Whisper White cardstock as you mask the sky area
and the snowy hills.   Add a few shadows on the hills using Midnight Muse Classic Ink and the darker areas in the sky.

Ink the tree from the hostess set, Warmth and Wonder using Midnight Muse Classic Ink and stamp off onto a piece of scrap paper before stamping onto the sky line area. Repeatedly stamp the trees along the sky line and stamp the foreground tree using Midnight Muse Classic Ink (without stamping off first). 

Stamp the deer image using Midnight Muse Classic Ink and if needed, fill in any lightened areas using the Stampin’ Write Midnight Muse marker as well :-).  Add a few shadows for the tree and deer using the Sponge Daubers with the Midnight Muse Classic Ink and the marker.

Trim to size and mount onto Midnight Muse cardstock, trim and mount again onto Pool Party and Midnight Muse cardstock. 

Add a few highlights to the snow banks using Two-Way Glue and Dazzling Diamonds glitter (the glitter is very difficult to see in the photo :-)).  

Use Midnight Muse Classic Ink to stamp the sentiment onto Whisper White cardstock, punch out using the 1 ¾” Circle Punch and layer onto the 1 ¾” Midnight Muse cardstock circle (cut the Midnight Muse cardstock circle in half and adhere behind the sentiment circle allowing the edge to show on the sides).  

Adhere a piece of Whisper White cardstock to the Midnight Muse card base and add the Winter Frost Designer Series Paper (DSP) panel (also mounted onto Midnight Muse cardstock). 

Mount the focal image panel using Stampin’ Dimensionals® as well as the sentiment.

Add the 3/8” Midnight Muse Stitched Satin Ribbon triple ribbon bow and Rhinestones to finish off the card.

Stamp Sets:  Warmth and Wonder (2013 Holiday Mini hostess set), Greetings of the Season

Ink: Midnight Muse, Pool Party, Midnight Muse Stampin’ Write Marker

Paper: Whisper White, Midnight Muse, Pool Party, Winter Frost DSP

Accessories:  Sponge Daubers, Sticky Notes, Dazzling Diamonds, 1 ¾” Circle Punch, Rhinestones, 3/8” Midnight Muse Stitched Satin Ribbon


Thanks again for stopping by!  I hope all of you will have a chance to visit us at The Dynamic Duos and play along in our DD81 Midnight Muse and “Your Choice” Color Challenge this week!!  
Related Posts Plugin for WordPress, Blogger...