Showing posts with label Markers. Show all posts

Wednesday, October 30, 2019

PP465 The Open Sea


Hi Friends!!

I am sharing another card today that I created using scraps that I discovered during my recent craft room reorganization. 

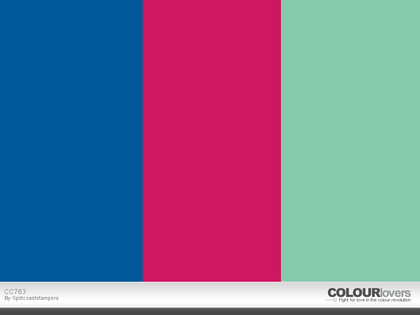
The main focal image and compass had been printed out from My Digital Studio (The Open Sea) a few years ago and decided to watercolor using the Splitcoaststampers CC763 "Lovely Coastal Blueberries" Color Challenge and included the optional dessert- Nautical. 

 If you have not had a chance to do so, I hope you will visit the above challenge sites- gorgeous inspiration from all!

To create this card:

Trim a piece of white cardstock to 4” x 5 ¼”.  Ink the sentiment with Memento™ Tuxedo Black ink and stamp onto the lower right-hand portion of the panel. 

Scribble the dark blue marker onto a silicone mat, spritz with water and press the panel into the ink to create the splatter background.  Add a bit more texture with the splatter stamp inked with black ink.

Mount the panel onto a piece of aqua cardstock, trim and mount onto a piece of hot pink cardstock. 

Add the strip of corrugated blue cardstock, add the knotted silver cord (wrapping the ends behind the panel) and adhere the entire panel onto a white card base.

Watercolor The Open Sea images with water-based markers, trim and mount onto aqua cardstock, trim and mount onto hot pink cardstock.

Add the small photo corners from hot pink cardstock, insert silver brads and mount the layered image onto the card front with dimensional foam or chipboard.

Punch the compass image out using circle punches, die cut a piece of aqua cardstock and adhere the enter part of the compass with dimensional foam.  

Insert a silver mini brad in the center and mount the compass onto the card front with dimensional foam.

Finish off the card with a clear glitter pen over the water and an extra fine white paint pen for the tops of the waves.

Stamp Sets: The Open Sea (digital images – Stampin’ Up!), New Mercies (retired Verve Stamps)

Ink/Mediums: Memento™ Tuxedo Black, Stampin’ Write Markers- Brilliant Blue, Coastal Cabana, Lovely Lipstick; Wink of Stella™ Clear Glitter Pen, Sharpie® Extra Fine White Paint Pen

Cardstock/Paper: Whisper White, Coastal Cabana, Lovey Lipstick, retired Brilliant Blue

Accessories: Big Shot™, Corrugated Dynamic Textured Impressions Embossing Folder, Sizzix Circles Dies; 1” and ¾” Circle Punches; AquaPainter, Silver Cord, Mini Silver Brads

Thanks again for taking the time to stop by- I hope all of you have a wonderful week!

Tuesday, February 27, 2018

SUO195 Favorite Sentiment


Hi Friends!   


I love using Scripture verses on my card so I decided to use the verse from the Occasions Mini stamp set, Hold On To Hope and incorporated the flowers from the Painted Harvest stamp set (carried over from the 2017 Holiday Mini) and a bit of splatter from Timeless Textures for a very simple card :-)

The main panel on this card is just one layer and since I did not have my ink pads near me when I created this card, I used masking along with Stampin’ Write Markers for the entire card (I love using markers for omitting and other techniques, don’t you? :-))


If you have not had a chance to stop by the SU-Only Challengesite to check out the rest of the Design Team’s samples or the other challenge sites yet, I encourage you to do so- terrific inspiration from all!

To create this card:

1). Ink the solid flower image from Painted Harvest with a Blushing Bride marker, stamp onto the lower part of a piece of Whisper White cardstock.  Ink the more detailed petal image with a Berry Burst marker and stamp over the solid image.  Stamp another detailed petal image flower onto a piece of scrap paper (or sticky note/masking paper), fussy cut the image and use this as your mask.

2). Mask the first flower and repeat the steps above to stamp the second and third flower (re-masking each flower as you proceed).  ***FYI- I used Flirty Flamingo as the base for the last two flowers versus Blushing Bride***

3). Ink the flower center image with an Early Espresso marker and stamp in the middle of the petals.  Use an AquaPainter™ to blend any areas that are missing ink or may be a bit misaligned.

4). Re-mask each flower as you stamp the outline leaf image with a Lemon Lime Twist marker.

5). Ink the sentiment from Hold On To Hope with a Basic Black marker (the words on each top line), stamp onto the panel, then ink the “Made You”, “Carry You”, “Sustain You”, “Rescue You” with the Berry Burst marker and re-stamp onto the panel.

6). Add a bit of splatter with the small splatter stamp from Timeless Textures, inked with the Early Espresso marker. 

7). Trim the panel and mount onto a piece of Berry Burst cardstock, trim again and mount onto the Extra Thick Whisper White card base.

8). To finish off the card, apply shimmer to all of the flower petals with Clear Wink of Stella®.

Stamp Sets:  Painted Harvest, Hold On To Hope, Timeless Textures

Ink/Mediums: Stampin’ Write Markers- Blushing Bride, Flirty Flamingo, Berry Burst, Early Espresso, Lemon Lime Twist; Clear Wink of Stella®

Paper: Whisper White, Extra Thick Whisper White, Berry Burst

Accessories/Tools: AquaPainter™

Thanks again for taking the time to stop by and I hope that you will create your own Stampin’ Up! Only project and join us for our “AFavorite Sentiment” challenge!  

Wednesday, July 6, 2016

The Fragrance of Christ

Hi Friends!

I hope all of you are having a great week so far!  I just love the images in the July 2016 release from Our Daily BreadDesigns and decided to create a quick Clean and Simple (CAS) card using the new stamp set, A True Friend along with the previously released stamp sets, Fragrance and Chalkboard Fan Background.


If you have not had a chance to visit any of the above challenge sites yet, I highly encourage you to do so- wonderful inspiration from all!

To create this card:

Using Stāz-On® Jet Black Ink, stamp the iris image from the ODBD A True Friend  onto a piece of Whisper White cardstock and use an AquaPainter™ along with Stampin’ Write Markers (Daffodil Delight, Melon Mambo and Bermuda Bay) to watercolor the image (I alos used the Smoky Slate marker for a few shadows).

Fussy-cut the flower, apply Clear Wink of Stella® to the petals (I also applied Frost White Shimmer Paint) and use a bone folder to curl the petals.

Using the Big Shot™, die cut two pieces of Whisper White cardstock using the ODBD Leafy EdgedBorder Dies – one with just the curved smaller scallop border die and the other with the curved ornate border.

Ink the ODBD Chalkboard Fan Background stamp with Bermuda Bay Classic Ink, stamp onto a piece of Bermuda Bay cardstock, clean the stamp, re-ink with Daffodil Delight and use your fingers to sporadically ink the die cut piece of Whisper White cardstock.

Stamp the sentiment from the ODBD Fragrance stamp set with Bermuda Bay Classic Ink, layer the die cut pieces of Whisper White cardstock onto the Bermuda Bay card base and add the watercolored iris image with dimensional foam to finish off the card.


Ink/Mediums: Stāz-On® Jet Black, Bermuda Bay Classic Ink  (Stampin’ Up); Stampin’ Write Markers- Bermuda Bay, Daffodil Delight, Melon Mambo, Smoky Slate; Clear Wink of Stella®, Frost White Shimmer Paint

Cardstock/Paper: Whisper White, Bermuda Bay (Stampin’ Up!)

Tools/Accessories: Big Shot™, ODBD Leafy Edged Border Dies, AquaPainter™

Thanks again for taking the time to stop by- hugs and God Bless!


Sunday, June 26, 2016

Winnie's Garden- Plant Kindness Gather Love


Hi Friends! 

I hope all of you are having a wonderful weekend so far!! I had a chance to create another card using Winnie’s Garden (designed by Wynne Gettelfinger) from Sweet ‘n Sassy Stamps (SNSS)  along with the Ticket Dies (SNSS).

Since I love participating in online challenges, I decided to incorporate the CQC347 ColourQ Challenge along with the Addicted To Stamps and More #199 CAS Challenge and the Splitcoaststampers’SC597 Sketch Challenge.

If you have not had a chance to visit any of the challenge sites yet, I hope you will find the time to do so- wonderful inspiration from all!

To create this card:

Ink the kneeling girl image from Winnie’s Garden (SNSS) with Stampin’ Archival™ Basic Black Ink onto Whisper White cardstock and heat set the ink with the Heat Tool.

Color the stamped image using Stampin’ Write Markers along with an AquaPainter™- Chocolate Chip (jeans), Going Gray (hair, leaves and sandals), Blushing Bride (substituted for Blush Blossom for shirt, flowers, lips) and Peekaboo Peach (substituted for Peach Parfait for skin, flowers).

Die cut the image using the Big Shot™ with the My Favorite Things® (MFT) Stitched Circle Dies and mount onto another die cut from Chocolate Chip cardstock.

Next create the lower layer (I call this "homemade" designer paper :-)) Ink the larger floral image from Winnie’s Garden with Stampin’ Archival™ Basic Black Ink and stamp repeatedly onto Whisper White cardstock (I actually cut the clear stamp image apart so I could fill in with some of the smaller flowers).

Once you are satisfied with the coverage, use the Heat Tool to heat set the ink and color the flowers with the same markers as noted above (using the Chocolate Chip to fill in the background color).

Cut the floral panel on an angle per the sketch and mount onto a piece of Whisper White cardstock.

Trim the background panel, mount onto a piece of Chocolate Chip cardstock, trim again and mount onto the Peekaboo Peach card front.
Mount the focal image circle using dimensional foam.

Stamp the sentiment using Stampin’ Archival™ Basic Black Ink, add the flowers with Going Gray ink (I used the marker to ink the stamp) and lightly color with Going Gray, Peekaboo Peach and Blushing Bride markers.

Use the Big Shot™ with the Ticket Duo Dies to die cut the sentiment and another piece from Chocolate Chip cardstock.

Cut the Chocolate Chip die cut in half, mount behind the sentiment and adhere to the card front with dimensional foam to finish off the card.

Winnie's Garden
Stamp Sets:  Winnie’s Garden (Sweet ‘n Sassy Stamps)

Ink:  Basic Black Stampin’ Archival™, Stampin’ Write Markers- Blushing Bride, Chocolate Chip, Peekaboo Peach, retired Going Gray

Ticket Dies
Paper: Whisper White, Chocolate Chip, Peekaboo Peach

Accessories: Big Shot™, Ticket Dies (SNSS), Stitched Circle Dies (MFT), AquaPainter™


Thanks again for stopping by- I am so encouraged by your visits and sweet comments!  Have a blessed week, my friends!

Monday, June 13, 2016

Thank You For All That You Do


Hi Again Friends!!

This is the last card that I designed this past weekend in my stamping spree and this card incorporates the Splitcoaststampers’ (SCS) CC586 "Green Pool Mist" Color Challenge (minus the dessert :-)) and a new challenge site for me-  Retro Rubber Challenge Blog #40 "Kind of Sketchy" Challenge along with Our Daily Bread Design (ODBD) stamps.

The Retro Rubber Challenge Blog's challenges focus on using older stamps so I decided to pull out the retired stamp set, Serving the Lord (ODBD).  

I love the idea of using our older stamps since it seems as though most of us focus on the newer, more current stamps and our older, retired stamps are collecting dust :-)  I have decided that I am going to ink up at least one retired set per week and am so thrilled to have found the Retro Rubber Challenge Blog site!

The retired Serve the Lord stamp set (from 2011 in cling mount rubber) originally included several sentiments along with the Crocheted Circle Poppy image (this floral image is still available as a single clear stamp from ODBD along with the coordinating Crochet Circle Die :-)).  

If you have not had an opportunity to check out the above challenge sites, I hope you will find the time to do so- gorgeous inspiration from all!

To create this card:

Ink the Chalkboard Vine Background (ODBD) stamp using Sponge Daubers with Pool Party, Marina Mist and Garden Green Classic Ink, spritz lightly with water and stamp onto a piece of Whisper White cardstock.

Trim the background panel, layer onto a piece of Pool Party cardstock.

Add the embossed Garden Green cardstock layer (from my stash already embossed with the retired Lacy Brocade Textured Impressions™ Embossing Folder), add the White Crochet Lace trim, 
1" Black Satin Ribbon  and the ¼” Stitched Pool Party Ribbon.

Ink the sentiment from Serve the Lord (ODBD) with Stāz-On® Jet Black Ink and stamp below the crochet trim (I used my MISTI® Tool for placement).

Layer the entire background panel onto a piece of Garden Green cardstock and mount onto the Extra Thick Whisper White card base.
Ink the poppy image from the retired Serve the Lord (ODBD) with Stāz-On® Jet Black Ink and stamp onto Whisper White cardstock (FYI-as I mentioned above, this pretty Crocheted Poppy image is still currently available as a single stamp from ODBD without all of the sentiments in the original set).

Use Stampin’ Write Markers to color the flowers (Pool Party, Marina Mist and Garden Green), add water with an AquaPainter™ to blend and soften the edges. 

Use a Sahara Sand Stampin’ Write marker for the shadows and apply Clear Wink of Stella® to the blossoms.

Cut out the image with the Big Shot™ and the ODBD Crocheted Circle Die and mount the die cut focal image with dimensional foam to finish off the card.

Stamp Sets: Serve the Lord (retired ODBD), Chalkboard Vine Background (ODBD)

Ink: Stāz-On® Jet Black, Classic Ink- Garden Green, Marina Mist, Pool Party; Stampin’ Write Markers- Garden Green, Marina Mist, Pool Party, Sahara Sand; Clear Wink of Stella®

Paper: Extra Thick and Regular Whisper White, Garden Green, Pool Party

Accessories: MISTI® Tool, Big Shot™, ODBD Crocheted Circle Die, retired Lacy Borcade Textured Impressions™ Embossing Folder, ¼” Pool Party Stitched Satin Ribbon, 1” Black Satin Ribbon, White Crochet Lace, AquaPainter™


Thanks again for taking the time to visit- hugs and I hope you have a fabulous week!

Sunday, June 12, 2016

Jeremiah 20:11- The Lord Is With Me


Hi Again Friends!!

I am sharing another card that I designed this weekend for a few online challenges using Our Daily Bread Design (ODBD) stamps.

This Clean and Simple (CAS) card uses one layer card for the base with the focal images mounted on dimensional foam and incorporates LeAnne's Color Challenge #299 at The Paper PlayersCAS Colours and Sketches #177 Sketch Challenge, and the Alphabet Challenge “H” for Hand Coloured Image.

This was a quick and easy card!  If you have not already done so, I hope you have a chance to check out the above challenge sites- fabulous ideas from all!


To create this card:

Score and fold a piece of Extra Thick Whisper White cardstock in half (I used a 4 ¼” x 11” piece for a finished 4 ¼” x 5 ½” A2 card size).

Ink the Old Flag Background (ODBD) using Stampin’ Write Markers- Dapper Denim for the star area, Cherry Cobbler for the red stripes and Smoky Slate for the white stripes, stamp off onto scrap paper and lay the card front down on top of the background stamp, pressing with your fingers to transfer the ink.

Ink the Not Forgotten military figure image with Stāz-On® Jet Black Ink and stamp onto Whisper White cardstock.

Scribble a bit of Dapper Denim and Cherry Cobbler ink from the Stampin’ Write markers onto your craft mat (or you can use an acrylic block) and color the image with the ink and an AquaPainter™.

Color the military uniform with a Sahara Sand Stampin’ Write Marker and add shadows with the Tip Top Taupe Stampin’ Write Marker.

Trim the image and mount onto Dapper Denim cardstock.

Ink the sentiment using the Cherry Cobbler and Dapper Denim Stampin’ Write Markers and stamp onto a piece of Whisper White cardstock.

Trim the sentiment, mount onto Dapper Denim cardstock, “huff” onto the Old Flag Background to re-moisten the ink in the star area of the stamp and press the sentiment over the background stamp for a light star background.

Mount the focal image and sentiment with dimensional foam to finish off the card.

Stamp Sets: Not Forgotten, Old Flag Background (both Our Daily Bread Designs)

Ink: Stāz-On® Jet Black, Stampin’ Write Markers- Dapper Denim, Cherry Cobbler, Smoky Slate, Sahara Sand, Tip Top Taupe

Paper: Extra Thick and Regular Whisper White, Dapper Denim

Accessories: AquaPainter™


Thanks again for taking the time to visit- hugs and I hope you have a marvelous week!

Very Merry- Christmas in June

Hi Friends!

I had fun in my stamping studio this past week and created a few cards- this Clean and Layered (CAL) Mixed Media card was designed using the FreshlyMade Sketches FMS240 Sketch Challenge along with the Splitcoaststampers’ CC582 "A Real Picnic in the Sand with Cucumbers" Color Challenge (dessert option was picnic- obviously I skipped dessert :-)).

I pulled out a few of my retired stamp sets to create a Christmas card for this year- I am so behind on my Christmas card stamping (I had hoped to start in January) and will have to start soon to get all of my Christmas cards created on time to mail ( I know I have several months but I do have a large Christmas card list :-)).

If you have not had a chance to visit the above challenge galleries yet, I encourage you to do so- it always amazes me how many different cards can be designed with one color, sketch or theme challenge!

To create this card:

Ink the Ageless Adornment image with Stāz-On® Jet Black Ink and stamp onto Whisper White cardstock.

Color the image with an AquaPainter™ and ink from Stampin’ Write Markers- Real Red, Cucumber Crush and Sahara Sand.

Add Clear Wink of Stella® to the background area.

Color the frame around the image with the retired Stampin’ Dazzle Gold Marker, fussy-cut the image, mount onto Basic Black cardstock and fussy-cut around the edge.

Use the Big Shot™ with Sizzix® Textured Impressions™ Folders (Holly and Poinsettia- I do not know the actual names) to emboss a piece of Real Red, Cucumber Crush and Sahara Sand cardstock, trim and mount each onto Basic Black cardstock (per the FMS240 Sketch).

Ink the sentiment from the retired set, Short & Sweet with Stāz-On® Jet Black Ink and stamp onto Whisper White cardstock, create the banner with the Hexagon Punch, mount onto Basic Black cardstock and use the Hexagon Punch to create the banner.

Trim a piece of Whisper White cardstock, mount onto a piece of Basic Black cardstock, trim and mount onto a piece of Sahara Sand cardstock, trim and mount onto the Extra Thick Whisper White card base.

Add the embossed layers per the sketch, add the Gold Cord Trim and mount the sentiment along with the stamped holly focal image to finish off the card.

Stamp Sets: Ageless Adornment, Short & Sweet (both retired Stampin’ Up!)

Ink: Stāz-On® Jet Black, Stampin’ Write Markers- Real Red, Cucumber Crush, Sahara Sand; Stampin’ Dazzle™ Gold Marker; Clear Wink of Stella®

Paper: Whisper White, Extra Thick Whisper White, Basic Black, Real Red, Cucumber Crush, Sahara Sand

Accessories: Big Shot™, Sizzix® Textured Impressions™ Embossing Folders (Holly & Poinsettia), AquaPainter™, Gold Cord, Hexagon Punch


Thanks again for stopping by!!  I will be sharing the rest of the cards shortly so if you have a chance, I hope you will drop by again soon :-) 

Hugs and have a great week, my friends!

Wednesday, June 8, 2016

You've Got This


Hi Friends!!

I am having a great time stamping this week and this card was designed using the  #tgif58 Color Challenge along with the Mojo Monday #451 Sketch Challenge (flipped the sketch and tilted the panel:-)) , the What Will You Stamp? #67 “You’ve Got This” Challenge and the Simon Says Monday "Summer Garden" Challenge. 

I always seem to have a difficult time capturing red shades when I photograph my cards but this card does look a bit better IRL :-).  Also, you can not see the pretty shimmer on the blossoms from the Clear Wink of Stella®- my camera is a basic point and shoot so I may need to upgrade- lol!!

Again, I hope you will take the time to visit the above listed challenge sites- fabulous inspiration from all!


To create this card:

Ink the floral image from "You’ve Got This" with Stāz-On® Jet Black Ink and stamp onto a piece of sticky note paper (repeat three times).  Fussy-cut out the images and set aside to be used as masks.

Ink the floral image again with Stāz-On® Jet Black Ink and stamp onto a piece of Whisper White cardstock, mask the image and re-ink the stamp, stamping two additional flowers onto the panel.

Remove the masks and color the entire flower with an AquaPainter™ using Daffodil Delight Classic Ink (being careful not to use too much water).

With the AquaPainter™ apply Pumpkin Pie Classic Ink onto the petals and follow with Melon Mambo, blending the ink slightly.

Dry the panel with the Heat Tool and use the Stampin’ Write Pumpkin Pie and Melon Mambo Markers to add additional color, blending with the AquaPainter™ and apply Clear Wink of Stella® to the blossoms.

Add highlights to the flower centers with the White Gel Pen.

Once you are satisfied with the color on the petals, mask the flowers, ink the background stamp from “You’ve Got This” using Melon Mambo ink and stamp over the remaining part of the background.

Add shadows with the Basic Black Stampin’ Write Marker, blending into the Melon Mambo background with the AquaPainter™.

After you have finished the background, use the AquaPainter™ to pick up excess water off your craft mat and tap onto the stamped background and flowers (to create the water drops).

Trim the stamped panel and mount onto a piece of Basic Black cardstock, trim and mount onto a piece of Pumpkin Pie cardstock, trim once more and mount onto a piece of Basic Black cardstock.

Use the Big Shot™ with the Woodgrain Textured Impressions™ to emboss a piece of Whisper White cardstock, trim and mount onto a piece of Pumpkin Pie cardstock, trim and mount onto the Basic Black card base.

Use the Big Shot™ with the Oval Framelits™ to cut an oval from Pumpkin Pie cardstock (also cutting an oval with the same size die from Basic Black cardstock), ink the background image with Pumpkin Pie Classic Ink, stamp onto the Pumpkin Pie die cut and cut both ovals in half layering the black oval behind the Pumpkin Pie layer.

Adhere the panel to the card front and mount the half oval Pumpkin Pie layer to the top of the card front per the sketch.

Stamp the sentiment from "You’ve Got This" with Stāz-On® Jet Black Ink onto Whisper White cardstock, use the Big Shot™ with the Circle Framelits™ to cut out the sentiment and mount onto a Basic Black circle cut from the same size framelit™.

Add the sentiment along with the Gold Cord and Pearls to the card front to finish off the card.

Stamp Sets: You’ve Got This (Stampin’ Up!)

Ink: Stāz-On® Jet Black Ink, Daffodil Delight, Pumpkin Pie, Melon Mambo; Stampin’ Write Markers- Pumpkin Pie, Melon Mambo; White Gel Pen, Clear Wink of Stella®

Paper: Whisper White, Basic Black, Pumpkin Pie

Accessories: Big Shot™, Circle and Oval Framelits™, Woodgrain Textured Impressions™ Embossing Folder, Gold Cord, Pearls


Thanks again for taking the time to visit- you are all such an encouragement to me!  Hugs and have a great week, my friends! 
Related Posts Plugin for WordPress, Blogger...