Showing posts with label Ageless Adornment. Show all posts

Tuesday, May 23, 2023

RRCB207 Be Strong and Courageous


Hi Friends!

I am so honored to be a Guest Designer, again, for The Retro Rubber Challenge Blog!  The Retro Rubber Challenge Blog is a bi-weekly challenge that focuses on stamps that are over one year old (or older). If you are chosen as a winner, you have a chance to Guest Design and I was thrilled and humbled to be chosen as a winner for two challenges in a row.

I decided to pull out some stamps that are over 15+ years old for The Retro Rubber Challenge Blog #207 “Anything Goes” Challenge.


For this card, I used the hostess set, Ageless Adornment (I believe from the year 2000).
  This was one of the first sets that I received with my hostess points and I love every single image in the set.  This is one that I will keep in my stash forever, lol!

I paired the image with a sentiment from the stamp set, Scripture Collection 3 (originally Our Daily Bread Designs now known as Divinity Designs LLC).  I believe this stamp is originally from the low-mid 2000’s.

I also have a personal goal to try to create a card for each of the over 900+ sketches at Splitcoaststampers and this card uses the SC47 Sketch for the layout. SC47 is a basic sketch that I slightly modified (see below about the black strips, lol!)

I am also playing along with the Simon Says Monday “Watercolor” Challenge along with the Cards 4 Galz #199 Backgrounds Challenge.   The background panel was created with distress oxide inks, lots of water and stenciling.

This card was fun to create- it is a “back to basics” type card.  No dies, just ink, stamps, a stencil, heat embossing and watercolor. I enjoy getting inky and having fun with backgrounds!

The background on this card was designed by applying distress oxide inks onto a silicone mat, adding water, pressing a piece of white cardstock into the wet ink, smoothing and lifting, then repeating until I was satisfied with the colors.  In hindsight, I should have used watercolor paper, lol!

The stenciling was applied with distress oxide ink (after I was finished with the smooshed background).


I used an embossing powder tool to de-static the background and heat embossed the sentiment from the Scripture Collection 3 using Versafine Onyx Black ink and clear embossing powder.

The butterfly image was stamped with Versafine Onyx Black ink, heat embossed with clear embossing powder before being water-colored with water-based markers and fussy cut.

The card was layered onto a white card base.  The black cardstock strips were added at the top and bottom (this helped with the waves created by the water, lol!)

The butterfly image from Ageless Adornment was mounted with dimensional foam and a few white highlights were created with an extra fine white paint pen.  Use a clear glitter marker to add shimmer on the wings.

The card was finished off with a few sequins from my stash.

Stamps: Scripture Collection 3 (Divinity Designs LLC), retired Ageless Adornment (Stampin’ Up!)

Ink/Mediums: Versafine Black Onyx, Tim Holtz Distress Oxide- Tumbled Glass. Broken China, Picked Raspberry; Stampin’ Write Markers- Coastal Cabana, Bermuda Bay, Gorgeous Grape, Melon Mambo, Blushing Bride; Wink of Stella Clear Glitter Marker, Extra Fine White Paint Marker

Cardstock/Paper: White, Black

Accessories/Tools: Embossing Powder Tool, Clear Embossing Powder, Heat Tool, Memory Box Heartwood Stencil, Stencil Brush, Sequins 

I hope you have time to check out the rest of the Design Team cards at The Retro Rubber Challenge Blog and possibly, create a card with an older stamp (at least a year old) and join us at The Retro Rubber Challenge Blog #207 “Anything Goes” Challenge!

Thanks again for stopping by- have a blessed week, sweet friends!

Wednesday, May 11, 2022

TCC175 It Is The Gift of God


Hi Friends!

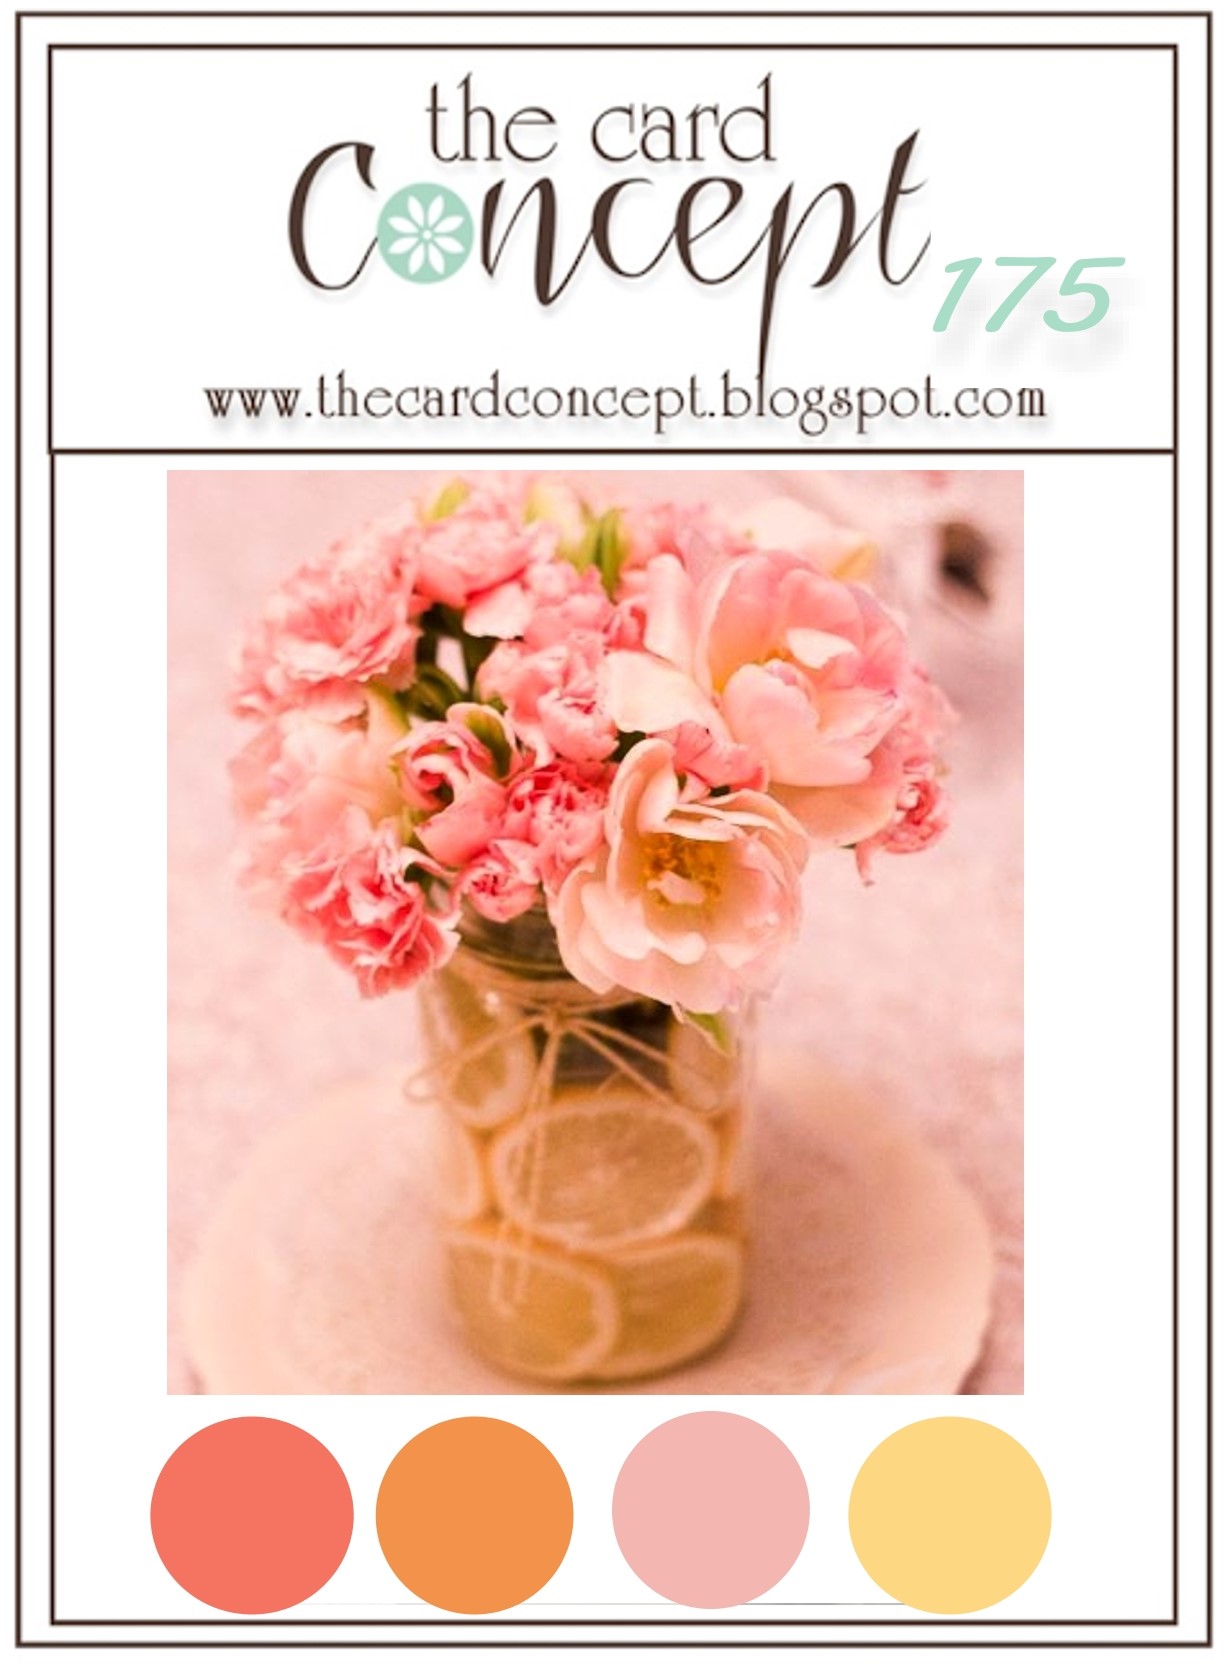
Welcome to the #175 May Flowers Challenge at The Card Concept! 

I love this beautiful floral arrangement and was inspired by the colors in the challenge photo to create a Mixed Media card.

As I have mentioned in previous posts, I have a personal goal to create cards using stamps and supplies that I already own (and have not inked up in a while) as well as a card for each of the over 900 Splitcoaststampers’ Sketch Challenges (I was able to incorporate Sketch #SC362 into the design of this card).   

For the main image, I pulled out the butterfly image from the retired Stampin’ Up! set, Ageless Adornments and the script image from the retired Stampin’ Up! Botanicals and paired it with a verse sentiment from the Scripture Collection 2 stamp set
(still available at
Divinity Designs LLC).

If you have not had a chance to visit the Splitcoaststampers’ gallery or our Design Team/gallery at The Card Concept Challenge, I hope you will find time to do so- so much inspiration from all!

To create this card:


Using a brayer, apply Peach Parfait and Melon Mambo to a piece of Glossy White cardstock. 

Once the ink has dried on the glossy panel, de-static with an embossing powder tool, ink the butterfly image with Versafine™ Black Onyx ink, stamp onto the prepared panel, apply Clear Embossing Powder and heat set with a heat tool. 

Once cooled, trim close to the edge of the stamped image, mount onto a piece of black cardstock and trim close to the edge.

Use a stencil brush with a Flourish stencil to apply Peach Parfait and Melon Mambo onto a piece of Very Vanilla cardstock. 

Trim the stenciled panel to approx. 4” x 5 ¼”, de-static the lower right hand corner with an embossing powder tool, stamp the Scripture stamp from Scripture Collection with Versafine™ Onyx Black ink, apply clear embossing powder and heat set with the heat tool.

Trim a piece of the patterned Kirby Teesdale designer paper to approx. 2 ¼” x 2 ¼”.  Mount onto black cardstock and adhere directly to the top of the background panel (per the sketch).

Ink the script image from Botanicals with Versafine™ Onyx Black ink, repeatedly stamp over the background panel and the designer paper.

Add a strip of 1 ¼” black satin ribbon over the cut edge of the upper panel, wrap the ends of the ribbon behind the panel.

Adhere the panel to a white card base.

Adhere the butterfly image to the card front with dimensional foam and add a few pearls to the ribbon layer along with the upper left hand corner of the designer paper layer and the lower right hand corner of the background panel.

Use a white gel pen to add a few white highlights to the butterfly image to finish off the card.

Stamp Sets:  Ageless Adornments, Botanicals (both retired Stampin’ Up!), Scripture Collection 2 (Divinity Designs LLC)

Ink/Mediums:  Versafine™ Onyx Black,  Picked Raspberry, Vintage Photo Distress Oxide, Stampin’ Up!- Peach Parfait, Melon Mambo; Extra Fine White Paint Pen

Cardstock/Paper:  Glossy White, Very Vanilla, Basic Black; Kirby Teesdale Designer Paper (Paper Studio), Whisper White, Elegant Eggplant, retired designer papers (Stampin’ Up!)

Accessories/Tools: Embossing Powder Tool, Clear Embossing Powder, Heat Tool, Brayer, Stencil Brush, Tim Holtz™ Flourish Layering Stencil, 1 ¼” Black Satin Ribbon (from my stash), Pearls

Thanks again for taking the time to visit- I hope you have been inspired to join us with our #175 May Flowers Challenge  at The Card Concept!

Wednesday, January 23, 2019

TCC107 How Beautiful A Day Can Be


Hi Friends!


It's time for The Card Concept #107 {Rainbow Cupcakes} Challenge!  The cupcakes are beautiful in the different rainbow colors and I love the dark background which inspired my card design.

I am still working on my craft room re-organization and have not had a chance to design many cards lately.  I am making an effort to use some of my retired stamps and give the older stamps some “love”.  I used the butterfly from the long ago retired Stampin’ Up! hostess set, Ageless Adornment and paired it with a digital sentiment from the Peonies Digi Stamp Set from Power Poppy by Marcella (I had this sentiment already printed and die cut in my “stash”- amazing what you find when you are able to take time to organize- lol!).


Just a reminder that The Card Concept is a bi-weekly challenge that has an inspiration photo along with a suggestion of design styles that you can choose from to create your card- Clean and Simple, Clean and Graphic, Clean and Layered, Shabby Chic, Freestyle Collage, Classy and Elegant and Mixed Media (or you can combine several styles for your own style).

If you have not had a chance to visit us at The Card Concept or the other challenge sites yet, I hope you will find time to do so- gorgeous inspiration from all!

To create this card:

1). De-static a piece of white cardstock with an embossing powder tool.   Using Versafine™ Onyx Black Ink, stamp the butterfly image from the retired Ageless Adornments stamp set onto the prepared panel, apply clear embossing powder and heat set with a heat tool.

2). Once the embossing powder has cooled, watercolor the butterfky using water-based markers (I used Zig® Clean Color Markers-see colors below) and fussy cut the image.  Mount onto a piece of black cardstock and fussy cut close to the edge.  Use a clear glitter pen to add shimmer to the butterfly wings and an extra fine white paint pen to add a few white highlights.

3). Using a photo editing program, import the sentiment from the Peonies Digi Stamp Set (Poppy Power by Marcella), resize and print out onto white cardstock,  Die cut the sentiment with a stitched square die.

4). Die cut a piece of black cardstock with a stitched rectangle die, mount onto a white card base. 

5). Adhere the sentiment directly to the card front and mount the butterfly image with dimensional foam.  Add a few sequins to finish off the card.

Stamp Sets: Ageless Adornment (retired Stampin’ Up! hostess set), Peonies (digi set- Power Poppy by Marcella)

Ink/Mediums: Versafine™ Onyx Black, Zig® Clean Color Real Brush Markers- Red, Orange, Yellow, Green, Purple;  Spectrum Noir™ Clear  Glitter Pen; Sharpie® Extra Fine White Paint Pen

Cardstock/Paper: Whisper White, Basic Black (Stampin’ Up!)

Tools/Accessories:  Big Shot™, My Favorite Things™ Dies- Stitched Square STAX, Stitched Rectangle A2 STAX Set 1; Embossing Buddy®, Clear Embossing Powder, Heat Tool, Purple Sequins (Craft Medley)

Thank you for taking the time to stop by! I hope I have inspired you to create your own card based on our {Rainbow Cupcakes } photo and link up to our gallery at The Card Concept- we would love to see your interpretation!!

Monday, July 9, 2018

His Love Endures Forever


Hi Friends!

Today I am sharing a fun simple Mixed Media card designed with retired stamps from my massive stash :-)  The butterfly image is from the retired Stampin’ Up! Ageless Adornment (hostess set) and the sentiment is from the recently retired Verve Stamps, Scripture Medley 3.  

I had this butterfly image already stamped, colored , fussy-cut and layered in my stash and in my recent (and continuing) organization project, I decided to pull out my "stashed" images and create a few cards:-).

If you have not had a chance to visit the above challenge galleries yet, I encourage you to do so- wonderful ideas and projects by all!

To create this card:

1). De-static a scrap piece of white cardstock with an embossing powder tool, stamp the butterfly image with Versafine™ Onyx Black ink onto the prepared cardstock, apply clear embossing powder and heat set with a heat tool.  Once the embossing as cooled, watercolor using ink from water-based markers.  Fussy-cut the image, mount onto black cardstock and cut close to the edge.

2). Die cut a piece of white cardstock with a stitched rectangle die.  Scribble a bit of green water-based marker onto a silicone craft mat, lightly spritz with water and press the die cut panel into the ink.  Lift up and repeat until you are satisfied with the background.

3). De-static the background panel with an embossing powder tool, stamp the verse image with Versafine™ Onyx Black ink, stamp onto a piece of white cardstock, apply clear embossing powder and heat set with a heat tool.  Mount the panel onto a piece of black cardstock, trim and mount onto the white card base.

4). Mount the fussy-cut butterfly image with dimensional foam.  Add white highlights to the butterfly’s wings using an extra fine white paint pen and use a clear glitter pen to add shimmer to the wings.

5). Finish off the card with a few jewel drops.

Stamp Sets: Ageless Adornment (retired Stampin’ Up!), Scripture Medley 3 (retired Verve Stamps)

Ink: Versafine™ Onyx Black, Zig® Real Clean Color Markers- Light Green, Yellow, Orange, Light Purple; Stampin’ Write Tangerine Tango Marker; Clear Wink of Stella® , Sharpie® Extra Fine White Paint Pen, Nuvo™ Lime Jewel Drops

Paper: Whisper White, Basic Black, Extra Thick Whisper White

Accessories: AquaPainter™, Embossing Buddy®, Clear Embossing Powder, Heat Tool, Water Spritzer Bottle

Thanks again for visiting- you are all such an encouragement to me!!  Hugs and I hope you have a fabulous week, my friends!


Sunday, June 12, 2016

Very Merry- Christmas in June

Hi Friends!

I had fun in my stamping studio this past week and created a few cards- this Clean and Layered (CAL) Mixed Media card was designed using the FreshlyMade Sketches FMS240 Sketch Challenge along with the Splitcoaststampers’ CC582 "A Real Picnic in the Sand with Cucumbers" Color Challenge (dessert option was picnic- obviously I skipped dessert :-)).

I pulled out a few of my retired stamp sets to create a Christmas card for this year- I am so behind on my Christmas card stamping (I had hoped to start in January) and will have to start soon to get all of my Christmas cards created on time to mail ( I know I have several months but I do have a large Christmas card list :-)).

If you have not had a chance to visit the above challenge galleries yet, I encourage you to do so- it always amazes me how many different cards can be designed with one color, sketch or theme challenge!

To create this card:

Ink the Ageless Adornment image with Stāz-On® Jet Black Ink and stamp onto Whisper White cardstock.

Color the image with an AquaPainter™ and ink from Stampin’ Write Markers- Real Red, Cucumber Crush and Sahara Sand.

Add Clear Wink of Stella® to the background area.

Color the frame around the image with the retired Stampin’ Dazzle Gold Marker, fussy-cut the image, mount onto Basic Black cardstock and fussy-cut around the edge.

Use the Big Shot™ with Sizzix® Textured Impressions™ Folders (Holly and Poinsettia- I do not know the actual names) to emboss a piece of Real Red, Cucumber Crush and Sahara Sand cardstock, trim and mount each onto Basic Black cardstock (per the FMS240 Sketch).

Ink the sentiment from the retired set, Short & Sweet with Stāz-On® Jet Black Ink and stamp onto Whisper White cardstock, create the banner with the Hexagon Punch, mount onto Basic Black cardstock and use the Hexagon Punch to create the banner.

Trim a piece of Whisper White cardstock, mount onto a piece of Basic Black cardstock, trim and mount onto a piece of Sahara Sand cardstock, trim and mount onto the Extra Thick Whisper White card base.

Add the embossed layers per the sketch, add the Gold Cord Trim and mount the sentiment along with the stamped holly focal image to finish off the card.

Stamp Sets: Ageless Adornment, Short & Sweet (both retired Stampin’ Up!)

Ink: Stāz-On® Jet Black, Stampin’ Write Markers- Real Red, Cucumber Crush, Sahara Sand; Stampin’ Dazzle™ Gold Marker; Clear Wink of Stella®

Paper: Whisper White, Extra Thick Whisper White, Basic Black, Real Red, Cucumber Crush, Sahara Sand

Accessories: Big Shot™, Sizzix® Textured Impressions™ Embossing Folders (Holly & Poinsettia), AquaPainter™, Gold Cord, Hexagon Punch


Thanks again for stopping by!!  I will be sharing the rest of the cards shortly so if you have a chance, I hope you will drop by again soon :-) 

Hugs and have a great week, my friends!

Sunday, November 8, 2015

CAS Thanks - Three Challenges in One!

Hello Friends!!

I hope you are having a great weekend!  My hubby was not able to have his maintenance chemo this past week since he caught a cold (he has now had it for 2 weeks and this week late Wednesday eve. after Awana, I came down with the chest congestion/sore throat part of the cold). 

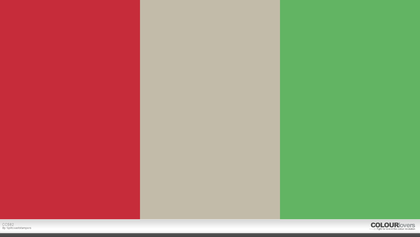
Soft Suede, Rich Razzleberry,
Mellow Moss 
Unfortunately, I have stayed homebound the rest of the week and in addition to missing my Ladie's Bible Study, we decided to stay home instead of meeting with our Small Group study/fellowship- I miss seeing everyone but did not want to spread the "love" around so to speak :-)

Luckily, I can still stamp and create and had a chance to design a Clean and Simple (CAS) card last night using the Splitcoaststampers’ CC555 Color Challenge along with the CAS347 “MeWant Candy” Inspiration Photo Challenge and the Simon Says Wednesday “Thanks”Challenge.

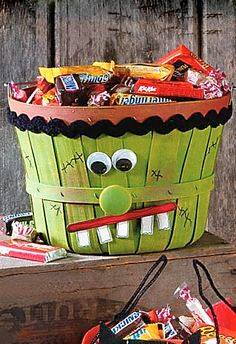
CAS347 Photo
As Christians (without children of our own) my husband and I choose not to celebrate Halloween, so even though the photo inspiration is a very cute Frankenstein basket, I chose to use the colors from the photo as my inspiration along with this week’s color palette (and I was even able to add the “dessert” of thanks).

If you have not done so, I hope you will have a chance to visit the above sites to check out the wonderful Design Team samples as well as their fantastic galleries!

To create this easy card:

Ink the retired hostess stamp image from Ageless Adornment using Memento™ Tuxedo Black Ink and stamp onto a piece of Whisper White cardstock.

Using an AquaPainter™ with Classic Ink, color the blossom with Rich Razzleberry, the stems and leaves with Mossy Meadow and the background with Soft Suede and add additional details with the coordinating Stampin’ Write Markers.  Apply Titanium White Acrylic Paint to the flower center (or just be careful not to paint this center with Rich Razzleberry- duh! :-)).

Use the AquaPainter™ to apply Frost White Shimmer Paint to the Soft Suede background and part of the petals (you cannot see this shimmer well in the photo but it is there) and once dry, carefully fussy-cut around the image and set aside.

Ink the “thank you” only portion of the stamp from Me=Grateful with the Soft Suede Stampin’ Write Marker and stamp the sentiment onto a piece of Whisper White cardstock.

Trim the panel to 4” x 5 ¼” and use the Simply Scored™ Scoring Tool to score the lines around the image.

Ink the Gorgeous Grunge large splatter stamp with Rich Razzleberry Classic Ink, stamp off on scrap paper and repeatedly stamp onto the panel.

Mount the panel onto a piece of Mossy Meadow cardstock, trim and mount onto the Rich Razzleberry card base.

Add the Silver Thread to the card front and mount the focal image with dimensional foam to cover the thread.

Add a few Rhinetsones to finish off the card.

Quick, easy and so much fun!!

Stamp Sets: Ageless Adornment (retired hostess), Me=Grateful, Gorgeous Grunge

Ink: Memento™ Tuxedo Black Ink, Rich Razzleberry, Mossy Meadow, Soft Suede Classic Ink and Stampin’ Write Markers; Frost White Shimmer Paint, Titanium White Acrylic Paint

Paper: Whisper White, Mossy Meadow, Rich Razzleberry

Accessories: Aquapainter™, Simply Scored™ Scoring Tool, Rhinestones, Silver Thread


Thanks again for stopping by- I hope all of you have a fabulous and restful day!!

Thursday, October 10, 2013

Holly, Berry Christmas- A Color and Sketch Challenge


Hi Stampers!

This afternoon I was able to work on another Christmas card design for the CCC13 Challenge and decided to use The Freshly Made FM107 Sketch Challenge along with the PPA175 ColorChallenge at Pals Paper Arts.   I hope you will find the time to stop by and visit each site- again, such great inspiration!

To create this card:

Use the Big Shot™ with the Chalk Talk Framelits™ to cut two of the large tags- one from Whisper White cardstock and the other from Cajun Craze and from Whisper White cardstock one of the narrow rectangular tags.

Stamp the sentiment from the retired set, Contempo Christmas using Cajun Craze onto the narrow rectangular tag and hand cut the banner points (or use a 1 “ Square Punch).

On the larger Whisper White Chalk Talk tag, using Early Espresso Classic Ink, stamp the holly image from the retired set, Ageless Adornments and watercolor using the AquaPainter™ with Always Artichoke and Cajun Craze Classic Ink.  

Use the Stampin’ Write So Saffron marker to fill in the background behind the leaves and add the drop shadow with the Sahara Sand Stampin’ Write marker.

Use the Chalk Marker to add a few highlights and overlay the So Saffon background using Gold Smooch™ Pearlized Accent Ink. 

Layer the Cajun Craze cardstock tag behind the focal image, add the sentiment banner along with the Cajun Craze Candy Dot.

Create the paper bow from Cajun Craze Designer Series Paper (DSP) using the XL Oval Punch.

Use the Big Shot™ with the Pretty Print Textured Impressions™ Embossing Folder to emboss a piece of Whisper White cardstock.  Use the Scoring Tool to emboss the edges and mount onto Always Artichoke cardstock.

Mount this layer onto the Cajun Craze card base, add the focal image and Paper Bow using Stampin’ Dimensionals® to finish off the card.  

Stamp Sets:  Ageless Adornments, Contempo Christmas (both retired)

Ink: Early Espresso, Always Artichoke, Cajun Craze, Chalk Marker, Stampin’ Write Markers- So Saffron, Sahara Sand, Gold Smooch™ Pearlized Accent Ink

Paper:  Whisper White, Always Artichoke, Cajun Craze, Cajun Craze DSP

Accessories:  Big Shot™, Chalk Talk Framelits™, Pretty Print Textured Impressions™ Embossing Folder, AquaPainter™, Punches- 1” Square, XL Oval, Cajun Craze Candy Dot


Thanks again for visiting- have a terrific Thursday!
Related Posts Plugin for WordPress, Blogger...