Showing posts with label The House That Stamps Built Challenge. Show all posts

Saturday, May 30, 2020

Create In Me A Pure Heart


Hi Friends!

I am sharing a card this evening that was designed using a digital image from Power Poppy by Marcella that was hand colored with watercolor pencils along with water-based markers.

I decided to participate with the Power Poppy “Rule of Thirds” Challenge, the Simon Says Wednesday “Anything Goes” Challenge and The House That Stamps Built M1320 Tic-Tac-Toe Challenge (left column down - Die Cut or Punch-Embossing- Ribbon or Twine).

To create this card:

Import the digital image from Power Poppy into a Word document or Photo Editing Software (I used the retired My Digital Studio from Stampin’ Up!). Resize the image, print out onto white cardstock and color with watercolor pencils and water-based markers.

Add a bit of shimmer with a clear glitter pen to the flower petals.

De-static the lower left corner of the panel with an embossing powder tool, stamp the sentiment from Stamp Simply with Versafine™ Onyx Black ink, apply clear embossing powder and heat set with a heat tool.

Die cut the floral panel and a piece of designer paper with stitched horizontal strip dies.

Mount onto a piece of black cardstock,  and trim close to edge.  Add the strips of black twine and finish off with the looped bow and taupe button.

Stamp Sets: Sunshine of My Life (digital Power Poppy by Marcella), Words of Encouragement (Stamp Simply)

Ink/Mediums: Printer Ink, Versafine™ Onyx Black, Derwent™ Watercolor Pencils, Stampin’ Write Markers- Crushed Curry, Daffodil Delight, Early Espresso, Wild Wasabi, Granny Apple Green, Flirty Flamingo, Pool Party, Bermuda Bay; Spectrum Noir™ Clear Glitter Pen

Cardstock/Paper:  Whisper White, Basic Black, retired Stampin’ Up! Designer Paper

Accessories: Gemini, Jr.™,  My Favorite Things Stitched Horizontal Strip Dies, AquaPainter™, Black Hemp Twine, retired Stampin’ Up! button

Thanks again for taking the time to visit- I hope all of you have a safe and healthy week!

Wednesday, April 15, 2020

TCC133 May Kindness Return to You


Hi Friends!


I love this beautiful floral bouquet and was inspired by the colors of the flowers as well as the script on the flower pitcher to create a Clean and Layered/ Mixed Media card! 

I decided to pull out a new to me stamp set/coordinating die, Grateful for Everything (Concord & 9th) and since the main image is very long and narrow, I made the card long and narrow as well (approx. 8 ½” L x 4 ¼” H).

I bought this set on sale a while ago and thought that the flowers would be perfect for this challenge.  I am still trying to ink up the stamps that I own over the next few years, lol!

I am linking this card to The House That Stamps Built #A820 Tic-Tac-Toe Challenge (Dimension,Pastels, Dew Drops) and the Simon Says Monday “E is for ?” Challenge.  "E" is for Embossing on my card- Heat and Dry Embossing.  

To create this card:

De-static a piece of white cardstock with an embossing powder tool.  Ink the flower image  with Versafine™ Onyx Black ink (I inked just the lower part of the sentiment only), stamp onto the prepared cardstock, apply clear embossing powder and heat emboss with a heat tool. 

Once the embossing has cooled, watercolor the image with water-based markers and die cut with the coordinating die.

Ink the retired script stamp from Notable Notions (Stampin’ Up!) with Hickory Smoke Distress Oxide ink, repeatedly stamp onto a piece of white cardstock (approx.. 4” x 8”).  Trim and mount onto a piece of black cardstock, trim close to the edge.

Emboss a piece of white cardstock with the retired Square Lattice embossing folder, add the strip in the center of the background panel.  Adhere the entire panel to a white card base (approx. 8.5” L x 4 ¼” H).

Stamp the sentiment from Grateful for Everything using Versafine™ Black Onyx ink onto black cardstock, apply white embossing powder and heat set with a heat tool.  Once the embossing has cooled, fussy cut the sentiment.

Mount the floral spray image and sentiment to the card front with dimensional foam.
To finish off the card, use a clear glitter pen to add shimmer to the flower petals, an extra fine white paint pen to add highlights to the flower centers and Pearl Nuvo™ Crystal Drops.

Stamp Sets:  Grateful for Everything (Concord & 9th), Notable Notions (retired Stampin’ Up!)

Ink/Mediums: Versafine™ Onyx Black, Stampin’ Write Markers- Blushing Bride, Flirty Flamingo, Daffodil Delight, Crushed Curry, Granny Apple Green, Pear Pizzazz, Balmy Blue, Berry Burst; Tim Holtz™ Hickory Smoke Distress Oxide; Sharpie® Extra Fine White Paint Pen, Spectrum Noir™ Clear Glitter Pen, Nuvo™ Pearl Crystal Drops

Cardstock/Paper: Whisper White, Basic Black

Tools/Accessories: Gemini, Jr™, Grateful Dies (Concord & 9th), Square Lattice Textured Impressions Embossing Folder,  Embossing Buddy®, Clear and White Embossing Powder, Heat Tool

Thanks again for taking the time to visit!  I hope I have inspired you to create your own card based on our {Hello Spring} photo and link up to our gallery at The Card Concept- we would love to see what inspired you! The challenge is open until April 27th  at noon EST.

Thursday, November 21, 2019

Winds of Change


Hi Friends!!

This evening I am sharing a card that I designed using two Stampin’ Up! stamp sets- Winds of Change (in the current catalog) and retired Harvest Blessings. 

In an effort to ink up stamps I already own, I have had this new stamp set, Winds of Change for several months and this is the first time I have had a chance to ink it up.  The sentiment from Harvest Blessings has not seen ink in a while as well. 

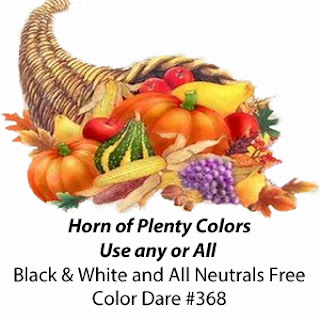
This card was a birthday card for my sister-in-law who loves tulips and I thought that the Color My Heart Color Dare #368 “Horn of Plenty Colors” Challenge (orange, green, red, yellow) would be perfect for her November birthday.

I am also used the Splitcoaststampers SC774 Sketch Challenge for the layout and incorporated The House That Stamps Built N1319 Tic-Tac-Toe Challenge (diagonal – watercolor, designer paper, button) and Word Art Wednesday #414-#415 “Anything Goes” Challenge into the design.

 If you have not had a chance to do so, I hope you will visit the above challenge sites- gorgeous inspiration from all!

To create this card- Ink the main focal image of the windmill image with Versafine™ Onyx Black Ink onto white cardstock and on another white cardstock panel, stamp the individual tulip image and sentiment. 

Apply clear embossing powder to all of the images, heat set with a heat gun and watercolor the tulips and main image using water-based markers. 

Die cut the main image with a stitched rectangle die, mount onto black cardstock, trim close to the edge.

Fussy cut the tulip image and trim the sentiment into a banner.  Adhere a split banner of black cardstock behind the sentiment. 

The background panels were cut from designer paper (retired hostess sets from Stampin’ Up! from years ago) and they were embossed with a plaid embossing folder before mounting onto black cardstock.

Wrap a piece of 1” black satin ribbon over the designer series panel, wrap the ends behind the panel.  Add the strip of lace, wrapping the ends behind the panel before mounting the panel onto a white card base.

Mount the main focal image onto the card front with dimensional foam (or chipboard), add the fussy cut tulips and banner using dimensional foam.  Add the orange button (I used a strip of black cardstock to mimic thread).

Use a clear glitter pen to add shimmer to the tulip petals to finish off the card.

Stamp Sets: Winds of Change, Harvest Blessings (Stampin’ Up!)

Ink/Mediums: Versafine™ Onyx Black, Stampin’ Write Markers- Pumpkin Pie, Cajun Craze, Cherry Cobbler, Smoky Slate, Lemon Line Twist, Old Olive; Tim Holtz™ Tumbled Glass Distress Oxide Ink, Spectrum Noir™ Clear Glitter Pen

Cardstock/Paper:  Whisper White, Basic Black, retired Hostess Level I Paper Pack (Stampin’ Up!)

Accessories: Big Shot™, My Favorite Things Stitched Rectangle A2 Dies Set 1, Sizzix™ Plaid Textured Impressions Embossing Folder,  Embossing Buddy®, Clear Embossing Powder, Heat Tool, AquaPainter™. Hexagon Punch, 1” Black Satin Ribbon, White Flat Lace, Tangerine Button

Thanks again for taking the time to stop by- I hope all of you have a great week!

Tuesday, October 29, 2019

Heartspeak Blessings


Hi Friends!!

This card was designed using the retired Stampin’ Up! set, Heartspeak  (for the focal image) and the sentiment is from the retired Doily Blessings stamp set(Our Daily Bread Designs). 

I have always loved this little bird image with its ruffled appearance and I wanted to give this stamp set some "love" (I have not inked this stamp since 2015).  When I was re-organizing my craft room this summer,  I found the embossed lacy die cut along with the embossed blue and yellow panels in my stash .  Because most of the background had already been die cut and embossed, this was a fairly quick and easy card to create! 

I was inspired by the Sweet Sketch Wednesday 2 October Sketch for the layout (I did modify the sketch  a bit with the addition of the circle sentiment) and am also participating with TheHouse That Stamps Built #0919 Tic-Tac-Toe Challenge (far left column down- Wildlife, Texture, Stencil) and the Word Art Wednesday #410-#411 “Anything Goes”Challenge.

If you have not had the opportunity, I hope you will visit the above challenge sites- great inspiration from all!

To create this card:

Ink the bird with the basket image with Versafine™ Onyx Black ink, stamp onto a piece of prepared white cardstock, apply clear embossing powder and heat set with a heat tool.

Once the embossing has cooled, watercolor with water-based markers (see colors below) and die cut with a stitched circle die.  Mount onto a circle die cut from espresso cardstock.

Repeat the steps above with the sentiment image. 

Use a stencil brush along with a flourish stencil to apply tumbled glass distress oxide ink over the sky area around the bird as well as the sentiment.  Carefully wipe off the excess ink from the sentiment.

Trim a piece of white cardstock to approx. 4 ⅛” x 5 ⅜” and mount onto a piece of espresso cardstock (4 ¼” x 5 ½”).  Mount the entire panel onto a white card base.

Trim two pieces of light blue cardstock and emboss both with a textured embossing folder.  Mount onto espresso cardstock and add directly to the card front.

Die cut and emboss a piece of espresso cardstock using the largest die from Layered Lacey Square Dies (Divinity Designs LLC).  Trim a piece of white cardstock to fit the interior of the die cut, trim a piece of saffron cardstock to fit the interior of the white square and emboss the saffron cardstock with the same textured embossing folder used for the light blue pieces in the step above.

Mount the entire layered square onto the card front with dimensional foam or chipboard.

Mount the focal image along with the sentiment onto the card front with dimensional foam or chipboard.

Use a clear glitter pen on the birds  along with a white gel pen for highlights for the flower centers to finish off the card.

Stamp Sets: Heartspeak (retired Stampin’ Up!), Doily Blessings (retired Our Daily Bread Designs)

Ink/Mediums: Versafine™ Onyx Black, Tim Hotlz™ Tumbled Glass Distress Oxide, Stampin’ Write Markers- Bashful Blue, Blushing Bride, Crushed Curry, Daffodil Delight, Elegant Eggplant, Smoky Slate, Wild Wasabi, Wink of Stella™ Clear Glitter Pen, White Gel Pen

Cardstock/Paper: Whisper White, Bashful Blue, Early Espresso, So Saffron

Accessories: Big Shot™, Lacy Brocade Textured Embossing Folder (retired Stampin’ Up!), Dies- MFT Stitched Circle STAX, Sizzix Circles, Divinity Designs LLC Layered Lacey Squares; Embossing Buddy®, Heat Tool, Clear Embossing Powder, AquaPainter, Clarity™ Stencil Brush, Memory Box™ Flourish Stencil

Thanks again for taking the time to visit- you are all such an encouragement to me!! 

May the blessings of the LORD be upon you this week :-)

Wednesday, September 11, 2019

The Card Concept #119 {Beautiful Butterflies}


Hi Friends!

Welcome back to The Card Concept!  We are starting off our fall session with The Card Concept #119 {BeautifulButterflies} Inspiration Photo!  I was inspired by the colors of the butterflies as well as the actual butterflies to create a fairly simple Mixed Media card!

I am still focusing on using some of my retired stamp sets as well as my stamps that are still available for purchase. This card was designed with the retired Swallowtail, Timeless Textures (Stampin’ Up!) along with a sentiment from Fear Not (currently available from Stamp Simply Ribbon Store).


If you have not had a chance to visit us at The Card Concept or the other challenge sites yet, I hope you will find time to do so- fabulous inspiration from all!

The butterfly image (Swallowtail from Stampin’ Up!) was inked with a water friendly black ink onto white cardstock and colored with alcohol markers along with a gold and white paint pen for highlights.  After fussy-cutting the image, ModPodge™ was applied to give the butterfly more stability.

Add pink splatter with distress oxide ink to a white card base, heat emboss the sentiment from Fear Not (Stamp Simply Ribbon Store) and add a bit of texture with a texture stamp.

Trim and mount onto a white card base to finish off the card.

Stamp Sets:  Swallowtail, Timeless Textures (retired Stampin’ Up!), Fear Not (Stamp Simply Ribbon Store)

Ink/Mediums: Versafine™ Onyx Black, Memento™ Tuxedo Black, Tim Holtz™ Picked Raspberry Distress Oxide, Spectrum Noir™ Alcohol Markers, ModPodge™, White and Gold Paint Pen

Cardstock/Paper: Whisper White

Tools/Accessories: Embossing Buddy®, Clear Embossing Powder, Heat Tool, 

Thanks again for taking the time to visit!  I hope I have inspired you to create your own card based on our {Beautiful Butterflies}  photo and link up to our gallery at The Card Concept- we would love to see your interpretation!! The challenge is open until Monday, September 23rd at noon (EDT).

Saturday, August 24, 2019

Cast All Your Cares


Hi Friends!

Here is another card with some of my older stamp sets- this card includes retired Stampin’ Up! Summer by the Sea, Stipple Shells along with the retired Verve Stamp Set, Faith Medley.


I heat embossed all of the images as well as the sentiment using clear embossing powder and water-colored the images with clean color markers and distress inks.  The shells were fussy-cut, the main image was die cut with a stitched rectangle die and the sentiment with a stitched oval die.

All of the elements were layered onto black cardstock with the main image and seashells mounted onto the card front with dimensional foam.

The card was finished off with a clear glitter pen and rhinestones.


If you have not had a chance to stop by the above challenge sites, I hope you will find the time to do so- gorgeous galleries and inspiration from all!

Stamp Sets: Summer by the Sea, Stipple Shells (retired Stampin’ Up!), Faith Medley (retired Verve Stamps)

Ink/Mediums: Versafine™ Onyx Black,  Zig® Clean FB Markers- Yellow, Ochre, Blue, Violet, Purple, Brown, Lt. Pink; Soft Suede Stampin’ Write Marker, Tim Holtz® Ground Espresso Distress Oxide, Clear Glitter Pen

Cardstock/Designer Paper: Whisper White, Basic Black, retired Stampin’ Up! designer paper- Brilliant Blue, misc. purple dsp (not sure of manufacturer)

Accessories: Big Shot™, MFT Dies- Stitched Rectangle STAX A2 Set 1, Stitched Ovals STAX; Embossing Buddy®, Clear Embossing Powder, Heat Tool, AquaPainter™, Sponge Daubers, Rhinestones

Thanks again for taking the time to visit- hugs and I hope you will visit again soon!

Friday, August 23, 2019

Betsy the Beekeeper- Near to God


Hi Friends!

I am still working on creating cards with some of my older stamp sets and this card includes the retired Stampin’ Up! sets- Betsy the Beekeeper and Timeless Textures along with the current Words of Encouragement stamp set from Simply Stamps.

I heat embossed the Betsy the Beekeeper image and water-colored the image with clean color markers.  After die-cutting the image with a stitched rectangle die, I used a honeycomb stencil and a texture stamp with oxide inks.  The texture stamps were heat embossed with clear embossing powder and the layers were mounted onto black cardstock. 

The card was finished off with a clear glitter pen, gold cord and rhinestones.

I incorporated the Try Stampin On Tuesday #421 Sketch Challenge along with the Retro Rubber Challenge Blog #117 “Anything Goes” Challenge (Betsy the Beekeeper is over ten years old) and The House That Stamps Built #A1419 Tic-Tac-Toe Challenge (bottom row across- Bright Colors, Food, Dimension). 

If you have not had a chance to stop by the above challenge sites, I encourage you to do so- fabulous galleries and inspiration from all!

Stamp Sets: Betsy the Beekeeper (retired Stampin’ Up!), Words of Encouragement (Stamp Simply)

Ink/Mediums: Versafine™ Onyx Black,  Zig® Clean FB Markers- Yellow, Ochre, Blue, Violet, Purple, Brown, Lt. Green; Soft Suede Stampin’ Write Marker, Tim Holtz® Distress Oxide- Fossilized Amber, Wild Honey; Clear Glitter Pen, Pilot V5 Pen

Cardstock/Designer Paper: Whisper White, Basic Black, retired Stampin’ Up! designer paper- Brilliant Blue, Daffodil Delight; misc. purple dsp (not sure of manufacturer)

Accessories: Big Shot™, MFT Dies- Stitched Rectangle STAX A2 Set 1, Stitched Circles STAX; Embossing Buddy®, Clear Embossing Powder, Heat Tool, AquaPainter™ , Honeycomb Stencil, Gold Cord, Rhinestones

Thanks again for taking the time to stop by- I will be sharing more cards this weekend.  I hope you will visit again soon!
Related Posts Plugin for WordPress, Blogger...