Showing posts with label #juliegearinger. Show all posts

Saturday, October 2, 2021

National Coffee Week- Taste and See

 Hi Friends!

I hope all of you are having a great week so far!  In honor of National Coffee Day this past week (09/29), I am sharing another card designed using stamps, dies and paper from Stamp Simply!

I personally love the smell of coffee, but only drink one cup every week or so.  I do drink a few cafĂ© latte Protein Drinks every day though (very similar to iced coffee) and I love the coffee flavor. 


As many of you who follow my blog know, I enjoy playing along with online challenges and will be linking this card to the A Place To Start September 2021#9 Patterned Paper, Please Challenge, Addicted to Stamps and More #415 “Die Cuts or Stencils” Challenge (I used Die Cuts) and the Word Art Wednesday #511-#512 “Anything Goes” Challenge.

If you have not had a chance to visit the Stamp Simply blog or the other challenge sites yet, I encourage you to do so- gorgeous inspiration from all!

To create this card:


For the background, ink the small subway style text image stamp from the A Cup of Java with distress oxide inks (I randomly applied Rusty Hinge, Ground Espresso and Spiced Marmalade over the image), repeatedly stamp onto a piece of white cardstock and heat set with a heat tool.

Once the oxide inks dry, stamp the coffee bean image from A Cup of Java with Ground Espresso distress oxide ink over the panel, heating with a heat tool to speed the drying process.

Use a stencil brush to apply Antique Linen distress oxide ink to “age” the paper, trim to approx. 4” x 5 ¼”.

Mount a strip of the rust pattern paper from the Carta Bella Welcome Autumn 6x6 Paper Pad onto espresso cardstock.

Die cut a piece of white cardstock with the Tim Holtz Crochet Die, sponge Ground Espresso distress oxide ink over the die cut “lace”, mount behind the strip of layered designer paper.

On a scrap piece of the light birch designer paper from the Craft Consortium Wood Textures 6x6 Paper Pad, ink the same background stamp with the distress oxide inks as in the steps above for the background panel, lightly stamp over the birch paper.  Heat set with a heat tool to dry thoroughly.


De-static the scrap birch piece with an embossing powder tool, stamp the verse sentiment with Versafine Onyx Black ink from
Coffee or Tea?, apply clear embossing powder and heat set with a heat tool.

Layer onto the patterned paper strip and adhere to the card front.

Die cut the “heat swirl” from the A Cup of Java dies, adhere to the background panel.

Mount the entire background panel onto a piece of espresso cardstock, adhere to a white card base.


Die cut the smaller coffee cup with the coordinating A Cup of Java dies from the fall leaves pattern in the Carta Bella Welcome Autumn 6x6 paper pad, layer a scrap piece of the Welcome Autumn paper and Tim Holtz Crochet Lace die for the “wrapper”.

Mount the coffee cup fie with dimensional foam.

To finish off the card, use a clear glitter marker to add shimmer to the “heat swirl” and add a pearl to the center of the coffee wrapper.

Stamp Sets:  A Cup of Java Bundle, Coffee or Tea? (Stamp Simply)

Ink/Mediums: Versafine Onyx Black, Tim Holtz Distress Oxide- Antique Linen, Ground Espresso, Rusty Hinge, Spiced Marmalade; Zig Wink of Stella Brush- Clear Glitter Marker

Cardstock/Paper: White, Espresso,  Carta Bella Welcome Autumn 6x6 Paper Pad , Craft Consortium Wood Textures 6x6 Paper Pad

Accessories/Tools: Gemini, Jr., Stamp Simply Dies- A Cup of Java Bundle, Sizzix Thinlits Dies by Tim Holtz- Crochet, Kaisercraft Self-Adhesive Round Pearls- Pearl, Embossing Powder Tool, Clear Embossing Powder, Heat Tool, Stenciling Brush


Thanks for taking the time to stop by and visit!  I hope I have inspired you to create something fun this week!

Saturday, June 12, 2021

Stamp Simply Summer Floral Release- Pretty Poppies and Delightful Dahlias!


Hi Friends!

Today I am sharing two cards that were created with the brand-new Summer Floral bundles- Pretty Poppies and Delightful Dahlias along with dies/other supplies (from Stamp Simply)!


This week we are celebrating the new release by sharing cards created with both sets- I hope you have a chance to check out the Stamp Simply blog to see the inspiration from the rest of our
Design Team!

I love both new floral bundles, Pretty Poppies and Delightful Dahlias- both are so versatile! This set of cards uses one sheet of Craft Consortium Grunge Light 6x6 paper layered behind the Mixed Media #1 die cut.


I am participating with the A Place To Start June 2021 Challenge #6- Create Your Own Challenge (Project Type- Card, Event- Encouragement, Trends- Embossing) and the Word Art Wednesday #495-#496 “Anything Goes” Challenge.


If you have not had a chance to visit the Stamp Simply blog or the other challenge sites yet, I encourage you to do so- wonderful inspiration from all!

To create both cards:

Emboss two pieces of white cardstock with the Darice Wire Fence embossing folder, trim to 4” x 5 ¼”, adhere to a 4 ¼” x 5 ½” piece of olive cardstock.  Mount the card panel onto a white card base.

Ink the sentiments from the Pretty Poppies and Delightful Dahlias on white cardstock, die cut each with the Fishtail Sentiment Banners dies.


Using the Tim Holtz Mixed Media #1 corner die, die cut two from white cardstock panels and hand tear along the edges.

Choose a piece of Craft Consortium Grunge Light 6x6 paper (I chose one of the darker sheets with greens, purples and yellows). 


Place the torn Mixed Media die cut over the corner of the designer paper, trace a line under the outside edge of the torn die cut, trim the designer paper and adhere the designer paper to the back of the Mixed Media die cut.

Ink the floral image from Pretty Poppies and Delightful Dahlias using Versafine Onyx Black ink, stamp onto white cardstock and set the ink with a heat tool.

Watercolor the images using water-based markers and once you are satisfied with the coloring, die cut each floral image with the coordinating die.  


Layer two pieces of scrap white cardstock together and die cut one of each of the coordinating floral dies.  Layer the blank die cuts behind each of the colored floral die-cut images (this gives the floral images additional thickness). 

Adhere the layered Mixed Media die cut to the card front, mount the banner die cut sentiment and add the floral die cut with dimensional foam (or chipboard).

Use a clear glitter pen to add shimmer to the floral petals and add the olive seam binding bow to finish off the card.


Stamp Sets: Pretty Poppies Bundle,  Delightful Dahlias Bundle (Stamp Simply)

Ink/Mediums: Versafine Onyx Black, Stampin’ Write Markers- Blushing Bride, Melon Mambo, Lemon Lime Twist, Old Olive, Peekaboo Peach, Mango Melody, Highland Heather, Gorgeous Grape, Poppy Parade; Zig Wink of Stella Brush- Clear Glitter Marker

Cardstock/Paper:  White, Olive, Craft Consortium Grunge Light 6x6


Accessories/Tools: Gemini, Jr., Stamp Simply Steel Dies- Fishtail Sentiment Banners, Sizzix Thinlit Dies by Tim Holtz- Mixed Media #1, Darice Embossing Folder- Wire Fence, Olive Green Seam Binding


Also, don't forget, here is the discount code for the month of June!


Thanks again for taking the time to visit- I hope all of you have a blessed weekend!

Saturday, June 5, 2021

The Red, White and Blue- Thank You For Your Service


Hi Friends!

Today I am sharing a card created with the brand new Red, White and Blue Bundle and the new God Bless America 6x6 Paper Pad by Carta Bella along with dies/other supplies (from Stamp Simply )!


The Red, White and Blue Bundle is such a great set!  I love the flag image as well as the coordinating dies and the wonderful sentiments and it pairs beautifully with the other patriotic sets from Stamp Simply as well as with the God Bless America 6x6 Paper Pad by Carta Bella.


This past Monday, we celebrated Memorial Day with picnics, family get-togethers (especially this year with COVID restrictions being lifted), etc. and sometimes in doing so, we forget the real meaning of the holiday.

In honor of Memorial Day, I decided to create a “Thank You for Your Service” card- remember, 

Freedom is not free- may we never forget their sacrifice.

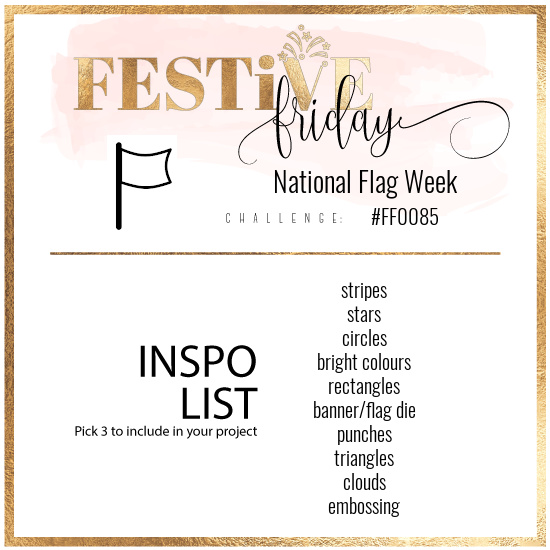
This is a fairly simple design and I was able to incorporate the Splitcoaststampers SC850 Sketch and am also linking this card to the Festive Friday #FF0085 Challenge (stars, stripes, flag dies, embossing ) , the C.R.A.F.T. #600 “Masculine” Challenge and the Word Art Wednesday #493-#494 “Anything Goes” Challenge.

If you have not had a chance to visit the Stamp Simply blog or the other challenge sites yet, I encourage you to do so- gorgeous inspiration from all!

To create this card:

Emboss a piece of white cardstock using the Tim Holtz 3D Lumber embossing folder, trim to approx. 4” x 5 ¼”, mat onto a piece of 4 ¼” x 5 ½” navy cardstock and mount onto a white card base.


Die cut a piece of red polka dot paper from the God Bless America paper pad with the Fishtail Sentiment Banners dies.  

Mount the flag die cut onto navy cardstock and trim close to the edge. (FYI- I extended the length of the flag die cut by splitting it in half since the cut would be hidden by the main panel).  Adhere the flag to the background panel.

On a piece of white cardstock, repeatedly stamp the word block image from Red, White, and Blue stamp set using Versamark ink, apply white embossing powder, heat set with a heat tool.   Trim the panel, tear the lower edge by hand, mount onto navy cardstock, tear the edge to match the embossed panel, distressing the edges.


Add a strip of the star design from the God Bless America paper pad  (this strip was the piece that I trimmed from the page that normally would be discarded- again cut in half where the hole is at the top of the paper pad and split to reach both sides of the panel). 

Stamp the sentiment from the Red, White, and Blue stamp set using navy ink onto white cardstock, die cut with the Fishtail Sentiment Banners dies (die cutting two additional flags from white cardstock to mount behind the sentiment).  Add to the panel with dimensional foam.


Stamp the flag image from Red, White, and Blue stamp set using Versafine Onyx Black ink onto white cardstock, heat set with a heat tool.

Color the flag with watercolor pencils and use a water brush to blend the colors.

Die cut the flag image with the coordinating Red, White and Blue Flag Die (again, cutting two additional flag shapes from white cardstock to mount behind the stamped and colored flag image).

Mount the layered flag onto the card front with dimensional foam and add a few silver rhinestones to finish off the card.

Stamp Sets: Stamp Simply Clear Stamps- The Red, White & Blue , Stamp Simply Clear Stamps/Dies- Red, White & Blue Bundle

Ink/Mediums:  Versafine Onyx Black, Versamark , Tim Holtz Blueprint Sketch Distress Ink, Watercolor Pencils- Derwent - #14- Deep Vermillion, #15-Geranium Lake, #28- Delft Blue, #57- Brown Ochre; Stampin’ Up!- Early Espresso

Cardstock/Designer Paper:  White, Navy, God Bless America 6x6 Paper Pad by Carta Bella

Accessories/Tools: Gemini, Jr. ,Sizzix 3D Texture Fades A6 Embossing Folder- Lumber, Stamp Simply Steel Dies- The Red, White & Blue Flag, Stamp Simply Steel Dies- Fishtail Sentiment Banners, Silver Rhinestones, Embossing Powder Tool, White Embossing Powder, Heat Tool

Thanks again for taking the time to visit- I hope I have inspired you to create a card this week!  Don't forget, we are also celebrating for the month of June!


Hugs and I hope you stop by again soon!

Saturday, April 17, 2021

Born of Water and the Spirit


Hi Friends!

Today I am sharing a quick Clean and Simple card using stamps, dies and paper from The Stamp Simply Ribbon Store.

I am having so much fun with the Craft Consortium Vivid Ink Drops 6x6 Paper Pad!  I love the look of the alcohol ink backgrounds and this one with the blues, purples and touches of gold reminded me of water.


I paired a sheet of the Vivid Ink Drops paper along with Bazzill Mirror Gold Cardstock and the new Baptism (and More) stamp set to create a card celebrating baptism. The Baptism (and More) stamp set has so many great sentiments and several verses- not just for baptism but for all year round!


I absolutely love this mirror cardstock (sorry for the glare in some of the photos, it definitely has a mirror finish and is so thick)!  I am looking forward to using it with an embossing folder, plus there are other finishes available- silver, copper - it will be wonderful to emboss with an embossing folder)!

While baptism is not a step you take for salvation, once you have accepted Christ as your Lord and Savior through faith alone, it is an outward expression of an inward change for a born-again Christian. 

The abstract nature of the Vivid Ink Drops paper lends itself to a masculine feel and would be perfect for a young (or older) man who was recently baptized.

As I have mentioned in previous posts, my personal goal is to create a card for each of the over 800 Splitcoaststampers Sketch Challenges and decided to incorporate the SC764 Sketch for the layout (from August 2019).       

In addition to the sketch challenge, I am also joining the Watercooler Wednesday #WWC313 Tristan’s Challenge- All Things Masculine and the Word Art Wednesday #487-#488 “Anything Goes” Challenge.

If you have not had time to check out the Stamp Simply blog or the other challenge sites yet, I hope you will do so- wonderful inspiration from all!

To create this card:


Trim a piece of the Bazzill Mirror Gold Cardstock to approx. 4” x 5 ¼” and mount onto a white card base.

Cut the 6x6 inch panel of Vivid Ink Drops paper to approx. 4” x 5” and cut into four strips with the bottom strip a bit wider than the other three.

Mount the strips of paper onto the card front, separating the panels (per the sketch).


De-static a piece of white cardstock with an embossing powder tool, ink the sentiment from the Baptism (And More) set with Versamark ink, stamp onto the prepared panel, apply extra fine gold embossing powder and heat set with a heat tool.  

Repeat the above steps on the inside of the card using the words from the Baptism (And More) set “Congratulations on your Baptism.

Allow the embossing to cool, die cut the verse sentiment using an oval die (cutting a few extra dies from white cardstock), adhere the ovals together to create a thicker panel and mount onto the front of the card with dimensional foam (or chipboard).

That is, it- the card is finished! Quick and easy and flat for mailing!

Stamp Sets:  Baptism (and More) (Stamp Simply)


Ink/Mediums:
Versamark

Cardstock/Paper:  White, Bazzill Mirror Cardstock- Gold 6 ct, Craft Consortium Ink Drops- Vivid  6x6 Paper Pad

Accessories/Tools: Gemini, Jr. Oval Dies, Embossing Powder Tool, Ranger Super Fine Gold Embossing Powder, Heat Tool

Thanks again for taking the time to visit! I hope I have inspired you to create something this weekend, sweet friends!

Related Posts Plugin for WordPress, Blogger...