Showing posts with label Encouragement. Show all posts

Saturday, June 12, 2021

Stamp Simply Summer Floral Release- Pretty Poppies and Delightful Dahlias!


Hi Friends!

Today I am sharing two cards that were created with the brand-new Summer Floral bundles- Pretty Poppies and Delightful Dahlias along with dies/other supplies (from Stamp Simply)!


This week we are celebrating the new release by sharing cards created with both sets- I hope you have a chance to check out the Stamp Simply blog to see the inspiration from the rest of our
Design Team!

I love both new floral bundles, Pretty Poppies and Delightful Dahlias- both are so versatile! This set of cards uses one sheet of Craft Consortium Grunge Light 6x6 paper layered behind the Mixed Media #1 die cut.


I am participating with the A Place To Start June 2021 Challenge #6- Create Your Own Challenge (Project Type- Card, Event- Encouragement, Trends- Embossing) and the Word Art Wednesday #495-#496 “Anything Goes” Challenge.


If you have not had a chance to visit the Stamp Simply blog or the other challenge sites yet, I encourage you to do so- wonderful inspiration from all!

To create both cards:

Emboss two pieces of white cardstock with the Darice Wire Fence embossing folder, trim to 4” x 5 ¼”, adhere to a 4 ¼” x 5 ½” piece of olive cardstock.  Mount the card panel onto a white card base.

Ink the sentiments from the Pretty Poppies and Delightful Dahlias on white cardstock, die cut each with the Fishtail Sentiment Banners dies.


Using the Tim Holtz Mixed Media #1 corner die, die cut two from white cardstock panels and hand tear along the edges.

Choose a piece of Craft Consortium Grunge Light 6x6 paper (I chose one of the darker sheets with greens, purples and yellows). 


Place the torn Mixed Media die cut over the corner of the designer paper, trace a line under the outside edge of the torn die cut, trim the designer paper and adhere the designer paper to the back of the Mixed Media die cut.

Ink the floral image from Pretty Poppies and Delightful Dahlias using Versafine Onyx Black ink, stamp onto white cardstock and set the ink with a heat tool.

Watercolor the images using water-based markers and once you are satisfied with the coloring, die cut each floral image with the coordinating die.  


Layer two pieces of scrap white cardstock together and die cut one of each of the coordinating floral dies.  Layer the blank die cuts behind each of the colored floral die-cut images (this gives the floral images additional thickness). 

Adhere the layered Mixed Media die cut to the card front, mount the banner die cut sentiment and add the floral die cut with dimensional foam (or chipboard).

Use a clear glitter pen to add shimmer to the floral petals and add the olive seam binding bow to finish off the card.


Stamp Sets: Pretty Poppies Bundle,  Delightful Dahlias Bundle (Stamp Simply)

Ink/Mediums: Versafine Onyx Black, Stampin’ Write Markers- Blushing Bride, Melon Mambo, Lemon Lime Twist, Old Olive, Peekaboo Peach, Mango Melody, Highland Heather, Gorgeous Grape, Poppy Parade; Zig Wink of Stella Brush- Clear Glitter Marker

Cardstock/Paper:  White, Olive, Craft Consortium Grunge Light 6x6


Accessories/Tools: Gemini, Jr., Stamp Simply Steel Dies- Fishtail Sentiment Banners, Sizzix Thinlit Dies by Tim Holtz- Mixed Media #1, Darice Embossing Folder- Wire Fence, Olive Green Seam Binding


Also, don't forget, here is the discount code for the month of June!


Thanks again for taking the time to visit- I hope all of you have a blessed weekend!

Saturday, April 16, 2016

Happy Together- True Friends Are Always Together In Spirit


Look at all of the Ridges
(farthest one approx. 35-40 miles)
Hi Friends! 

I hope all of you are having a great week so far!! Yesterday my hubby and I were able to take a trip to Shenandoah National Park and drive 80 miles along Skyline Drive (160 miles round trip in the park) and we had a great time!

The weather was absolutely gorgeous and there were only a few other visitors, so we basically had the park all to ourselves (just the way we like it!)  The vistas are amazing....beautifully serene and peaceful and barely a cloud in the sky- just a perfect day!

I had a chance to create a Clean and Simple (CAS) card Thursday that I am sharing today over on the Sweet ‘n Sassy Stamps (SNSS) blog and wanted to share it with all of you here as well.  


This card was designed using the brand new Happy Together stamp set (designed by Korin Sutherland) along with Grunge Elements and the Ticket Dies.


To create this card:

Ink the Grunge Elements (SNSS) image with Delightful Dijon Classic Ink, stamp off before stamping onto a piece of Whisper White cardstock- repeat this step three times.

Ink the same Grunge Elements image using Crushed Curry Classic Ink and stamp at the bottom.

Ink the silhouette images from HappyTogether (SNSS) with Stāz-On® Stone Gray Ink and stamp over the yellow background (I used my MISTI® Tool so I could repeatedly stamp the image).

Die cut the image into a circle and layer a die cut circle of Basic Gray cardstock behind the focal image.

Stamp the sentiment from HappyTogether (SNSS) using Stāz-On® Stone Gray Ink onto Whisper White cardstock (again, I used my MISTI® Tool for positioning and repeated stamping). 

Cut the sentiment out with the Big Shot® and the largest die from the Ticket Dies (SNSS) and also cut the same size die from Basic Gray cardstock.
Split the Basic Gray Ticket Dies die cut in half and layer behind the sentiment (spreading the Basic Gray die cut apart a bit so the layer will show on the sides).

Cut the retired Eastern Elegance Designer Series Paper (DSP) on an angle and layer a strip of Basic Gray cardstock at the top of each angled piece.

Layer a piece of Whisper White cardstock onto the Basic Gray card base, add the angled DSP pieces and mount the sentiment with dimensional foam.

Add the focal image circle with dimensional foam to finish off the card- quick and easy!

Stamp Sets:  Happy Together, Grunge Elements (SNSS)

Ink:  Stāz-On® Stone Gray, Delightful Dijon, Crushed Curry

Paper: Whisper White, Basic Gray; retired Eastern Elegance DSP

Accessories: Big Shot™, Ticket Dies(SNSS), Stitched Circle Dies (MFT)

Thanks again for stopping by- your visits are such an encouragement to me :-) I hope you all have a fabulous weekend! 

Monday, April 11, 2016

The Wilderness Awaits- You've Got This!


Hi Again Friends!

Here is the another card that I created this morning using the FMS231 Freshly MadeSketches Challenge along with the Hand Stamped Sentiments HSSCC235 ColorChallenge (I did use Blackberry Bliss cardstock although it looks very dark in the photo.

This will be another design for the Splitcoaststampers’ April 2016 Cards for A Cause (see here for more details).

I hope you will take the time to visit the above galleries- so much inspiration from the Design Teams as well as the entries!

To create this card:

Ink the Elk image from The Wilderness Awaits using Basic Black Stampin’ Archival Ink and stamp onto Whisper White cardstock.

Heat set the image with the Heat Tool, use an AquaPainter™ with Smoky Slate Classic Ink to color the Elk and the rocks,  add additional shadows with the Smoky Slate and Sahara Sand Stampin’ Write Marker. 

Color the sky area with the AquaPainter™ and Pool Party Classic Ink, trim the panel, mount onto Pool Party cardstock, trim and mount onto the Blackberry Bliss card base.

Cut a strip of Blackberry Bliss cardstock on an angle, add to the card front and adhere a strip of Pool Party cardstock down the center.

Ink the sentiment from You’ve Got This with Stāz-On® Stone Gray Ink, stamp onto Whisper White cardstock, add the Pool Party ink in the background with the Work of Art square background stamp, cut out the image using the Big Shot™ and the My Favorite Things® (MFT) Stitched Square Dies.

Mount the sentiment onto Pool Party cardstock, trim and mount onto Blackberry Bliss cardstock.

Create the photo corners with a 1 ⅜” Square Punch (punch a notch in the corner of the cardstock with just one corner of the punch, re-insert the punched cardstock to the desired width of the photo corner, punch again with the square punch and cut the diagonal line with scissors).

Add the photo corners to the sentiment along with Antique Brass Brads.

Mount the sentiment onto the card front with dimensional foam to finish off the card.

Stamp Sets: The Wilderness Awaits, Work of Art, You’ve Got This

Ink: Basic Black Stampin’ Archival, Stāz-On® Stone Gray, Pool Party, Smoky Slate

Paper: Whisper White, Blackberry Bliss, Pool Party

Accessories: Big Shot™, MFT Stitched Square STAX, AquaPainter™, 1 ⅜” Square Punch, Antique Brass Brads


Thanks again for taking the time to stop by- I am off for a nap :-)  I hope all of you have a marvelous day!

Sunday, July 12, 2015

Bravo! Way to Go- A "Throwdown" and Sketch Challenge :-)


Hi Again Stampers! 

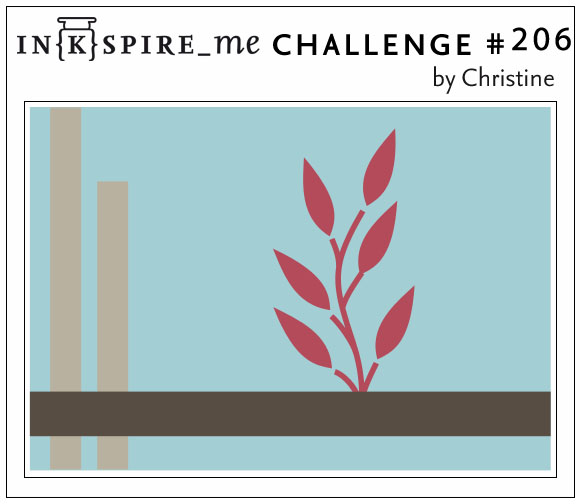
Ok- this is the last card that I will be sharing that I created this past weekend…I decided to try a brand new challenge for me- TGIFC Throwdown Challenge #2 for July along with the IN{K}SPIRE_Me #206 Sketch Challenge ( flipped the sketch over).

The TGIFC "Throwdown" Challenge is a monthly challenge where you can only use at least four of six items that they list as the “throwdown” along with a few other “pantry” items- trust me, this was a tough one- lol!!

I hope you will find the time to visit the above sites and check out all of the inspiration from their Design Teams as well as their galleries!

To create this card:

Using Hello Honey and Pool Party re-inkers, place a few ink drops on your acrylic blocks and spritz with water.

Lay a piece of Whisper White cardstock face down into the ink, swirl and lift (do not get the paper too wet or it will “pill”).

Add a bit more interest using an AquaPainter™ and dripping plain water over the dried ink- it will spread a bit and create larger circles.

Add a bit of black splatters using the AquaPainter™ with Momento™  Tuxedo Black Ink (drop  a spot of the refill, pick it up with the AquaPainter™ and tap the brush end top to create the splatter or allow to just drop onto the paper).

Stamp the sentiment from Bravo! using Momento™  Tuxedo Black Ink (I probably should have used Stāz-On® Jet Black Ink) onto Whisper White cardstock, trim and mount onto Basic Black cardstock.   

Add another Whisper White panel mounted onto Basic Black cardstock on an angle behind the sentiment.

Place the sentiment face down onto the acrylic blocks with the remaining Hello Honey and Pool Party re-inker and swirl the paper a bit.
Also swirl a small piece of Whisper White cardstock into the Hello Honey and Pool Party ink- set aside to dry.

Cut the background panel into three strips and mount onto Basic Black cardstock. Trim the panel again and mount onto the Whisper White card base.

Add the scrap strips of Basic Black cardstock and mount the sentiment using Stampin’ Dimensionals®.

Hand cut the small squares of Whisper White cardstock and hand cut the tiny squares of Hello Honey and Pool Party paper (created in the step above) to create the two diamond shaped accents-  add to the card front to finish off the card.

I love being challenged and think that the limited “Throwdown” challenge is a great idea, but I feel that this card is missing something (I may end up adding a few Rhinestones before I send this one in the mail)....

Stamp Sets: Bravo!

Ink: Memento™ Tuxedo Black Ink ; Re-Inkers- Hello Honey, Pool Party, Memento™ Tuxedo Black

Paper: Whisper White, Basic Black

Accessories: AquaPainter™, Acrylic Blocks, Water Spritzer Bottle


Thanks again for visiting- I hope all of you have a fantastic week!

Tuesday, June 16, 2015

You've Got This- Encouragement for a Friend


Hi Stampers! 

I love the colors for this week’s Pals Paper Arts PPA255 Color Challenge and originally did not think I would have enough time to create a card (since I wanted to create something a bit non-traditional) but this morning, I woke up with an idea for a non-tradional floral card :-)

One of our elders in our church went to be with the Lord a year ago and this week would have been their 36th Wedding Anniversary.  His wife along with his three children have been a great testimony to the Lord's faithfulness during this difficult time and I thought that the sentiment on this card would reflect what her husband would say to her, "Honey, with the Lord, You've Got This" :-)  

I decided to incorporate the wonderful  Connie and Mary CCMC359 Sketch Challenge as well- I just love their sketches!

If you have not had a chance to do so, I hope you will find the time to visit the above challenge sites to check out all of the Design Team samples as well as their galleries- gorgeous inspiration from all!

To create this card:

Ink the floral image from You’ve Got This with Stāz-On® Jet Black Ink and stamp onto Whisper White cardstock.

Color the petals with the Stampin’ Write Sahara Sand marker (three layers of color for the shadowing on the petals) and use the Early Espresso marker for the center.

Use an AquaPainter™ with Marina Mist Classic Ink to watercolor the background.

Once dry, trim the image and mount onto Early Espresso cardstock.

Use the Big Shot™ with the Woodgrain Textured Impressions™ Embossing Folder to emboss a piece of Sahara Sand cardstock, trim into two panels (saving the excess for another project) and mount onto Early Espresso cardstock.

Trim a piece of Whisper White cardstock and adhere to the Early Espresso card base.

Adhere the two woodgrain panels per the sketch and mount the focal image using Stampin’ Dimensionals®.

De-static a piece of  Early Espresso cardstock with the Embossing Buddy®, stamp the sentiment using Versamark™ ink, apply Stampin’ Emboss® White Embossing Powder and heat with the Heat Tool.

Once the embossing has cooled, trim the panel and create the banner points using the Banner Triple Punch.

Mount the sentiment using Stampin’ Dimensionals® and add a few  highlights to the center of the flower with the White Gel Pen to finish off the card.

Stamps: You’ve Got This

Ink: Stāz-On® Jet Black, Versamark™, Marina Mist; Stampin’ Write Markers- Sahara Sand, Early Espresso; White Gel Pen

Paper: Whisper White, Early Espresso, Sahara Sand
Accessories: Big Shot™, Woodgrain Textured Impressions™ Embossing Folder, Embossing Buddy®, Stampin’ Emboss® White Embossing Powder, Heat Tool, AquaPainter


Thanks again for stopping by- I hope all of you have a fantastic day and remember, "You've Got This" :-) !!

Monday, November 10, 2014

HYCCT1410 I’m Here For You

Hi Again Stampers!

Here is another card created for the Splitcoaststampers HopeYou Can Cling To Annual Card drive- this Clean and Simple (CAS) card was created for HYCCT1410 Ashjoy aka Joyce’s  “Something’s Missing”  Challenge - (see the gallery here and the details here).

I used the reverse image of the die cut, plus no stamps since the sentiment was from My Digital Studio (in my stash). 

To create this card:

Use the Big Shot™ with the Leafy Branch Die (non SU!)  to cut a piece of Basic Black cardstock.

Add the ¾” Black Satin Ribbon strip at the top of the card front and mount the entire panel onto the Whisper White card base.

Add the sentiment (previously printed from My Digital Studio) to the card front.

Add the double ribbon Gingham bow to finish off the card.

Stamp Sets: Friends 24-7 (MDS version)

Ink: Printer Ink- Black

Paper: Whisper White, Basic Black

Accessories: Big Shot™, Leafy Branch Die (Impression Obsession), 1 3/8” Circle Punch, Satin and Gingham Ribbon (from my stash)

Thanks again for stopping by to visit- I will be sharing more of the HYCCT Challenge cards throughout the next few weeks :-)

Related Posts Plugin for WordPress, Blogger...