Showing posts with label Bravo. Show all posts

Tuesday, April 26, 2016

SUO147 Bravo! You Did It- Congratulations

Hi Friends!   

It’s time for the SUO147 “Congratulations” Challenge and I decided to create another card for the Splitcoaststampers’ April 2016 Cards for A Cause (see details here about this card drive).


 I hope you will have a chance to check out my sister Design Team member samples at the SU-Only Challenge site as well as the fantastic Design Team samples and entries at the other galleries- wonderful inspiration from all!


To create this card:

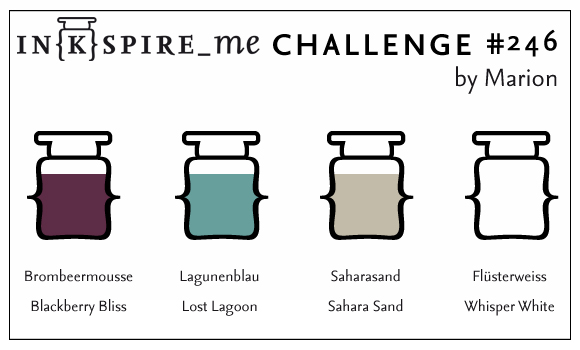
The background was designed using the Smakin' Acetate Technique using a page protector or clear envelope (acetate)- open one side and the bottom to create a “book”, press the Blackberry Bliss and Lost Lagoon Classic Ink pads onto the right hand side (I use the ink pads directly versus the markers as in the tutorial),  spritz with water, close the envelope and “smoosh” the ink a bit with your finger, reopen the envelope and insert a piece of Whisper White cardstock onto each side (you will receive two background panels).

Trim the one panel, stamp the coral image from By The Tide with Blackberry Classic Ink, de-static the panel, ink the “Bravo!” sentiment with Versamark™ ink, re-ink immediately with Blackberry Bliss Classic Ink, stamp onto the panel, apply Stampin’ Emboss® Clear Embossing Powder and heat set with the Heat Tool.

Allow the embossed panel to cool, ink the “Bravo!” sentiment with Versamark™ ink, offset from the original stamped sentiment a bit to the left, stamp onto the panel, apply Stampin’ Emboss® White Embossing Powder and heat set with the Heat Tool.
Trim the panel and mount onto a piece of Blackberry Bliss cardstock.
Ink the Chalk Lines border stamp using Blackberry Bliss and stamp onto the left hand side of the remaining panel (created in step 1 with the  Smakin’ Acetate technique). 
Ink the splatter stamp from Timeless Textures with Lost Lagoon Classic Ink and add a bit of distressing to the background as well as the embossed sentiment focal image panel.

Trim the background panel, decide where you would like to place the focal image panel and stamp the “you did it” stamp with Blackberry Bliss Classic Ink.

Mount the trimmed background panel onto the Blackberry Bliss card base.

Ink the sea turtle image with Stāz-On® Jet Black Ink and stamp onto Whisper White cardstock.

Color the image with and AquaPainter™ and ink from the Sahara Sand and Lost Lagoon Classic Ink Pads.

Use the Sahara Sand and Lost Lagoon Stampin’ Write Markers to add shadows and additional color, fussy-cut the image and apply Clear Wink of Stella® over the turtle.

Mount the focal image panel along with the sea turtle using dimensional foam to finish off the card.

Stamp Sets:  From Land to Sea, By The Tide, Bravo, Chalk Lines, Timeless Textures

Ink:  Versamark™, Blackberry Bliss, Lost Lagoon, Sahara Sand; Stampin’ Write Markers- Lost Lagoon, Sahara Sand ; Clear Wink of Stella®

Paper/Cardstock: Whisper White, Blackberry Bliss
Accessories: Clear Envelope, Embossing Buddy®, Heat Tool, Stampin’ Emboss® White and Clear Embossing Powder

Thanks again for stopping by and we hope to see your Stampin’ Up! Only project in our “Congratulations” Challenge gallery!

Saturday, April 23, 2016

One Layer Mixed Media Card- Congrats, You Did It!


Hi Friends!

I wanted to share one more card that I created this morning that is a bit different for me- this is a one layer card.  That’s right, no layering at all, just score your cardstock , fold and stamp on the front.

Sounds simple, right?  Well, for this shabby-chic, vintage, Mixed Media , have to lots of layers, etc. artist, trust me, it is not!  I truly admire those artists who can design Clean and Simple cards as well as One Layer Cards :-)

Why do it, you ask?  For me, I like to stretch myself and try different techniques and styles so all of my cards do not look the same- lol!  Plus, it makes life interesting to try something new...


If you have not had a chance to visit the above challenge galleries yet, I encourage you to do so- it always amazes me how many different cards can be designed with one color, sketch or theme challenge!

To create this card:

Using sticky note paper, create a rectangle mask on a folded piece of retired Naturals White cardstock.

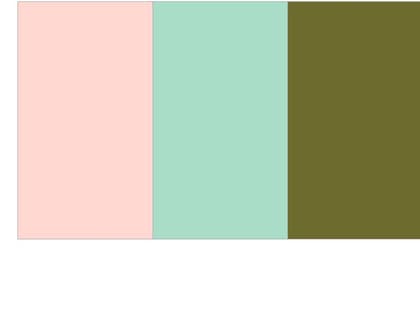
Create additional masks for the moon/sun and hills, use a Sponge Dauber to apply Pool Party and Pink Pirouette to the sky area and Mossy Meadow to the hills.

Remove the masks and de-static the cardstock with the Embossing Buddy®.

Ink the locomotive image from Traveler with Versamark™ and stamp onto the card front, apply Stampin’ Emboss® Black Embossing Powder and heat set with the Heat Tool.

Repeat the above steps with the sentiments from the soon to be retired set, Bravo.

Add shadows with the Tip Top Taupe Stampin’ Write Marker and white highlights to the train with the Chalk Marker (retired).

Finish off the card by adding a few birds to the sky with a Faber-Castell® XS Black Marker.

Stamp Sets: Traveler, Bravo

Ink: Versamark™, Mossy Meadow, Pink Pirouette, Pool Party; Stampin’ Write Marker- Tip Top Taupe, retired Chalk Marker; Faber-Castell® XS Black Pitt Pen Marker

Paper: Naturals White

Accessories: Paper for masking, 1 ¾” Circle Punch


Thanks again for stopping by!!  I hope you have a wonderful weekend, my friends!

Monday, April 11, 2016

Bravo! You Did It!


Hi Friends!

I had another chance to play around the Smakin’ Acetate technique today (see the Splitcoaststampers’ tutorial here) and decided to use the PaperCraft Crew PCCCS189 Sketch Challenge along with the Splitcoaststampers’ CC564Color Challenge and the Cards for a Cause April C4AC38 Challenge.
 
If you have not had a chance to visit the above challenge site galleries yet, I highly encourage you to do so- fabulous inspiration from all!

To create this card:

For the background, cut open a clear envelope (I slit the one side, top and bottom of a clear packaging envelope to create an opening like a book), add Pacific Point  and Cucumber Crush Classic Ink directly to the inside of the clear envelope, spritz with water and “close” the top part of the envelope.

Smoosh the ink inside with your fingers, open the envelope and two pieces of Whisper White cardstock down onto the ink on both sides of the envelope.

Dry the panels with the Heat Tool and set one aside for a future project.

Trim the “smooshed” background panel, repeatedly stamp the small splatter stamp from Timeless Textures with Sahara Sand Classic Ink over the background, mount onto Sahara Sand cardstock, trim and mount onto the Pacific Point card base.

Ink the sentiments from Bravo using Pacific Point Classic Ink and stamp onto the card front.

Use the Big Shot™ with the Banner Framelits™ to cut out the banner from Whisper White, Cucumber Crush and Pacific Point cardstock and use the Lots of Tags Framelits™ to cut the tag element from Sahara Sand cardstock.

Emboss the Whisper White banner with the Chevron Textured Impressions™ Embossing Folder and layer onto the Pacific Point and Cucumber Crush banners.
Use the Big Shot™ with the Boho Chic Textured Impressions™ Embossing Folder to emboss the Sahara Sand tag, cut off the one end of the tag and attach behind the layered banner.

Mount the banner onto the card front with dimensional foam, add the stamped Pacific Point and Cucumber Crush strips to the top (also mounted with dimensional foam) along with the retired Silver Basics Designer Button.

Using the Black Stampin’ Archival Ink Pad, stamp the sailfish image (From Land to Sea) onto Whisper White cardstock, heat set the ink with the Heat Tool and use an AquaPainter™ with Sahara Sand and Pacific Point Classic Ink to watercolor the image.

Fussy cut the sailfish, add Clear Wink of Stella® over the image and mount onto the layered banner with dimensional foam to finish off the card.

Stamp Sets:  From Land to Sea, Timeless Textures, Bravo

Ink: Basic Black Stampin’ Archival, Cucumber Crush, Pacific Point, Sahara Sand, Clear Wink of Stella®

Paper/Cardstock: Whisper White, Cucumber Crush, Pacific Point, Sahara Sand

Accessories:  Big Shot™, Banner and Lots of Tags Framelits™, Boho Chic and Chevron Textured Impressions™ Embossing Folder, AquaPainter™, Silver Basics Designer Button (retired)


Thanks again for taking the time to stop by- I hope you have a wonderful week, my friends!

Sunday, July 12, 2015

Bravo! Way to Go- A "Throwdown" and Sketch Challenge :-)


Hi Again Stampers! 

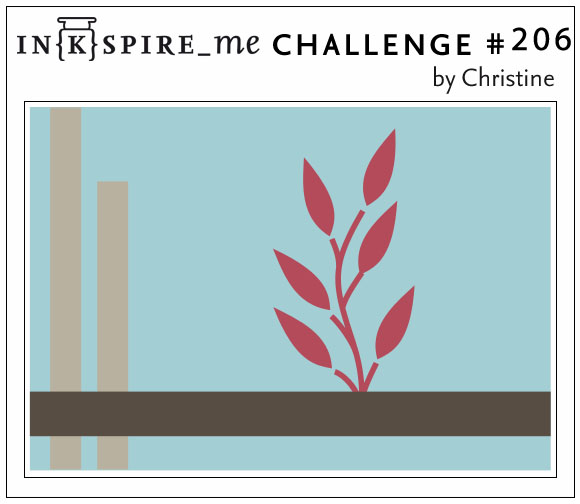
Ok- this is the last card that I will be sharing that I created this past weekend…I decided to try a brand new challenge for me- TGIFC Throwdown Challenge #2 for July along with the IN{K}SPIRE_Me #206 Sketch Challenge ( flipped the sketch over).

The TGIFC "Throwdown" Challenge is a monthly challenge where you can only use at least four of six items that they list as the “throwdown” along with a few other “pantry” items- trust me, this was a tough one- lol!!

I hope you will find the time to visit the above sites and check out all of the inspiration from their Design Teams as well as their galleries!

To create this card:

Using Hello Honey and Pool Party re-inkers, place a few ink drops on your acrylic blocks and spritz with water.

Lay a piece of Whisper White cardstock face down into the ink, swirl and lift (do not get the paper too wet or it will “pill”).

Add a bit more interest using an AquaPainter™ and dripping plain water over the dried ink- it will spread a bit and create larger circles.

Add a bit of black splatters using the AquaPainter™ with Momento™  Tuxedo Black Ink (drop  a spot of the refill, pick it up with the AquaPainter™ and tap the brush end top to create the splatter or allow to just drop onto the paper).

Stamp the sentiment from Bravo! using Momento™  Tuxedo Black Ink (I probably should have used Stāz-On® Jet Black Ink) onto Whisper White cardstock, trim and mount onto Basic Black cardstock.   

Add another Whisper White panel mounted onto Basic Black cardstock on an angle behind the sentiment.

Place the sentiment face down onto the acrylic blocks with the remaining Hello Honey and Pool Party re-inker and swirl the paper a bit.
Also swirl a small piece of Whisper White cardstock into the Hello Honey and Pool Party ink- set aside to dry.

Cut the background panel into three strips and mount onto Basic Black cardstock. Trim the panel again and mount onto the Whisper White card base.

Add the scrap strips of Basic Black cardstock and mount the sentiment using Stampin’ Dimensionals®.

Hand cut the small squares of Whisper White cardstock and hand cut the tiny squares of Hello Honey and Pool Party paper (created in the step above) to create the two diamond shaped accents-  add to the card front to finish off the card.

I love being challenged and think that the limited “Throwdown” challenge is a great idea, but I feel that this card is missing something (I may end up adding a few Rhinestones before I send this one in the mail)....

Stamp Sets: Bravo!

Ink: Memento™ Tuxedo Black Ink ; Re-Inkers- Hello Honey, Pool Party, Memento™ Tuxedo Black

Paper: Whisper White, Basic Black

Accessories: AquaPainter™, Acrylic Blocks, Water Spritzer Bottle


Thanks again for visiting- I hope all of you have a fantastic week!

Sunday, April 26, 2015

CAS Congrats! A Floral Photo Inspiration and Sketch Challenge :-)


Hi Stampers!!

This Clean and Simple (CAS) card was created for the Hand Stamped Sentiments  HSSSC210 Sketch Challenge (flipped the sketch) along with the Around the World AW39 Inspiration Photo Challenge  (I was inspired by the colorful flowers) and the CAS317 Bulbs or Bulb Flowers Challenge (see the details here and gallery here).

Again, if you have not had the chance to do so, I hope you will find the time to visit each of the above sites- tremendous inspiration from all!

To create this card:

Ink the floral stamp image from Bloom with Hope using Stāz-On® Jet Black Ink and repeatedly stamp onto a piece of Whisper White cardstock. 

Use an AquaPainter™ with Melon Mambo, Hello Honey and Real Red Classic Ink to color the petals, Wild Wasabi for the stems and add additional contrast with the Stampin’ Write markers in the same colors along with Sahara Sand for shadows.

Ink the sentiment using Melon Mambo Classic Ink and stamp onto a piece of Whisper White cardstock. 

Use the large splatter stamp from Gorgeous Grunge with Stāz-On® Jet Black Ink and Melon Mambo Classic Ink to add the splatter to the background, trim the panel and mount onto a piece of Basic Black cardstock, trim again and mount onto the Melon Mambo card base.

Fussy-cut the flowers and adhere to the card front to finish off the card.

Stamp Sets: Bloom with Hope, Gorgeous Grunge, Bravo!

Ink: Stāz-On® Jet Black, Melon Mambo, Hello Honey, Pink Pirouette; Stampin’ Write Markers- Melon Mambo, Hello Honey, Pink Pirouette, Sahara Sand

Paper: Whisper White, Basic Black, Melon Mambo

Accessories: AquaPainter™

Thanks again for stopping by- I hope all of you have a restful Sunday!


Monday, June 23, 2014

SR233 Nautical Card with Two Versions :-)

Hi Stampers!!

I had a chance to play in my craft room this evening and decided to create a card for the Stampin’ Royalty SR233 Color Challenge.  I love the colors and thought that they would make a great nautical card so I pulled out the new set, Traveler.

I hope you have a chance to visit their site and check out the Design Team samples and other entries- great job by all!

 To create this card:

Version #1
Ink the script stamp from By The Tide using Night of Navy Classic Ink, stamp off and repeatedly stamp over the continents on a piece of I Am Me Designer Series Paper (DSP).  Trim the panel and add a strip of Night of Navy cardstock to the lower part of the DSP.

Punch out banners from the retired Fresh Prints DSP stack (along with a few from a piece of retired Night of Navy DSP) and adhere to the bottom of the panel.

Ink the splatter stamp from Gorgeous Grunge using Night of Navy Classic Ink, stamp off onto a piece of scrap paper and stamp onto the DSP.

Stamp the sentiments from Bravo using Coastal Cabana Classic Ink onto Whisper White cardstock, re-ink the same sentiments with Night of Navy Classic Ink and stamp over the initial stamping (creating a shadow effect).  

Stamp the splatter stamp from Gorgeous Grunge using Night of Navy Classic Ink, stamp off onto a piece of scrap paper and stamp over the sentiment area.
 
Add the vertical strip of Night of Navy and Real Red cardstock (I used scraps for this layer).  Adhere the map panel to the upper part of the Whisper White layer, trim and mount onto Coastal Cabana cardstock, trim and mount onto Night of Navy cardstock, trim and adhere to the Real Red card base.

 Ink the ship stamp from Traveler using Night of Navy Classic Ink and stamp onto Whisper White cardstock, add a few highlights using the Real Red Stampin’ Write marker and punch out using the 2 ½” XL Circle Punch.
Version#2- "Stepped Up" with brads :-)

Using the 2 ½” XL Circle Punch, punch out one circle from Night of Navy, Real Red and Whisper White cardstock, cut each circle in half and adhere in a rotating pattern around the ship image.

Mount the ship onto the card front using Stampin’ Dimensionals®.

To “step” up the card, adhere the three retired Star brads to finish off the “stepped-up” version of the card :-)

Stamp Sets: Traveler, By The Tide, Gorgeous Grunge, Bravo

Ink: Night of Navy, Coastal Cabana, Real Red Stampin’ Write marker

Paper: Whisper White, Coastal Cabana, Night of Navy, Real Red, retired Fresh Prints DSP stack, Retired Night of Navy DSP (hostess set)

Accessories: Punches- 2 ½” Circle, Banner, retired Star brads


Thanks again for taking the time to visit- I hope you have a great week!

Saturday, May 24, 2014

Way To Go- CAS for Three Challenges!


Hi Stampers!!

I decided to create another Clean and Simple (CAS) card using the CASology Theme-Flower along with the CCMC304 Create with Connie and Mary Color Challenge and a fairly loose interpretation of the CTS77 CAS(E) This Sketch! Challenge


This card is CAS to me (compared to my normal style) but may have a few too many elements to qualify for the CAS Challenges- even so, I had fun making it!!

If you have not had time to visit any of the above sites, I hope that you will do so- truly great inspiration from all!

To create this card:

Sporadically ink the Chevron background using Basic Gray Classic Ink and stamp onto a piece of Sahara Sand and Whisper White cardstock.  Trim both panels and mount the Sahara Sand background onto a piece of Basic Gray cardstock and add to the Whisper White card base.

Stamp the sentiment from Bravo using Basic Gray onto the Whisper White background panel, trim and mount onto a piece of Basic Gray cardstock.  Adhere to the Sahara Sand background (I darkened the sentiment using a Basic Gray Stampin’ Write marker and added a few shadows using the Sahara Sand Stampin’ Write marker). 

Stamp the flowers from Flower Shop using Basic Gray Classic Ink onto Soft Sky cardstock and punch out using the Pansy Punch.  Use the Soft Sky Stampin’ Write marker to darken the petals and add the Kraft corduroy button brads to the center (buttons retired years ago and seemed to match the Sahara Sand better than our current Crumb Cake).

Punch the leaves out using the Bird Builder Punch from Basic Gray cardstock and add the leaves and flowers to the front of the card.   

Sporadically add a few Rhinestones to finish off the card.

Stamp Sets: Flower Shop, Chevron, Bravo

Ink: Basic Gray, Stampin’ Write markers- Sahara Sand, Soft Sky and Basic Gray
Paper: Whisper White, Basic Gray, Sahara Sand, Soft Sky

Accessories: Punches- Pansy and Bird Builder; Rhinestones, retired Kraft corduroy button brads

Thanks again for taking the time to stop by-  I hope you have a wonderful weekend

Sunday, May 18, 2014

Bravo- You Did It!!


Hi Again Stampers!!

I decided to create a Clean and Simple (CAS) card for the CAS (E) This Sketch! CTS76 Sketch using the CASology 95- Splash.    

Since I tend to gravitate toward a vintage/shabby chic style, I truly admire those artists who can create CAS cards and try to push myself to create them every so often :-)

If you have not had time to check out both sites, I hope that you will do so- great inspiration from all!

To create this card:

Ink the image from For the Birds using Memento Ink and stamp onto Whisper White cardstock.   Color the images using Stampin’ Write Markers- Bermuda Bay, Crisp Cantaloupe, Pumpkin Pie, Real Red, Sahara Sand, Soft Sky and Wild Wasabi. 

Punch the image out using the 2” Circle Punch, layer a 1 ¾” cardstock circle punched from Real Red cardstock behind the image (cut in half before layering on an angle) and mount the layered image onto a 2 ½” circle punched from Bermuda Bay cardstock.

Ink the Gorgeous Grunge ink splatter stamp using Soft Sky Classic Ink and stamp repeatedly to designate the elements of the sketch.  Add the Real Red accents using the larger splatter from Gorgeous Grunge as well as the sentiment from the new set, Bravo.

Trim and adhere to a Real Red cardstock panel and mount onto the Bermuda Bay card base. 

Add a few Rhinestones to finish off the card.

Stamp Sets: For The Birds, Bravo, Gorgeous Grunge

Ink: Tuxedo Memento Black, Real Red, Soft Sky; Stampin’ Write Markers- Bermuda Bay, Crisp Cantaloupe, Pumpkin Pie, Real Red, Sahara Sand, Soft Sky and Wild Wasabi
Paper: Whisper White, Bermuda Bay, Real Red

Accessories: Punches- 1 ¾”, 2” and 2 ½” Circle; Rhinestones


Thanks again for taking the time to visit- I hope you have a wonderful Sunday!
Related Posts Plugin for WordPress, Blogger...