Showing posts with label Smakin' Acetate. Show all posts

Sunday, April 23, 2017

Peace I Leave With You


Hi Friends!

I have another Mixed Media card to share using the Peaceful Peonies Clear Stamp Set (designed by NinaB Designs for Sweet ‘n Sassy Stamps).  I love the floral images in this stamp set along with the verse sentiments, don’t you?


Again, if you have not had a chance to visit the challenge sites or SNSS Blog/FB Page yet, I encourage you to do so- gorgeous inspiration from all!

To create this card:

1). To create the background, press a melon and cherry ink pad onto a craft sheet, spritz with water and press an acrylic sheet into the ink.  Press a piece of white cardstock for the background along with another strip into the ink, continue to re-press the paper into the ink until you are satisfied with the results. (FYI- My ink was a bit too bright, so I applied picket white distress stain over some of the ink to tone down the color).

2). Trim the panel, stamp the sentiment from Peaceful Peonies with navy ink, mount onto navy cardstock and adhere to a white card base.

3). Die cut a piece of navy cardstock with a stitched rectangle die, mount the splattered horizontal strip onto the die cut and adhere to the card front.

4). Ink the Peaceful Peonies large floral image with memento tuxedo black ink onto white cardstock, color with alcohol markers and fussy cut the flower, cutting the leaves away from the floral image.

5). Mount the flower onto the card front with dimensional foam, adding the leaves around the edges to avoid the sentiment area. 

6).  To finish off the card, use a clear glitter pen to apply shimmer to the flower petals and an extra fine white paint pen to add highlights to the flower.


Thanks again for stopping by- I hope you have a fabulous week, sweet friends!


Monday, July 4, 2016

Summer Fun Winnie- Happy Independence Day!


Hi Again Friends! 

I hope all of you are having a wonderful 4th of July so far!! 

I am sharing this card tomorrow on the Sweet ‘n Sassy blog using the brand new Summer Fun Winnie clear stamp set (designed by Wynne Gettelfinger) for Sweet‘n Sassy Stamps (SNSS) along with the previously released Grunge Elements and Heart & Stars Scallop Border Dies (all SNSS) and wanted to share with you here as well :-)

Since I love participating in online challenges, I decided to incorporate the Splitcoaststampers CC589 Color Challenge along with the SC589 Sketch Challenge and Just Us Girls #350 Word Week “Summer” Challenge.

If you have not had a chance to visit any of the challenge sites yet, I hope you will find the time to do so- wonderful inspiration from all!

To create this card:

Ink the banner image from Summer Fun Winnie clear stamp set with Stampin’ Archival™ Basic Black Ink onto Whisper White cardstock and heat set the ink with the Heat Tool.

Ink and stamp the banner onto a piece of sticky note paper, fussy cut the image to create a mask.

Mask the banner, ink and stamp the girl image from Summer Fun Winnie clear stamp with Stampin’ Archival™ Basic Black Ink over the masked banner and heat set the ink with the Heat Tool.

Also create a mask of the girl image, mask the girl (keep the banner mask in place) and use a modified version of the Smakin’ Acetate technique to create the contemporary “flag” background (using Island Indigo and Cherry Cobbler Stampin’ Write markers for the ink).

***Modified Smakin’ Acetate technique*** Take a clear acetate envelope (or packaging from your Sweet ‘n Sassy Stamps), cut the top and bottom off as well as cut up one side of the envelope to create a “book”, open the envelope, apply (in this case I used markers so I scribbled the ink  onto one page of the acetate), lightly spritz the ink with water, close the envelope,  use your fingers to gently “smoosh” (or “smack”)  the ink, open the envelope and I press the paper into the ink in the areas that I want the ink to show.

After the Smakin’ Acetate, “define” the flag a bit by inking the small splatter stamp from Grunge Elements with the Stampin’ Write Island Indigo marker and stamp in the “star” area.

Ink the smaller line image from Grunge Elements with the Stampin’ Write Rose Red marker and stamp in the “stripe” areas.

Remove the mask from the images, stamp the “Happy” in the banner and color the Winnie girl image with Stampin’ Write Markers and an AquaPainter™ (I used Elegant Eggplant and created a little arm band to cover up a bit of splatter that leaked through during the Smakin’ Acetate step).

Add a few shadows with the Stampin’ Write  Smoky Slate marker, color her hair with Delightful Dijon marker and add a horizon line with a Faber-Castell® Pitt Pen Black XS marker.

Trim the stamped panel, mount onto Rose Red cardstock, trim again and mount onto Island Indigo cardstock.

Using the Big Shot™ with the Hearts & Stars Scallop Border Dies (SNSS), cut four star scallop die pieces from Island Indigo cardstock, add to the stamped panel, hand piecing and rounding the cut corners to create the frame.

Stamp the “Independence Day” sentiment from Summer Fun with Winnie using Stampin’ Archival™ Basic Black Ink onto Whisper White cardstock, die cut and layer the sentiment (retired SNSS Prim Blessings dies) and add the Elegant Eggplant button with Silver Thread.

For the card base, trim a piece of Whisper White cardstock and mount onto a piece of Rose Red cardstock. 

Adhere the entire panel to the Extra Thick Whisper White card base and mount the framed Summer Fun Winnie panel to the card front with dimensional foam.

Add the looped Silver Cord and mount the sentiment with dimensional foam to finish off the card.

Stamp Sets:  Summer Fun with Winnie, Grunge Elements (Sweet ‘n Sassy Stamps)

Ink:  Basic Black Stampin’ Archival™, Stampin’ Write Markers- Island Indigo, Rose Red, Elegant Eggplant, Smoky Slate, Delightful Dijon; Faber-Castell® Black XS Pitt Pen Marker

Paper: Whisper White, Island Indigo, Rose Red

Accessories: Big Shot™, Hearts & Stars Scallop Border Dies (SNSS), retired Prim Blessings Dies (SNSS), AquaPainter™, Heat Tool, Clear Envelope, Sticky Note Paper, Silver Cord, Silver Thread, Button

Thanks again for stopping by- I am so encouraged by your visits and sweet comments!  Have a blessed week, my friends!

Sunday, June 12, 2016

Happy Father's Day!


Hi Again Friends!

I wanted to share another card that I had fun creating this weekend using the Pals Paper Arts PPA304 Sketch Challenge (I flipped the sketch) along with the CC586 Color Challenge and the Simon Says Wednesday “Father’s Day/Guy Card” Challenge.


If you have not had a chance to visit the above challenge galleries yet, I encourage you to do so- wonderful ideas and projects by all!

To create this card:

Ink the Stampin’ Up! From the Land to Sea sailfish image with Stāz-On® Jet Black Ink and stamp onto Whisper White cardstock.

Color the image with an AquaPainter™ and ink from Stampin’ Write Markers- Pool Party, Marina Mist and Garden Green, fussy cut the image and add Clear Wink of Stella® to the fins and body.

FYI- I used a modified version of the Smakin' Acetate technique for the background and focal image panels :-)

To create the background, open up a clear envelope and press Pool Party and Marina Mist onto the acetate, spritz with water, close the envelope and “smoosh” the ink with your fingers through the acetate, open the envelope and press a 2 ½” x 4 ¼” panel of Whisper White cardstock into the ink, mount the panel onto Garden Green cardstock.

Repeat the above process with a piece of 4 ¼” x 5 ½” panel of Whisper White cardstock, trim the panel and adhere to a piece of Garden Green cardstock, trim and mount onto the Extra Thick Whisper White card base.

Use the Big Shot™ with retired Square Lattice Textured Impressions™ Folder to emboss a piece of Marina Mist cardstock, cut the embossed panel with the MFT Stitched Circle STAX die (I already had this piece embossed and cut in my scrap paper stash :-)).

Add the embossed circle to the card front and mount the splattered panel to the card front with dimensional foam (per the sketch).

Use a Sponge Dauber with Marina Mist Classic Ink to add a bit more color for the “water”, adhere the looped Silver Cord and mount the sailfish image with dimensional foam.

Ink the sentiment from More Great Greetings with Versamark™ Ink, de-static a piece of Basic Black cardstock with an Embossing Buddy®, stamp the sentiment onto the prepared cardstock, apply Stampin’ Emboss® White Embossing Powder and heat set with the Heat Tool.

Cut the sentiment apart and mount onto the card front with dimensional foam to finish off the card.

Stamp Sets: From Land to Sea, More Great Greetings (retired)

Ink: Stāz-On® Jet Black, Versamark™, Classic Ink-Marina Mist, Pool Party; Stampin’ Write Markers- Pool Party, Marina Mist, Garden Green; Clear Wink of Stella®

Paper: Whisper White, Extra Thick Whisper White, Basic Black, Garden Green

Accessories: Big Shot™, retired Square Lattice Textured Impressions™ Embossing Folder, MFT Stitched Circle STAX Dies, AquaPainter™, Embossing Buddy®, Stampin’ Emboss® White Embossing Powder, Heat Tool, Silver Cord, Clear Envelope, Water Spritzer Bottle


Thanks again for visiting- you are all such an encouragement to me!!  I hope all of you have a fabulous week, my friends!

Monday, May 30, 2016

Happy Birthday Blooms for Bert :-)


Hi Friends!

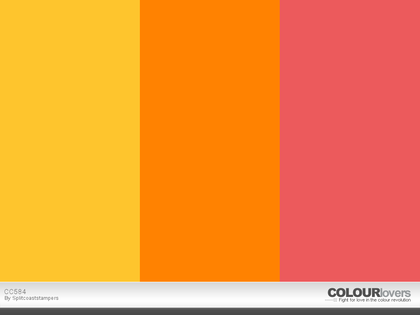
I am sharing a fun birthday card that I designed for my dear friend Bert using a modified version of the Smakin’ Acetate technique (see the Splitcoaststampers’ tutorial here) along with the Splitcoaststampers’ CC584 Color Challenge and  Seize the Birthday 05/19 Topping- "Adding Dimension" challenge (second cards for both of these challenges).   

While this card is primarily a one layer card, the button is a bit dimensional and the "topping" for the Seize The Birthday challenge is optional :-)

Bert loves pink and just purchased Watermelon Wonder ink so when I saw the colors for this week’s challenge, I knew that I would have to make a card for her. 

My friend Susan and I had a great day celebrating by taking Bert to lunch and then going back to Bert's house to create a card similar to this one using Melon Mambo and the new Flirty Flamingo :-) It was a wonderful, relaxing day with good friends...
  
If you have not had a chance to visit the Splitcoaststampers’ galleries yet, I highly encourage you to do so- fabulous inspiration from all!

To create this card:

Create a mask for the sentiment area from sticky note or scrap paper.

Ink the Birthday Bloom floral image with using Stampin’ Archival™ Basic Black Ink, stamp onto the top of the masked area as well as the bottom and heat set the ink with the Heat Tool.

Using Stampin’ Write Markers- Pumpkin Pie and Watermelon Wonder along with an AquaPainter™, color the flower blossoms. 

Color the leaves in the same manner with Pear Pizzazz and Always Artichoke markers and color the centers directly with the Crushed Curry marker.

Once you are satisfied with the flowers, stamp the sentiment from Rose Wonder in the center using Stampin’ Archival™ Basic Black Ink and heat set with the Heat Tool.
For the splattered background, cut open a clear envelope (I slit the one side, top and bottom of a clear packaging envelope to create an opening like a book), add Pumpkin Pie and Watermelon Wonder Classic Ink directly to the inside of the clear envelope, spritz with water and “close” the top part of the envelope.

"Smoosh" the ink inside with your fingers (smoosh is a combination of squish squiggle and smash :-)) , open the envelope and lay the stamped panel face down onto portions of the ink (lifting and re-positioning in the ink as you continue over the panel).

Dry the ink with the Heat Tool, add shadows with the Watermelon Wonder marker and AquaPainter™.

Ink the grid stamp from Timeless Textures using Crushed Curry and stamp over the background, add splatter stamping with Stampin’ Archival™ Basic Black Ink and the splatter stamp, trim and mount onto the Extra Thick Whisper White card base.

FYI- Originally this was a one layer panel with just the image popped up on the card front with dimensional foam but I had made a mistake on the initial stamping and flipped the card front over to use the back (now you know my secrets-lol!).  To my dismay, the initial inking from the error was visible on the sides- yikes!!  Since I could not remove the panel from the card base, I had to cut thin strips of the metallic gold cardstock and gently (and very patiently) add them to create a “frame” and hide the stamping on the back...the card is not as “wavy” as it appears in the photo though but since I have already given it to Bert, I could not take anymore photos :-)  Now you know the "rest of the story" - lol!!

Loop some Gold Thread through the retired Pumpkin Pie button, tie a bow, flip the button over, mount it to the card front and clip the loops.

Use a Stampin’ Write Basic Black marker with a ruler to add the lines to the top and bottom of the sentiment area and add Clear Wink of Stella® to all of the blossoms to finish off the card. 

Stamp Sets:  Birthday Bloom, Rose Wonder, Timeless Textures

Ink: Stampin’ Archival™ Basic Black, Pumpkin Pie, Watermelon Wonder Classic Ink;  Stampin’ Write Markers- Pumpkin Pie, Watermelon Wonder, Crushed Curry, Pear Pizzazz, Always Artichoke, Basic Black;  Clear Wink of Stella®

Paper/Cardstock: Whisper White, Extra Thick Whisper White, Gold Metallic

Accessories:  Clear Envelope, Water Spritzer Bottle, AquaPainter™, Gold Thread, retired Pumpkin Pie Button


Thanks again for taking the time to stop by- I hope you have a fabulous week, my friends!

Wednesday, May 25, 2016

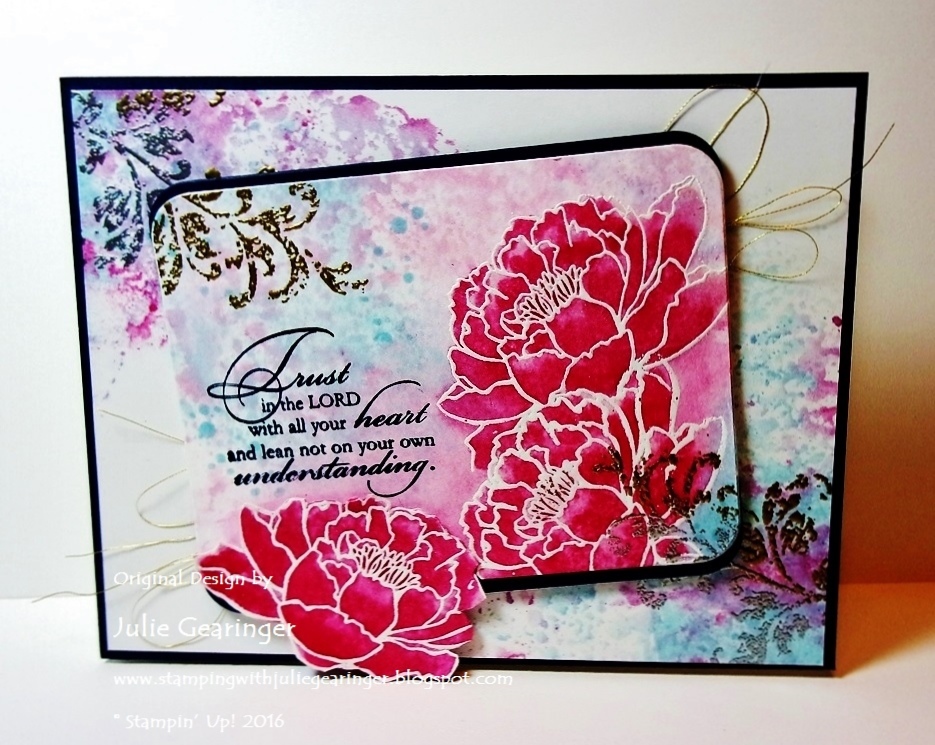
TCC56- Trust In the Lord


Hi Friends!!


Woohoo!  It’s time for the #56 Sweet Tea Challenge at The Card Concept!  Don't you just love this inspiration photo?  

I think that it is gorgeous and can be interpreted in so many ways- the colors, teacup, bloom/flower, silverware, lace, etc.  Remember- there is no right or wrong way when it comes to interpretation and we hope to see your card in our gallery!!

I was inspired by the bloom in the teacup, the soft pastel colors and the metallic silver and gold of the silverware for my Mixed Media card- I think the photo depicts such a beautifully elegant setting and I hope I was able to create that feeling in this card :-)

I gave this card to my sister in law for a belated Mother's Day celebration.  She was able to sneak away for a vacation right after Mother's Day so we celebrated this past weekend- she loves the Lord and has raised three wonderful children (yes, I am biased :-)).  She truly exemplifies a woman who fears the Lord and trusts in Him completely :-)

I am also linking this card to the Splitcoaststampers’ Alphabet “S” Challenge (“S”= Silver Embossing, Smakin’ Acetate and Shimmer – hard to see in the photo but the flowers are very shimmery).

I hope you have a chance to visit us at The Card Concept and check out the rest of our DesignTeam samples as well as the Splitcoaststampers challenge site- wonderful inspiration from all!!

In order to save time, I am not listing a step by step for this card- this Mixed Media card utilizes a few techniques that I use often- heat embossing for the flowers with two tone heat embossing for the flourishes in the corners, Smakin’ Acetate for the splatter, watercoloring for the flowers and shadows, looped gold thread and fussy cutting one bloom to hang off the edge.

All of these techniques are fairly basic and if you have any questions , please feel free to ask me in the comment section :-)

Stamp Sets:  You’ve Got This, Timeless Textures, Trust God

Ink: Versamark™, Classic Ink and Stampin’ Write Markers- Blushing Bride, Melon Mambo, Rose Red, Night of Navy, Pool Party; Clear Wink of Stella®, Gold Stampin’ Up! Marker (retired)

Paper: Whisper White, Night of Navy

FYI- This was my original version and I felt that it needed greater contrast so I added the
darker shadows and gold for the flower centers (once added, you cannot go back- lol!)
Accessories: Big Shot™, Project Life® Label Framelits™, AquaPainter™, Embossing Buddy®, Stampin’ Emboss® White, Silver and Gold Embossing Powder, Heat Tool, Gold Thread, Clear Envelope


Thanks again for taking the time to stop by!  I hope all of you have a fabulous week and join us for our #56 Sweet Tea Challenge at The CardConcept!

Tuesday, May 17, 2016

Phil 4:8 "Think About Such Things" - A One Layer Floral Card

Hi Again Friends!


If you have not had a chance to visit the above challenge galleries yet, I encourage you to do so- fabulous cards and so much inspiration!!

Our Awana club year ends this week with our Award ceremony, so I created seven of this design (each a bit different) for each of my 5th and 6th grade girls.  

We have had a wonderful year together and several of the girls have been with me for two years...I will miss seeing each of them every week and look forward to serving in Awana again next year - it is always hard to see the girls "move up" but I know that each one of these young ladies will be living for the Lord and that in itself, makes it a bit easier:-)

The design of this card is fairly simple to create- stamp the sentiment from Scripture Collection 9 (ODBD) with Stāz-On® Jet Black Ink onto a folded piece of Extra Thick Whisper White cardstock, mask the sentiment with sticky note paper,  stamp the flowers from the Fragrance stamp set (ODBD) with Stāz-On® Jet Black Ink (creating a mask for the flowers and repeat stamping), color the flowers with a variety of Stampin’ Write Markers and use an AquaPainter™ to watercolor and soften the markers.

Add the splashes of ink with the Smakin’ Acetate technique, draw a few lines with a Pitt Pen “B” Black Marker and finish off with Clear Wink of Stella®. 

I have more details on each of the steps in a previous post of a similar card here.

Stamp Sets: Fragrance, Scripture Collection 9 (Our Daily Bread Designs)

Ink: Stāz-On® Jet Black, Rose Red, Wisteria Wonder; Stampin’ Write Markers- Always Artichoke, Pear Pizzazz, Pink Pirouette, Melon Mambo, Wisteria Wonder, Rich Razzleberry, Flirty Flamingo, Sweet Sugarplum, Blackberry Bliss, Hello Honey, Faber-Castell® B Black Pitt Pen Marker; Clear Wink of Stella®

Paper: Extra Thick Whisper White

Accessories: AquaPainter™, Paper for masking, Clear Envelope, Water Spritzer Bottle

Thanks again for stopping by!  I hope you have a great week and find time to be creative 

Monochromatic Floral One Layer Card


Hi Friends!

I hope you are having a great week so far!  I had a chance to spend some time in my stamping studio today and decided to create another One Layer Floral card using the Create with Connie and Mary CCMC406 Color Challenge along with Splitcoaststampers’ Alphabet“N” Challenge (I chose neutrals for my “N”).

I know, why would you create flowers with brown and grays?  Not sure, but when I saw this color combination, this card came to my mind- lol!!

If you have not had a chance to visit the above challenge galleries yet, I encourage you to do so- it always amazes me how many different cards can be designed with one color, sketch or theme challenge!

To create this card:

Use a bone folder to score and fold a 4 ¼” x 11” piece of Extra Thick Whisper White cardstock.

Create a diagonal mask from a piece of scrap paper and tape down to a craft mat using washi tape (or any tape that will lift easily from your paper :-)).

Ink the large flower image from You’ve Got This with Stāz-On® Jet Black Ink and stamp onto the card base. 

Stamp an additional flower onto a piece of sticky note paper, fussy cut the image to create a mask and repeatedly re-ink the floral image and stamp along the diagonal line as well as in the corner.

Color the blossoms with the Stampin’ Write Crumb Cake marker, add additional shadows with the Smoky Slate marker and use the AquaPainter™ to blend the colors.

Add more shadows with the Basic Gray marker (I also used the re-inker with the AquaPainter™) until you are satisfied with the colors.

Using the Smakin’ Acetate technique, scribble some color from the Crumb Cake and Smoky Slate markers into the center of a clear envelope (cut open like a book), spritz the ink and close the envelope, use your fingers to “smoosh/smack” the colors together, re-open the envelope and lay the card front into the ink.
Close-Up to try to show the sparkle :-)

Ink the Timeless Textures border stamp with Crumb Cake Classic Ink and stamp around the border.

Add additional distressing with the splatter stamp from Timeless Textures and Smoky Slate Classic Ink.

Ink the sentiment from Rose Wonder with the Basic Gray Stampin’ Archival Pad™and stamp onto the card front.

Use a ruler with the Basic Black Stampin’ Marker to add the line on the diagonal and apply Clear Wink of Stella® to the flowers to finish off the card.

Stamp Sets: You’ve Got This, Rose Wonder, Timeless Textures

Ink: Stāz-On® Jet Black Ink, Basic Gray Stampin’ Archival Ink, Crumb Cake; Stampin’ Write Marker- Crumb Cake, Basic Gray, Smoky Slate, Basic Black; Clear Wink of Stella®

Paper: Extra Thick Whisper White

Accessories: AquaPainter™, Ruler, Paper for masking


Thanks again for stopping by!!  I hope you have a fabulous week, my friends!

Sunday, May 15, 2016

Amazing Grace- One Layer Card


Hi Again Stampers!!

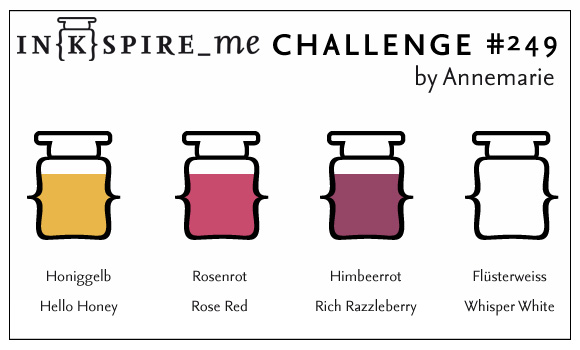
This Clean and Simple (CAS) One Layer card was created using the IN{K}SPIRE_me #249  Color Challenge along with the One Layer Simplicity OLS27 "Fruit Smoothie" Challenge and the CAS(E) This Sketch #172 Sketch Challenge.

Again, if you have not already done so, I hope you will find the time to visit the above challenge sites to check out their fabulous Design Team samples and challenge entries!

To create this card:

Fold a piece of 4 ¼” x 11” Extra Thick Whisper White cardstock in half for the card base.

Ink the sentiment from How Sweet the Sound (Our Daily Bread Designs) with Stāz-On® Jet Black Ink and stamp onto the card front.
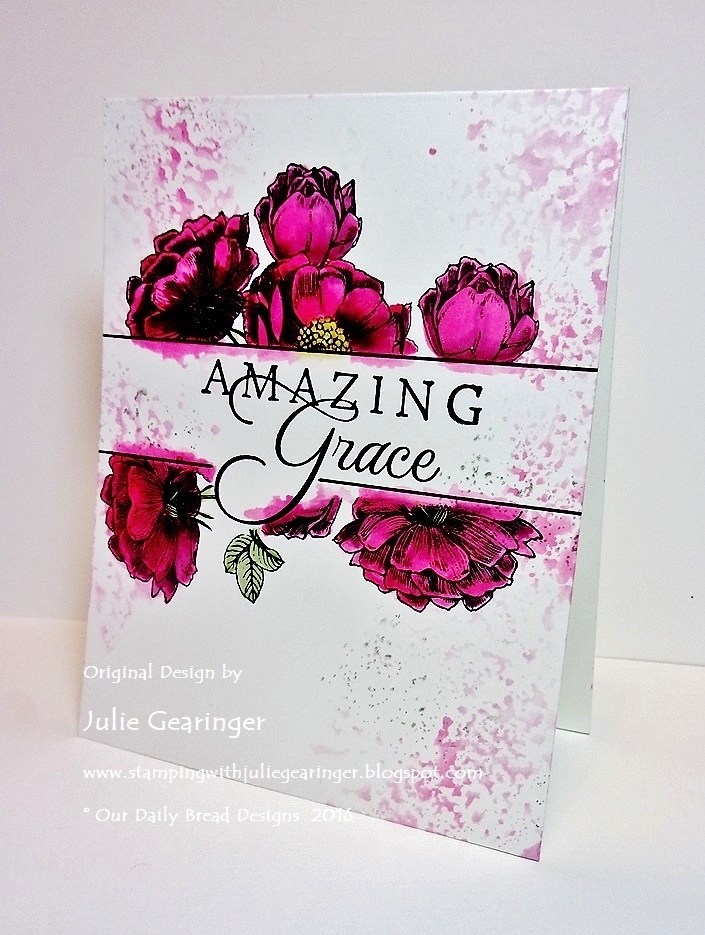
Use sticky note paper to create a mask over the sentiment, ink the Fragrance floral image (ODBD) with Stāz-On® Jet Black Ink and stamp around the sentiment.

Use an AquaPainter™ with Rose Red Classic Ink to color the flowers and add additional shadows with the Rich Razzleberry Stampin’ Write Marker.

Use Stampin’ Write Markers- Hello Honey for the flower center and Pear Pizzazz for the leaves to finish coloring the flowers.

Add Rose Red and Rich Razzleberry ink to the center of a clear envelope (cut open like a book- this is a modified Smakin' Acetate technique :-)), spritz with water, “smoosh” the marker ink between the acetate of the envelope, lay portions of the card front onto the ink to add the splatter on the corners.

Add additional splatter with the Grunge Elements (Artistic Outpost) stamp and Stāz-On® Stone Gray Ink (stamping off before stamping onto the card front).

Card base was decorated only-
no additional layers :-)
Add the definition lines with a ruler and a Faber-Castell® Pitt Pen “B” Black Marker and apply Clear Wink of Stella® to the flowers to finish off the card.

Stamp Sets: How Sweet the Sound & Fragrance (Our Daily Bread Designs), Grunge Elements (Artistic Outpost)

Ink/Mediums: Stāz-On® Jet Black, Rose Red; Stampin’ Write Markers- Rose Red, Rich Razzleberry, Hello Honey, Pear Pizzazz; Clear Wink of Stella®, Faber-Castell® Pitt Pen Black Marker

Paper: Extra Thick Whisper White

Accessories: AquaPainter™, Ruler, Sticky Note Paper, Clear Envelope, Water Spritzer Bottle


Thanks again for taking the time to stop by- hugs and have a blessed week, my friends!  
Related Posts Plugin for WordPress, Blogger...