
 Hi Friends!
I am sharing a fun birthday card that I designed for my dear friend Bert using a modified version of the Smakin’ Acetate technique (see the Splitcoaststampers’ tutorial here)
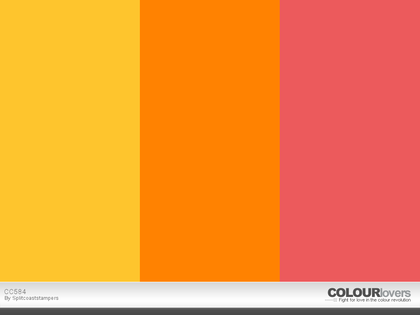
along with the Splitcoaststampers’ CC584 Color Challenge and Seize the Birthday 05/19 Topping- "Adding Dimension" challenge (second cards for both of these challenges).
 While this card is primarily a one layer card, the button is a bit dimensional and the "topping" for the Seize The Birthday challenge is optional :-)
 While this card is primarily a one layer card, the button is a bit dimensional and the "topping" for the Seize The Birthday challenge is optional :-)
Bert loves pink and just purchased Watermelon Wonder ink so when I saw the colors for this week’s
challenge, I knew that I would have to make a card for her.
My friend Susan and I had a great day celebrating by taking Bert to lunch and then going back to Bert's house to create a card similar to this one using Melon Mambo and the new Flirty Flamingo :-) It was a wonderful, relaxing day with good friends...
If you have not had a chance to visit the Splitcoaststampers’
galleries yet, I highly encourage you to do so- fabulous inspiration from all!
To create
this card:

Create a
mask for the sentiment area from sticky note or scrap paper.
Ink the
Birthday Bloom floral image with using Stampin’ Archival™ Basic Black Ink, stamp
onto the top of the masked area as well as the bottom and heat set the ink with
the Heat Tool.
Using
Stampin’ Write Markers- Pumpkin Pie and Watermelon Wonder along with an
AquaPainter™, color the flower blossoms.
Color the
leaves in the same manner with Pear Pizzazz and Always Artichoke markers and
color the centers directly with the Crushed Curry marker.
Once you
are satisfied with the flowers, stamp the sentiment from Rose Wonder in the
center using Stampin’ Archival™ Basic Black Ink and heat set with the Heat
Tool.
For the splattered
background, cut open a clear envelope (I slit the one side, top and bottom of a
clear packaging envelope to create an opening like a book), add Pumpkin Pie and
Watermelon Wonder Classic Ink directly to the inside of the clear envelope,
spritz with water and “close” the top part of the envelope.
"Smoosh" the ink inside with your fingers (smoosh is a combination of squish squiggle and smash :-)) , open the envelope and lay the stamped panel
face down onto portions of the ink (lifting and re-positioning in the ink as
you continue over the panel).
Dry the
ink with the Heat Tool, add shadows with the Watermelon Wonder marker and
AquaPainter™.
Ink the
grid stamp from Timeless Textures using Crushed Curry and stamp over the
background, add splatter stamping with Stampin’ Archival™ Basic Black Ink and
the splatter stamp, trim and mount onto the Extra Thick Whisper White card
base.
 FYI- Originally this was a one layer panel with just the image popped up on the card front with dimensional foam but I had made a mistake on the initial stamping and flipped the card front over to use the back (now you know my secrets-lol!). To my dismay, the initial inking from the error was visible on the sides- yikes!! Since I could not remove the panel from the card base, I had to cut thin strips of the metallic gold cardstock and gently (and very patiently) add them to create a “frame” and hide the stamping on the back...the card is not as “wavy” as it appears in the photo though but since I have already given it to Bert, I could not take anymore photos :-) Now you know the "rest of the story" - lol!!
Loop some
Gold Thread through the retired Pumpkin Pie button, tie a bow, flip the button over, mount it to the card front and clip the loops.
Use a
Stampin’ Write Basic Black marker with a ruler to add the lines to the top and
bottom of the sentiment area and add Clear Wink of Stella® to all of the
blossoms to finish off the card.
Stamp
Sets: Birthday Bloom, Rose Wonder, Timeless
Textures
Ink: Stampin’ Archival™ Basic
Black, Pumpkin Pie, Watermelon Wonder Classic Ink; Stampin’ Write Markers- Pumpkin Pie,
Watermelon Wonder, Crushed Curry, Pear Pizzazz, Always Artichoke, Basic Black; Clear Wink of Stella®
Paper/Cardstock: Whisper White, Extra Thick Whisper White,
Gold Metallic
Accessories: Clear
Envelope, Water Spritzer Bottle, AquaPainter™, Gold Thread, retired Pumpkin Pie
Button
Thanks again for taking the time to stop by- I hope you have
a fabulous week, my friends!





