Showing posts with label monochromatic. Show all posts

Wednesday, February 11, 2026

TCC224 Measure of A Life


Hi Friends!

Welcome to the #224 {Monochromatic Green} Challenge at The Card Concept! 

I was inspired by the greens (of course) to create my Mixed Media card.

I decided to pull out another one of my neglected /retired Stampin' Up! stamps from the Measure of a Life hostess set (I believe from 2005) and created three different versions with the main dragonfly/verse image :-) 

We hope that you will take a moment to stop by our challenge blog and check out how the rest of our wonderful Design Team was inspired as well!

 Our challenge is for the entire month, so hopefully you will have time to create a card and join us.


I enjoy playing along with other online challenges and will be linking this card to the Word Art Wednesday #738-#739 "Anything Goes" Challenge.  I hope you have a chance to stop by the Word Art Wednesday Challenge and check out their gorgeous DT and gallery as well. 


To create these cards:

Ink the dragonfly image with Versafine Black Onyx ink, stamp onto a piece of white cardstock, apply clear embossing powder and heat set with a heat tool.

Once the embossing has cooled, watercolor the image using water-based markers.

Trim close to the edge and mount onto a piece of black cardstock, trim close to the edge.

For the different layouts, layer cardstock or designer paper onto black cardstock, add the white paper doily and ribbon trims.  FYI- I pulled out pieces that were already embossed or previously cut (from my stash) for several of the cards.


Add the Frost White Shimmer Paint with an AquaPainter™ to the wings to finish off the cards.


Stamp Sets: Measure of a Life (retired Stampin’ Up! hostess set)

Inks/Mediums: Versafine Black Onyx, Gumball Green, Stampin’ Write Markers- Lemon Lime Twist, Old Olive, Gumball Green, Emerald Envy ; Frost White Shimmer Paint

Cardstock/Paper: White, Black, Certainly Celery, White Paper Doily (retired Stampin’ Up!), misc retired Stampin’ Up! designer series paper

Accessories/Tools: Gemini, Jr., retired Vintage Wallpaper Embossing Folder, Sizzix French Script Embossing Folder, 1” Black Satin Ribbon, 1” misc Green Satin Ribbon, 1 ½” wired Black Gingham ribbon (both from my stash), Embossing Powder Tool, Clear Embossing Powder, Heat Tool, AquaPainter™

I hope you have had a chance to stop by The Card Concept to see how the rest of the Design Team were inspired as well as check out the other challenge gallery entries- gorgeous inspiration from all!

We hope you are inspired to create a card and join us for our #224 {Monochromatic Green} at The Card Concept. The deadline to play along is Monday, March 9th  at noon EDT. 

Friday, July 24, 2020

Three Decoys- CAS in Grays


Hi Friends!

While I had the Three Decoys stamp from Impression Obsession on my desk, this is another card that I designed pairing it with a verse sentiment from A Godly Man (Stamp Simply).  

I have owned the wood mount Three Decoys stamp for years and it is still available as cling, wood mount or a digi version from Impression Obsession (see here).  This stamp was designed by Gary Robertson and I absolutely love his line art work stamps.  

FYI- I am not receiving any compensation from promoting either I/O stamps or Stamp Simply- I just love both companies!

I also enjoy participating with online challenges and will be linking this card to the A Bit More Time toCraft #120 “Anything Goes” Challenge along with the Splitcoaststampers Cleanand Simple CAS595 “Cloudy Days” Challenge (use only grays).

If you have not had a chance to visit the above challenge sites yet, I hope you will do so- wonderful inspiration from all!

This card was extremely easy to create- stamp both the decoy image and sentiment with archival black ink onto white cardstock and heat emboss with clear embossing powder. 

Watercolor the decoy image with ink from distress oxide pads along with water-based markers and watercolor pencils.  Once dry, trim the panel and mount onto black cardstock and adhere to a white card base.

To finish off the card, using a water brush, dilute a bit of pearl texture paste and watercolor the moon.

Stamp Sets: Three Decoys (Impression Obsession),  A Godly Man (Stamp Simply)

Ink/Mediums: Versafine™ Onyx Black, Tim Holtz® Hickory Smoke Distress Oxide;  Stampin’ Write Smoky Slate Marker; Stampin’ Up Black Watercolor Pencil; Faber-Castell® Texture Luxe™ Pearl

Paper/Cardstock: Whisper White, Basic Black

Accessories/Tools: AquaPainter™, Embossing Buddy®, Clear Embossing Powder, Heat Tool

Thanks again for taking the time to stop by- I am planning on posting a few more cards this weekend, I hope you are able to visit again soon! Hugs and have a great weekend!

Wednesday, March 4, 2020

Phil 4:13 I Can Do All Things Through Christ


Hi Friends!!

I am sharing one more card this morning (before retiring to get some beauty sleep, lol!) that I designed with the Cosmo stamp set (Technique Tuesday) along with the Scripture sentiment from Words of Encouragement (Stamp Simply).

I have owned the Cosmo stamp set for a few years (love the floral image) and this is the first time I have had a chance to create a card- I think I have too many stamps, don't you?

I decided to use the Splitcoaststampers SC311 Sketch Challenge  for the layout (FYI- this sketch is from 2011- so glad that they do not expire :-))  and am also playing along with the Color My Heart Color Dare #382 Purple Monochromatic Challenge and the StampingSensations “Spring Florals” Challenge.

To create this card:

De-static a piece of white cardstock with an embossing powder tool, ink the Cosmo floral image with Versafine™ Onyx Black Ink and stamp onto the panel.  Apply clear embossing powder and heat set with a heat tool. 

Repeat the same steps as above with the sentiment from Words of Encouragement. Trim the sentiment and mount onto a piece of black cardstock.

Using water-based markers and watercolor pencils, color the flowers on the floral image (being careful with the pencil points around the embossing).  Once you are satisfied with the coloring, die cut the image with a stitched rectangle die, mount onto black cardstock and trim close to the die cut.

Emboss a piece of concord designer paper with a flourish embossing folder, lightly sand the surface with a sanding block, trim the panel and mount onto a piece of black cardstock. 

Die cut another piece of white cardstock with a larger stitched rectangle die for the background panel, mount onto black cardstock and adhere to a white card base.

Add the embossed purple panel directly to the card front and mount the focal image and sentiment with dimensional foam (lately,  I prefer using chipboard).

Use a clear glitter pen to add shimmer to the petals and an extra fine white paint pen to add a few highlights to the flower centers.

Add a few pearls to the corners of the sentiment as well as the floral panel to finish off the card.

Stamp Sets: Cosmo (Technique Tuesday), Words of Encouragement (Stamp Simply)

Ink/Mediums: Versafine™ Onyx Black; Stampin’ Write Markers- Wisteria Wonder, Gorgeous Grape, Concord Crush; Derwent™ Watercolor Pencils- shades of purple, Spectrum Noir™ Clear Glitter Pen, Sharpie™ Extra Fine White Paint Pen

Cardstock/Paper:  Whisper White, Basic Black; retired Concord Crush Designer Series Paper (Hostess Level I Pack)

Accessories: MISTI™, Embossing Buddy®, Clear EP, Heat Tool, Gemini Jr™, MFT Stitched Rectangle A2 STAX Set 1 & 2 Dies, Crafters Companion™ Swirl 3D Embossing Folder, Sanding Block, Pearls

I hope I have inspired you to create something this week and I will be posting my Design Team card for The Card Concept at 8 am (so stay tuned, lol!)!

Thanks again for taking the time to visit my blog- have a blessed week, sweet friends!

Tuesday, September 25, 2018

Give Thanks


Hi Friends!

I hope all of you had a wonderful week/weekend!  We are celebrating and  giving "thanks to the Lord, for He is good, His love endures forever" 1 Chron 16:34!!   

This past week, we received answer to prayer- my hubby Dave’s recent CT scan did not reveal any new tumors, Praise the Lord! At this point, he does not have to undergo any chemo treatments or other medications :-)  Of course, he will be monitored every three months for his bladder cancer (and every six months for his non-Hodgkins lymphoma) but the Lord has definitely answered our prayers :-)  We are so thankful for His faithfulness to us!

In between doctor appointments, organizing my craft room (still working on this "never-ending" project- are you ever really done?) as well as our other weekly activities, I took some time to create a quick and easy monochromatic Mixed Media card. 

I needed a few more masculine cards for my stash so I am playing along with The Male Room Challenge #94 “Geometric”  and also incorporated the JustAdd Ink #427 “Just Add K” Challenge (K= Kraft) and the Simon Monday “Monochrome” Challenge.

If you have not had a chance to visit the above challenge galleries yet, I encourage you to do so- fabulous ideas and projects by all!

To create this card:

1). Using a Word Processing or Photo Editing program (I am still using the retired My Digital Studio™ from Stampin’ Up!), import the truck image from Countryside and print out onto Whisper White cardstock.  Using Stampin’ Write markers (I used Crumb Cake and Sahara Sand) watercolor the image. 

2). Die cut the image with the MFT Stitched Rectangle A2 STAX Set 2 Dies, mount onto black cardstock and trim close to the edge.

3). Die cut a piece of Kraft cardstock using the largest rectangle from the MFT Stitched Rectangle A2 STAX Set 2 Dies.  De-static the lower corner with an embossing powder tool, ink the verse sentiment from Scripture Medley 3 (retired Verve Stamps) with Versafine™ Onyx Black ink, apply clear embossing powder and heat set with a heat tool.
Another view - trying to capture the faint shimmer :-)

4). Once the embossing has cooled, stencil the chevron pattern using a stencil brush with Tim Holtz® Frayed Burlap Distress Ink and the Memory Box Modern Chic Chevron Stencil.  Keep the stencil in place and use a clear glitter pen to add a bit of shimmer to the chevron and add a bit of shimmer to the truck image as well (guys can like shimmer, right?).

5). Use a 1/16” Handheld Punch to create the holes for the square brads, add the brads, mount the panel onto a piece of black cardstock, trim and mount onto a white card base.

6). Mount the layered truck image with dimensional foam to finish off the card.

Stamp Sets: Countryside (digital stamp- Stampin’ Up!), Scripture Medley 3 (retired Verve Stamps)

Ink: Printer Ink- Black; Versafine™ Onyx Black, Tim  Holtz® Frayed Burlap Distress Ink, Stampin’ Write Markers- Crumb Cake, Sahara Sand, Spectrum Noir™ Clear Glitter Pen

Paper: Whisper White, Basic Black, Crumb Cake (all Stampin’ Up!)

Accessories: Printer, My Digital Studio™, AquaPainter™, Memory Box Modern Chic Chevron Stencil, Embossing Buddy™, Clear Embossing Powder, Heat Tool, 1/16” Handheld Punch (SU!), Square Black Brads (from my stash)

Thanks again for taking the time to visit- hugs and I hope you have a fabulous week, my friends!

Tuesday, January 16, 2018

SUO192 Monochromatic Blues


Hi Friends!   

It’s time for the #192 "Fun with Just One Color" Challenge at SU-Only Challenges! I pulled out a few of my new stamp sets- Hold on to Hope from the 2018 Occasions Mini Catalog and the 2018 Sale-A-Bration stamp set, Amazing You to create a Clean and Simple Mixed Media card :-)


If you have not had a chance to stop by the SU-Only Challengesite to check out the rest of the Design Team’s samples or the other challenge sites yet, I encourage you to do so- fabulous inspiration from all!

To create this card:

1). Using Stampin’ Write Markers- Night of Navy, Dapper Denim and Marina Mist to color the floral spray image from Hold on to Hope. “huff” onto the stamp before stamping onto a piece of Whisper White cardstock.  Clean the stamp, re-ink again with the markers and stamp again onto the panel to create the scroll design.

2). Trim the panel and mount onto a piece of Night of Navy cardstock.  Mount the panel onto the Extra Thick Whisper White card base.

3). Ink the sentiment from Hold on to Hope with Night of Navy Classic Ink, stamp onto a piece of Whisper White cardstock.  Die cut the sentiment with Stitched Shapes Framelits™, mount onto a circle of Night of Navy cardstock using the Layering Circles Framelits™.  Add to the card front with Stampin’ Dimensionals®.

4). In the sentiment again using Versamark™ ink, apply Stampin’ Emboss® White Embossing Powder and heat set with a heat tool.  Trim the portion of the sentiment “And I Will Rescue You” by hand and create a flag point.  Adhere over the sentiment with Stampin’ Dimensionals®.

5). Ink the flowers from Amazing You with Night of Navy Classic Ink, stamp three times onto a piece of Whisper White cardstock.  Scribble ink from the Marina Mist and Dapper Denim marker onto a silicone craft mat and use an AquaPainter™ to watercolor the petals.  Once you are satisfied with the watercolor, dry with a heat tool and fussy-cut out the center portion of the flower.  Mount the flowers around the circle using Stampin’ Dimensionals®.

6). Finish off the card using the White Gel Pen to add highlights to the flower centers and add shimmer to the petals with Clear Wink of Stella®. 


Stamp Sets: Hold on to Hope, Amazing You

Ink/Mediums: Versamark™, Night of Navy, Stampin’ Write Markers- Dapper Denim, Marina Mist, Night of Navy; Clear Wink of Stella®, White Gel Pen

Paper: Whisper White, Extra Thick Whisper White, Night of Navy

Accessories/Tools: Big Shot™, Stitched Shapes Framelits™, Layering Circles Framelits™, Embossing Buddy®, Stampin’ Emboss® White Embossing Powder, Heat Tool

Thanks again for taking the time to stop by and I hope that you will create your own Stampin’ Up! Only project and join us for our “Fun with Just One Color”challenge!  

Wednesday, March 29, 2017

TCC70 Sending Peace and Strength


Hi Friends!!

It’s time for The Card Concept #70 “Purple Haze” Challenge!  Isn’t this a fun inspiration photo with all of the purple bottles and hazy finishes?  I decided to create a Clean and Simple (CAS) Mixed Media card using Power Poppy’s digital images.


If you have not had a chance to do so, I hope you will find the time to check out the wonderful Design Team cards at The Card Concept as well as the Splitcoaststampers challenge galleries- wonderful inspiration from all!

To create this card:

1). Using your computer along with a printer, print out the Power Poppy digital image of Easy Breezy Coneflowers and position the sentiment from the digital set, Olive  and Oak onto white cardstock.

2). Color the floral image using watercolor pencils, alcohol and water-based markers adding shadows with a water soluble graphite pencil. 

3). Use a chevron stencil, apply light purple classic ink with a stencil brush and apply shimmer with a clear glitter pen.

4). Die cut the panel with a stitched rectangle die and mount onto eggplant cardstock, mount onto the white card base.

5). Use an extra fine white paint pen to add highlights to the coneflower centers.

Stamp Sets:  Easy Breezy Coneflowers, Olive and Oak (both digital from Power Poppy)

Ink/Mediums: Printer Ink- black; Derwent® Watercolor and Graphite Water Soluble Pencils, Spectrum Noir Alcohol Markers. Perfect Plum Classic Ink, Extra Fine Sharpie® White Paint Pen, Spectrum Noir® Clear Glitter Pen

Paper: Whisper White, Elegant Eggplant

Accessories: AquaPainter™, Chevron Stencil, MFT Stitched Rectangle Die

Thanks again for taking the time to visit!  I hope all of you have a wonderful week and you will be able to join us for the #70 “Purple Haze” Challenge at The Card Concept!

Saturday, July 9, 2016

By The Seeds You Plant


Hi Friends!! 

I hope all of you are having a great weekend so far!!  Today it is my turn to highlight a card on the Artistic Outpost blog and I wanted to share this Mixed Media card using Seed Packets Background along with Harvest and Grunge Elements from the 2016 Spring Release at Artistic Outpost.

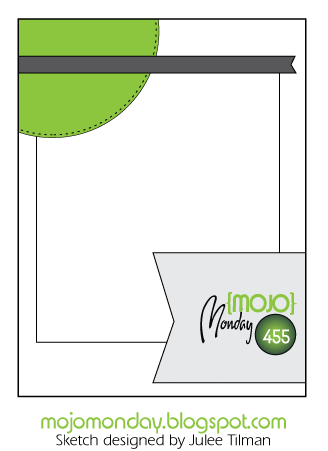
I love playing along with online challenges and decided to incorporate the Mojo Monday #455 Sketch Challenge along with the Splitcoaststampers’ WT591 “Celebrate Chocolate” Challenge into the design :-)

If you have not already visited the Artistic Outpost blog, or the other challenge sites yet, I hope you will do so- fabulous inspiration from my Design Team sisters at the Artistic Outpost as well as the Mojo Monday and Splitcoaststampers' challenge galleries!

To create a card:

Ink the Seed Packets Background with Ranger® Tim Holtz® Walnut Stain Distress Ink and stamp onto a piece of Tip Top Taupe cardstock.

Use the Big Shot™ with the Double Stitched Circle Dies from Our Daily Bread Designs (ODBD) to cut the circle portion from the upper left hand side of the stamped panel.

Use a Distressing Tool to distress the outside edges of the panel, sponge Ranger® Tim Holtz® Vintage Photo Distress Ink over the edges as well as the stamped area to age the paper, mount onto Early Espresso cardstock and distress the edges again.

Ink the Seed Packets Background with Ranger® Tim Holtz® Tea Dye and Vintage Photo Distress Ink, stamp onto a piece of Very Vanilla cardstock.

Trim the stamped Very Vanilla cardstock panel, mount onto a piece of Very Vanilla cardstock and adhere to the Early Espresso card base.

Add the distressed Seed Packets Background focal image panel on an angle, add a piece of 3/8” Early Espresso Seam Binding Ribbon with the Very Vanilla Ribbon Slide and mount onto the card base.

Using images from Grunge Elements, ink the grid and the large splatter with Ranger® Tim Holtz® Vintage Photo Distress Ink and stamp over the panel, ink the coffee stain with Whisper White Craft Ink and stamp a few times onto the panel as well.

Ink the sentiment from Harvest with Stāz-On® Jet Black Ink, stamp onto a piece of Very Vanilla cardstock, hand trim the banner and distress the edges with a distressing tool.

Mount the sentiment onto Early Espresso cardstock, distress the edges once more, stamp the grid image from Grunge Elements with Ranger® Tim Holtz® Vintage Photo Distress Ink and sponge additional ink along the edges to age the paper.

Mount the sentiment to the
card front with layers of dimensional foam to finish off the card.

After finishing this card and photographing it for the Artistic Outpost blog post, I decided to add additional shadows with the Vintage Watercolor Technique (using a Speedball® Elegant Writer® Black Pen with an AquaPainter™) plus adding watercolor to the vegetables with Ranger® Tim Holtz® Mowed Lawn, Ripe Persimmon and Gathered Twigs Distress Markers for the “stepped up” version #2.

Stamp Sets:  Seed Packets Background, Harvest, Grunge Elements (Artistic Outpost)

Ink/Mediums: Stāz-On® Jet Black, Whisper White Craft Ink; Ranger® Tim Holtz® Vintage Photo and Walnut Stain Distress Ink; Card #2- Ranger® Tim Holtz® Gathered Twigs, Mowed Lawn, Ripe Persimmon Distress Markers; Speedball® Elegant Writer® Black Marker

Paper/Cardstock: Very Vanilla, Early Espresso, Tip Top Taupe (Stampin’ Up!)

Accessories/Tools: Big Shot™, ODBD Double Stitched Circle Dies,  AquaPainter™, Distressing Tool, 3/8” retired Early Espresso Seam Binding Ribbon, retired Very Vanilla Hodgepodge Hardware Ribbon Slide, Burlap Twine pieces

So which one do you prefer- the monochromatic version #1 or the “stepped up” version #2?  I am leaning toward version #2 but I tend to like more details....

Thanks again for stopping by- your visits and comments are such an encouragement to me!  Hugs and have a great week, my friends!

Related Posts Plugin for WordPress, Blogger...