Showing posts with label #masculine. Show all posts

Tuesday, June 11, 2024

Admired, Respected, Loved


Hi Friends!

I am having fun this week creating cards using some of my older retired stamp sets, paper and ribbons.

With Father's Day approaching, I wanted to create a few masculine cards and decided to combine two retired stamp sets from Stampin’ Up!- the moose image from the Walk in the Wild set and the sentiment is from The Wilderness Awaits.

I enjoy playing along with online challenges and will be linking this card to The Male Room #187 “Ribbon or Twine” Challenge,  the C.R.A.F.T. #722 “Masculine” Challenge and the Simon Says Wednesday “Masculine” Challenge.  

 If you have not had a chance to visit the above challenge sites yet,  I hope you will find time to do so- fabulous inspiration from all!


To create this card:

Heat emboss the moose image as well as the sentiment using Versafine Onyx Black ink and clear embossing powder.

Once the embossing for the moose image has cooled, watercolor the moose image using distress oxide inks and die cut with a stitched square die.

Mount the die cut square onto a piece of black cardstock and trim close to the die cut.

Die cut the sentiment with a fishtail banner die (die cut two additional fishtail banners from black cardstock and layer behind the embossed sentiment).

Emboss a piece of woodgrain designer paper (approx.4” x 3 ½”) with a woodgrain embossing folder and distress the edges.


Adhere the embossed panel onto a piece of black cardstock.

Trim a piece of designer paper to approx. 4” x 2 ¾” and adhere to the lower portion of the panel.

Add a strip of 1” black grosgrain ribbon to the card panel, wrap the ends behind the panel before adhering to a white card base.

Add a few pieces of looped green satin ribbon to the right hand side of the layered moose image.

Adhere the moose and sentiment to the card front using dimensional foam to finish off the card.

Stamp Sets: The Wilderness Awaits, Walk in the Wild (both retired Stampin; Up!)

Ink/Mediums: Versafine Onyx Black. Tim Holtz Distress Oxide- Broken China, Brushed Corduroy, Ground Espresso, Mowed Lawn

Cardstock/Paper: White, Black, misc. Woodgrain and Green Designer Paper (not sure of the manufacturer)

Accessories/Tools: Gemini, Jr, MFT Stitched Square Dies, Fishtail Sentiment Banners Dies (Stamp Simply), Woodgrain Embossing Folder (retired SU!). Embossing Powder Tool, Clear Embossing Powder, Heat Tool, Distressing Tool, 3/8” Green Satin and 1” Black Grosgrain Ribbon (from my stash)

Thanks again for taking the time to visit- I hope all of you have a blessed week!

Sunday, June 12, 2022

Praise the Lord - In Wilderness


Hi Friends!

This is the second card I designed using the retired In Wilderness stamp set from Stampin’ Up!  (see this post for my first card)

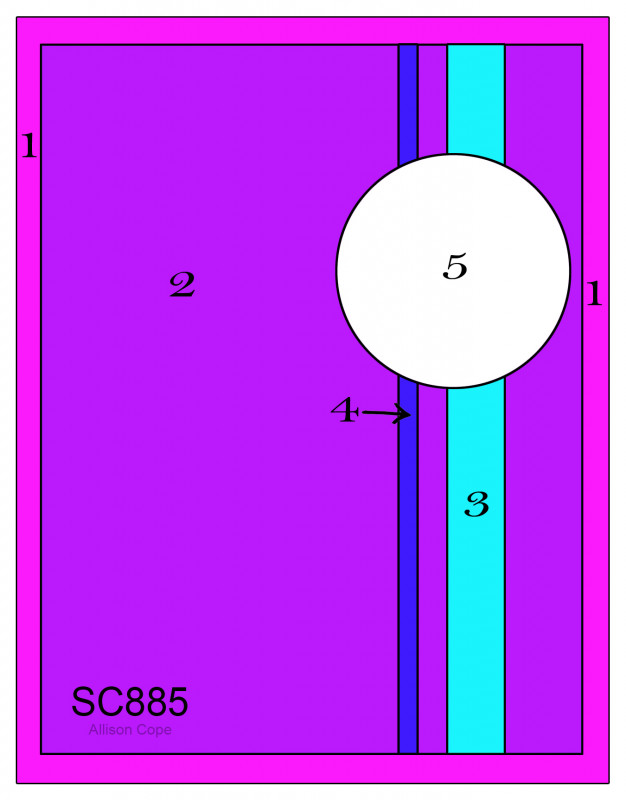
As I have mentioned in previous posts, I have a personal goal to create cards using stamps and supplies that I already own (and have not inked up in a while) as well as a card for each of the over 900+ Splitcoaststampers’ Sketch Challenges (I was able to incorporate Sketch #SC885 into the design of this card).   

I also enjoy participating with other online challenges and decided to incorporate the Retro Rubber Challenge Blog #184 Far Out! Challenge (I used Harvest Gold, Burnt Orange, and Brown) along with the WordArt Wednesday #547-#548 “Anything Goes” Challenge and the Try It On Tuesday “For the Man in Your Life” Challenge into the design.

The In Wilderness stamp set is several years old and I have not inked it up in years.  The scripture verse from Scripture Medley Five is also retired and older- I love being able to pair older sets together! 

I decided to use the eagle image as a memory of the many eagles that my hubby, Dave and I would see on our rural drives.  They are so majestic and we loved seeing them!

If you have not had a chance to visit the above challenge sites, I hope you will find time to do so- wonderful inspiration
from all!

To create this card:

De-static a piece of vanilla cardstock, stamp the eagle image with Versafine™ Onyx Black ink, apply clear embossing powder and heat set with a heat tool.


Once the embossing has cooled, color the image with water-based markers and oxide ink before die cutting with a circle die.  Use a fine point black marker to finish off the edge of the branch (I did not like it just ending without an end, lol!).

Die cut a larger circle from espresso cardstock with a stitched circle die.  Mount the colored eagle image onto the stitched circle die cut and set aside.

De-static the lower left-hand side of a panel of harvest gold designer paper (approx. 3 ¾” x 3”) with an embossing powder tool, stamp the sentiment with Versafine™ Onyx Black, apply clear embossing powder and heat set with a heat tool.

Distress the sides of the embossed sentiment panel and lightly mount onto a piece of vanilla cardstock to 5 ¼” x 4”.

Trim a piece of plaid designer paper to approx. 1 ½” x 3 ¾”, and two additional pieces of designer paper to 1” x 3 ¾”.

Distress the outer edges of all the designer panels before layering onto the vanilla background.

Use a zig-zag stitch to sew around all the edges and mount the entire panel onto a piece of espresso cardstock (approx. 4 ⅛” x 5 ⅜”).

Use a piercing tool to create holes for the brads and hardware at the top and bottom of the first vertical panel.

Knot the polished twine to the ends of the hardware and add to the card front with brads (the ends are adhered behind the eagle panel).

Adhere the entire panel onto a white card base.

Mount the layered eagle image onto the card front using dimensional foam (or chipboard) to finish off the card.

Stamp Sets:  In Wilderness (retired Stampin’ Up!), Scripture Medley Five (retired Verve Stamps)

Ink/Mediums:  Versafine™ Onyx Black, Tumbled Glass Distress Oxide, Stampin’ Write Markers- Chocolate Chip, Delightful Dijon, Gray Granite; .01 Pigma Micron Pen

Cardstock/Paper: Very Vanilla, Early Espresso; retired designer papers- Orchard Harvest, Misc others (Stampin’ Up!) and Authentique Thankful Collection

Accessories/Tools: Big Shot™, SU! Stitched Circles Layering Dies, Distressing Tool, Embossing Powder Tool, Clear Embossing Powder, Heat Tool, Antique Brass Hodgepodge Hardware, Polished Hemp Twine, Sewing Machine, White Thread

Thanks again for taking the time to visit- I am still working on my massive re-organization of my main living floor since my hubby went to be with the Lord. I am moving each room into a new area and creating a larger craft room, so I can get all of my supplies into one room (finally :-)). 

I am hoping to be able to create more cards again soon- hugs and God Bless!

TCC177 Make It Masculine - In Wilderness Buffalo


Hi Friends!

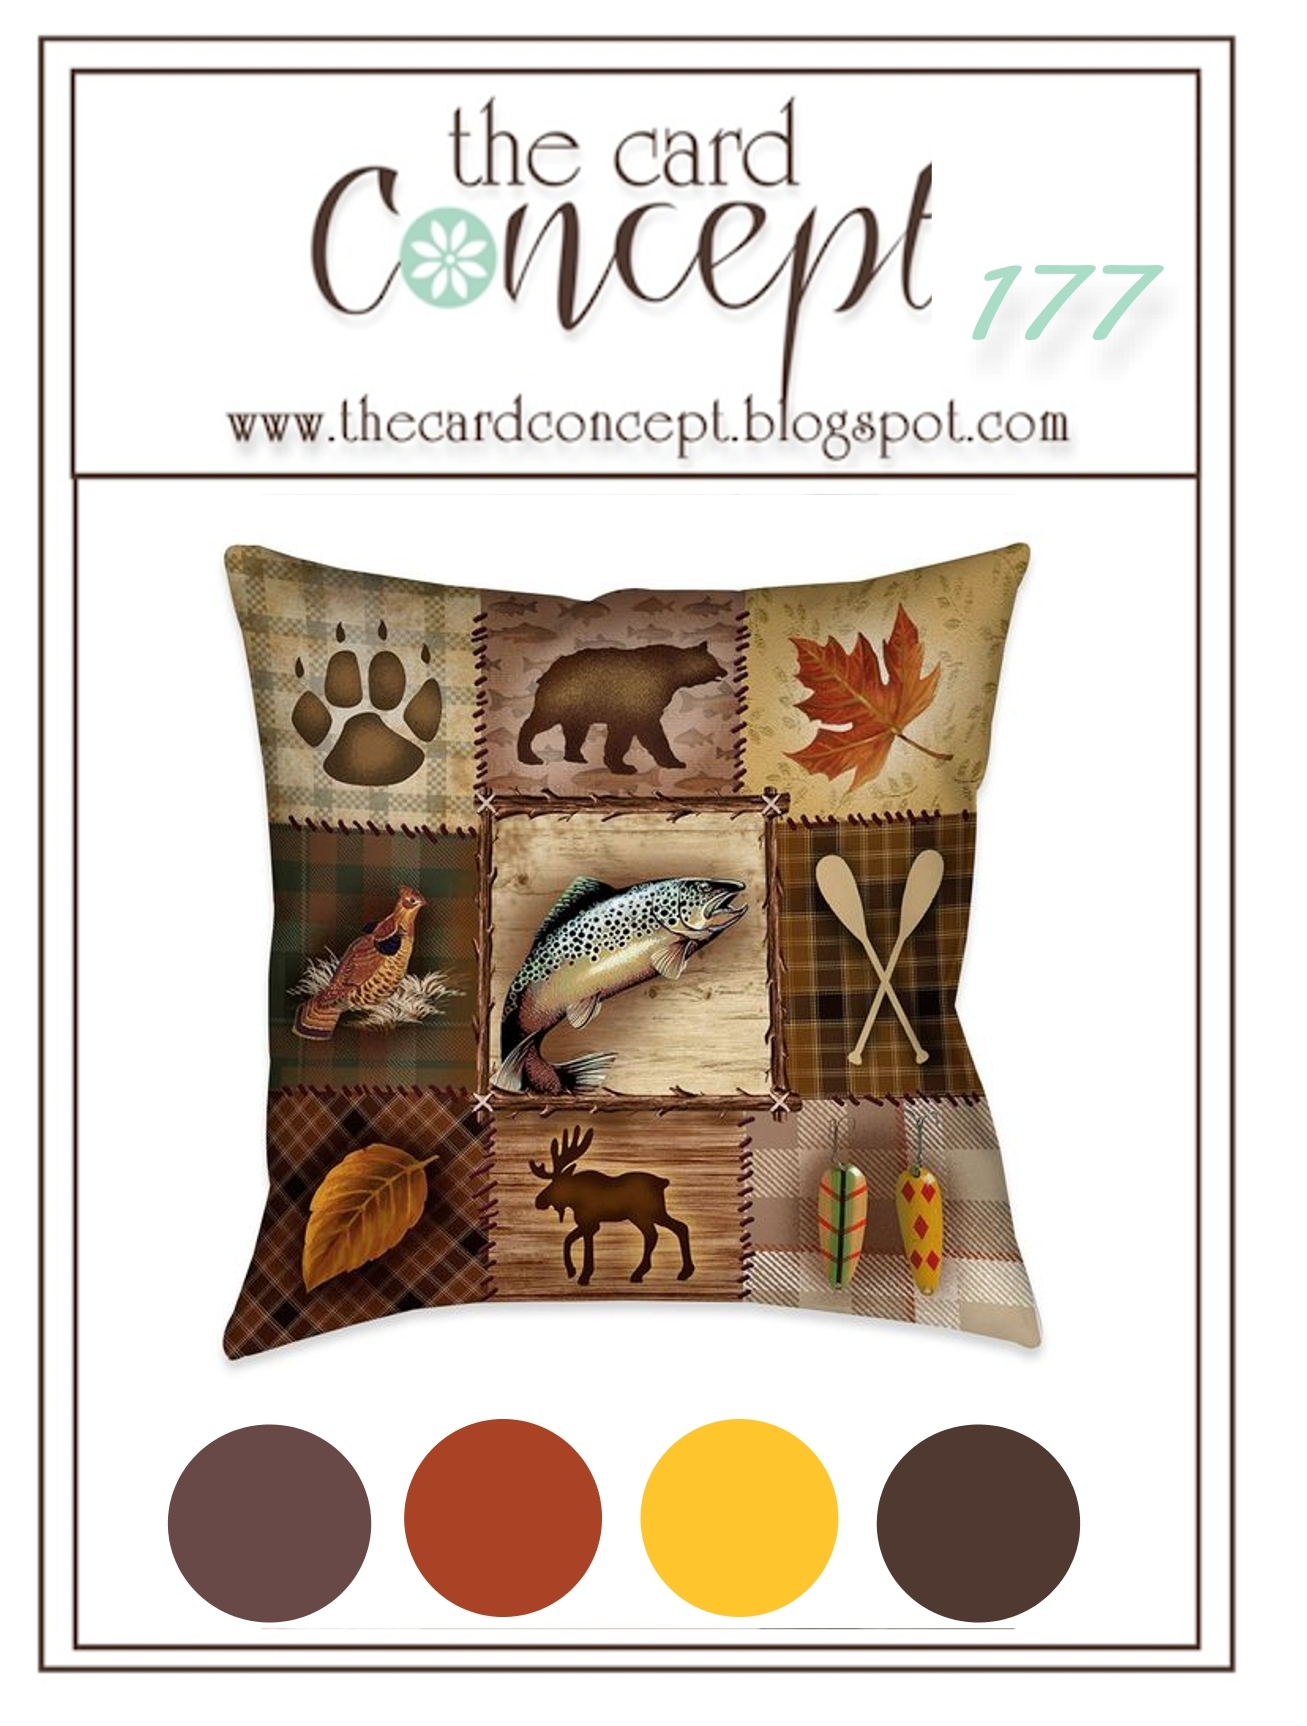
Welcome to the #177 Make It Masculine Challenge at The Card Concept! 

I was inspired by the wilderness images, the stitching between the squares on the pillow as well as the autumn colors in our inspiration photo to create a Vintage and Shabby/Mixed Media card using the retired Stampin’ Up! set, In Wilderness along with retired papers and embellishments.  

In fact, I was finally feeling a bit creative and created two different card designs and this is the first of the two.

As I have mentioned in previous posts, I have a personal goal to create cards using stamps and supplies that I already own (and have not inked up in a while) as well as a card for each of the over 900+ Splitcoaststampers’ Sketch Challenges (I was able to incorporate Sketch #SC882 into the design of this card).  

I also incorporated the Alphabet “E is forEmbossing- Wet or Dry” Challenge (this card has both types) and the Word Art Wednesday #547-#548 “Anything Goes” Challenge into the design.

If you have not had a chance to visit our Design Team/gallery at The Card Concept Challenge, or the other challenge sites,  I hope you will find time to do so- gorgeous inspiration from all!

To create this card:

De-static a piece of vanilla cardstock, stamp the buffalo image with Versafine™ Onyx Black ink, apply clear embossing powder and heat set with a heat tool.

Once the embossing has cooled, color the image with water-based markers and 
die cut with a stitched rectangle die.

Mount onto espresso cardstock, trim close to the edge.

Trim a piece of vanilla cardstock to 5 ¼” x 4”, mount onto a piece of 5 ½” x 4 ¼” espresso cardstock. 

Cut two pieces of designer paper for the background (approx. 3 ¾” x 2”), emboss with a quilt embossing folder, distress the edges, attach to background lightly with adhesive.

Distress the edges of a 2” x 3 ¾” strip of espresso designer paper, attach over the background lightly with adhesive and a zig-zag stitch around the edges.

Mount the background panel onto a 5 ½” x 4 ¼” white card base.

Mount the buffalo image onto the card front with dimensional foam (or chipboard). 

Heat emboss the sentiment using the same steps as the buffalo, trim the panel, mount onto espresso cardstock and adhere to the card front with dimensional foam.

Finish off the card by creating photo corners from espresso cardstock (I cut a square by hand, cut on the diagonal, then used scissors to create the little notches).

Stamp Sets:  In Wilderness (retired Stampin’ Up!)

Ink/Mediums:  Versafine™ Onyx Black, Tumbled Glass and Broken China Distress Oxide, Stampin’ Write Markers- Soft Suede, Gray Granite, Early Espresso, Gumball Green

Cardstock/Paper: Very Vanilla, Early Espresso; retired designer papers (Stampin’ Up!) and Authentique Thankful Collection

Accessories/Tools: Big Shot™, Quilt Top Embossing Folder (SU!), My Favorite Things Stitched Rectangle STAX, Sanding Block, Distressing Tool, Embossing Powder Tool, Clear Embossing Powder, Heat Tool,  Sage Twill Ribbon

Thanks so much for stopping by- I am slowly getting back to a point where I can start blogging again.  I apologize for not posting as often as I normally would, but I have been working on rearranging my entire home and still have many boxes to unpack and put away. 

It is my goal to try to find a “home” for everything and have different “zones” in my home (for ex: library/study, gift wrap station, Bible Journaling area, etc.).  Since I have been focused on this goal and in addition to mowing, trimming bushes and outside maintenance that my hubby used to do, I have not had a chance to create any cards. I miss being creative for sure!

I hope you have been inspired to join us with our #177 Make It Masculine Challenge at The Card Concept!

Wednesday, August 5, 2020

Come, Follow Me


Hi Friends!

I am finally having a chance to post a few more cards that were designed recently and this card uses the retired Angler stamp set from Stampin’ Up! along with a sentiment from The Waves on the Sea stamp set (currently available at Divinity Designs LLC).

I enjoy participating with online challenges and will be linking this card to the Retro Rubber Challenge Blog #140 Tic-Tac-Toe Challenge (middle row across  Twine, Rectangle, Embossing) along with the AllsortsChallenge #583/84 “Make It Masculine” Challenge and the Simon Says Wednesday  “Anything Goes” Challenge.

If you have not had a chance to check out the above challenge sites yet, I encourage you to do so- gorgeous inspiration from all!

To create this card:

Ink the Angler stamp image and the sentiment using Versafine™ Onyx Black ink, stamp onto two separate panels of white cardstock and heat set with a heat tool. 

Using various brown water-based markers, watercolor pencils and distress ink, watercolor the main Angler image.  Die cut with a stitched square die, mount onto espresso cardstock and trim close to the edge.

Stamp the Angler fly fishing lure image using vintage tea archival ink, heat set and watercolor a bit of distress ink to age the paper.  Die cut the sentiment with a stitched rectangle die, mount onto espresso cardstock and trim close to the edge.


Emboss a piece of suede cardstock with a diamond embossing folder, trim and mount onto white cardstock, trim and mount onto espresso cardstock.

Emboss a piece of suede cardstock with a lattice embossing folder, mount onto espresso cardstock, trim and adhere to the background panel.

Mount the entire background panel to a white card base.

Add a piece of knotted twine to the card front, fraying the edges. 

Add pieces of cheesecloth behind the main image and sentiment, pulling to create a bit of distressing.  Mount the main image and sentiment to the card front with chipboard (or dimensional foam).

Stamp Sets: Angler (retired Stampin’ Up!), The Waves on the Sea (Divinity Designs LLC)

Ink/Mediums: Versafine™ Onyx Black, Stampin’ Write Markers- Soft Suede, Early Espresso, Smoky Slate; Tim Holtz® Vintage Tea Archival & Vintage Tea Distress; Stampin’ Up! Watercolor Pencils- Basic Black, Early Espresso

Paper/Cardstock: Whisper White, Early Espresso, Soft Suede

Accessories/Tools: Gemini, Jr™, Diamond (Darice) and Square Lattice (retired Stampin’ Up!) Embossing Folders, My Favorite Things Stitched Rectangle STAX A2 Set 1, Stitched Square STAX; Heat Tool, AquaPainter™, Cheesecloth, Hemp Twine

Thanks again for taking the time to visit- I hope you have a wonderful week! If you have time, the new Card Concept challenge will post at 8 am – we hope you can join us!

Tuesday, July 28, 2020

Cast Thy Burden


Hi Friends!

I am finally able to get caught up (a little bit) with posting the cards that I have designed this past week :-)

This card was created with the retired Stampin’ Up! (SU) Countryside and Blessings from Heaven stamp sets along with retired SU Designer Series Paper from my massive stash, lol!

As I have also shared in previous posts, in addition to trying to use older stamps and “stuff” (as my hubby calls it, lovingly) in my designs, I am also trying to create a card for each of the over 800 sketches at Splitcoaststampers.

For this card, I incorporated the Splitcoaststampers SC112 Sketch Challenge (this sketch is from 2007) for the layout along with the Splitcoaststampers CC755 Color Challenge (including the dessert option of plaid) into the design.  

I am also participating with the SUO Challenges #254 Coloring Challenge along with a new to me challenge site, Craft Rocket #72 “For the Men/Boys”.

To create this card:

If you have the stamp image (which I do but used the digi version for this card), you can ink the image using a waterproof black ink and stamp onto white paper.  FYI- This image was one I found in my stash during my re-organization process.  Once I had imported the Countryside truck digi image into the retired My Digital Studio™ program, I enlarged it a bit before printing out onto white cardstock.  Usually when I print digital images, I print a few extra to have on hand and this image was in my stash just waiting to be colored, lol!

Use Stampin’ Write water-based markers and watercolor pencils to watercolor the truck and grass areas,  Use a basic black watercolor pencil to add the darker clouds (for this I actually scribbled the pencil onto my craft mat, added a bit of water to dilute before creating the cloudy sky).

Trim the truck image by hand, mount onto black cardstock and create the little photo corners (I created these by hand as well, cut a small square diagonally and snip to create the corners).  Add the retired black brads and set aside.

Stamp the sentiment from Blessings from Heaven onto the lower right of a piece of 4” x 5 ¼” white cardstock.  

Layer a piece of green designer paper (very old SU hostess level I paper- do you remember that?) onto the top half of the panel.

Mount the plaid designer paper onto black cardstock, trim close to the edges and add to the background panel.  Trim the entire panel and mount onto black cardstock, trim close to the edge before mounting onto the A2 (4 ¼” x 5 ½”) white card base.

Add the truck image using chipboard or dimensional foam.

Using a black Sharpie®, color the Rhinestones before adhering to the card front (hopefully this touch would be still considered masculine, lol!)

Stamp Sets: Countryside (retired digi image- Stampin’ Up!), Blessings from Heaven (retired Stampn’ Up!)

Ink/Mediums: Versafine™ Onyx Black, Printer Ink- Black, Stampin’ Write Markers- Granny Apple Red, Call Me Clover, Real Red; Stampin’ Up! Watercolor Pencils- Real Red, Basic Black; black Sharpie®

Paper/Cardstock: Whisper White, Basic Black, retired Pear Pizzazz (Hostess Level I pack), retired Warmth Designer Series Paper

Accessories/Tools: AquaPainter™, Heat Tool, Rhinestones, Black Brads

Thanks again for taking the time to visit- I hope all of you have a creative week!

Friday, July 24, 2020

Three Decoys- CAS in Grays


Hi Friends!

While I had the Three Decoys stamp from Impression Obsession on my desk, this is another card that I designed pairing it with a verse sentiment from A Godly Man (Stamp Simply).  

I have owned the wood mount Three Decoys stamp for years and it is still available as cling, wood mount or a digi version from Impression Obsession (see here).  This stamp was designed by Gary Robertson and I absolutely love his line art work stamps.  

FYI- I am not receiving any compensation from promoting either I/O stamps or Stamp Simply- I just love both companies!

I also enjoy participating with online challenges and will be linking this card to the A Bit More Time toCraft #120 “Anything Goes” Challenge along with the Splitcoaststampers Cleanand Simple CAS595 “Cloudy Days” Challenge (use only grays).

If you have not had a chance to visit the above challenge sites yet, I hope you will do so- wonderful inspiration from all!

This card was extremely easy to create- stamp both the decoy image and sentiment with archival black ink onto white cardstock and heat emboss with clear embossing powder. 

Watercolor the decoy image with ink from distress oxide pads along with water-based markers and watercolor pencils.  Once dry, trim the panel and mount onto black cardstock and adhere to a white card base.

To finish off the card, using a water brush, dilute a bit of pearl texture paste and watercolor the moon.

Stamp Sets: Three Decoys (Impression Obsession),  A Godly Man (Stamp Simply)

Ink/Mediums: Versafine™ Onyx Black, Tim Holtz® Hickory Smoke Distress Oxide;  Stampin’ Write Smoky Slate Marker; Stampin’ Up Black Watercolor Pencil; Faber-Castell® Texture Luxe™ Pearl

Paper/Cardstock: Whisper White, Basic Black

Accessories/Tools: AquaPainter™, Embossing Buddy®, Clear Embossing Powder, Heat Tool

Thanks again for taking the time to stop by- I am planning on posting a few more cards this weekend, I hope you are able to visit again soon! Hugs and have a great weekend!

Wednesday, June 10, 2020

TCC137 Fun at the Lake


Hi Friends!


I love all of the textures, colors along with the fishing gear in our inspiration photo- perfect for a masculine card so I thought it would be great for Father’s Day!

I am still making an effort to ink up some stamps that I have not used in a while and this image reminded me of the retired Angler set from Stampin’ Up!.  I decided to pair it with a sentiment from the retired Verve stamp set, Strong Anchor (I never had a chance to ink up this sentiment before :-)).

The main image took a while to watercolor but the rest of the card was fairly quick.


To create this card:

Ink the main image along with the fishing fly image from the retired Stampin’ Up! set, Angler using Versafine™ Onyx Black ink, stamp onto white cardstock and heat set with a heat tool.

Watercolor the images using watercolor pencils and water-based markers (it took several layers of color before I was satisfied).  Watercolor a bit of antique linen distress oxide ink to “antique” the paper and add texture using vintage photo distress ink with a splatter stamp.

Die cut the main image with a stitched  square die and the fishing fly image with a stitched circle die.  Mount the die-cut square onto espresso cardstock, trim close to the edge of the square.  Die cut a larger circle from espresso cardstock, mount the stitched circle image onto the espresso circle.

Stamp the sentiment from the retired Verve stamp set, Strong Anchor onto white cardstock, heat set with a heat tool and add a bit of color with antique linen distress oxide ink along with the spatter image using vintage tea distress ink.  

Die cut the sentiment with a stitched circle die and mount onto an espresso die cut circle. Add the sentiment behind the main focal image and adhere the stitched circle with the fishing fly to the top corner.

Trim a piece of designer paper (this was from the retired Wood Textures paper stack from Stampin’ Up! pack), distress the edges and mount onto a piece of espresso cardstock.

Emboss a piece of dark green cardstock with a diamond embossing folder (I thought this folder would look a bit like a fish net:-)), mount onto espresso cardstock and distress the outside edges.  Adhere to the card front and mount the entire background panel onto a white card base.

Knot a piece of hemp twine and add to the card front (I left the center free of knots so I could mount the focal image panel onto the card).

Create the small photo corners (I created these by hand), add to the opposite corners and insert the pewter brads.

Mount the layered main image panel to the card front using dimensional foam to finish off the card.

Stamp Sets: Angler, Timeless Textures (both retired Stampin’ Up!), Strong Anchor (retired Verve Stamps)

Ink/Mediums: Versafine™ Onyx Black, Derwent™ Watercolor Pencils and Water-Soluble Graphite Pencils- oranges, greens, reds, grays, black), Stampin’ Write Markers-Crushed Curry, Granny Apple Green, Island Indigo, Poppy Parade, Tangerine Tango, Wild Wasabi;, Tim Holtz™ - Antique Linen Distress Oxide, Vintage Tea Distress

Cardstock/Paper: Whisper White, Early Espresso, Mossy Meadow; retired Stampin’ Up! Wood Textures designer series paper

Tools/Accessories: Gemini, Jr™, My Favorite Things Stitched Square and Circle STAX Dies, Sizzix™ Circles Dies; Sizzix™ Diamond Embossing Folder, Heat Tool, AquaPainter™, Pewter Brads, Natural Hemp Twine, Distressing Tool

Thanks again for taking the time to visit!  I hope I have inspired you to create your own card based on our {Fun at the Lake} photo and link up to our gallery at The Card Concept- we would love to see what inspired you! The challenge is open until June 22nd  at noon EST.
Related Posts Plugin for WordPress, Blogger...