Showing posts with label Hold on to Hope. Show all posts

Tuesday, March 13, 2018

SUO196 Cross of Hope


Hi Friends!   


Easter is only a few weeks away and I have not had a chance to create a card yet with the new Crosses of Hope Framelits™. 
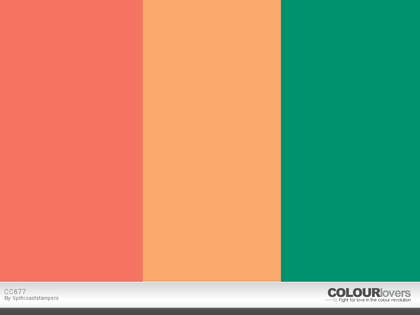
I decided to incorporate the Splitcoaststampers CC677 Color Challenge into the design along with the  Tic-Tac-Toe #038 Challenge (Green, Sparkle, Happy) and the International Art & Soul #28 “Emboss and Use A Die”Challenge.

If you have not had a chance to stop by the SU-Only Challengesite to check out the rest of the Design Team’s samples or the other challenge sites yet, I encourage you to do so- wonderful inspiration from all!

To create this card:

1). Use Stampin’ Write Markers- color the flower spray image from Hold On To Hope using Emerald Envy for the stems and Calypso Coral for the flowers. “Huff” onto the stamp to re-moisten and stamp onto a piece of Peekaboo Peach cardstock. “Huff” again for a second generation stamping, re-color the image and stamp a few more times.

2). Trim the panel to 4” x 5 ¼”.  Stamp the flourish image from Timeless Textures with Versamark™ ink repeatedly around the edges and score at the bottom and top of the panel.  Mount onto a piece of Emerald Envy cardstock, trim and mount onto the Extra Thick Whisper White card base.

3). Die cut the main cross from Crosses of Hope Framelits™ from Calypso Coral cardstock and the intricate cross from Whisper White cardstock.  Layer the two and add shimmer to the Calypso Coral areas with Clear Wink of Stella®.

4). Loop a bit of Gold Metallic Thread behind the area where the cross will be mounted and mount the cross with Stampin’ Dimensionals®.

5). Ink the sentiment from Teeny Tiny Wishes with Versamark™ and stamp onto a scrap piece of Emerald Envy cardstock.  Apply Stampin’ Emboss® White Embossing Powder and heat set with the Heat Tool. Hand trim and add a flag banner on the end before mounting onto the card front with Stampin’ Dimensionals®.

6). Add a Pearl to the middle of the cross to finish off the card.
  
Stamp Sets:  Hold On To Hope, Timeless Textures, Teeny Tiny Wishes

Ink/Mediums: Versamark™, Stampin’ Write Markers- Emerald Envy, Calypso Coral; Clear Wink of Stella®

Paper: Whisper White, Extra Thick Whisper White, Emerald Envy, Peekaboo Peach

Accessories/Tools: Big Shot™, Crosses of Hope Framelits™, Embossing Buddy®, Stampin’ Write® White Embossing Powder, Heat Tool, Gold Metallic Thread, Pearls

Thanks again for taking the time to stop by and I hope that you will create your own Stampin’ Up! Only project and join us for our “Spring is About to Spring” challenge! 

Tuesday, February 27, 2018

SUO195 Favorite Sentiment


Hi Friends!   


I love using Scripture verses on my card so I decided to use the verse from the Occasions Mini stamp set, Hold On To Hope and incorporated the flowers from the Painted Harvest stamp set (carried over from the 2017 Holiday Mini) and a bit of splatter from Timeless Textures for a very simple card :-)

The main panel on this card is just one layer and since I did not have my ink pads near me when I created this card, I used masking along with Stampin’ Write Markers for the entire card (I love using markers for omitting and other techniques, don’t you? :-))


If you have not had a chance to stop by the SU-Only Challengesite to check out the rest of the Design Team’s samples or the other challenge sites yet, I encourage you to do so- terrific inspiration from all!

To create this card:

1). Ink the solid flower image from Painted Harvest with a Blushing Bride marker, stamp onto the lower part of a piece of Whisper White cardstock.  Ink the more detailed petal image with a Berry Burst marker and stamp over the solid image.  Stamp another detailed petal image flower onto a piece of scrap paper (or sticky note/masking paper), fussy cut the image and use this as your mask.

2). Mask the first flower and repeat the steps above to stamp the second and third flower (re-masking each flower as you proceed).  ***FYI- I used Flirty Flamingo as the base for the last two flowers versus Blushing Bride***

3). Ink the flower center image with an Early Espresso marker and stamp in the middle of the petals.  Use an AquaPainter™ to blend any areas that are missing ink or may be a bit misaligned.

4). Re-mask each flower as you stamp the outline leaf image with a Lemon Lime Twist marker.

5). Ink the sentiment from Hold On To Hope with a Basic Black marker (the words on each top line), stamp onto the panel, then ink the “Made You”, “Carry You”, “Sustain You”, “Rescue You” with the Berry Burst marker and re-stamp onto the panel.

6). Add a bit of splatter with the small splatter stamp from Timeless Textures, inked with the Early Espresso marker. 

7). Trim the panel and mount onto a piece of Berry Burst cardstock, trim again and mount onto the Extra Thick Whisper White card base.

8). To finish off the card, apply shimmer to all of the flower petals with Clear Wink of Stella®.

Stamp Sets:  Painted Harvest, Hold On To Hope, Timeless Textures

Ink/Mediums: Stampin’ Write Markers- Blushing Bride, Flirty Flamingo, Berry Burst, Early Espresso, Lemon Lime Twist; Clear Wink of Stella®

Paper: Whisper White, Extra Thick Whisper White, Berry Burst

Accessories/Tools: AquaPainter™

Thanks again for taking the time to stop by and I hope that you will create your own Stampin’ Up! Only project and join us for our “AFavorite Sentiment” challenge!  

Tuesday, January 16, 2018

SUO192 Monochromatic Blues


Hi Friends!   

It’s time for the #192 "Fun with Just One Color" Challenge at SU-Only Challenges! I pulled out a few of my new stamp sets- Hold on to Hope from the 2018 Occasions Mini Catalog and the 2018 Sale-A-Bration stamp set, Amazing You to create a Clean and Simple Mixed Media card :-)


If you have not had a chance to stop by the SU-Only Challengesite to check out the rest of the Design Team’s samples or the other challenge sites yet, I encourage you to do so- fabulous inspiration from all!

To create this card:

1). Using Stampin’ Write Markers- Night of Navy, Dapper Denim and Marina Mist to color the floral spray image from Hold on to Hope. “huff” onto the stamp before stamping onto a piece of Whisper White cardstock.  Clean the stamp, re-ink again with the markers and stamp again onto the panel to create the scroll design.

2). Trim the panel and mount onto a piece of Night of Navy cardstock.  Mount the panel onto the Extra Thick Whisper White card base.

3). Ink the sentiment from Hold on to Hope with Night of Navy Classic Ink, stamp onto a piece of Whisper White cardstock.  Die cut the sentiment with Stitched Shapes Framelits™, mount onto a circle of Night of Navy cardstock using the Layering Circles Framelits™.  Add to the card front with Stampin’ Dimensionals®.

4). In the sentiment again using Versamark™ ink, apply Stampin’ Emboss® White Embossing Powder and heat set with a heat tool.  Trim the portion of the sentiment “And I Will Rescue You” by hand and create a flag point.  Adhere over the sentiment with Stampin’ Dimensionals®.

5). Ink the flowers from Amazing You with Night of Navy Classic Ink, stamp three times onto a piece of Whisper White cardstock.  Scribble ink from the Marina Mist and Dapper Denim marker onto a silicone craft mat and use an AquaPainter™ to watercolor the petals.  Once you are satisfied with the watercolor, dry with a heat tool and fussy-cut out the center portion of the flower.  Mount the flowers around the circle using Stampin’ Dimensionals®.

6). Finish off the card using the White Gel Pen to add highlights to the flower centers and add shimmer to the petals with Clear Wink of Stella®. 


Stamp Sets: Hold on to Hope, Amazing You

Ink/Mediums: Versamark™, Night of Navy, Stampin’ Write Markers- Dapper Denim, Marina Mist, Night of Navy; Clear Wink of Stella®, White Gel Pen

Paper: Whisper White, Extra Thick Whisper White, Night of Navy

Accessories/Tools: Big Shot™, Stitched Shapes Framelits™, Layering Circles Framelits™, Embossing Buddy®, Stampin’ Emboss® White Embossing Powder, Heat Tool

Thanks again for taking the time to stop by and I hope that you will create your own Stampin’ Up! Only project and join us for our “Fun with Just One Color”challenge!  
Related Posts Plugin for WordPress, Blogger...
