Showing posts with label C4AC38. Show all posts

Wednesday, April 27, 2016

Cards for A Cause- You're The Best

Hi Friends!

This card is another design that I created for the Splitcoaststampers' April 2016 MISSION- Cards for a Cause (see details here) along with the SC586 Sketch Challenge and the Simon Monday “Show Us Your Metal” Challenge.

If you have not had a chance to check out the above challenge sites, I hope you will find time to do so- wonderful samples from all!

To create this card:

Using a 2” Circle Punch, punch out the map image from the Paper Studio Cape Cod Designer Paper.

Use the Big Shot™ with the My Favorite Things™ (MFT) Stitched Circle STAX Dies to cut out a circle from Really Rust cardstock and adhere the map image circle to the die cut.

Trim the other pieces of the Cape Cod paper, adhere to a piece of Really Rust cardstock and mount onto a piece of Night of Navy cardstock using a zig zag stitch.

Apply Ranger® Tim Holtz® Old Paper Distress Ink over the edges of the sewing and paper to “age” the thread.

Wrap a piece of 1” Dark Navy Grosgrain Ribbon around the card front, add the metal Nautical Charm with an Antique Brass brad, create a metal “rope” with brass wire and loop over a strip of 5/8” Rust Satin Ribbon (wrapping the ends of the Rust ribbon behind the back of the card front).

Mount the entire panel onto the Whisper White card base.

Ink the sentiment from the retired stamp set, Simply Wonderful using Stāz-On® Midnight Blue ink and stamp onto Whisper White cardstock.

Apply Ranger® Tim Holtz® Old Paper Distress Ink over the paper, punch the ends with the Hexagon Punch to create the banner points, mount onto Really Rust cardstock and punch the banner points with the punch.  

Add the Night of Navy banner behind the sentiment and add texture to the background with the Timeless Textures stamp using Ranger® Tim Holtz® Old Paper Distress Ink.

Mount the die cut circle along with the sentiment using dimensional foam to finish off the card.

Stamp Sets: Simply Wonderful (retired SAB)

Ink/Mediums: Stāz-On® Midnight Blue, Ranger® Tim Holtz® Old Paper Distress Ink

Paper: Whisper White, Night of Navy, retired Really Rust; Cape Cod Designer Paper (The Paper Studio™)

Accessories: Big Shot™, MFT Stitched Circle STAX Dies, Sewing Machine, White Thread, Nautical Charm, Antique Brass Brad, Antique Brass Wire, 1” Dark Navy Grosgrain Ribbon, 5/8” Rust Satin Ribbon


Thanks again for taking the time to visit- I hope you have a wonderful week!

Tuesday, April 26, 2016

SUO147 Bravo! You Did It- Congratulations

Hi Friends!   

It’s time for the SUO147 “Congratulations” Challenge and I decided to create another card for the Splitcoaststampers’ April 2016 Cards for A Cause (see details here about this card drive).


 I hope you will have a chance to check out my sister Design Team member samples at the SU-Only Challenge site as well as the fantastic Design Team samples and entries at the other galleries- wonderful inspiration from all!


To create this card:

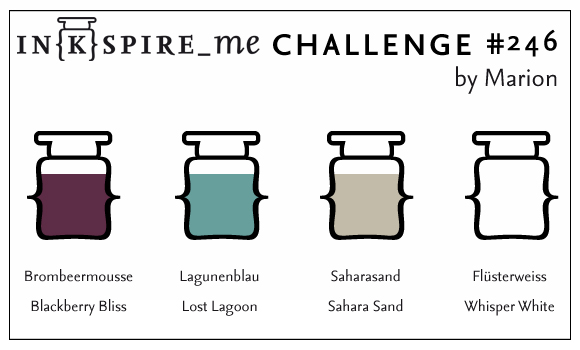
The background was designed using the Smakin' Acetate Technique using a page protector or clear envelope (acetate)- open one side and the bottom to create a “book”, press the Blackberry Bliss and Lost Lagoon Classic Ink pads onto the right hand side (I use the ink pads directly versus the markers as in the tutorial),  spritz with water, close the envelope and “smoosh” the ink a bit with your finger, reopen the envelope and insert a piece of Whisper White cardstock onto each side (you will receive two background panels).

Trim the one panel, stamp the coral image from By The Tide with Blackberry Classic Ink, de-static the panel, ink the “Bravo!” sentiment with Versamark™ ink, re-ink immediately with Blackberry Bliss Classic Ink, stamp onto the panel, apply Stampin’ Emboss® Clear Embossing Powder and heat set with the Heat Tool.

Allow the embossed panel to cool, ink the “Bravo!” sentiment with Versamark™ ink, offset from the original stamped sentiment a bit to the left, stamp onto the panel, apply Stampin’ Emboss® White Embossing Powder and heat set with the Heat Tool.
Trim the panel and mount onto a piece of Blackberry Bliss cardstock.
Ink the Chalk Lines border stamp using Blackberry Bliss and stamp onto the left hand side of the remaining panel (created in step 1 with the  Smakin’ Acetate technique). 
Ink the splatter stamp from Timeless Textures with Lost Lagoon Classic Ink and add a bit of distressing to the background as well as the embossed sentiment focal image panel.

Trim the background panel, decide where you would like to place the focal image panel and stamp the “you did it” stamp with Blackberry Bliss Classic Ink.

Mount the trimmed background panel onto the Blackberry Bliss card base.

Ink the sea turtle image with Stāz-On® Jet Black Ink and stamp onto Whisper White cardstock.

Color the image with and AquaPainter™ and ink from the Sahara Sand and Lost Lagoon Classic Ink Pads.

Use the Sahara Sand and Lost Lagoon Stampin’ Write Markers to add shadows and additional color, fussy-cut the image and apply Clear Wink of Stella® over the turtle.

Mount the focal image panel along with the sea turtle using dimensional foam to finish off the card.

Stamp Sets:  From Land to Sea, By The Tide, Bravo, Chalk Lines, Timeless Textures

Ink:  Versamark™, Blackberry Bliss, Lost Lagoon, Sahara Sand; Stampin’ Write Markers- Lost Lagoon, Sahara Sand ; Clear Wink of Stella®

Paper/Cardstock: Whisper White, Blackberry Bliss
Accessories: Clear Envelope, Embossing Buddy®, Heat Tool, Stampin’ Emboss® White and Clear Embossing Powder

Thanks again for stopping by and we hope to see your Stampin’ Up! Only project in our “Congratulations” Challenge gallery!

Card for A Cause, Sketch and Colour Challenge :-)

Hi Stampers! 

I am continuing to create cards for the Splitcoaststampers April 2016 MISSION- Cards for A Cause- this month, encouragement cards are being sent to the Miami VA Medical Center for the Homeless Veterans Program (see details here).
   
As I mentioned in a previous post, I am so thankful to have a chance to possibly give a little back to those who have sacrificed so much for our country and to think that they are now homeless and now in need.....I hope these cards that are donated will bring a bit of hope to the recipients and, there is still time, if you would like to send cards to this cause (again, please see details here- if you do not have a Splitcoaststampers’ sign-on, it is free to sign up).


Hopefully you will have a chance to visit the above mentioned challenge sites- so many wonderful Design Teams samples and entries!

To create this card:

Ink the train image from Traveler with Stāz-On® Jet Black Ink and stamp onto a piece of Whisper White cardstock.

Trim the panel, color the train with the Stampin’ Write Sahara Sand marker and add distressing to the background with stamps from Timeless Textures (stamped with Sahara Sand Classic Ink).

Mount the panel onto Sahara Sand cardstock, trim and mount onto Night of Navy cardstock and distress with the retired Distressing Tool.

Ink the sentiment from the retired set, Absolutely Fabulous with Stāz-On® Jet Black Ink and stamp onto a piece of Whisper White cardstock.  Create the banner points on the end with the Hexagon Punch (soon to be retired), mount onto Night of Navy cardstock, trim and punch the banner points again with the Hexagon Punch and add texture with Sahara Sand Classic Ink and the Timeless Textures stamp.

Create the background for the next layer using the suitcase, journal and camera from Traveler, stamp onto a piece of Sahara Sand cardstock with Night of Navy Classic Ink (masking the images as you stamp onto the panel).

Trim the stamped background, mount onto Night of Navy cardstock and distress the edges with the Distressing Tool.

The larger background was created with stamps from the Timeless Textures set, stamped with Sahara Sand Classic Ink onto Sahara Sand cardstock, distress the edges with the Distressing Tool and mount onto the Night of Navy card front.

Ink the Timeless Textures images with Night of Navy and stamp onto a piece of Calypso Coral cardstock, cut with the Big Shot™ using the Circle Framelits™ (also cutting the same size circle from Night of Navy cardstock), mount the stamped Calypso Coral circle die cut onto the Night of Navy circle and distress the edges of both with the Distressing Tool.

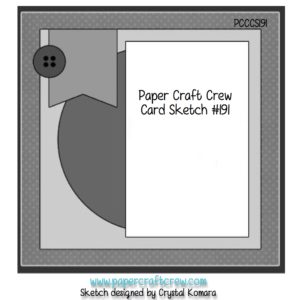
Layer the card per the sketch and add the Calypso Coral banners (created with the Banner Triple Punch and retired Crimper Tool).

Stamp Sets: Traveler, Timeless Textures, Absolutely Fabulous (retired Stampin’ Up!)

Ink: Stāz-On® Jet Black, Night of Navy, Sahara Sand; Stampin’ Write Marker- Sahara Sand

Paper/Cardstock:  Whisper White, Calypso Coral, Sahara Sand, Night of Navy, retired Calypso Coral DSP

Accessories: Big Shot™, Circle Framelits™, Distressing Tool, Punches-  Banner Triple, Hexagon; retired Night of Navy button, Crimper Tool


Thanks again for stopping by- the new SUO Challenge will be posting soon!!  Have a wonderful week- hugs and God Bless!

Saturday, April 23, 2016

One Layer Mixed Media Card- Congrats, You Did It!


Hi Friends!

I wanted to share one more card that I created this morning that is a bit different for me- this is a one layer card.  That’s right, no layering at all, just score your cardstock , fold and stamp on the front.

Sounds simple, right?  Well, for this shabby-chic, vintage, Mixed Media , have to lots of layers, etc. artist, trust me, it is not!  I truly admire those artists who can design Clean and Simple cards as well as One Layer Cards :-)

Why do it, you ask?  For me, I like to stretch myself and try different techniques and styles so all of my cards do not look the same- lol!  Plus, it makes life interesting to try something new...


If you have not had a chance to visit the above challenge galleries yet, I encourage you to do so- it always amazes me how many different cards can be designed with one color, sketch or theme challenge!

To create this card:

Using sticky note paper, create a rectangle mask on a folded piece of retired Naturals White cardstock.

Create additional masks for the moon/sun and hills, use a Sponge Dauber to apply Pool Party and Pink Pirouette to the sky area and Mossy Meadow to the hills.

Remove the masks and de-static the cardstock with the Embossing Buddy®.

Ink the locomotive image from Traveler with Versamark™ and stamp onto the card front, apply Stampin’ Emboss® Black Embossing Powder and heat set with the Heat Tool.

Repeat the above steps with the sentiments from the soon to be retired set, Bravo.

Add shadows with the Tip Top Taupe Stampin’ Write Marker and white highlights to the train with the Chalk Marker (retired).

Finish off the card by adding a few birds to the sky with a Faber-Castell® XS Black Marker.

Stamp Sets: Traveler, Bravo

Ink: Versamark™, Mossy Meadow, Pink Pirouette, Pool Party; Stampin’ Write Marker- Tip Top Taupe, retired Chalk Marker; Faber-Castell® XS Black Pitt Pen Marker

Paper: Naturals White

Accessories: Paper for masking, 1 ¾” Circle Punch


Thanks again for stopping by!!  I hope you have a wonderful weekend, my friends!

Monday, April 18, 2016

Congrats- One Word Challenge

Hi Again Friends!

Today I will be sharing three additional cards that I designed for the April 2016 MISSION- Cards for A Cause at Splitcoaststampers (Homeless Veterans Program at Miami  VA Medical Center- see details here) and all three cards use the Cape Cod designer paper from The Paper Studio (this first card was super easy to create since the designer paper does all of the “work” :-)).

This card will also be linked to the Splitcoaststampers’ Free For All F4A304 “One Word Wonder” Challenge as well as the USEIT2016 Challenge (I had not inked up the retired 2015 SAB set Simply Wonderful stamp set until now).  

I hope you will take the time to visit the above linked sites- so much inspiration!

To create this card:

Trim and distress the edges of the seahorse design from The Paper Studio, add shadows to the seahorse using the Stampin’ Write Sahara Sand Marker, mount onto a piece of Night of Navy cardstock and adhere to a piece of Cajun Craze cardstock.

Add the 1” Dark Navy grosgrain ribbon and layer the 5/8” Rust Satin Ribbon over the grosgrain (wrapping the edges and adhering to the back).

Mount the entire panel onto the Whisper White card base.

Ink the sentiment from the retired Simply Wonderful stamp set with Stāz-On® Midnight Blue Ink onto Whisper White cardstock, cut out with the Big Shot™ using the Rose Garden Thinlits™.

Cut another frame with the Rose Garden Thinlit™, cut in half and mount behind the sentiment label.

Ink the Timeless Textures stamp with Sahara Sand Classic Ink and repeatedly stamp over the sentiment.

Mount the sentiment to the card front with dimensional foam to finish off the card.

Stamp Sets: Simply Wonderful (retired SAB), Timeless Textures

Ink: Stāz-On® Midnight Blue, Sahara Sand; Sahara Sand Stampin’ Write Marker

Paper: Whisper White, Cajun Craze, Night of Navy; Cape Cod Designer Paper (The Paper Studio)

Accessories: Big Shot™, Rose Garden Thinlits™, 1 “ Dark Navy Grosgrain, 5/8” Rust Satin Ribbon, Distressing Tool


Thanks again for taking the time to stop by- I will be sharing the other two cards from this paper collection shortly.

Saturday, April 16, 2016

You're Absolutely Fabulous- Cards for a Worthy Cause

Hi Stampers! 

I have been busy this week creating cards for the Splitcoaststampers' April 2016 MISSION-Cards for A Cause.  

This month, encouragement cards are being sent to the Miami VA Medical Center for the Homeless Veterans Program (see details here).   

I am honored to have a chance to possibly give a little back to those who have sacrificed so much for our country and to think that they are now homeless and in medical need.....if you would like to send cards to this cause, there is still time  (again, please see details here- if you do not have a Splitcoaststampers’ sign-on, it is free to sign up).

I have several cards finished for this card drive and will share over the next few days- this one was designed using the Mojo443 Sketch Challenge along with the Splitcoaststampers’ WT578 “Shabby Chic”Challenge.

To create this card:

Ink the Landscape Silhouettes image from Sweet ‘n Sassy Stamps (SNSS) using Early Espresso Classic Ink and stamp onto a piece of Very Vanilla cardstock (I used my MISTI® Tool so I could stamp several times for a very dark image).

Use the 1 ¼” Circle Punch with sticky note paper to create a mask for the “sun/moon” and place over the stamped image.

With a Sponge Dauber and Dusty Durango Classic Ink (retired) apply ink to the sky , lift up the mask and sponge a bit onto the sun/moon.

Trim the panel and mount onto a piece of Early Espresso cardstock.

The background layers were created using retired Stampin’ Up! Outlaw Designer Series Paper (DSP), distressing the edges with the Distressing Tool and mounting onto Early Espresso cardstock (some of the background pieces were die cut with stitched square or rectangle dies).

The card base is retired Dusty Durango cardstock and the star border was cut from Very Vanilla cardstock with the SNSS Hearts and Stars Scallop Border Die Set.

The other three stars were cut from My Favorite Things (MFT) Stitched Stars STAX Dies and the smaller two stars are layered onto Wplus9 Clear Cut Stacker Stars Dies.  

The tiny stars (Very Vanilla) in the centers of the stitched stars are the negative die cut pieces from the SNSS Stars Scalloped Border Die- woohoo, nothing went to waste!

The sentiment is from a retired Stampin’ Up! set, Absolutely Fabulous and the banner points were created with the Hexagon Punch.

Stamp Sets: Absolutely Fabulous (retired Stampin’ Up!), Landscape Silhouettes (Sweet ‘n Sassy Stamps)

Ink: Early Espresso, retired Dusty Durango, Faber-Castell® Black Pitt Pen Marker

Paper/Cardstock:  Very Vanilla, Early Espresso, retired Dusty Durango, retired Outlaw DSP

Accessories: MISTI® Tool, Big Shot™, retired Square Lattice Textured Impressions™ Embossing Folder,  Heart and Stars Scallop Border Dies (SNSS), Stitched Rectangle, Square and Star STAX Dies (MFT),  Clear Stacker Stars Dies (Wplus9), Distressing Tool, Sponge Dauber, Sticky Note Paper, Punches-  Banner Triple, Hexagon, 1 ¼” Circle

If you have any questions, please let me know in the comment section- I truly appreciate your visits and comments- they are such an encouragement to me!


I hope you have a wonderful weekend- hugs and God Bless!

Tuesday, April 12, 2016

Life's Roughest Storms

Hi Again Friends!

I am continuing to create cards for the Splitcoaststampers’ April 2016 Cards for A Cause (see here for more details) and designed this card using the Splitcoaststampers' SC583 Sketch Challenge (modified a bit on my card :-)) and the Alphabet "K" Challenge (“K” for Knot).

I hope you will take the time to visit the above linked sites- so much inspiration!

To create this card:

Ink the sentiment from the Our Daily Bread Designs (ODBD) Anchor the Soul with Stāz-On® Midnight Blue Ink and stamp onto a piece of Whisper White cardstock.

Use the Big Shot™ with the My Favorite Things® (MFT) Stitched Square STAX to cut out the sentiment, mount onto Night of Navy cardstock, trim and apply Ranger® Tim Holtz® Old Paper Distress Ink to distress the paper.

Ink the anchor image from Stampin’ Up! The Open Sea with Cherry Cobbler Classic Ink, stamp off twice and stamp over the sentiment.
Cut the oval from the Cape Cod DSP using the MFT Oval Stitched STAX and mount onto the lower portion of the card front.

Layer the designer paper from The Paper Studio© Cape Cod Premium Cardstock pack over a piece of Cherry Cobbler cardstock, trim the edges and mount onto a piece of Night of Navy cardstock.

Add a few scrap strips of Night of Navy across the card panel along with the knotted Hemp Twine.

Use the 1 ¼” Circle Punch to create the layered circle with the knotted pattern paper and mount the circle and sentiment with dimensional foam to finish off the card.

Stamp Sets: The Open Sea (Stampin’ Up!), Anchor the Soul (ODBD)

Ink: Stāz-On® Midnight Blue, Cherry Cobbler Classic Ink, Ranger® Tim Holtz® Old Paper Distress Ink

Paper: Whisper White, Cherry Cobbler, Night of Navy; Cape Cod (Paper Studio©)

Accessories: Big Shot™, MFT Stitched Square and Oval STAX, Sponge Dauber,  1 ¼” Circle Punch, Hemp Twine

The card is a bit narrower than the normal A2 size (I had a 4" x 6" envelope that I wanted to use so the overall size is 3 3/4" x 5 1/2").  


Thanks again for taking the time to stop by- I hope you have a terrific day, my friends!

Monday, April 11, 2016

The Wilderness Awaits- You've Got This!


Hi Again Friends!

Here is the another card that I created this morning using the FMS231 Freshly MadeSketches Challenge along with the Hand Stamped Sentiments HSSCC235 ColorChallenge (I did use Blackberry Bliss cardstock although it looks very dark in the photo.

This will be another design for the Splitcoaststampers’ April 2016 Cards for A Cause (see here for more details).

I hope you will take the time to visit the above galleries- so much inspiration from the Design Teams as well as the entries!

To create this card:

Ink the Elk image from The Wilderness Awaits using Basic Black Stampin’ Archival Ink and stamp onto Whisper White cardstock.

Heat set the image with the Heat Tool, use an AquaPainter™ with Smoky Slate Classic Ink to color the Elk and the rocks,  add additional shadows with the Smoky Slate and Sahara Sand Stampin’ Write Marker. 

Color the sky area with the AquaPainter™ and Pool Party Classic Ink, trim the panel, mount onto Pool Party cardstock, trim and mount onto the Blackberry Bliss card base.

Cut a strip of Blackberry Bliss cardstock on an angle, add to the card front and adhere a strip of Pool Party cardstock down the center.

Ink the sentiment from You’ve Got This with Stāz-On® Stone Gray Ink, stamp onto Whisper White cardstock, add the Pool Party ink in the background with the Work of Art square background stamp, cut out the image using the Big Shot™ and the My Favorite Things® (MFT) Stitched Square Dies.

Mount the sentiment onto Pool Party cardstock, trim and mount onto Blackberry Bliss cardstock.

Create the photo corners with a 1 ⅜” Square Punch (punch a notch in the corner of the cardstock with just one corner of the punch, re-insert the punched cardstock to the desired width of the photo corner, punch again with the square punch and cut the diagonal line with scissors).

Add the photo corners to the sentiment along with Antique Brass Brads.

Mount the sentiment onto the card front with dimensional foam to finish off the card.

Stamp Sets: The Wilderness Awaits, Work of Art, You’ve Got This

Ink: Basic Black Stampin’ Archival, Stāz-On® Stone Gray, Pool Party, Smoky Slate

Paper: Whisper White, Blackberry Bliss, Pool Party

Accessories: Big Shot™, MFT Stitched Square STAX, AquaPainter™, 1 ⅜” Square Punch, Antique Brass Brads


Thanks again for taking the time to stop by- I am off for a nap :-)  I hope all of you have a marvelous day!

By The Tide- Congratulations

Hi Again Friends!

I had fun this weekend stamping images, coloring and fussy-cutting (I know, sounds like fun- right :-)?)!  

Anyway, I decided to put together one more card this evening/ morning and used the fussy-cut Lobster from By The Tide along with the Create with Connie and Mary CCMC401Sketch,  the CC557 Splitcoaststampers’ (SCS) Color Challenge and Alphabet Week 12 “L” Challenge (“L”for Lobster).

I hope you will take the time to visit the above galleries- so much inspiration from the Design Teams as well as the entries!

Other than the fussy-cutting of the lobster, this card was fairly easy to create:

Hard to see in the photo but the lobster is raised up above the panel :-)
Ink the Lobster image from By The Tide using Basic Black Stampin’ Archival Ink and stamp onto Whisper White cardstock.

Heat set the image with the Heat Tool and use an AquaPainter™  with Cherry Cobbler Classic Ink to color the lobster and add additional shadows with the Cherry Cobbler Stampin’ Write Marker.
 
Carefully fussy-cut the image, add Clear Wink of Stella® over the entire Lobster and set aside.

Ink the square stamp from Work of Art with Soft Sky Classic Ink and stamp repeatedly onto a piece of Whisper White cardstock.

Add additional splatter with Timeless Textures and Soft Sky Ink, trim to a square image (I used the Big Shot™ with the Square Framelits™ and mount onto Basic Black cardstock (trimming close to the edge).

Emboss a piece of retired Wild Wasabi Designer Series Paper (DSP) with the Woodgrain Textured Impressions™ Embossing Folder, trim and mount onto a square of Basic Black cardstock (also die cut with the Square Framelits™).

Mount the Soft Sky layered square onto the Wild Wasabi DSP square using dimensional foam and add the Lobster image with dimensional foam as well.

Create the Soft Sky banner using Soft Sky cardstock and the Banner Triple Punch, ink the Timeless Textures stamp with Soft Sky Classic Ink and stamp over the entire banner.

Layer the banner onto a Basic Black banner created in the same manner as above but cut a bit wider.

Create the Wild Wasabi strip in the same manner as the Soft Sky banner (using Wild Wasabi cardstock and ink) and once the banner has been layered, cut it in half.

Use the Big Shot™ with the Woodgrain Textured Impressions™ Embossing Folder to emboss a piece of Whisper White cardstock, trim and mount onto the Basic Black card base.

Mount the banners, the layered Lobster panel and sentiment to finish off the card.

Stamp Sets: By The Tide, Work of Art, Timeless Textures, Express Yourself (retired Hostess Set)

Ink: Basic Black Stampin’ Archival, Cherry Cobbler, Soft Sky, Cherry Cobbler Stampin’ Write Marker, Clear Wink of Stella®

Paper: Whisper White, Basic Black, Soft Sky, Wild Wasabi

Accessories: Big Shot™, Square Framelits™, Woodgrain Textured Impressions™ Embossing Folder, Banner Triple and Hexagon Punch, AquaPainter™


Thanks again for taking the time to visit- hugs and I hope you have a fabulous week!!
Related Posts Plugin for WordPress, Blogger...