Showing posts with label Traveler. Show all posts

Wednesday, October 9, 2019

TCC121 Cast Your Cares


Hi Friends!

Welcome to The Card Concept #121 {Adventure Awaits} Challenge!  I love this inspiration photo and was inspired by the train station, the colors and textures of the luggage as well as the brick wall to create a Shabby and Vintage Mixed Media card!

Since I have not used the retired Stampin’ Up! (SU!) Traveler stamp set in a while, I decided to pull out the locomotive image (well, it is a train station, right?) and paired it with a sentiment from the retired Faith Medley stamp set from Verve Stamps.

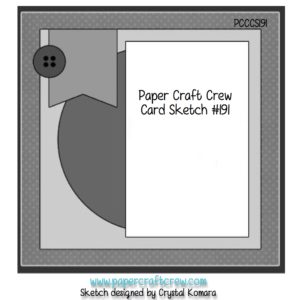
I used the MojoMonday #424 Sketch Challenge for the layout (since Julee Tilman is the designer of the sketch challenge as well as the stamp set, I just had to play along with her challenge- sending hugs Julee!) and will also be linking to the Word Art Wednesday #408-#409 “Anything Goes”Challenge.

If you have not had a chance to visit us at The Card Concept or the other challenge sites yet, I hope you will find time to do so- such gorgeous inspiration from all!

The locomotive image was stamped onto prepared white cardstock with Versafine™ Onyx Black and heat embossed with clear embossing powder.  Once the embossing powder had cooled, the image was water-colored with SU! Markers and Distress Ink (see colors below) using a water brush to soften the edges before die cutting with a stitched circle die.  Layer the image onto a die cut circle from espresso cardstock.

Emboss two pieces of retired designer paper (SU! Howlstooth & Herrinbone) with different embossing folders, lightly sand the embossing and mount onto espresso cardstock.  (I used the Tim Holtz™ Alterations Air Mail on the left panel and the retired SU! Boho Chic on the other panel).

Layer the embossed designer paper panels onto the white card front (die cut with a stitched rectangle die) and mount onto a piece of espresso cardstock. 

Sponge a bit of distress ink over the edges, add the satin ribbon strips with the pewter ribbon glides (the glides reminded me of the straps on the luggage) and wrap the ends of the ribbon behind the panel before mounting onto the white card base.

Heat emboss the sentiment onto white cardstock (in the same manner as the locomotive), hand trim and mount onto espresso cardstock.

Use the splatter stamp to add a bit of distressing.  Mount the locomotive and sentiment with dimensional foam (or chipboard, lately I have preferred chipboard since I have an abundance from designer paper packs). 

Finish off the card by using a silver paint pen to add a bit of silver to the locomotive’s metal parts. 

Stamp Sets:  Traveler, Timeless Textures (retired SU!), Faith Medley (retired Verve Stamps)

Ink/Mediums: Versafine™ Onyx Black,  Memento™ Tuxedo Black; Tim Holtz™ Distress Ink- Frayed Burlap and Hickory Smoke; Stampin’ Write Markers- Gray Granite, Smoky Slate, Chocolate Chip, Espresso; Silver Paint Marker (retired SU!)

Cardstock/Paper: Whisper White, Early Espresso; retired SU! Designer Series Paper- Howlstooth & Herringbone

Tools/Accessories: Big Shot™, My Favorite Things™ Dies- Stitched A2 Rectangle STAX Set 1, Stitched Circle STAX; Sixxiz™ Circle Dies; Embossing Folders- TH Alterations Airmail, SU! retired Boho Chic; AquaPainter™, Embossing Buddy®, Clear Embossing Powder, Heat Tool, ⅝” Espresso Satin Ribbon, Pewter Ribbon Slides

Thanks again for taking the time to visit!  I hope I have inspired you to create your own card based on our {Adventure Awaits}  photo and link up to our gallery at The Card Concept- we would love to see your interpretation and what design style(s) you decide to choose :-) The challenge is open until Monday, October 21st. 

Tuesday, April 26, 2016

Card for A Cause, Sketch and Colour Challenge :-)

Hi Stampers! 

I am continuing to create cards for the Splitcoaststampers April 2016 MISSION- Cards for A Cause- this month, encouragement cards are being sent to the Miami VA Medical Center for the Homeless Veterans Program (see details here).
   
As I mentioned in a previous post, I am so thankful to have a chance to possibly give a little back to those who have sacrificed so much for our country and to think that they are now homeless and now in need.....I hope these cards that are donated will bring a bit of hope to the recipients and, there is still time, if you would like to send cards to this cause (again, please see details here- if you do not have a Splitcoaststampers’ sign-on, it is free to sign up).


Hopefully you will have a chance to visit the above mentioned challenge sites- so many wonderful Design Teams samples and entries!

To create this card:

Ink the train image from Traveler with Stāz-On® Jet Black Ink and stamp onto a piece of Whisper White cardstock.

Trim the panel, color the train with the Stampin’ Write Sahara Sand marker and add distressing to the background with stamps from Timeless Textures (stamped with Sahara Sand Classic Ink).

Mount the panel onto Sahara Sand cardstock, trim and mount onto Night of Navy cardstock and distress with the retired Distressing Tool.

Ink the sentiment from the retired set, Absolutely Fabulous with Stāz-On® Jet Black Ink and stamp onto a piece of Whisper White cardstock.  Create the banner points on the end with the Hexagon Punch (soon to be retired), mount onto Night of Navy cardstock, trim and punch the banner points again with the Hexagon Punch and add texture with Sahara Sand Classic Ink and the Timeless Textures stamp.

Create the background for the next layer using the suitcase, journal and camera from Traveler, stamp onto a piece of Sahara Sand cardstock with Night of Navy Classic Ink (masking the images as you stamp onto the panel).

Trim the stamped background, mount onto Night of Navy cardstock and distress the edges with the Distressing Tool.

The larger background was created with stamps from the Timeless Textures set, stamped with Sahara Sand Classic Ink onto Sahara Sand cardstock, distress the edges with the Distressing Tool and mount onto the Night of Navy card front.

Ink the Timeless Textures images with Night of Navy and stamp onto a piece of Calypso Coral cardstock, cut with the Big Shot™ using the Circle Framelits™ (also cutting the same size circle from Night of Navy cardstock), mount the stamped Calypso Coral circle die cut onto the Night of Navy circle and distress the edges of both with the Distressing Tool.

Layer the card per the sketch and add the Calypso Coral banners (created with the Banner Triple Punch and retired Crimper Tool).

Stamp Sets: Traveler, Timeless Textures, Absolutely Fabulous (retired Stampin’ Up!)

Ink: Stāz-On® Jet Black, Night of Navy, Sahara Sand; Stampin’ Write Marker- Sahara Sand

Paper/Cardstock:  Whisper White, Calypso Coral, Sahara Sand, Night of Navy, retired Calypso Coral DSP

Accessories: Big Shot™, Circle Framelits™, Distressing Tool, Punches-  Banner Triple, Hexagon; retired Night of Navy button, Crimper Tool


Thanks again for stopping by- the new SUO Challenge will be posting soon!!  Have a wonderful week- hugs and God Bless!

Saturday, April 23, 2016

One Layer Mixed Media Card- Congrats, You Did It!


Hi Friends!

I wanted to share one more card that I created this morning that is a bit different for me- this is a one layer card.  That’s right, no layering at all, just score your cardstock , fold and stamp on the front.

Sounds simple, right?  Well, for this shabby-chic, vintage, Mixed Media , have to lots of layers, etc. artist, trust me, it is not!  I truly admire those artists who can design Clean and Simple cards as well as One Layer Cards :-)

Why do it, you ask?  For me, I like to stretch myself and try different techniques and styles so all of my cards do not look the same- lol!  Plus, it makes life interesting to try something new...


If you have not had a chance to visit the above challenge galleries yet, I encourage you to do so- it always amazes me how many different cards can be designed with one color, sketch or theme challenge!

To create this card:

Using sticky note paper, create a rectangle mask on a folded piece of retired Naturals White cardstock.

Create additional masks for the moon/sun and hills, use a Sponge Dauber to apply Pool Party and Pink Pirouette to the sky area and Mossy Meadow to the hills.

Remove the masks and de-static the cardstock with the Embossing Buddy®.

Ink the locomotive image from Traveler with Versamark™ and stamp onto the card front, apply Stampin’ Emboss® Black Embossing Powder and heat set with the Heat Tool.

Repeat the above steps with the sentiments from the soon to be retired set, Bravo.

Add shadows with the Tip Top Taupe Stampin’ Write Marker and white highlights to the train with the Chalk Marker (retired).

Finish off the card by adding a few birds to the sky with a Faber-Castell® XS Black Marker.

Stamp Sets: Traveler, Bravo

Ink: Versamark™, Mossy Meadow, Pink Pirouette, Pool Party; Stampin’ Write Marker- Tip Top Taupe, retired Chalk Marker; Faber-Castell® XS Black Pitt Pen Marker

Paper: Naturals White

Accessories: Paper for masking, 1 ¾” Circle Punch


Thanks again for stopping by!!  I hope you have a wonderful weekend, my friends!

Monday, October 12, 2015

CC552 Vintage Locomotive

Hi Friends!

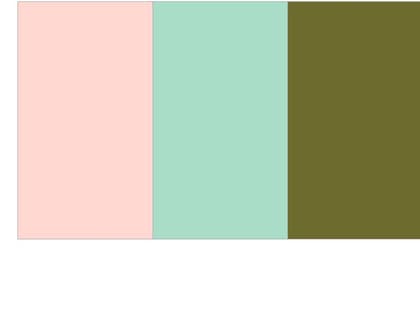
Here is my card for this week’s Splitcoaststampers' CC552 Color Challenge- Pool Party, Pistachio Pudding and Sahara Sand (dessert option is to use your favorite embellishment) along with the  HYCCT1511 "Can I Get a Ride?" Challenge (card with any mode of transportation), Free for All F4A292 “Extra, Read All About It” Challenge (celebrate newsprint) as well as the CAS-ual Chic 004 "Tic, Tac Toe" Challenge (stitching, coloring and distressing).

I tend to use quite a few embellishments and just love this crochet lace that I found on clearance years ago...plus, I cannot seem to create a card without Pearls!  How can I choose a favorite?  Difficult to say which is my very favorite but I did use two of my favs on this card :-)

If you have not had a chance to do, I hope that you will take a moment to visit each of the galleries linked above – great designs by all!

To create this card:

Stamp the train image from Traveler using Stāz-On® Jet Black Ink onto Whisper White cardstock, color using an AquaPainter™ and Classic Ink from the Pool Party and Pistachio Pudding ink pads.

Add a horizon line with the Stampin’ Write Black Marker and additional shadows on the train with the Sahara Sand Stampin’ Write Marker.  Cut the image out using the Big Shot™ with the Squares Collection Framelits™.

Use a sewing machine to stitch the panel onto a piece of Sahara Sand cardstock.  Mount onto a piece of Pistachio Pudding cardstock and use the Distressing Tool to distress the edges.

Distress the edges of a piece of Typeset Specialty Designer Series Paper (DSP) using the Distressing Tool, stitch to the upper part of a piece of Pistachio Pudding cardstock, emboss the entire panel using the Big Shot™ with the retired Lacy Brocade Textured Impressions™ Embossing Folder.

Use a Sponge Dauber to apply Sahara Sand Classic Ink over the Typeset DSP, add the crochet lace and strips of ¼” Pool Party Stitched Satin Ribbon.

Mount the entire card front onto the Pool Party card base.

Use the Big Shot™ with the My Favorite Things™ Stitched Jumbo Fishtail Banner STAX Die to cut a banner from Pool Party cardstock, apply Sahara Sand Classic Ink using a Sponge Dauber and adhere to the front of the card.

Add the triple ¼” Pool Party Stitched Satin Ribbon bow along with the retired Sahara Sand button (using a strip of Pool Party cardstock as the “thread”).

Stamp the Banner Blast image using Memento™ Tuxedo Black Ink onto Whisper White cardstock and punch out with the Banner Punch. 

Punch a piece of Sahara Sand cardstock using the Banner Punch, distress with your fingernail and mount behind the stamped banner.

Add the banner to the focal image panel and mount the focal image to the front of the card using dimensional foam.

Add a few Pearls to the corner to finish off the card.

Stamp Sets: Traveler, Banner Blast (retired)

Ink: Memento™ Tuxedo Black, Pool Party, retired Pistachio Pudding; Stampin’ Write Markers- Basic Black, Sahara Sand

Paper/Cardstock:  Whisper White, Pool Party, Sahara Sand, retired Pistachio Pudding; retired Typeset Specialty DSP

Accessories: Big Shot™, Square Collections Framelits™, MFT Stitched Jumbo Fishtail Banner STAX Die, retired Lacy Brocade Textured Impressions™ Embossing Folder, Banner Punch, Distressing Tool, Sewing Machine, Sponge Dauber, ¼” Pool Party Stitched Satin Ribbon, Sahara Sand Button, Crochet Lace, Pearls 

Thanks again for stopping by- I hope you have a wonderful week, my friends!

Thursday, August 13, 2015

Traveler Locomotive with a Color and Sketch Challenge :-)


Hi Again Stampers!!

I am trying to catch up my postings for my blog and will be sharing several cards throughout the day that I have created for the Splitcoaststampers' Dare To Get Dirty Challenges as well as a few for some of my favorite online challenges. 

This card was created for The Paper Players Claire's PP257 Color Challenge using the RetroSketches RS176 Challenge (love both of these weekly challenge sites!) :-)

Again, if you have not already done so, I hope you will find the time to visit the above sites to check out the wonderful Design Team samples as well as their challenge galleries!

This card was fairly easy to create but took a bit of time with the layering.

Stamp the locomotive image from Stampin' Up! Traveler using Stāz-On® Jet Black Ink, watercolor with an AquaPainter™ along with Bermuda Bay and Old Olive Classic Ink, add color to the train using the Stampin' Write Crumb Cake marker, die cut the image and mount onto cardstock layers, emboss a few pieces of cardstock with the Woodgrain Textured Impressions™ Folder, create some banners with the Banner Punch and layer onto Basic Black banners (also created with the banner punch), add the sentiment using the Hexagon Punch for the banner points and finish by layering all to the card front.

Stamp Sets: Traveler, Teeny Tiny Wishes

Ink: Stāz-On® Jet Black, Bermuda Bay, Old Olive; Crumb Cake Stampin’ Write Marker

Paper: Very Vanilla, Bermuda Bay, Basic Black, Crumb Cake, Old Olive; Typeset Designer Series Paper

Accessories: Big Shot™,  Square Collection Framelits™, Woodgrain Textured Impressions™ Embossing Folder, AquaPainter™, Punches- Banner (for banners), Hexagon (for sentiment banner), Envelope Punch Board (for corner rounder);  Natural Linen Thread, Pearls, retired Antique Copper Hodgepodge Hardware Clip (still have a bunch of this in stock-lol!)


Thanks again for taking the time to stop by- I hope all of you enjoy the rest of the week!  

Tuesday, June 9, 2015

SUO124 Thinking of You on the Starry Sea :-)


Hi Stampers!   

It’s time for the new SUO124 “Stars and Stripes” Challenge (it does not have to be patriotic) and since my last project was patriotic, I decided to use the Star Collection Framelits™ along with the Stylish Stripes Textured Impressions™ Embossing Folder to create my “Stars and Stripes” card.

I also incorporated the Fusion 06/04/15 “Blue Skies and Smooth Sailing”Challenge using their sketch as inspiration as well as some of the colors from the inspiration photo.

I hope you will find the time to check out all the rest of our Design Team ideas as well as those at the Fusion site and come join in on the “Stars and Stripes” fun by creating your own project using Stampin’ Up! Only products!!

To create this card:
Ink the ship image from Traveler with Stāz-On® Jet Black Ink and stamp onto a piece of Whisper White cardstock.  Stamp another image onto a piece of scrap paper to use as a mask.
Create a mask for the sun using the 1 ¼” Circle Punch.  
Place the mask for the ship over the stamped image and place the mask for the sun over the ship’s mask and onto the Whisper White cardstock.
Use Sponge Daubers to apply Melon Mambo and Tangelo Twist Classic Ink for the sky, create a mask for the skyline and apply Pool Party and Island Indigo to the water area.
Remove the masks and color the ship with the Island Indigo Stampin’ Write Marker (add shadows with the Sahara Sand marker).
Darken the sea area for the shadow of the ship and add additional lines to the water with the Basic Black Stampin’ Marker.
Use the Big Shot™ with the Star Collection Framelits™ to cut out the image and also cut the same size star from Island Indigo and Tangelo Twist cardstock.
Cut the Island Indigo and Tangelo Twist stars in half and mount behind the focal image.
Ink the World Map background stamp using Island Indigo Classic Ink and stamp onto a piece of Pool Party cardstock.
Trim the piece to 1 ½” and punch the banner end with the new Banner Triple Punch.
Trim a piece of Island Indigo cardstock to 1 ¾” and punch the banner with the Banner Triple Punch, mount the World Map banner to the Island Indigo layer.
Trim a piece of Tangelo Twist cardstock to approx. 2” and punch with the Banner Triple Punch, add the layered World Map pieces to complete the vertical banner.
Emboss a piece of Whisper White cardstock using the Big Shot™ along with the Stylish Stripes Textured Impressions™ Embossing Folder, trim and mount onto a piece of Island Indigo cardstock, trim and mount onto the Tangelo Twist card base.
Adhere the layered World Map banner strip to the embossed background and add the star focal image using Stampin’ Dimensionals®. 
Stamp the sentiment from Teeny Tiny Wishes using Stāz-On® Jet Black Ink and create the banner points with the Banner Punch.
Mount onto pieces of Island Indigo and Tangelo Twist (also using the Banner Punch to create the banner points), adhere to the card front using Stampin’ Dimensionals® and add a few Rhinestones to finish off the card.
Stamp Sets:  Traveler, World Map, Teeny Tiny Wishes
Ink: Stāz-On® Jet Black, Island Indigo, Melon Mambo, Pool Party, Tangelo Twist; Stampin’ Write Markers- Island Indigo, Sahara Sand, Basic Black
Paper/Cardstock: Whisper White, Island Indigo, Tangelo Twist
 Accessories: Big Shot™, Star Collection Framelits™, Banner Triple Punch, Banner Punch, Sponge Daubers, Rhinestones, scrap paper (for masking)

Thanks again for stopping by – I hope to see your Stampin’ Up! Only project in our “Stars and Stripes”challenge  gallery!

Monday, June 1, 2015

Traveler- Praying for You :-)

Hi Again Stampers!

This card was created using The Paper Players PP247 Tic-Tac-Toe Challenge (Blue, Embossing, DSP) along with the Splitcoaststampers’ SC462 Sketch Challenge (see details here and gallery here). 

I needed a few masculine cards for several men that we have been praying for and thought that the Traveler set would be perfect for a masculine card :-)

If you have not had a chance to visit the above challenge sites yet, again, I would encourage you to do so- great inspiration from all!

To create this card:

Use the Embossing Buddy® to de-static a piece of Whisper White cardstock. 

Ink the ship image from Traveler using Versamark™ ink, then ink again using Night of Navy Classic Ink and stamp onto the prepared cardstock. 

Apply Stampin’ Emboss® Clear Embossing Powder and heat with the Heat Tool.

Use the Big Shot™ with the My Favorite Things® Stitched Square Dies to cut out the image and mount onto a piece of Night of Navy cardstock, trim and mount onto a piece of Real Red cardstock.

Trim a piece of Maritime Designer Series Paper (DSP) and mount onto a piece of Night of Navy cardstock, trim and mount onto a piece of Real Red cardstock.

Cut the Night of Navy map piece of Maritime DSP in half, emboss with the Big Shot™ and the Woodgrain Textured Impressions™ Embossing  Folder and mount onto a piece of Night of Navy cardstock (splitting the pieces). 

Add a scrap strip of Real Red cardstock to the center, trim and mount onto a piece of Real Red cardstock, trim and mount onto the Whisper White card base.

Ink the sentiment from the Our Daily Bread Designs (ODBD) Doily Blessings set with a Night of Navy Stampin’ Write Marker omitting the “I am”.

Trim the sentiment and create the banner points with the Banner Punch.

Mount onto a piece of Night of Navy cardstock,  trim and create the banner points with the Banner Punch as well.
Adhere the sentiment to the focal image and add the retired Real Red button (with a few scrap strands of Night of Navy cardstock for “thread”).

Use the Banner Punch to create the banners and adhere behind the focal image.

Mount the Coastal Cabana Star Panel onto the card front on a diagonal (per the sketch) and add the focal image using Stampin’ Dimensionals® to finish off the card.

Stamp Sets:  Traveler, Doily Blessings (ODBD)

Ink: Versamark™, Night of Navy Classic Ink; Night of Navy Stampin’ Write Marker

Paper/Cardstock:  Whisper White, Night of Navy, Real Red; Maritime DSP

Accessories:  Big Shot™, Woodgrain Textured Impressions™ Embossing Folder, Embossing Buddy®, Stampin’ Emboss® Clear Embossing Powder, Heat Tool, Banner Punch, retired Real Red button


Thanks again for stopping by- I will be sharing a few more cards later this evening :-)

Sunday, March 22, 2015

Traveler- Three Challenges in One!


Hi Again Stampers!

I hope all of you are having a great weekend so far!  I rearranged my stamping area this week and did not have a chance to stamp until last night, so I wanted to share one more card that I was able to complete for a few of my favorite challenges- the SR271 Sketch Challenge using the FM201 FridayMashup! Color Challenge and the Splitcoaststampers F4A260 Double, Triple Challenge (three inks, three elements- see the details here and the gallery here). 

Again, I hope you have the time to stop by the above sites to check out the terrific inspiration from the Design Teams as well as the other entries!

To create this card:

Ink the ship stamp from Traveler using the Memento™ Tuxedo Black Ink and stamp onto Whisper White cardstock. 

Use the Big Shot™ with the MFT Stitched Rectangle Dies to cut out the image. 
Color the image using an AquaPainter™ with Pacific Point Classic Ink for the ship’s hull and the ocean. 

Create a mask using the 1 3/8” Circle Punch and sponge Pacific Point along with Rich Razzleberry Classic Ink over the sky area (using the AquaPainter™ to blend over the moon, etc.).  Add color using the Smoky Slate Stampin’ Write marker for the smoke, the Rich Razzleberry as well as Pacific Point markers to add additional detail to the ship and Basic Black to add waves and a few birds to the sky.

Sponge a bit of Pacific Point Classic Ink over the edges and mount onto a piece of Rich Razzleberry cardstock.  Add the bitty flag with a scrap of DSP (I did not line up the stamped image low enough on the die- oops!) :-)

Create the banners with the retired Banner Blast set using Pacific Point and Rich Razzleberry Classic Ink and punch out with the Banner Punch.

Add the banners to the back of the focal image along with another one from Rich Razzleberry cardstock.

Use the Big Shot to emboss a piece of retired High Tide Designer Series Paper (DSP) with the Woodgrain Textured Impressions™ Embossing Folder and mount onto a piece of Pacific Point cardstock.  Trim and mount the panel onto the Rich Razzleberry card base.

Use the Big Shot™ with the Circle Collection Framelits™ to cut a portion of a large circle from the retired High Tide DSP as well as Pacific Point cardstock. 

Mount the circles onto the card front and add a vertical strip of the High Tide DSP (Smoky Slate with anchors adhered to Pacific Point cardstock).

Add the focal image using Stampin’ Dimensionals® and adhere the three retired Circle Brads to finish off the card (FYI- I removed the brad points and used Hot Glue to mount the brads).

Stamp Sets:  Traveler, Banner Blast

Ink: Memento™ Tuxedo Black Ink, Pacific Point, Rich Razzleberry; Stampin’ Write Markers- Pacific Point, Rich Razzleberry, Smoky Slate, Basic Black

Paper:  Whisper White, Pacific Point, Rich Razzleberry; retired High Tide DSP
Accessories: Big Shot™, Circle Collection Framelits™, MFT Stitched Rectangular Dies, Banner Punch, retired Circle Brads, Sponge Dauber, AquaPainter™


Thanks again for visiting- now off to do some housework and get some rest :-)  Have a great day, my friends!

Friday, March 6, 2015

Thinking of You- A Color, Sketch and Theme Challenge :-)


Hi Stampers! 

This card was created using the CQC282 ColourQ Challenge (I substituted Marina Mist for Brocade Blue) along with the CCMC345 Create with Connie and Mary Sketch Challenge and the Splitcoaststampers’ WT521 “Hoop It Up” Challenge (details here and gallery here).   

I hope you will have the time to check out all of the linked sites- gorgeous creations and inspiration from all!

To create this card:

Using Stāz-On© Jet Black Ink stamp the ship from Traveler, ledger and compass from The Open Sea, sentiment from Moon Lake onto Very Vanilla cardstock and the World Map onto Marina Mist and Soft Sky cardstock.

Cut the World Map images diagonally, distress the edges with the Distressing Tool and mount onto a piece of Basic Black cardstock. 

Using a Sponge Dauber, apply Baked Brown Sugar Classic Ink to edges and over the background to “antique” the paper.

Add the strip of diagonal Basic Black cardstock as per the sketch (plus this covers the seams).

Use the Big Shot™ with the Circle Collection Framelits™ to cut out the ship and ledger images plus a circle from a piece of Typeset Designer Series Paper (DSP)- also cut the same size circles from Basic Black cardstock to add as frames behind the images.

Create a moon mask from a piece of scrap paper and apply Soft Sky Classic Ink onto the ship image for the sky, mask the ship a bit and apply Marina Mist for the ocean.  

Color the ship using the Marina Mist Stampin’ Write marker and add a shadow for the ship along with a few birds in the sky with the Basic Black Stampin’ Write marker. 

Mount the image onto the split Basic Black circle frame, use a Distressing Tool to lightly distress the edges.

Do the same for the Typeset Designer Series circle as well as the ledger and compass.

Use the Marina Mist and Soft Sky Stampin’ Write markers to color the compass and use a Sponge Dauber with Baked Brown Sugar Classic Ink to “antique” the paper on all of the circle elements. 

Ink the large splatter stamp from Gorgeous Grunge using Baked Brown Sugar Classic Ink and stamp over all images and the background.

Mount the Typeset DSP and ledger circles to the card front.  Add the ship image along with the compass using Stampin’ Dimensionals®.

Use the Word Window Punch to punch out the sentiment, add the banner using the Hexagon Punch, apply Baked Brown Sugar with a Sponge Dauber and mount the sentiment using Stampin’ Dimensionals®.

Add a small Rhinestone to the center of the compass and a few larger ones to the diagonal Basic Black cardstock to finish off the card.

Stamp Sets: Traveler, World Map, The Open Sea, Moon Lake, Gorgeous Grunge

Ink: Stāz-On© Jet Black, Marina Mist, Soft Sky, Baked Brown Sugar; Stampin’ Write Markers- Marina Mist, Soft Sky, Basic Black

Paper:  Very Vanilla, Marina Mist, Soft Sky, Basic Black; Typeset DSP

Accessories: Big Shot™, Circle Collections Framelits™, Distressing Tool, Sponge Daubers, Hexagon Punch , Rhinestones


Thanks again for visiting- I hope you have a wonderful Friday!!
Related Posts Plugin for WordPress, Blogger...