Showing posts with label Banner Triple Punch. Show all posts

Friday, December 11, 2015

Sing Choirs of Angels


Hello Friends!

I am still working on Christmas cards and decided to use the ODBDSLC265 Color Challenge  (it was a bit difficult for me to see all of the colors in this array so I used a shade of green closer to the pine needles with Vanillam Cherry and Gold- hope that was OK :-)) along with the ‘Tis The Season "O Christmas Tree" Challenge  and Simon Monday “Holly Jolly Stamping” Challenge for the design on this set of Christmas cards.

If you have not already had a chance to do so, I hope you will visit the above challenge sites and check out the amazing Design Team samples as well as the galleries!

I just love the new Our Daily Bread Designs (ODBD) Sing Choir of Angels stamp set and it was an easy set to use for multiple cards.  FYI- I already had some tall narrow envelopes on hand (4"x6") and decided to create cards to fit the envelopes:-)

To create this card:

Pearl was added to the tree top after photo was already taken:-)
De-static a piece of Very Vanilla cardstock using the Embossing Buddy®, stamp the ODBD Sing Choirs of Angels using Versamark™ ink onto a piece of Very Vanilla cardstock, apply Stampin’ Emboss® Gold Embossing Powder and heat set with the Heat Tool.

Trim the panel and mount onto a piece of Cherry Cobbler cardstock.
Create the banner using Wild Wasabi and retired More Mustard cardstock (I used the Banner Triple Punch), adhere the two layers together, mount behind the focal image panel and add the 5/8” Gold Satin Ribbon bow.

Trim the piece of retired designer paper and mount onto the Cherry Cobbler card front, add the focal image panel with dimensional foam and finish off with the Pearl in the center of the star on the tree.

Another one of the DSP designs 
I was able to create 24 of these cards in a few evenings with the help of my MISTI® Tool (love my MISTI®)!

Stamp Sets: Sing Choir of Angels (ODBD)

Ink: Versamark™

Paper: Very Vanilla, Cherry Cobbler, Wild Wasabi, retired More Mustard and Be of Good Cheer DSP (all Stampin’ Up!)

Accessories: Embossing Buddy®, Stampin’ Emboss® Gold Embossing Powder, Heat Tool, 5/8” Gold Satin Ribbon, Pearls, Banner Triple Punch, MISTI® Tool


One more of the designs 
Thanks again for taking the time to stop by- the ladies in my Bible Study have been such a wonderful blessing to me this year!!  They seemed to enjoy the cards and I am so thankful that I was able to create them for my friends!  

Hugs and have a great weekend- God Bless!

Monday, August 24, 2015

The Wilderness Awaits- Thinking of You :-)


Hi Again Stampers!!

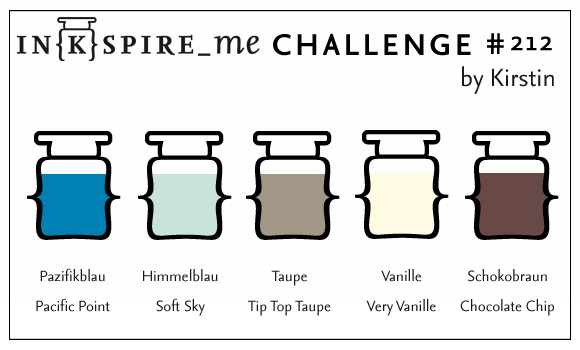
This card was created using the Create with Connie and Mary CCMC369 Sketch Challenge along with the Just Add Ink JAI276 "Cards for Males" Challenge and the IN{K}SPIRE_Me#212 Color Challenge (oops! just realized I used Whisper White versus Very Vanilla- hope I will not be disqualified :-))

I am trying to use up some of my retired stash of DSP, ribbons and hardware so the embellishments along with the Designer Series Paper (DSP) are retired...

If you have not already done so, I hope you will find the time to visit the above sites to check out the great Design Team samples as well as their wonderful galleries!

To create this card:

Stamp the elk image from The Wilderness Awaits using Stāz-On® Jet Black Ink onto Whisper White cardstock, watercolor with an AquaPainter™ using Stampin’ Write Markers- Soft Sky and Pacific
Point for the sky area, Tip Top Taupe and Chocolate Chip for the elk and stones. 

Cut the image out with the Big Shot™ and the Oval Collections Framelits™, cutting another oval the same size from Chocolate Chip cardstock as well.

Split the Chocolate Chip oval in half and adhere behind the focal image.

Add a few more stones to the bottom of the image using the Basic Black Stampin’ Write Marker.

Use the Big Shot™ with the Woodgrain Textured Impressions™ Embossing Folder to emboss a piece of retired Sweater Weather Soft Sky DSP, trim and mount onto a piece of Tip Top Taupe cardstock, trim and mount onto Chocolate Chip cardstock, trim and mount onto Pacific Point cardstock, trim once more and mount onto the Chocolate Chip card base.

Add the panels of retired DSP mounted onto Chocolate Chip along with the banners created with the Banner Triple Punch (per the sketch).

Stamp the sentiment using Stāz-On® Jet Black Ink onto Whisper White cardstock and punch out with the Word Window Punch.
Mount the sentiment along with the focal image to the card front using Stampin’ Dimensionals®.

Trim a piece of retired Pacific Point Striped Grosgrain Ribbon, fray the ribbon, cut a piece of retired 5/8” Chocolate Chip Satin Ribbon in half, fold and adhere both behind the focal image.

Fray a piece of retired Hemp Twine and tie onto the retired Antique Pewter Hodgepodge Hardware Clip- add the clip to the focal image to finish off the card.

Stamp Sets: The Wilderness Awaits, Teeny Tiny Wishes

Ink: Stāz-On® Jet Black; Stampin’ Write Markers- Soft Sky, Pacific Point, Tip Top Taupe, Chocolate Chip

Paper: Whisper White, Pacific Point, Tip Top Taupe, Chocolate Chip; retired Sweater Weather DSP, retired Pacific Point DSP (from Hostess Level I Pack)

Accessories: Big Shot™,  Ovals Collection Framelits™, AquaPainter™, Banner Triple Punch, retired items- Hemp Twine, 5/8" Pacific Point Striped Grosgrain Ribbon,  5/8” Chocolate Chip Satin Ribbon, Antique Pewter Hodgepodge Hardware Clip


Thanks again for taking the time to stop by- I hope all of you have a marvelous day!

Tuesday, June 9, 2015

SUO124 Thinking of You on the Starry Sea :-)


Hi Stampers!   

It’s time for the new SUO124 “Stars and Stripes” Challenge (it does not have to be patriotic) and since my last project was patriotic, I decided to use the Star Collection Framelits™ along with the Stylish Stripes Textured Impressions™ Embossing Folder to create my “Stars and Stripes” card.

I also incorporated the Fusion 06/04/15 “Blue Skies and Smooth Sailing”Challenge using their sketch as inspiration as well as some of the colors from the inspiration photo.

I hope you will find the time to check out all the rest of our Design Team ideas as well as those at the Fusion site and come join in on the “Stars and Stripes” fun by creating your own project using Stampin’ Up! Only products!!

To create this card:
Ink the ship image from Traveler with Stāz-On® Jet Black Ink and stamp onto a piece of Whisper White cardstock.  Stamp another image onto a piece of scrap paper to use as a mask.
Create a mask for the sun using the 1 ¼” Circle Punch.  
Place the mask for the ship over the stamped image and place the mask for the sun over the ship’s mask and onto the Whisper White cardstock.
Use Sponge Daubers to apply Melon Mambo and Tangelo Twist Classic Ink for the sky, create a mask for the skyline and apply Pool Party and Island Indigo to the water area.
Remove the masks and color the ship with the Island Indigo Stampin’ Write Marker (add shadows with the Sahara Sand marker).
Darken the sea area for the shadow of the ship and add additional lines to the water with the Basic Black Stampin’ Marker.
Use the Big Shot™ with the Star Collection Framelits™ to cut out the image and also cut the same size star from Island Indigo and Tangelo Twist cardstock.
Cut the Island Indigo and Tangelo Twist stars in half and mount behind the focal image.
Ink the World Map background stamp using Island Indigo Classic Ink and stamp onto a piece of Pool Party cardstock.
Trim the piece to 1 ½” and punch the banner end with the new Banner Triple Punch.
Trim a piece of Island Indigo cardstock to 1 ¾” and punch the banner with the Banner Triple Punch, mount the World Map banner to the Island Indigo layer.
Trim a piece of Tangelo Twist cardstock to approx. 2” and punch with the Banner Triple Punch, add the layered World Map pieces to complete the vertical banner.
Emboss a piece of Whisper White cardstock using the Big Shot™ along with the Stylish Stripes Textured Impressions™ Embossing Folder, trim and mount onto a piece of Island Indigo cardstock, trim and mount onto the Tangelo Twist card base.
Adhere the layered World Map banner strip to the embossed background and add the star focal image using Stampin’ Dimensionals®. 
Stamp the sentiment from Teeny Tiny Wishes using Stāz-On® Jet Black Ink and create the banner points with the Banner Punch.
Mount onto pieces of Island Indigo and Tangelo Twist (also using the Banner Punch to create the banner points), adhere to the card front using Stampin’ Dimensionals® and add a few Rhinestones to finish off the card.
Stamp Sets:  Traveler, World Map, Teeny Tiny Wishes
Ink: Stāz-On® Jet Black, Island Indigo, Melon Mambo, Pool Party, Tangelo Twist; Stampin’ Write Markers- Island Indigo, Sahara Sand, Basic Black
Paper/Cardstock: Whisper White, Island Indigo, Tangelo Twist
 Accessories: Big Shot™, Star Collection Framelits™, Banner Triple Punch, Banner Punch, Sponge Daubers, Rhinestones, scrap paper (for masking)

Thanks again for stopping by – I hope to see your Stampin’ Up! Only project in our “Stars and Stripes”challenge  gallery!

Sunday, May 24, 2015

Thank You for Your Service and Sacrifice

Hi Stampers! 

Memorial Day is upon us once more and I am so thankful for the men and women who have served our country and given the ultimate sacrifice for our freedom- may we never forget their service and sacrifice!

I wanted to create one more patriotic card with Memorial Day in mind and chose to find inspiration from the As You See It AYSI088 Sketch Challenge as well as the Splitcoaststampers’ Free For All FA274 “Oh My Stars” (see details here and gallery here). 

If you have not had a chance to do so, I hope you will find the time to visit the challenge sites- they all have wonderful Design Team samples as well as inspiration from their galleries!

To create this card:

Use Stampin’ Write Markers to carefully color the eagle image from the Our Daily Bread Designs (ODBD) Land of the Free stamp set... Basic Black for the white part of the feathers, Night of Navy for the star area and retired Riding Hood Red for the stripes on the feathers.  

Add additional color to the stripes with a Cajun Craze marker, Daffodil Delight for the beak and Sahara Sand over the entire image.  Add Ranger® Tim Holtz® Antique Linen Distress Stain over the entire image to “antique” a bit more.

Fussy-cut the eagle image and mount onto Vary Vanilla cardstock, fussy-cut again allowing a bit of the Very Vanilla cardstock to show and set aside (I decided to add this step since the eagle seemed to blend a bit too well with the background paper I chose- you could of course, omit this step :-)). 

Mount the Authentique® Price Collection paper onto Very Vanilla cardstock, trim and mount onto Riding Hood Red cardstock, trim and mount onto the Night of Navy card base.

Create the vertical strip for the sketch leaving a portion of Very Vanilla in the center for the sentiment.

Create the banners using the new Banner Triple  Punch for the banners (they are not as thick as the ones that the punch would normally make, just insert the banners and flip the punch over so you can see the end of the paper to punch the banner points) and mount onto the vertical strip. 

Add the Antique Brass brads and mount the layered vertical strip to the card front.

Ink the sentiment from the retired Stampin’ Up! Service and Sacrifice set using the Riding Hood Red marker, stamp onto a piece of Very Vanilla cardstock (I used a piece in my scraps that had been previously punched with the Note Tag Punch), trim the edges and mount onto a piece of Riding Hood Red cardstock (again, I used the Note Tag Punch to create the curve on the left hand side).

Mount the sentiment onto the card front and add the eagle with Stampin’ Dimensionals®.

Ink the star from the ODBD Land of the Free set with the Night of Navy and Riding Hood Red Stampin’ Up! markers and stamp onto a piece of Very Vanilla cardstock that had been distressed with Ranger® Tim Holtz® Antique Linen Distress Stain.

Fussy-cut the star, add the Antique Brass brad to the center and mount the star to the star to the card front with Stampin’ Dimensionals®.

To finish off the card, repeat the same steps as above with the flag (from the Stampin’ Up! Service and Sacrifice set).

Stamps:  Service and Sacrifice (retired SU!), Land of the Free (ODBD)

Ink: Stampin’ Write Markers- Basic Black, Cajun Craze, Cherry Cobbler, Daffodil Delight, Night of Navy, Sahara Sand, retired Riding Hood Red; Ranger® Tim Holtz® Antique Linen Distress Stain

Paper: Very Vanilla, Night of Navy, retired Riding Hood Red; Authentique® Pride Collection

Accessories: Banner Triple Punch, Note Punch; Antique Brass brads


Thanks again for stopping by- my husband is on vacation today and we will be reflecting on the lives that were sacrificed for our freedom today as we take a day to remember.  

I hope all of you will have the time to take a moment today to think about those that have gone before you to keep our country free!!    I am so thankful that the Lord has allowed the United States of America to remain free and that He sent His Son to give the Ultimate Sacrifice for all of us- may we never forget!!
Related Posts Plugin for WordPress, Blogger...