
Hi Friends!
It’s time for the SUO147 “Congratulations” Challenge and I
decided to create another card for the Splitcoaststampers’ April 2016 Cards for
A Cause (see details here about this card drive).
 I also incorporated the Create with Connie and Mary CCMC403 Sketch Challenge along with the IN{K}SPIRE_me #246 Color Challenge.
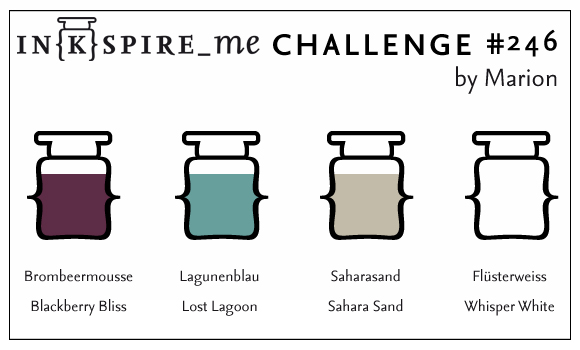 I hope you will have a
chance to check out my sister Design Team member samples at the SU-Only Challenge site as well as the fantastic Design Team samples and entries at the other
galleries- wonderful inspiration from all!
I hope you will have a
chance to check out my sister Design Team member samples at the SU-Only Challenge site as well as the fantastic Design Team samples and entries at the other
galleries- wonderful inspiration from all!  To create this card:
The background was designed using the Smakin' Acetate Technique using a page protector or clear envelope (acetate)- open one
side and the bottom to create a “book”, press the Blackberry Bliss and Lost
Lagoon Classic Ink pads onto the right hand side (I use the ink pads directly versus the markers as in the tutorial), spritz with water, close the
envelope and “smoosh” the ink a bit with your finger, reopen the envelope and
insert a piece of Whisper White cardstock onto each side (you will receive two
background panels).
Trim the one panel, stamp the coral image from By The Tide with Blackberry Classic Ink, de-static the panel,
ink the “Bravo!” sentiment with Versamark™ ink, re-ink immediately with
Blackberry Bliss Classic Ink, stamp onto the panel, apply Stampin’ Emboss®
Clear Embossing Powder and heat set with the Heat Tool.
Allow the embossed panel to cool, ink the “Bravo!” sentiment with
Versamark™ ink, offset from the original stamped sentiment a bit to the left, stamp
onto the panel, apply Stampin’ Emboss® White Embossing Powder and heat set with
the Heat Tool.
Trim the panel and mount onto a piece of Blackberry Bliss
cardstock.
Ink the Chalk Lines border stamp using Blackberry Bliss and
stamp onto the left hand side of the remaining panel (created in step 1 with the
Smakin’ Acetate technique).
Ink the splatter stamp from Timeless Textures with Lost Lagoon
Classic Ink and add a bit of distressing to the background as well as the
embossed sentiment focal image panel.
Trim the background panel, decide where you would like to
place the focal image panel and stamp the “you did it” stamp with Blackberry
Bliss Classic Ink.
Mount the trimmed background panel onto the Blackberry Bliss
card base.
Ink the sea turtle image with Stāz-On® Jet Black Ink and stamp
onto Whisper White cardstock.
Color the image with and AquaPainter™ and ink from the Sahara
Sand and Lost Lagoon Classic Ink Pads.
Use the Sahara Sand and Lost Lagoon Stampin’ Write Markers to
add shadows and additional color, fussy-cut the image and apply Clear Wink of
Stella® over the turtle.
Mount the focal image panel along with the sea turtle using
dimensional foam to finish off the card.
Stamp Sets: From Land
to Sea, By The Tide, Bravo, Chalk Lines, Timeless Textures
Ink: Versamark™, Blackberry
Bliss, Lost Lagoon, Sahara Sand; Stampin’ Write Markers- Lost Lagoon, Sahara
Sand ; Clear Wink of Stella®
Paper/Cardstock: Whisper White, Blackberry Bliss
Accessories: Clear
Envelope, Embossing Buddy®, Heat Tool, Stampin’ Emboss® White and Clear
Embossing Powder
Thanks again for stopping
by and we hope to see your Stampin’ Up! Only project in our “Congratulations” Challenge gallery!

13 comments:
Wow I love the background you've created. It's stunning! Great technique! And I love how you've then used the sketch for the layout. Great card! Thanks for joining us at Create with Connie & Mary this week!
love the colors and technique you used to create this card. i know everyone who reads your blog will also appreciate the directions on how to create the background. thank you for stamping along with the Create with Connie and Mary challenge!
Your background is SENSATIONAL! You "smacked the acetate" just perfectly! Spectacular card! Thank you so much for taking your time to play along and share your talent with us at Create with Connie and Mary!
Oh my! Wow, what a cool background! Ties in perfectly with the oceanic images! Beautiful creation! Thanks for playing the Create with Connie and Mary sketch challenge this week!
Wow! Fabulous look - especially in those colors! I love the crisp black details and tiny borders, too! Thank you for joining us at Create with Connie and Mary!
What a terrific card! And, combining all these challenges - even better! Thank you for joining us at Create with Connie and Mary this week!
Your card is stunning! Love the background. Thanks for joining us at Inkspire me. Marion
Thanks for playing IN{K}SPIRE_me. Best Wishes, Jenny
Oh gosh...I haven't done Smackin' Acetate for years! What a great background! LOVE the colors. Wonderful job! Thanks for playing along with the sketch challenge this week on Create with Connie and Mary!
What a fabulous showcase of this fun technique Julie - I love the splash of colours on your card! As for the turtle, he reminds me of many pleasant hours on scuba in the Caribbean - I bought this set too just for him! Thanks for joining us over at Create With Connie and Mary this week!
Such an amazing card :D
Thanks for sharing the tutorial - I need to try this!
Thanks for joining us at In{k}spire_me!
All the best, Christine
What a STUNNING background you created Julie...AMAZING!!! LOVE the bright colors! Thanks for playing along this week in the Create with Connie and Mary Thursday Challenge!
Wow, Julie! What a COOL card!!!! I love the colors you've chosen. Such a neat theme as well! Thanks for joining us at Create with Connie and Mary this week!
Post a Comment