Showing posts with label Congratulations. Show all posts

Monday, April 11, 2016

Bravo! You Did It!


Hi Friends!

I had another chance to play around the Smakin’ Acetate technique today (see the Splitcoaststampers’ tutorial here) and decided to use the PaperCraft Crew PCCCS189 Sketch Challenge along with the Splitcoaststampers’ CC564Color Challenge and the Cards for a Cause April C4AC38 Challenge.

 
If you have not had a chance to visit the above challenge site galleries yet, I highly encourage you to do so- fabulous inspiration from all!

To create this card:

For the background, cut open a clear envelope (I slit the one side, top and bottom of a clear packaging envelope to create an opening like a book), add Pacific Point  and Cucumber Crush Classic Ink directly to the inside of the clear envelope, spritz with water and “close” the top part of the envelope.

Smoosh the ink inside with your fingers, open the envelope and two pieces of Whisper White cardstock down onto the ink on both sides of the envelope.

Dry the panels with the Heat Tool and set one aside for a future project.

Trim the “smooshed” background panel, repeatedly stamp the small splatter stamp from Timeless Textures with Sahara Sand Classic Ink over the background, mount onto Sahara Sand cardstock, trim and mount onto the Pacific Point card base.

Ink the sentiments from Bravo using Pacific Point Classic Ink and stamp onto the card front.

Use the Big Shot™ with the Banner Framelits™ to cut out the banner from Whisper White, Cucumber Crush and Pacific Point cardstock and use the Lots of Tags Framelits™ to cut the tag element from Sahara Sand cardstock.

Emboss the Whisper White banner with the Chevron Textured Impressions™ Embossing Folder and layer onto the Pacific Point and Cucumber Crush banners.
Use the Big Shot™ with the Boho Chic Textured Impressions™ Embossing Folder to emboss the Sahara Sand tag, cut off the one end of the tag and attach behind the layered banner.

Mount the banner onto the card front with dimensional foam, add the stamped Pacific Point and Cucumber Crush strips to the top (also mounted with dimensional foam) along with the retired Silver Basics Designer Button.

Using the Black Stampin’ Archival Ink Pad, stamp the sailfish image (From Land to Sea) onto Whisper White cardstock, heat set the ink with the Heat Tool and use an AquaPainter™ with Sahara Sand and Pacific Point Classic Ink to watercolor the image.

Fussy cut the sailfish, add Clear Wink of Stella® over the image and mount onto the layered banner with dimensional foam to finish off the card.

Stamp Sets:  From Land to Sea, Timeless Textures, Bravo

Ink: Basic Black Stampin’ Archival, Cucumber Crush, Pacific Point, Sahara Sand, Clear Wink of Stella®

Paper/Cardstock: Whisper White, Cucumber Crush, Pacific Point, Sahara Sand

Accessories:  Big Shot™, Banner and Lots of Tags Framelits™, Boho Chic and Chevron Textured Impressions™ Embossing Folder, AquaPainter™, Silver Basics Designer Button (retired)


Thanks again for taking the time to stop by- I hope you have a wonderful week, my friends!

Saturday, May 30, 2015

PPA253 Four Feathers Congratulations :-)

Hi Stampers! 

I had a great time stamping with friends today- love it when we can get together!! 

After dinner this evening, I had the chance to design a card using the fun PPA253 Pals Paper Arts Sketch using a soon-to-be retired stamp set, Four Feathers.

If you have not had a chance to do so, I hope you will find the time to visit the Pals Paper Arts site- such wonderful inspiration from their Design Team as well as their challenge gallery!

To create this card:

Create the fun background layer from Back to Black Designer Series Paper (DSP) and mount onto a piece of Basic Black cardstock.

Adhere the background layer onto a piece of Whisper White cardstock, trim and mount onto the Basic Black card base.

Trim a piece of Tempting Turquoise DSP, round the corners with the Envelope Punch Board and emboss with the Big Shot™ and the Arrows Textured Impressions™ Embossing Folder.

Adhere to a piece of Basic Black cardstock, trim and round the corners with the Envelope Punch Board.

Use the Sanding Block to lightly sand the DSP to bring out the white core.

Ink the feather stamps using Stāz-On® Jet Black Ink and stamp onto a piece of Whisper White cardstock.

Use the Big Shot™ with the Feather Framelits™ to cut out the feathers, trim a bit closer to the edge of the feathers, cut into each to create a more realistic feather edge and mount the three feathers onto the embossed Tempting Turquoise panel.
Create the Whisper White bow using the Bow Builder Punch, add the Tempting Turquoise button (with Basic Black cardstock strands as “thread) to the center and add the bow to the panel.

Ink the sentiment using Stāz-On® Jet Black Ink and stamp onto a piece of Whisper White cardstock, trim and create the banner points using the Banner Punch, mount onto a piece of Basic Black cardstock and use the Banner Punch to create the banner points.

Add the sentiment to the bottom of the panel and mount the panel onto Stampin’ Dimensionals® to finish off the card.

Stamps: Four Feathers, Express Yourself

Ink: Stāz-On® Jet Black

Paper: Whisper White, Basic Black; Back to Black and Tempting Turquoise DSP

Accessories: Big Shot™, Feather Framelits™, Arrows Textured Impressions™ Embossing Folder, Sanding Block, Punches- Banner and Bow Builder,  Tempting Turquoise button


Thanks again for visiting- I hope you have a wonderful weekend!

Thursday, February 20, 2014

CAS Patriotic Star


Hi Stampers!

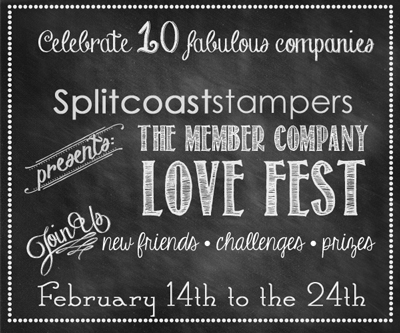
I had a chance to stamp today and decided to create a card for LeAnne’s CAS PP183Challenge at The Paper Players along with the Splitcoaststampers Love Fest LOVEFEST2014GChallenge to use scoring and WT467 Starry Eyed Challenge

If you have not had a chance to check out both sites, I hope you will take the time to visit- great inspiration by all!

I love this retired star, Christmas Star and thought that it could be used for other occasions versus just for Christmas....I decided to create a patriotic card...

To create this card:

Use Stampin’ Write markers in Cherry Cobbler and Midnight Muse (alternating the colors for each panel of the star) and stamp the image onto Whisper White cardstock. 

 *** HINT *** “Huff” onto the stamp for a second image to be used at a later date before cleaning the stamp :-)

Carefully cut out the stamped image by hand and use the Simply Scored Tool to create score lines, fold onto the lines to create a dimensional star.

Ink the diagonal line image stamp from Gorgeous Grunge using Cherry Cobbler Classic ink,  the splatter stamp using Midnight Muse Classic Ink and stamp off before stamping onto a piece of Whisper White cardstock. 

Trim and adhere onto a piece of Midnight Muse cardstock, trim again and mount onto the Cherry Cobbler card base.

Stamp the sentiment from Express Yourself using Midnight Muse Classic Ink onto Whisper White cardstock.  Create a banner using the Hexagon Punch and mount onto a piece of Midnight Muse cardstock (using the Hexagon Punch to create banner points as well). 

Mount the star and banner to the card front using Stampin’ Dimensionals®.  Add a few Rhinestones to finish off the card. 

Stamp Sets: Christmas Star, Gorgeous Grunge, Express Yourself

Ink: Cherry Cobbler, Midnight Muse; Stampin’ Write Markers- Cherry Cobbler, Midnight Muse

Paper: Whisper White, Cherry Cobbler, Midnight Muse

Accessories: Rhinestones, Hexagon Punch


Thanks again for taking the time to stop by and visit- I hope all of you enjoy the rest of the week!
Related Posts Plugin for WordPress, Blogger...