Showing posts with label Christmas Star. Show all posts

Wednesday, November 30, 2016

Merry Christmas Star


Hi Friends!

I hope all of you are having a wonderful week so far!  It’s time for the new Splitcoaststampers’ SC621Sketch Challenge and I just love the sketch that Diane designed for us this week!

I decided to create a Clean and Simple (CAS) Christmas card with the retired Stampin’ Up! Christmas Star (Holiday Single) stamp along with a sentiment from the retired Contempo stamp set.

I am also linking this card to the Hand Stamped Sentiments HSS252 Inspiration Challenge (I was inspired by the reds and greens as well as the white) along with the Time Out #71 “Christmas with an Optional Twist of Glitter/Shimmer” Challenge.

If you have not already visited the above challenge sites yet, I hope you will have a chance to do so- fabulous inspiration from my DT Sisters at the SCS Sketch Gallery as well as the other challenge sites!

To create this card:

Using Stampin’ Write Markers (Cherry Cobbler and Always Artichoke), color the retired Stampin’ Up! Christmas Star image, “huff” onto the ink to re-moisten and stamp onto a piece of Whisper White cardstock.

Fussy-cut the image and use the Simply Scored™ Tool to score all of the lines.  Fold the score lines to create the dimension and use a foam brush to apply ModPodge® to the image (be careful not to press too hard since the ink will start to run together and set it aside to dry).  FYI- I like to apply ModPodge® at times to images to give them more stability and it does have shimmer :-).

Use the Simply Scored™ Tool to add scoring to create the “side panel” elements of the sketch, trim the panel, mount onto Always Artichoke cardstock, trim again and mount onto Cherry Cobbler Cardstock.

Use Clear Wink of Stella® to add shimmer to the scored areas (difficult to see in the photo).

Use the Cherry Cobbler Stampin’ Write Marker Ink to ink the sentiment from the retired Contempo Christmas stamp set and stamp onto the card front.

Mount the entire card front onto the white card base, add the looped retired Silver Cord and mount the Christmas Star image with dimensional foam.

Stamp Sets:  Christmas Star,  Contempo Christmas (retired Stampin’ Up!)

Ink/Medium: Stampin’ Write Markers- Always Artichoke, Cherry Cobbler; Clear Wink of Stella®; ModPodge®

Cardstock/Designer Paper:  Whisper White, Always Artichoke, Cherry Cobbler

Accessories/Tools:  Simply Scored Tool™, retired Silver Cord


Thanks again for taking the time to visit- I hope you can gather your supplies and join us for the SC621 Sketch Challenge at Splitcoaststampers this week!

Wednesday, November 18, 2015

TCC44 Christmas In The Air


Hi Friends!!

It is time for the new Card Concept #44 Photo Inspiration Challenge- I just love this cozy homespun scene! 

I was inspired by the rustic stars as well as the traditional plaid for my Mixed Media card design.

Just a reminder that the Card Concept is a bi-weekly challenge that has an inspiration photo along with a number of design styles that you can choose from to create your card- Clean and Simple, Clean and Graphic, Clean and Layered, Shabby Chic, Freestyle Collage, Classy and Elegant and Mixed Media.   

I hope you can find some time to gather your supplies together and come join in on the fun!! 


To create this card:

Ink the retired Christmas Star stamp using Cajun Craze Classic Ink and stamp onto Very Vanilla cardstock. Use a Sponge Dauber to add Early Espresso Classic Ink to distress the star and create a rust finish.

Fussy-cut the star, score along all of the lines, folding the score lines to give a bit of dimension and use a foam brush to apply Mod Podge® to the star.

Using a foam brush, apply Gesso® to a piece of cardstock and once dry, use a palette knife with the Memory Box™ Heartwood Stencil to spread Finnabair® ArtExtravagance™ Copper Crackle Texture Paste onto the prepared cardstock.

Once the texture paste as dried, apply more Gesso® with your finger to tone down the copper and show the texture from the stencil.

Mount the stenciled background along with a piece of gingham designer paper onto a piece of Very Vanilla cardstock using a sewing machine with a zig zag stitch.

Add the 5/8” Green Satin Ribbon and Ivory Crochet Lace Trim wrapping the ends behind the panel.

Mount the panel onto the Always Artichoke card base.

Adhere the looped Copper Cord Trim to the card front and mount the star image using dimensional foam.

Stamp the sentiment using Early Espresso Classic Ink, roll lightly into a bit of Cajun Craze Classic Ink onto Very Vanilla cardstock, trim and create a banner with the Hexagon Punch.

Mount the sentiment using dimensional foam to finish off the card.

Stamp Sets:  Christmas Star, Open Sleigh (retired Stampin’ Up!)

Ink: Cajun Craze, Early Espresso

Paper: Very Vanilla, Always Artichoke, Green Plaid Designer Paper (not sure of manufacturer)

Accessories: Gesso®, Finnabair® ArtExtravagance™ Copper Crackle Texture Paste, Memory Box™ Heartwood Stencil, 5/8” Green Satin Ribbon, Ivory Crochet Lace Trim, Copper Cord Trim, Sewing Machine, Thread


Thanks again for stopping by- I hope you have a wonderful week and come play along with us at The Card Concept!

Thursday, February 20, 2014

CAS Patriotic Star


Hi Stampers!

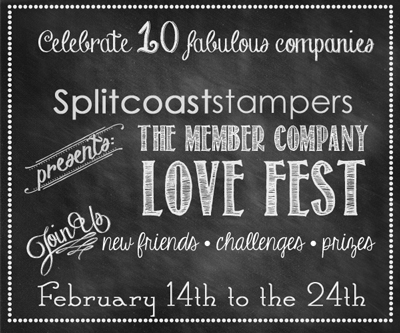
I had a chance to stamp today and decided to create a card for LeAnne’s CAS PP183Challenge at The Paper Players along with the Splitcoaststampers Love Fest LOVEFEST2014GChallenge to use scoring and WT467 Starry Eyed Challenge

If you have not had a chance to check out both sites, I hope you will take the time to visit- great inspiration by all!

I love this retired star, Christmas Star and thought that it could be used for other occasions versus just for Christmas....I decided to create a patriotic card...

To create this card:

Use Stampin’ Write markers in Cherry Cobbler and Midnight Muse (alternating the colors for each panel of the star) and stamp the image onto Whisper White cardstock. 

 *** HINT *** “Huff” onto the stamp for a second image to be used at a later date before cleaning the stamp :-)

Carefully cut out the stamped image by hand and use the Simply Scored Tool to create score lines, fold onto the lines to create a dimensional star.

Ink the diagonal line image stamp from Gorgeous Grunge using Cherry Cobbler Classic ink,  the splatter stamp using Midnight Muse Classic Ink and stamp off before stamping onto a piece of Whisper White cardstock. 

Trim and adhere onto a piece of Midnight Muse cardstock, trim again and mount onto the Cherry Cobbler card base.

Stamp the sentiment from Express Yourself using Midnight Muse Classic Ink onto Whisper White cardstock.  Create a banner using the Hexagon Punch and mount onto a piece of Midnight Muse cardstock (using the Hexagon Punch to create banner points as well). 

Mount the star and banner to the card front using Stampin’ Dimensionals®.  Add a few Rhinestones to finish off the card. 

Stamp Sets: Christmas Star, Gorgeous Grunge, Express Yourself

Ink: Cherry Cobbler, Midnight Muse; Stampin’ Write Markers- Cherry Cobbler, Midnight Muse

Paper: Whisper White, Cherry Cobbler, Midnight Muse

Accessories: Rhinestones, Hexagon Punch


Thanks again for taking the time to stop by and visit- I hope all of you enjoy the rest of the week!

Friday, November 15, 2013

CAS Joyful Tidings Star

Hi Stampers!!

I wanted to create a card using the SR202 Stampin’ Royalty Holiday “No Embellishment”theme along with the PPA179 Pals Paper Arts colors and chose to create a Clean and Simple (CAS) card. 

I always find it difficult to create a card without ribbon, pearls or some other embellishment so this was a real challenge for me :-)

If you have not visited either site yet, I hope you will find the time to do so- great projects by both Design Teams and other entries!

To create this card:

Stamp the Christmas Star using Rich Razzleberry Classic Ink onto a piece of the Crushed Curry sheet from the retired Razzleberry Lemonade Designer Series Paper (DSP)-   Carefully cut out by hand and score along the lines. 

Using the AquaPainter™ lightly paint Frost White Shimmer Paint onto the star.  

Adhere two strips of Rich Razzleberry scraps onto another piece of the Crushed Curry DSP (from the retired Razzleberry Lemonade DSP) and adhere this layer onto a piece of Crumb Cake cardstock.

Stamp the sentiment from Christmas Messages using Rich Razzleberry Classic Ink under the layer and using the Big Shot™ with the Woodgrain Textured Impressions™ Embossing Folder, emboss the entire panel. 

Mount onto a layer of Rich Razzleberry cardstock and again onto the Crumb Cake card base. 

Add the star image using Stampin’ Dimensionals® to finish off the card.  

Stamp Sets:  Christmas Star, Christmas Messages

Ink: Rich Razzleberry

Paper: Crumb Cake, Rich Razzleberry, retired Razzleberry Lemonade DSP 
                        
Accessories: Big Shot™, WoodgrainTextured Impressions™ Embossing Folder, retired Frost White Shimmer Paint

Thanks again for visiting- I hope all of you have a fabulous Friday!   
Related Posts Plugin for WordPress, Blogger...