Showing posts with label CCC13Nov. Show all posts

Sunday, December 8, 2013

DD82 CAS Cardinal Christmas- Card #3

Hi Again Stampers! 

Here is card #3 that I created using this week’s DD82 DynamicDuos Bright and Cheery Color Combination of Primrose Petals and Gumball Green (here is the post for card #1 and card #2).

I hope these cards have inspired you to create a project with the two colors and link it up at the Dynamic Duos site- we would love to see your creations!!

While I have the actual stamp set, I decided to use My Digital Studio (MDS) to create this quick, easy CAS card:

Open a blank 8.5x11 page in MDS and insert the image from Winter Memories (I re-sized the image a bit).  Also add the sentiment from Endless Wishes, remembering to leave enough room to be able to cut out the image using the Oval Collection Framelits™.

Print the images onto a piece of Whisper White cardstock and color the cardinals and the bow using the Primrose Petals Stampin’ Write marker, the wreath using the Gumball Green Stampin’ Write marker and add a few shadows to the wood paneling/sled using a Sahara Sand Stampin’ Write marker.  Use the Chalk Marker to add a few highlights to the wreath. 

Use the Big Shot™ with the Ovals Collection Framelits™ to cut out the sled image. 
Emboss a piece of Whisper White cardstock using the Woodgrain Textured Impressions™ Embossing Folder and add to a piece of Primrose Petals cardstock and adhere to the Gumball Green card base.

Add the focal image using Stampin’ Dimensionals® and add the triple 3/8” Gumball Green Stitched Satin Ribbon bow to the corner and the sentiment using Stampin’ Dimensionals® to finish off the card.

Stamp Sets:  Winter Memories, Endless Wishes (MDS version-both current)

Ink: Printer Ink- Black, Stampin’ Write Marker- Primrose Petals, Gumball Green, Chalk Marker 

Paper: Whisper White, Primrose Petals, Gumball Green


Accessories:  Big Shot™, Woodgrain Textured Impressions™ Embossing Folder, Ovals Collection Framelits™, Hexagon Punch, Pearls, 3/8” Gumball Green Stitched Satin Ribbon


Thanks again for stopping by- you are all such an encouragement to me!  Again, top by and visit us at The Dynamic Duos- we hope to see your DD82 “Bright and Cheery” creation thisweek!!  

DD82 Patterned Pines- Thinking of You

Hi Stampers! 

While I had the colors out for this week’s DD82 Dynamic Duos “Brightand Cheery” Challenge, I ended up creating a total of three cards (this is card #2- the first card is here).


This card uses a retired SU! Hostess set, Patterned Pines that had never seen ink yet...  I love the three pines and the patterns so decided that this color combination may be the perfect opportunity to show this set some love :-)

Again, I hope you will find the time to visit the Dynamic Duos site this week and we would love to see your creations!  
 
To create this card:

Ink the three tree stamp image using Gumball Green Classic Ink and stamp onto a piece of Whisper White cardstock.

Use the Big Shot™ with the Window Frames Collection Framelits™ to cut out the image along with another piece the same size using Primrose Petals cardstock.   Trim the Primrose Petals layer in half horizontally and layer behind the focal image.

Emboss a piece of Birthday Basics Designer Series Paper (DSP) using the Big Shot™ with the Petals-A-Plenty Textured Impressions™ Embossing Folder (make sure you have the correct side up inside the folder- I had the wrong side up so my embossing is actually debossing-oops!).  Lightly sand with the Sanding Blocks and layer onto the Primrose Petals card base.  

Create the sentiment using My Digital Studio (MDS) from Endless Wishes- print onto Whisper White cardstock, punch the banners using the Hexagon Punch and add the Primrose Petals cardstock layer.

Stamp the sentiment from Beautiful Season onto Whisper White cardstock (I used the My Digital Studio version printed onto Whisper White cardstock).  Create the banner points using the Hexagon Punch and layer onto a piece of Primrose Petals cardstock (also punching the banner points with the Hexagon Punch).

Add the tree focal panel to the card front using Stampin’ Dimensionals® .  Gently curve the sentiment layer using your bone folder and add with Stampin’ Dimensionals® as well.
 
Add the triple 3/8” Primrose Petals Stitched Satin Ribbon bow and Pearls finish the card.

Stamp Sets:  Patterned Pines (retired), Beautiful Season (MDS version- current)

Ink: Printer Ink- Black, Gumball Green Classic Ink

Paper: Whisper White, Primrose Petals, Birthday Basics DSP

Accessories:  Big Shot™, Window Frames Collection Framelits™, Petals-A-Plenty Textured Impressions™ Embossing Folder, Hexagon Punch, Pearls, 3/8” Primrose Petals Stitched Satin Ribbon


Thanks again for visiting!  I hope you can take some time to visit us at The Dynamic Duos and play along in our DD82 “Bright and Cheery” Color Challenge this week!!  

Saturday, December 7, 2013

DD82 CAS Christmas Dove

Hi Stampers! 

This week’s DD82 Dynamic Duos “Bright and Cheery” Challengeuses the 2012-2013 In-Colors Primrose Petals and Gumball Green.

I hope you will find the time to visit the rest of the fabulous Design Team projects- they did a wonderful job with this color challenge!!   


I decided to create another Christmas card and pulled out the retired set, Gifts of Christmas and use a quick marker technique - this one is very easy and fun! :-)

To create this card:

Using the Stampin’ Write markers in Primrose Petals and Gumball Green, color the flowers and leaves directly on the stamp.  Color the dove with the Basic Black Stampin’ Write marker and re-moisten the stamp by “huffing” onto the image and stamp onto Whisper White cardstock.

Use the Big Shot™ with the Deco Label Framelits™ to cut out the dove image along with another piece the same size using Primrose Petals cardstock.

Trim the Primrose Petals die cut layer in half and layer behind the focal image along portions to show beyond the Whisper White cardstock.

Emboss a piece of Vellum using the Big Shot™ with the Pretty Print Textured Impressions™ Embossing Folder and layer onto a piece of Whisper White cardstock.

Add the Primrose Petals layer onto the Whisper White card base.  Adhere the vellum layer and add the focal image using Stampin’ Dimensionals®. 

Create the sentiment using My Digital Studio (MDS) from Endless Wishes- print onto Whisper White cardstock, punch the banners using the Hexagon Punch and add the Primrose Petals cardstock layer.

Add the sentiment using Stampin’ Dimensionals® and finish the card off with Pearls. 

Stamp Sets:  Gifts of Christmas (retired), Endless Wishes (MDS version)

Ink: Printer Ink- Black, Stampin’ Write Marker- Primrose Petals, Gumball Green, Basic Black

Paper: Whisper White, Primrose Petals, Vellum

Accessories:  Big Shot™, Deco Labels Framelits™, Pretty Print Textured Impressions™ Embossing Folder, Hexagon Punch, Pearls 

Thanks again for stopping by!  I do hope all of you will have a chance to visit us at The Dynamic Duos and play along in our DD82 “Bright and Cheery” Color Challenge this week!!  

Wednesday, December 4, 2013

Vintage Christmas Greetings- Two Challenges in One!


Hi Stampers! 

I am still working on my Christmas cards and decided to play along with The Paper Players PP174 Evergreen Challenge along with the Stampin’Celebration SCIC73 Inspiration Challenge.  I am having so much fun making the Christmas cards, hopefully I will take the time to mail them- lol!!

If you have not had a chance to visit either of these challenge sites yet, I hope you will find the time to do so- again, great inspiration from the Design Teams and all of the other entries as well!

To save time, I used My Digital Studio (MDS)to create this card but you could use the regular stamps..it was easier for me to insert, print and create!  Love MDS for cardmaking :-) !! 

To create this card:

In MDS, open a blank 8.5 x 11 custom page and insert the Christmas Lodge image and overlay the Evergreen tree a bit to the right of the lodge.  Also insert the sentiment to be printed separate as well as the poinsettia image (again, I arrange randomly on the page leaving room for cutting out by hand, etc. and filling the page before I print on my printer).

Print out onto Whisper White cardstock and color the images using Stampin’ Write markers in Primrose Petals and Gumball Green.

Create a mask using a sticky note and mask the sky area- sponge a bit of Crumb Cake over the sky and the snowy banks in the front (a bit hard to see in the photo).

Close-up to show the shadows and distressing :-)
Distress the edges using the Distressing Tool and sponge additional Crumb Cake Classic Ink onto the edges- hand tear the corners and adhere to a piece of Primrose Petals cardstock.  Tear to "mirror" the edges of the focal image and distress in the same manner.

Add a few highlights using the Chalk Marker and Frost White Shimmer Paint (you cannot see the shimmer in the photo).

Use the Big Shot™ along with the retired Lacy Brocade Textured Impressions™ Embossing Folder (ink the smooth side of the embossing folder using the Crumb Cake Classic Ink pad direct to the folder) and emboss a piece of Whisper White cardstock.  Add this layer to a piece of Primrose Petals cardstock and mount onto the Basic Black card base.


Use the Hexagon Punch to add the banner points to the sentiment and sponge a bit of Crumb Cake Classic Ink to distress the sentiment.  Adhere to a piece of Primrose Petals cardstock and add the banner points with the same punch.

A view of the layers :-)
Add the focal image to the card front and adhere the sentiment using Stampin’ Dimensionals®.    Hand cut the poinsettia image apart to create three separate pieces and adhere to the corners and around the sentiment using Stampin’ Dimensionals®.  

Add a few Pearls to the sentiment corners to finish off the card.

Stamp Sets:  Christmas Lodge, Bells and Boughs, Special Seasion- all MDS versions

Ink: Printer Ink- Black, Crumb Cake Classic Ink, Stampin’ Write markers- Primrose Petals, Gumball Green, Chalk Marker

Paper: Whisper White, Basic Black, Primrose Petals

Accessories:  Big Shot™, retired Lacy Brocade Textured Impressions™ Embossing Folder, Hexagon Punch, Distressing Tool, Sponge Daubers, Pearls


Thanks again for stopping by!  Hope you have a wonderful Wednesday- God Bless!

Tuesday, December 3, 2013

SUO85 Peace On Earth- Purple Poinsettia :-)

Hi Stampers! 

It’s time for the new SUO85 SU-Only Challenge and the theme is “Non-Traditional Christmas”.  I chose purple and black since my husband loves the Ravens football team  along with My Digital Studio (MDS) to create this Peace on Earth card :-)

Again, I do hope you will find some time during this busy holiday season to check out the SU-Only Challenge site and the rest of the Design Team’s creations- a wonderful selection of non-traditional colors indeed!! 

To create this card:
Using My Digital Studio (MDS) position the various stamp images onto the 8.5x11 blank page- Post Card, the poinsettia from Joyful Christmas, the sentiment from Greetings of the Season, an outline snowflake behind the sentiment from Old St. Nick, the stamp image from Old St. Nick and the “Do not open until Dec. 25th” image from Winter Post. 
Print onto Whisper White cardstock- color the poinsettia using the AquaPainter™ using Elegant Eggplant Classic Ink and the Smoky Slate Stampin’ Write marker to add the shadows.  Hand cut out the flower, add the Frost White Shimmer paint with the AquaPainter™ and add more details with the Chalk Marker (the flower is all one layer but the leaves are individual pieces).
Use the Smoky Slate Stampin’ Write marker to color the leaves along with the Frost White Shimmer paint with the AquaPainter™ and add more details with the Chalk Marker as well. 
Trim around the Post Card image and mount onto a piece of Basic Black cardstock.  Lightly sponge Smoky Slate Classic Ink over the edges and background.
Use the Big Shot™ along with the Petals-A-Plenty Textured Impressions™ Embossing Folder to emboss a piece of Elegant Eggplant cardstock- adhere to the Whisper White card base.
Add the Post Card panel at an angle and adhere the poinsettia with the leaves using Stampin’ Dimensionals®.
Punch the sentiment out using the XL Oval Punch and also punch out two additional ovals from Basic Black cardstock (adhere the two black ovals together to create the frame for the sentiment).  Add the sentiment to the card using Stampin’ Dimensionals® and add the Pearls along with the 5/8” Basic Black double satin ribbon bow.
Add the Elegant Eggplant accents to the Postage Stamp and “Do not open” images as well as a bit of Frost White Shimmer Paint.  Punch out the postage stamp image using the Postage Stamp Punch and hand cut the “Do not open” image. 
Adhere the Postage Stamp image to the upper portion of the Post Card and add the “Do not open” image using Stampin’ Dimensionals® and Pearls to the center of the poinsettia to finish off the card.
Stamp Sets: Post Card, Joyful Christmas, Greetings of the Season, Winter Post, Old St. Nick (all MDS)
Ink: Printer Ink- Black, Elegant Eggplant, Smoky Slate, Stampin’ Write marker- Smoky Slate
Paper/Cardstock:  Whisper White, Basic Black, Elegant Eggplant
Accessories: Big Shot™, Petals-A-Plenty Textured Impressions™ Embossing Folder, XL Oval Punch, Postage Stamp Punch, Sponge Dauber, Pearls, 5/8” Basic Black Satin Ribbon (retired)

Thanks again for stopping by- I hope you will find the time to visit us and enter your project into the SU-Only SUO85 “Non-Traditional Christmas” Challenge 

Saturday, November 23, 2013

DD80 Triple Threat Christmas

Hi Stampers!  

This week’s Dynamic Duos DD80 “Triple Threat” Challenge uses Blushing Bride, Raspberry Ripple and Pear Pizzazz.   Again, I hope you will find the time to visit the rest of the fabulous Design Team projects- they rocked the challenge this week!!   


Since Christmas is almost here, I decided to create another Christmas card design :-)

To create this card:

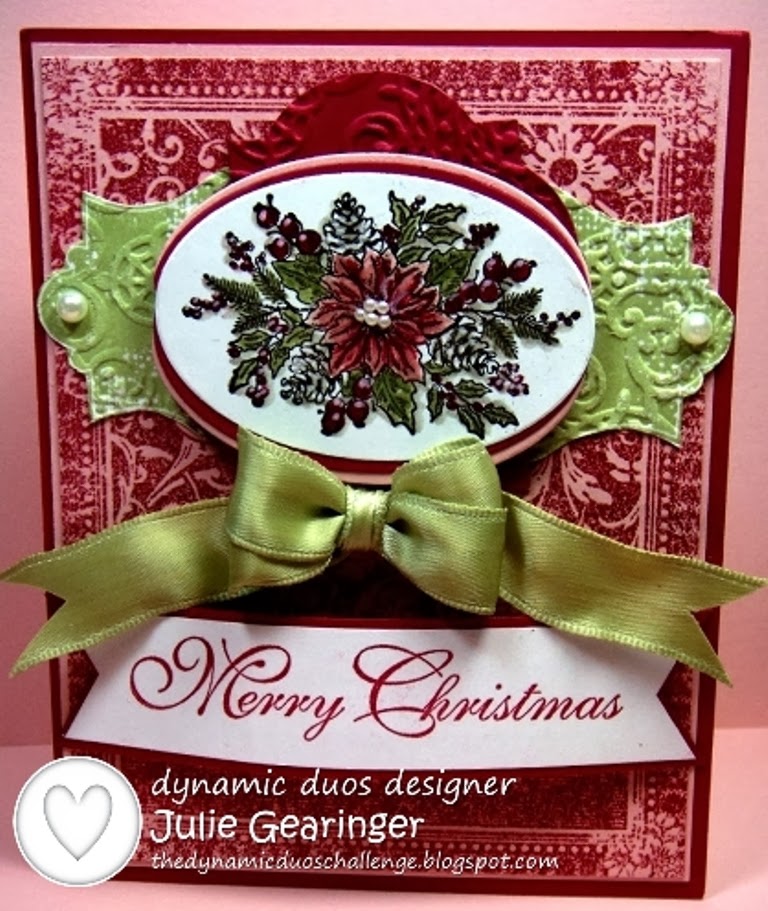
I decided to dig into my retired stamp collection and use the poinsettia image from one of the Christmas sets from years ago – My Favorite Frame (Holiday Frame).

Stamp the image using Early Espresso Classic Ink onto Whisper White cardstock and color using Stampin’ Write markers- Blushing Bride and Raspberry Ripple for the petals and berries, Pear Pizzazz for the leaves.  Add a few highlights with the Chalk Marker (this marker will be carried over in the upcoming Occasions Mini- yea!)

Use the Big Shot™ with the Ovals Collection Framelits™ to cut out the image and mount onto a piece of Blushing Bride and Raspberry Ripple cardstock (also cut from the same oval framelit™). 

With the Big Shot™ and the Window Frames Collection Framelits™, cut a window frame from Raspberry Ripple cardstock and emboss with the retired Lacy Brocade Textured Impressions™ Embossing Folder- cut in half by hand in the middle horizontally.

Stamp the label image from Everything Eleanor onto a piece of Whisper White cardstock.  Emboss using the Big Shot™ with the retired Lacy Brocade Textured Impressions™ Embossing Folder and cut around the outline by hand and cut in half vertically in the middle.

Ink the background stamp, Ex Libris with Raspberry Ripple Classic Ink and stamp onto a piece of Blushing Bride cardstock.  Trim to 4 1/8” x 5 3/8”.  Mount onto a piece of Raspberry Ripple cardstock.

Stamp the sentiment from Greetings of the Season using Raspberry Ripple Classic Ink onto Whisper White cardstock and cut the banner points using the Hexagon Punch.  Layer onto a piece of Raspberry Ripple cardstock and mirror cut the points with the Hexagon Punch as well :-)

Layer onto the card base the Everything Eleanor label (with the center spread apart to reach the edges of the card) and add the Window Frame (again spread apart) to cover the split areas of the Pear Pizzazz label at the top and bottom.  Add the Poinsettia focal image and sentiment using Stampin’ Dimensionals®.

Add the double satin ribbon bow and Pearls to finish off the card.  

Stamp Sets:  Greetings of the Season, Ex Libris, Everything Eleanor, retired Favorite Frame (Holiday)

Ink: Early Espresso, Blushing Bride, Pear Pizzazz, Raspberry Ripple, Stampin’ Write 

Markers- Blushing Bride, Pear Pizzazz, Raspberry Ripple, Chalk Marker

Paper: Whisper White, Blushing Bride, Raspberry Ripple

Accessories:  Big Shot™, retired Lacy Brocade Textured Impressions™ Embossing Folder, Window Frames and Ovals Collection Framelits™, Hexagon Punch, Pearls, satin ribbon from my stash


Thanks again for stopping by!  I hope all of you will have a chance to visit us at The Dynamic Duos andplay along in our DD80 “Triple Threat” this week!!  

Black Tie Christmas- Card #2 :-)

Hi Stampers! 

I wanted to create one more card using last week’s DD79 Black Tie Challenge colors from the Dynamic Duos and decided to include the dessert option of Christmas again :-)

The winners have been posted for this challenge, and if you have not had a chance to visit yet, I hope you will check them out- wonderful examples of how two colors can be interpreted!!
 
Also, the new weekly DD80 “Triple Threat” Challenge will be starting at 12:00 noon EST today –looking forward to seeing you in the gallery :-)

To create this card:

In My Digital Studio (MDS), open a blank 8.5 x 11 custom page and insert the ornament image from Festive Flurries along with the sentiment from More Merry Messages onto Whisper White cardstock. 

*** Hint **** Whenever printing images in MDS for card making, fill up your page before printing with other images that you may use in the future.

Cut the ornament out with the 1 ¾” Circle Punch and mount onto another circle cut from Basic Black cardstock (cut the black circle in half vertically).  Create the top of the ornament using a scrap piece of Smoky Slate cardstock and mount a few scraps of Basic Black on the sides- adhere this behind the circle ornament.

Use the AquaPainter™ with Platinum Shimmer Paint to cover the top of the ornament and parts of the snowflake.  Add the Basic Black cardstock strip in the center and punch out a ½” Circle to put in the center.  Add the Frosted Finishes Embellisment to the center of the small circle using Mini Glue Dots and wrap the retired Silver Cord around the top of the ornament – place a Rhinestone in the center to hold the cord in place. 

Use the Big Shot™ with the retired Lacy Brocade Textured Impressions™ Embossing Folder to emboss a piece of Smoky Slate cardstock and Silver Foil Paper.  Add a few scraps of Basic Black cardstock to the back of the embossed Smoky Slate layer, adhere the Silver Foil strip in the middle and the Whisper White border (from the Big Shot™ and the Finishing Touches Edgelits™) at the bottom.   Mount onto the DSP panel, trim to size, adhere to a Whisper White cardstock layer and again onto a piece of Smoky Slate cardstock.

Add the ornament to the center of the front of the card using Stampin’ Dimensionals® and adhere the tails of the Silver Cord behind the card front.  Mount the entire panel onto the Basic Black card base.

Trim the sentiment and add banner points using the 1” Square Punch. Mount onto a piece of Basic Black cardstock and trim to match the banner.  Mount to the card front over the Silver Cord using Stampin’ Dimensionals™ to finish off the card.

Stamp Sets:  Festive Flurry, More Merry Messages– both MDS

Ink: Printer Ink- Black

Paper: Whisper White, Basic Black, Smoky Slate, Silver Foil, retired Mocha Morning DSP

Accessories:  Big Shot™, Finishing Touches Edgelits™, retired Lacy Brocade Textured Impressions™ Embossing Folder, Punches- 1” Square, 1 ¾” Circle; Frosted Finishes Embellishment, Rhinestones, retired Silver Cord, Platinum Shimmer Paint


Thanks again for visiting!  I hope will have a chance to visit again and check out the new DD80Dynamic Duos Challenge!

Tuesday, November 19, 2013

SUO84 Snowy Christmas Night

Hi Stampers! 

It’s time for the new SUO84 SU-Only Challenge and the theme this for this challenge is “Let It Snow”.  I wanted to create another scene with falling snow, so decided to use the Masking Technique along with other techniques to create this card.

I hope you will take time to visit the SU-Only Challenge site and check out the rest of the Design Team’s creations- a fabulous array of different styles and projects!! 

And of course, we would love to see you link up your “Let It Snow” card or project using Stampin’ Up! Only products- hope to see you there :-) !

To create this card:
Punch out a circle using the 1 ¼” Circle Punch from a sticky note and place the mask over the area for the moon on a piece of Whisper White cardstock.  Using Sponge Daubers lightly apply Pool Party Classic Ink, followed by Coastal Cabana Classic Ink and finally with Island Indigo Classic Ink.
Ink the row of tree lined images from Lovely As A Tree with Midnight Muse Classic Ink and stamp a few rows over the horizon area, follow with repeated stamping of the solid pine tree image from Evergreen (also inked with Midnight Muse Classic Ink).
Stamp the falling snow using Whisper White Craft Ink and the small dotted background stamp from Gorgeous Grunge.  Trim the panel and mount onto a piece of Whisper White cardstock.
Tearing a few layers of Whisper White cardstock to create the snowy banks on the lower part of the card, use the Two-Way Glue to apply adhesive and Dazzling Diamonds glitter.
Stamp the sentiment from More Merry Messages using Midnight Muse Classic Ink and hand tear around the sentiment, apply Two-Way Glue and Dazzling Diamonds glitter as well.
Adhere the layers of “snow” to the lower part of the Whisper White base and add the sentiment along with the 5/8” White Organza Double Ribbon bow. 
Adhere the entire panel to the Midnight Muse card base and add the Frosted Flurry Embellishment to finish off the card.
Stamp Sets: Evergreen, Lovely As A Tree, More Merry Messages
Ink: Pool Party, Coastal Cabana, Island Indigo, Midnight Muse
Paper/Cardstock:  Whisper White, Midnight Muse
Accessories: Sponge Daubers, Two-Way Glue, Dazzling Diamonds, 5/8” White Organza Ribbon, Frosted Flurry Embellishment

Thanks again for stopping by- I hope you will find the time to visit us and enter your project into the SU-Only SUO84 “Let It Snow” Challenge - have a great day!!

Friday, November 15, 2013

CAS Contempo Christmas :-)

Hi Again Stampers!!


I wanted to create another Clean and Simple (CAS) Christmas card and decided to use the STS#8 Seize The Sketch STS8 Challenge and the fun colors from this week's CC452 Color Challenge at Splitcoaststampers :-)

Seize The Sketch is is a new challenge site for me and they have a wonderful Design Team along with all of the inspirational entries- hope you will have a chance to check them out as well as the Splitcoaststampers gallery!

To create this card:

Stamp the Christmas tree image from the retired set, Contempo Christmas using the Silver Encore!™ Ultimate Metallic ink onto Island Indigo cardstock.  Cut out with the 2 ½” Circle Punch and layer onto two other circles from the same punch- one from Whisper White and the other from Island Indigo cardstock.

Layer a piece of the Winter Frost Designer Series Paper (DSP) onto Whisper White cardstock and again onto Island Indigo cardstock.  Adhere to the Pool Party card base.

Stamp the sentiment from the Contempo Christmas set using Island Indigo Classic Ink onto Whisper White cardstock and layer onto an Island Indigo cardstock strip.

Adhere the Christmas tree image using Stampin’ Dimensionals®.  Add the 5/8” Whisper White Organza Ribbon bow along with the Frosted Finishes Embellishment. 

Stamp Sets: Contempo Christmas (retired)

Ink: Island Indigo, Silver Encore!™ Metallic

Paper: Whisper White, Island Indigo, Winter Frost DSP

Accessories: 5/8” Whisper White Organza Ribbon, Frosted Finishes Embellishments

Thanks again for visiting- have a wonderful day!   

CAS Joyful Tidings Star

Hi Stampers!!

I wanted to create a card using the SR202 Stampin’ Royalty Holiday “No Embellishment”theme along with the PPA179 Pals Paper Arts colors and chose to create a Clean and Simple (CAS) card. 

I always find it difficult to create a card without ribbon, pearls or some other embellishment so this was a real challenge for me :-)

If you have not visited either site yet, I hope you will find the time to do so- great projects by both Design Teams and other entries!

To create this card:

Stamp the Christmas Star using Rich Razzleberry Classic Ink onto a piece of the Crushed Curry sheet from the retired Razzleberry Lemonade Designer Series Paper (DSP)-   Carefully cut out by hand and score along the lines. 

Using the AquaPainter™ lightly paint Frost White Shimmer Paint onto the star.  

Adhere two strips of Rich Razzleberry scraps onto another piece of the Crushed Curry DSP (from the retired Razzleberry Lemonade DSP) and adhere this layer onto a piece of Crumb Cake cardstock.

Stamp the sentiment from Christmas Messages using Rich Razzleberry Classic Ink under the layer and using the Big Shot™ with the Woodgrain Textured Impressions™ Embossing Folder, emboss the entire panel. 

Mount onto a layer of Rich Razzleberry cardstock and again onto the Crumb Cake card base. 

Add the star image using Stampin’ Dimensionals® to finish off the card.  

Stamp Sets:  Christmas Star, Christmas Messages

Ink: Rich Razzleberry

Paper: Crumb Cake, Rich Razzleberry, retired Razzleberry Lemonade DSP 
                        
Accessories: Big Shot™, WoodgrainTextured Impressions™ Embossing Folder, retired Frost White Shimmer Paint

Thanks again for visiting- I hope all of you have a fabulous Friday!   
Related Posts Plugin for WordPress, Blogger...