Showing posts with label Friendship. Show all posts

Friday, December 6, 2019

Snowman Wishes


Hi Friends!!

Today I am sharing a card designed with the retired Stampin’ Up! Garden Snowmen and paired with a sentiment from Beautiful You (a current Stampin’ Up! set).  

I have always loved the fun snowman images in this set and have not inked them in a while.   I will be sharing another card later with the second snowman image in this set :-)


If you have not had a chance to do so, I hope you will visit the above challenge sites- such great inspiration from all!

To create this card- Ink the snowman image with Versafine™ Onyx Black Ink and stamp onto white cardstock, apply clear embossing powder and heat with a heat tool.
Once the embossing has cooled, watercolor the image with water-based markers and distress oxide ink.  Die cut the panel with a stitched square die, mount onto white cardstock and trim close to the edge.

Heat emboss the sentiment using the same steps above, die cut with a stitched circle die and mount onto a circle of white cardstock.  Adhere the circle to the main focal image creating the half moon shape for the sketch.

Emboss a piece of white cardstock with a snowflake embossing folder, trim and mount onto the white card base.

Add the layered focal image/sentiment onto the card front using dimensional foam or chipboard (I have been using chipboard) lately.

Use a clear glitter pen to add shimmer to all of the snow, snow balls and snowmen to finish off the card.

Stamp Sets: Garden Snowmen (retired Stampin’ Up!), Beautiful You (current Stampin’ Up!)

Ink/Mediums: Versafine™ Onyx Black, Arteza Water-based Markers- various reds, purple, greens, blues, browns; Tim Holtz® (TH) Tumbled Glass Distress Oxide, Spectrum Noir™ Clear Glitter Pen

Cardstock/Paper:  Whisper White, Extra Thick Whisper White

Accessories: Big Shot™, My Favorite Things Dies- Stitched Square and Circle STAX; Sizzix Circle Dies (retired SU!), Embossing Buddy®, Clear Embossing Powder, Heat Tool, AquaPainter™,  Darice™ Snowflake Embossing Folder

Thanks again for taking the time to stop by- I hope all of you have a wonderful weekend!

Wednesday, June 26, 2019

TCC118 When I Need A Friend


Hi Friends!

Welcome to The Card Concept #118 {Cacti Clusters}Challenge!  I was inspired by the colors of the succulents as well as the images to pull out the Sweet Succulents Stamp Set (Technique Tuesday) and create a Classy and Elegant/Mixed Media card!

This will be the last challenge at The Card Concept until September.  We take a break over the summer to give our Designers time to spend with their families as well as take a vacation or two :-).  We will be back in the beginning of September with another round of inspiration photos for sure!

I paired the Sweet Succulents Stamp Set (Technique Tuesday) with a sentiment from Choose Happiness (Stampin’ Up!).    I have owned the Sweet Succulents set for a while and this is the first time I have had a chance to ink it up (still working on goal of giving all of my stamps some “love”).


If you have not had a chance to visit us at The Card Concept or the other challenge sites yet, I hope you will find time to do so- gorgeous inspiration from all!

To create this card:

1). De-static a piece of white cardstock with an embossing powder tool, stamp the succulent images from Sweet Succulents with Versafine™ Onyx Black, apply clear embossing powder and heat set with the heat tool.  Once the embossing has cooled, color the images with water-based markers, colored pencils and distress oxide inks.  Once you are satisfied with the coloring, fussy-cut the images and set aside.

2). Using a stitched rectangle die, die cut another piece of white cardstock for the middle frame, use the next smaller stitched rectangle die to die cut a piece of green designer paper, a stitched circle die to die cut a piece of white cardstock and the same size circle die to die cut two pieces of blackberry cardstock.

3). Layer the white and green die cut rectangles together, add the lace strip along with the wide blackberry satin grosgrain ribbon (wrap the ends of the ribbon behind the back of the panel).  Mount the panel onto a piece of blackberry cardstock and adhere to the white card base.

4). Overlap the two blackberry stitched circle dies to create a small border for the white stitched circle die cut.  Layer together and mount onto the card front with dimensional foam.

5).  Mount the fussy cut image onto the die cut circle using dimensional foam and use a clear shimmer pen to add shimmer to the succulent images.

6). Using the same steps as in Step #1, stamp the sentiment from the retired Stampin’ Up! Set, Choose Happiness using Versafine™ Onyx Black ink, emboss with clear embossing powder, trim and mount onto blackberry cardstock and adhere to the card front.

7). Add a few pearls to the upper right hand corner to finish off the card.

Stamp Sets:  Sweet Succulents (Technique Tuesday), Choose Happiness (Stampin’ Up!)

Ink/Mediums: Versafine™ Onyx Black, Tim Holtz™ Distress Oxide Inks-Bundled Sage, Seedless Preserves; Stampin’ Write Markers (all retired)-Sage Shadow, Orchid Opulence, Bordering Blue, Mellow Moss; Zig® Clean Color Real Brush Markers- Violet, Pale Green, Olive Green; Spectrum Noir™ Clear Glitter Pen

Cardstock/Paper: Whisper White, Blackberry Bliss (Stampin’ Up!); misc. designer paper- from my stash, not sure of manufacturer

Tools/Accessories: Big Shot™;  My Favorite Things™ Dies- Stitched A2 Rectangle Sets 1 & 2, Stitched Circles; AquaPainter™, Embossing Buddy®, Clear Embossing Powder, Heat Tool, White Lace and 1 ¼” Wine Grosgrain Satin Ribbon (from my stash), Pearls

Thanks again for taking the time to visit! I hope I have inspired you to create your own card based on our {Cacti Clusters}  photo and link up to our gallery at The Card Concept- we would love to see your interpretation!! The challenge is open until Monday, July 8th at noon (EDT).

Update: My hubby, Dave is still recovering in the hospital and after a few very rough days, but he seems to be doing so much better!  We found out that he did have Stage 1 prostate cancer as well, so we are so blessed that he no longer has to worry about bladder cancer or prostate cancer :-)  

He still has the rare Waldenstrom Macroglobulinemia (Waldenstroms or WM for  short).  He had several years of chemo/immunotherapy from 2014-2018, so while there is no cure for WM, he had a positive response to the treatment and his numbers for the WM look good so far! 

Hugs and thanks for all of your prayers and well wishes!  Praise the Lord, He is answering the prayers!!

Wednesday, August 3, 2016

SC604 A True Friend Loves At All Times


Hi Friends!

I hope all of you are having a fabulous week so far!  Woohoo!  I am excited to announce that I will be on the Splitcoaststampers Sketch Challenge Design Team for the next few months!  

I truly love participating in sketch challenges and am always amazed at how many interpretations can be designed using one sketch.

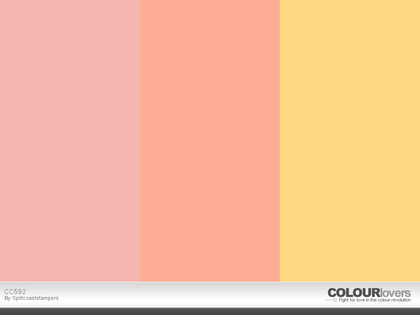
For this Mixed Media card, I used the Splitcoaststampers' SC604 Sketch (see the rest of the SC604 Sketch Gallery here),   the SCS CC592 Color  Challenge and the SCS Dare To Get Dirty “DTGD16basementstamper” Challenge (sorry, I cannot share the details but if you are a Splitcoaststampers Fan Club Member, you can see the details here and if not, you can check out how to join here) as well as the JustUs Girls #354 Wild Card “Let’s Hear It for the Girls” Challenge.


If you have not already visited the above challenge sites, I hope you will have a chance to do so- fabulous inspiration from my Sketch Design Team "Sisters" as well as the rest of the challenge sites!

To create this card:

Die cut a piece of white cardstock with the Our Daily Bread Designs (ODBD) Flourished Star Patterns Dies and mount onto a piece of black cardstock.

Die cut the piece of So Saffron cardstock with the largest ODBD Double Stitched Rectangle Dies, mount onto a piece of black cardstock, trim and mount onto the card front.

Add the strip of 1” Black Satin Ribbon and mount the entire card front onto the white card base.

Die cut a piece of the ODBD Christmas Collection 2015 6x6 Paper with the next to the largest  ODBD Double Stitched Rectangles  Dies, mount onto black cardstock, trim and mount onto the card front.

Die cut and emboss the ODBD Doily Dies from white cardstock and layer onto the front of the card.

Ink the ODBD Star Quilt image using black archival ink, stamp onto white cardstock, color the image with water-based markers and die cut with the ODBD Double Stitched Rectangle Dies.

Layer the quilt image onto black cardstock, trim and apply ModPodge to the entire surface.

Stamp the sentiment from ODBD A True Friend with archival black ink onto white cardstock, die cut with the ODBD Double Stitched Circle Dies and mount onto a die cut from black cardstock using the ODBD Flourish Pattern Dies.

Add the sentiment to the card front with dimensional foam to finish off the card.

I hope this card inspires you to create a project this week and if so, come play along with us at Splitcoaststampers!


Thanks again for visiting- hugs and have a blessed week, my friends!


Friday, July 15, 2016

ODBD Sweet As Perfume


Hello Friends!

Today we are taking a look back at the July 2016 Release from Our Daily Bread Designs.

This card was fairly easy to create with just a bit of patience needed for all of the masking and watercolor :-)).  


The main panel is all one layer (the sentiment is popped up with dimensional foam) and I used two of the new ODBD July release stamp sets- Sweet As Perfume and You Bless Me along with the new ODBD Layered Lacey Oval Dies and the previously released ODBD Double Stitched Rectangle Dies.

I hope you will find the time to check out the ODBD blog to see the rest of the gorgeous inspiration from the Breadbasket as well as visit their individual blogs:


Lori
 * Robin * Melissa * Julie (me)* 
Sandee * Cathy * Dawn * Lisa 
Sabrina * Diana * Diane (Guest Designer)


Ink/Mediums: Stāz-On® Jet Black, Distress Markers and Ink- Tumbled Glass, Crushed Olive, Brushed Corduroy, Mowed Lawn, Spun Sugar, Picked Raspberry and Seedless Preserves; Sahara Sand marker

Paper/Cardstock: Watercolor; Rich Razzleberry and Whisper White 

Accessories/Tools: Big Shot™, ODBD Layered Lacey Oval Dies, ODBD Double Stitched Rectangle Dies, Masking Paper, 5/8” White Organdy Ribbon, ½” Olive Green Ribbon, Pearls

Thanks again for taking the time to stop by- you are all such a blessing to me!

Hugs and have a great weekend, my friends!


Saturday, April 16, 2016

Happy Together- True Friends Are Always Together In Spirit


Look at all of the Ridges
(farthest one approx. 35-40 miles)
Hi Friends! 

I hope all of you are having a great week so far!! Yesterday my hubby and I were able to take a trip to Shenandoah National Park and drive 80 miles along Skyline Drive (160 miles round trip in the park) and we had a great time!

The weather was absolutely gorgeous and there were only a few other visitors, so we basically had the park all to ourselves (just the way we like it!)  The vistas are amazing....beautifully serene and peaceful and barely a cloud in the sky- just a perfect day!

I had a chance to create a Clean and Simple (CAS) card Thursday that I am sharing today over on the Sweet ‘n Sassy Stamps (SNSS) blog and wanted to share it with all of you here as well.  


This card was designed using the brand new Happy Together stamp set (designed by Korin Sutherland) along with Grunge Elements and the Ticket Dies.


To create this card:

Ink the Grunge Elements (SNSS) image with Delightful Dijon Classic Ink, stamp off before stamping onto a piece of Whisper White cardstock- repeat this step three times.

Ink the same Grunge Elements image using Crushed Curry Classic Ink and stamp at the bottom.

Ink the silhouette images from HappyTogether (SNSS) with Stāz-On® Stone Gray Ink and stamp over the yellow background (I used my MISTI® Tool so I could repeatedly stamp the image).

Die cut the image into a circle and layer a die cut circle of Basic Gray cardstock behind the focal image.

Stamp the sentiment from HappyTogether (SNSS) using Stāz-On® Stone Gray Ink onto Whisper White cardstock (again, I used my MISTI® Tool for positioning and repeated stamping). 

Cut the sentiment out with the Big Shot® and the largest die from the Ticket Dies (SNSS) and also cut the same size die from Basic Gray cardstock.
Split the Basic Gray Ticket Dies die cut in half and layer behind the sentiment (spreading the Basic Gray die cut apart a bit so the layer will show on the sides).

Cut the retired Eastern Elegance Designer Series Paper (DSP) on an angle and layer a strip of Basic Gray cardstock at the top of each angled piece.

Layer a piece of Whisper White cardstock onto the Basic Gray card base, add the angled DSP pieces and mount the sentiment with dimensional foam.

Add the focal image circle with dimensional foam to finish off the card- quick and easy!

Stamp Sets:  Happy Together, Grunge Elements (SNSS)

Ink:  Stāz-On® Stone Gray, Delightful Dijon, Crushed Curry

Paper: Whisper White, Basic Gray; retired Eastern Elegance DSP

Accessories: Big Shot™, Ticket Dies(SNSS), Stitched Circle Dies (MFT)

Thanks again for stopping by- your visits are such an encouragement to me :-) I hope you all have a fabulous weekend! 

Wednesday, October 21, 2015

HYCCT1519 "Pinkalicious" Cup of Thanks


Hi Again Friends!!

This card was created for the Splitcoaststampers’ Hope You Can Cling To  HYCCT1519 Lee’s “Pinkalicious” Challenge (to create a card using a few of the unscrambled words from “Pinkalicious”- I used PINK, INK, CLIP, CUP and if allowed to use two “C”s CLOCK) and I used a friendship theme for the FM230 "So Sweet" Challenge.  

If you have not had a chance to do so, I hope you will take the time to visit both of the above sites- great inspiration from all!!

To create this card:

Using Stāz-On® Jet Black Ink, stamp the sentiment from Tea Shoppe onto a piece of Whisper White cardstock. Trim and create the banner points with the Hexagon Punch, layer onto a piece of Melon Mambo cardstock, using the Hexagon Punch for the points as well.

De-static a piece of Whisper White cardstock with the Embossing Buddy®, ink the large tea cup from Tea Shoppe using Versamark™ ink and stamp onto the prepared piece of Whisper White cardstock, apply Light Pink Stampin’ Emboss® Embossing Powder and heat set with the Heat Tool. 

Once the embossing powder has cooled, use a Sponge Dauber to apply Melon Mambo Classic Ink over the embossed image and carefully cut out the tea cup.

Use the Big Shot™ with the Darice® Clock Embossing Folder to emboss a piece of Razzleberry Lemonade Designer Series Paper (retired DSP), trim mount onto a piece of Melon Mambo cardstock and lightly sand with the Sanding Block.

Cut out the circle element behind the tea cup with the Big Shot™ using the Spellbinders™ Stately Circles Die from Whisper White cardstock.

Mount the Whisper White die cut (created with the Big Shot™ with the Our Daily Bread Designs Beautiful Borders Die) to the card front covering the edge of the DSP, adhere the 5/8” Pink Triple Satin Ribbon bow (wrapping the ends of the ribbon to the back of the panel) and mount the entire panel onto the Whisper White card base.

Stamp the sentiments from the Tiny Tags using Stāz-On® Jet Black Ink and Melon Mambo Classic Ink onto Whisper White cardstock, cut out the images using the Jewelry Tag Punch, use the 1/16” Hand Held Punch for the openings at the top of the tag, slip the tags onto the Antique Pewter Hodgepodge Hardware Clip and slip the clip over the ribbon.

Adhere the tags using dimensional foam, add the die cut circle to the card front, mount the embossed tea cup with dimensional foam and adhere the layered sentiment.
Create the roses from Melon Mambo and Pink Pirouette cardstock from the My Favorite Things™ (MFT) Royal Mini Dies, add leaves punched from Pear Pizzazz cardstock using the Martha Stewart® (MS)  Leaf Punch behind the roses and mount the roses to the card front to finish off the card.

Stamp Sets:  Tea Shoppe, Tiny Tags (both retired Stampin’ Up!)

Ink: Versamark™,  Stāz-On® Jet Black, Melon Mambo

Paper: Whisper White, Melon Mambo, Pear Pizzazz, Pink Pirouette, Razzleberry Lemonade DSP (retired)

Accessories: Big Shot™, Darice® Clock Embossing Folder, ODBD Beautiful Borders Dies, MFT Royal Mini Rose Dies, Spellbinders™ Stately Circles Die , Emobssing Buddy®, Light Pink Stampin’ Emboss® Embossing Powder, Heat Tool, Antique Pewter Hodgepodge Hardware Clip, Jewelry Tag Punch, MS Leaf Punch, Sanding Block, 5/8” Pink Satin Ribbon


Thanks again for taking the time to visit- I hope you have a wonderful Wednesday, my friends!
Related Posts Plugin for WordPress, Blogger...