Showing posts with label #flag. Show all posts

Saturday, November 9, 2024

Red, White and Blue


Hi Friends!

Today I am sharing a patriotic card designed to honor our Veterans for Veteran’s Day, but this card would be an easy one to create in multiples for Memorial Day or Independence Day.


This card was created with The Red, White and Blue Stamp/Die Bundle, a bit of lace and seam binding ribbon- all from Stamp Simply!.

I enjoy playing along with online challenges and will be linking this card to  the Word Art Wednesday #673-#674 “Anything Goes” Challenge.

If you have not had a chance to check out the rest of my Sister Design Team cards on the Stamp Simply blog, or the Word Art Wednesday challenge site I hope you take the time to do so- so much inspiration from all!


To create this card:


De-static a piece of white cardstock with an embossing powder tool.

Stamp the script background image from TheRed, White and Blue stamp set with Versamark ink onto the upper top part of the panel, apply gold embossing powder and heat set with a heat tool.

Repeat the above steps for the lower half of the panel.

Once the embossing has cooled, trim the panel, add the strip of Gabriella lace and add a strip of red seam binding over the top of the lace (wrapping the ends of the seam binding behind the panel).

Adhere the entire card front onto a 4 ¼” x 5 ½” piece of red cardstock and mount onto a white card base.

Ink the flog image with Versafine Onyx Black ink, heat set the ink with a heat tool, and color the image with colored pencils.


Die cut the flag image with the coordinating die, layering onto another die cut from white cardstock.

Mount the flag onto the card front with dimensional foam to finish off the card. 

Stamp Sets: The Red, White and Blue Bundle (Stamp Simply)

Ink/Mediums: Versafine Black Onyx, Versamark , Prismacolor Pencils

Cardstock/Paper: White, Real Red

Accessories/Tools: Gemini, Jr., Stamp Simply Steel Dies- The Red, White and Blue Bundle , Embossing Powder Tool, Heat Tool, Gold Embossing Powder, Venise Lace Gabriella – 1.75” White- 1 yard, Seam Binding Sampler- Christmas- 30 yards

Don’t forget to stop by and check out the current sale at Stamp Simply!

Thanks again for visiting and I hope you have a great weekend! 

Wednesday, May 15, 2024

TCC207 Red, White and Blue


Hi Friends!

Welcome to our #207 {Red, White and Blue} Challenge at the The Card Concept!

We are looking forward to seeing what inspires your card from our inspiration photo! Will it be the overall theme, the flowers, water pitcher, lantern, the colors, textures or something else?

I truly love all things patriotic so this photo inspired me to create a Clean and Layered Mixed Media card using stamps, dies and lace from Stamp Simply.

I hope you will take a moment to visit our challenge blog and see how the rest of the Design Team were inspired- Christmas, a kid’s card, floral and more!

To create this card:

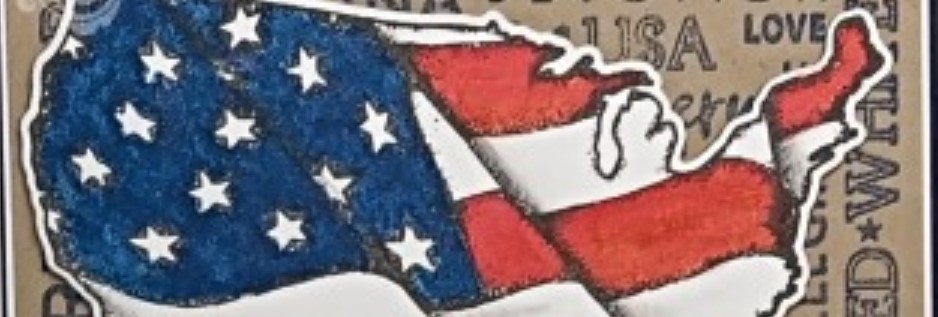
On a piece of white cardstock, de-static with an embossing powder tool, ink the USA flag map image from the Old Glory Bundle with Versafine Black Onyx ink, stamp onto the prepared panel, apply clear embossing powder and heat set with a heat tool.

Watercolor the image with water color pencils and water-based markers.


Die cut with the coordinating die from the Old Glory Bundle (also die cut another flag image from white cardstock to layer behind the colored image).

Trim a piece of kraft cardstock to approx. 4” x 5 ¼”, ink the background image from The Red, White and Blue with blue ink, stamp repeatedly onto the panel.

Mount the stamped panel onto a piece of white cardstock, trim and mount onto navy cardstock.

Add the strip of lace and satin ribbon (wrapping the ends of the ribbon around to the back of the panel).

Mount the panel onto a white card base and add the scrap strip of designer paper to the inside panel.

Mount the die cut USA Flag map image onto the card front with dimensional foam and the card is done!


Stamp Sets: Old Glory Bundle, The Red, White & Blue (Stamp Simply)

Inks/Mediums: Versafine Onyx Black,  Tim Holtz™ Chipped Sapphire Distress Oxide Ink, Derwent™ Watercolor Pencils- Red, Navy, Black; Stampin’ Write Markers- Poppy Parade, Night of Navy

Cardstock/Paper: Kraft, White, Night of Navy, Echo Park Let Freedom Ring 6x6 Paper Pad


Accessories/Tools: Gemini, Jr.,  Old Glory Bundle, Embossing Powder Tool, Clear Embossing Powder, Heat Tool, AquaPainter™, Venise Lace Lucia .75”- 1 yard- White, Red Satin Ribbon (from my stash)

Thanks again for taking the time to stop by! I hope you are inspired to create a card and join us for our #207 {Red, White and Blue} Challenge at The Card Concept!  The deadline to play along is Monday, June 10th at noon EST. 

Also, I hope you have a chance to check out the specials at Stamp Simply!


Saturday, May 4, 2024

God Bless the USA


Hi Friends!

I hope all of you are enjoying your week!  Today I am sharing a very easy patriotic card using stamps, dies, and paper all from Stamp Simply


When I first received The Fourth of July paper pad, the flag design on this piece of the paper seemed to call out to me to create a simple card so the flag design would show. 


To create this card:

Trim the flag patterned piece of designer paper from The Fourth of July 6x6 paper pad to approx. 4” x 5 ¼”.

De-static the paper with an embossing powder tool, ink the sentiment from Patriotic Sentiments with Versafine Onyx Black ink, apply clear embossing powder and heat set with a heat tool.

Mount the panel onto white cardstock, trim and mount onto black cardstock before adhering to a white card base.

Add the strip of the remaining piece of the designer paper onto the left hand side of the inner part of the card ( I used the opposite side of the paper). 


Die cut the three stars from silver mirror cardstock using the star dies from the Stars & Stripes dies, mount onto the card front with dimensional foam to finish off the card.

If you have not had a chance to check out the rest of my Sister Design Team cards on the Stamp Simply blog, I hope you will do so- such gorgeous inspiration from all!!


Stamp Sets: Patriotic Sentiments, Patriotic Bundle Trio (Stamp Simply)

Ink/Mediums: Versafine Black Onyx

Cardstock/Paper:  White, Black,  Carta Bella The Fourth of July 6x6, Bazzill Mirror Cardstock- 8.5 x 11- Silver – 15 ct

Accessories/Tools:  Gemini, Jr., Embossing Powder Tool, Heat Tool, Clear Embossing Powder,  Stamp Simply Steel Dies- Patriotic Stars & Stripes (Old Glory), Stamp Simply Clear Stamps- Patriotic Bundle Trio


Don’t forget to stop by and check out the current specials at Stamp Simply!

Thanks again for visiting and I hope you have a great week! 


Saturday, April 20, 2024

Pledge of Allegiance


Hi Friends!

Today I am sharing a fairly quick patriotic card created with stamps, dies, lace and paper all from Stamp Simply.  


I decided to pair two stamp sets, Old Glory and The Pledge of Allegiance along with paper from the Fourth of July from Carta Bella.


I enjoy playing along with online card challenges and will be linking this card to the Addictedto Stamps and More #466- Make Your Mark Challenge along with the Word Art Wednesday#643-644 “Anything Goes” Challenge.  


To create this card:

Trim the two pieces of designer paper (the white lined and red starred) from the Carta Bella Fourth of July 6x6 paper pad to approx. 4” x 2.5” and layer onto a piece of white cardstock.

Ink The Pledge of Allegiance stamp with Versafine Black Onyx ink and stamp onto the lined designer paper


Ink the Patriotism sentiment from The Pledge of Allegiance stamp set with Versafine Black Onyx ink onto the star patterned paper, heat set with a heat tool. 

Cut the dark blue lined designer paper to approx. 1 ½” x 4 “ and adhere a strip of the crochet lace behind the designer paper before adhering to the center of the card front.


Stamp the USA flag map image from Old Glory using Versafine Onyx Black ink onto white cardstock, heat set the ink with a heat tool.


Watercolor the image with watercolor pencils and water-based markers before die cutting with the coordinating die (I also die cut two additional USA map images from plain white cardstock to layer behind the colored image).

Mount the layered panel onto a white card base.

To finish off the card, add a strip of red starred designer paper to the center.

If you have not had a chance to check out the rest of my Sister Design Team cards on the Stamp Simply blog, I hope you will do so- fabulous inspiration from all!!

Stamp Sets: Old Glory Bundle, The Pledge of Allegiance (Stamp Simply)

Ink/Mediums: Versafine Black Onyx , Stampin’ Write Markers- Poppy Parade, Midnight Muse; Derwent Watercolor Pencils- Red, Navy, Black

Cardstock/Paper:  White,  Carta Bella The Fourth of July 6x6 Paper Pad

Accessories/Tools:  Gemini, Jr., Heat Tool, .75 Venise Lace Lucia- 1 yard - White

Don’t forget to stop by and check out the current specials at Stamp Simply!


Thanks again for visiting and I hope you have a wonderful weekend/week! 


Saturday, November 11, 2023

In Honor of Our Veterans


Hi Friends!

Today I am sharing a card in honor of Veterans Day. 

I love the patriotic sets from Stamp Simply and feel that we can never thank our veterans enough for the sacrifices that they and their families have made in service to our country.    

My card features The Red, White and Blue Bundle along with the Patriotic Sentiments stamp set, the 3D Brick Embossing Folder and Navy Seam Binding (all from Stamp Simply).

If you have not had a chance to check out my Sister DT cards yet, I hope you will do so- wonderful inspiration from all!


To create this card:

Trim a piece of white cardstock to 4” x 5 ¼” and emboss with the Sizzix 3D Brick Embossing Folder (I inked the interior of the folder with Antique Linen Distress Ink prior to embossing).

Trim the embossed panel to approx. 3 ¾” x 5”, distressing the edges slightly.

Mount onto a piece of red cardstock, distress the edges and mount onto the 4 ¼” x 5 ½” navy panel.

Add the navy seam binding strip, wrapping the ends behind the panel. Adhere the double navy seam binding bow.

Mount the panel onto a white card front.


Ink the sentiments from The Red, White, and Blue stamp set and Patriotic Sentiments stamp set with Versafine Black Onyx ink, stamp onto prepared white cardstock, apply clear embossing powder and heat set with a heat tool.

Die cut the sentiments using Fishtail Sentiment Banners Dies (also die cutting banners from red and navy cardstock).

Distress the sentiment panels with a stencil brush and Antique Linen Distress ink.

Layer the red and navy banners behind the sentiments and mount onto the card front using dimensional foam.

Ink the flag image from The Red, White and Blue with Versafine Black Onyx ink, stamp onto white cardstock and heat set the ink with a heat tool.


Watercolor the image with watercolor pencils and water-based markers.

Die cut with the coordinating die and mount onto an additional die cut from plain white cardstock.

Adhere the flag image with dimensional foam to finish off the card.


Stamp Sets: The Red, White and Blue Bundle , Patriotic Sentiments (Stamp Simply)

Inks/Mediums: Versafine Onyx Black, Stampin’ Write Markers- Poppy Parade, Night of Navy; Watercolor Pencils- Navy, Red, Beige, Black


Cardstock/Paper: White, Poppy Parade, Night of Navy

Accessories/Tools: Gemini, Jr., Sizzix 3D Brick Embossing Folder, Stamp Simply Steel Dies- The Red, White and Blue Bundle, Fishtail Sentiment Banners Dies, Navy Seam Binding, Embossing Powder Tool, Clear Embossing Powder, Heat Tool, Distressing Tool

I enjoy playing along with online challenges and will be linking this card to the WordArt Wednesday #621-#622 “Anything Goes” Challenge and the Addicted to Stamps and More #456 “Make Your Mark” Challenge.


I hope you will take the time to check out the current specials at Stamp Simply!


Remember, free shipping as well on USA orders over $100! 


Thanks again for visiting- may we never forget the brave men and women who served in our military!

Related Posts Plugin for WordPress, Blogger...